Freelander 1. Manual - part 152
INTERMEDIATE REDUCTION DRIVE
ADJUSTMENTS
41-1
INTERMEDIATE REDUCTION DRIVE
ADJUSTMENTS
Intermediate reduction drive (IRD) fluid -
drain & refill - Non NAS
$% 41.25.06
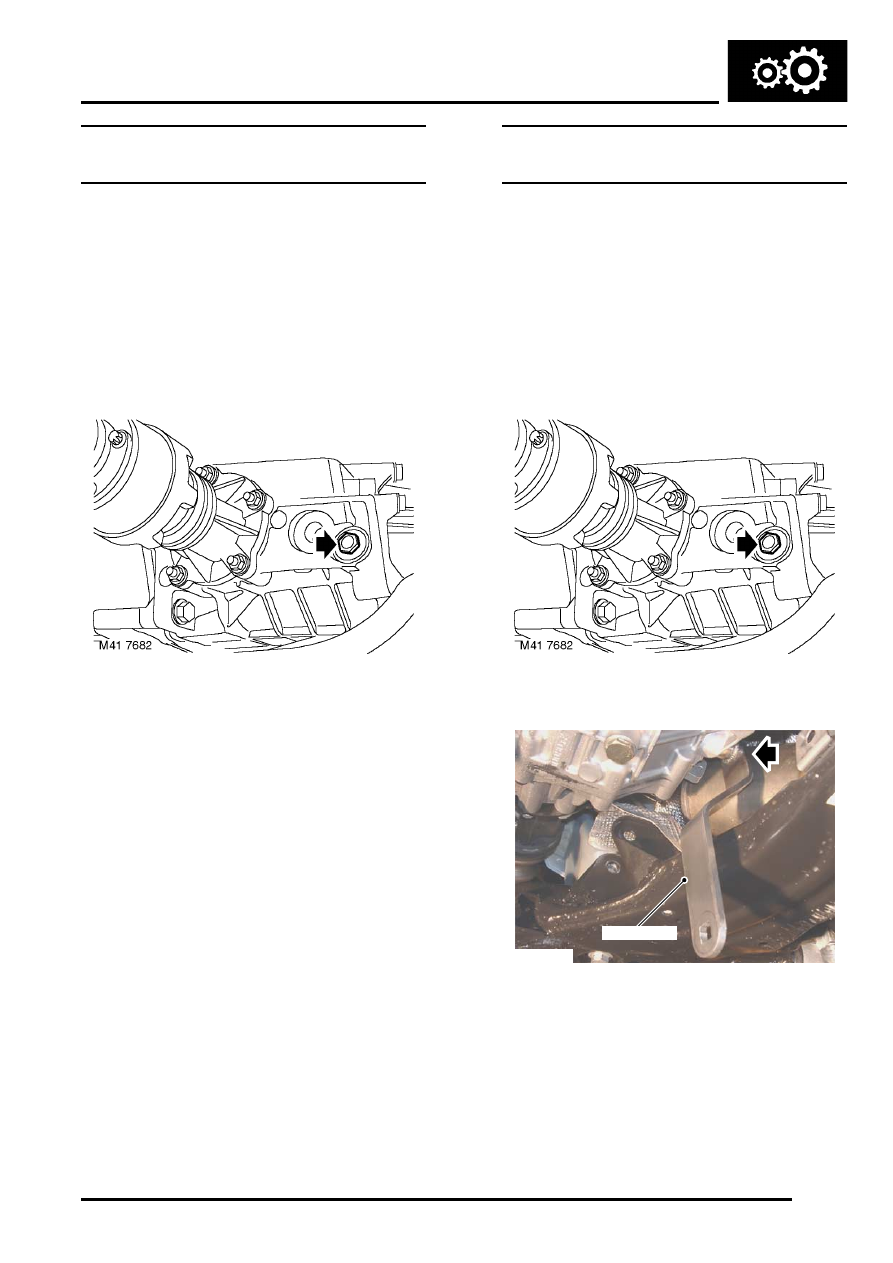
Drain
1. Remove underbelly panel.
2. Place container beneath IRD unit.
WARNING: Observe due care when draining
gearbox fluid as the fluid can be very hot.
3. Clean area around filler/level and drain plugs.
4. Remove filler/drain plugs and discard sealing
washers. Allow fluid to drain.
NOTE: The fluid should be drained with the
transmission at normal operating temperature.
5. Fit new sealing washer and tighten drain plug to
35 Nm (26 lbf.ft).
Refill
1. Fill with correct fluid until it just runs from filler/
level hole. Allow sufficient time for fluid to flow
and reach a common level in unit.
2. Fit new sealing washer and tighten filler/level
plug to 35 Nm (26 lbf.ft).
3. Fit underbelly panel.
Intermediate reduction drive (IRD)
lubrication system - drain & refill - NAS
$% 41.25.06
Drain
1. Remove underbelly panel
2. Place container beneath IRD unit.
WARNING: Observe due care when draining
gearbox fluid as the fluid can be very hot.
3. Clean area around filler/level and drain plugs.
4. Using LRT-41-021 remove filler plug and
discard sealing washer.
M417853
LRT-41-021