Freelander 1. Manual - part 117


  Index      Land Rover     Freelander 1 - service manual 2002 year


Search            


Content   ..  115  116  117  118   ..


Freelander 1. Manual - part 117


FUEL DELIVERY SYSTEM - DIESEL

REPAIRS 19-1-19

Lift pump - fuel 

$% 19.45.09

Remove

1. Disconnect battery earth lead.

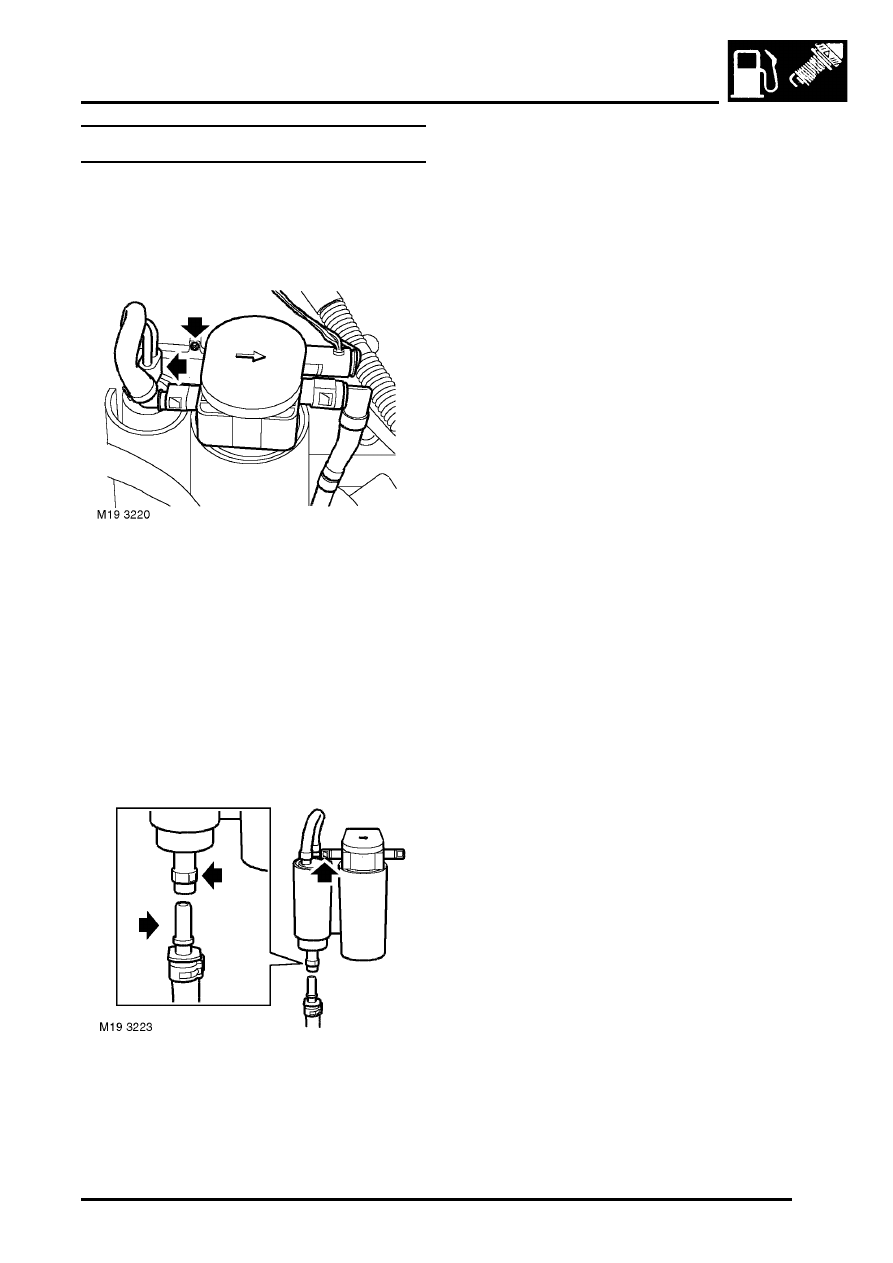
2. Remove screw securing fuel pump housing to 

bracket.

WARNING: Fuel vapour is highly flammable 
and in confined spaces is also explosive 
and toxic. Always have a fire extinguisher 
containing foam, CO

2

, gas or powder close 

at hand when handling or draining fuel.

3. Lift and tilt fuel pump housing away from 

bracket.

4. Disconnect multiplug from fuel pump.
5. Position absorbent cloth to collect fuel spillage.

6. Disconnect quick release fuel hose connectors 

from fuel pump and filter.

CAUTION: Always fit plugs to open 
connections to prevent contamination.

7. Remove fuel pump.

8. Release retaining clips and remove hoses from 

fuel pump.

Refit

1. Connect hoses to fuel pump and secure with 

retaining clips.

2. Fit fuel pump to housing.
3. Connect quick release fuel hose connectors to 

pump and filter.

4. Connect multiplug to fuel pump.
5. Fit fuel pump housing to bracket and secure 

with screw.

6. Remove absorbent cloth.
7. Connect battery earth lead.

FUEL DELIVERY SYSTEM - DIESEL

19-1-20 REPAIRS

Tank

$% 19.55.01

Remove

1. Position vehicle on ramp.
2. Disconnect battery earth lead.
3. Remove fuel pump assembly.


 + 

 FUEL DELIVERY SYSTEM - DIESEL, 

REPAIRS, Pump - integral - fuel tank - rear.

WARNING: The spilling of fuel is 
unavoidable during this operation. Ensure 
that all necessary precautions are taken to 
prevent fire and explosion.

4. Using a fuel recovery appliance, drain the fuel 

from the tank into a sealed container. Follow 
the manufacturer's instructions for the 
connection and safe use of the appliance.    

WARNING: The fuel tank must be drained 
before it is removed from the vehicle.

5. Remove intermediate exhaust pipe.


 + 

 MANIFOLDS & EXHAUST SYSTEMS 

- Td4, REPAIRS, Exhaust pipe - 
intermediate.

6. Remove propeller shaft.


 + 

 DRIVESHAFTS, REPAIRS, Propeller 

shaft assembly.

7. Remove RH rear wheel arch liner.


 + 

 EXTERIOR FITTINGS, REPAIRS, 

Liner - rear wheel arch.

8. Release clip from breather hose and 

disconnect breather hose from filler neck.

9. Release clip and disconnect vent hose from 

fuel tank on vapour separator.

10. Remove tamper proof cover from filler hose clip 

and loosen clip.

11. Support weight of rear subframe and remove 4 

bolts securing subframe to body.

12. Lower subframe.

CAUTION: Do not allow sub frame to hang 
on rear brake hoses.

FUEL DELIVERY SYSTEM - DIESEL

REPAIRS 19-1-21

13. With assistance, remove 4 bolts securing fuel 

tank to body and remove tank.

NOTE: Pull vent and breather hoses through 
body while lowering fuel tank.

14. Remove fuel tank from cradle. Collect heat and 

fire shields.

15. Remove clips from breather hose and vent 

pipes.

16. Disconnect breather hose and vent pipes from 

fuel tank.

Refit

1. Connect breather hose and vent pipes to fuel 

tank, secure with clips.

2. Position heat and fire shields. Fit cradle to fuel 

tank.

3. With assistance, fit bolts securing fuel tank to 

body and tighten to 45 Nm (33 lbf.ft).

NOTE: Pass vent and breather hoses through 
body while fitting tank.

4. Raise subframe, fit bolts and tighten to 190 Nm 

(140 lbf.ft).

5. Connect breather hose to filler neck, fit and 

secure clip.

6. Connect vent hose to vapour separator, fit and 

secure clip.

7. Fit RH rear wheel arch liner.


 + 

 EXTERIOR FITTINGS, REPAIRS, 

Liner - rear wheel arch.

8. Fit propeller shaft.


 + 

 DRIVESHAFTS, REPAIRS, Propeller 

shaft assembly.

9. Fit intermediate exhaust pipe.


 + 

 MANIFOLDS & EXHAUST SYSTEMS 

- Td4, REPAIRS, Exhaust pipe - 
intermediate.

10. Fit fuel pump assembly.


 + 

 FUEL DELIVERY SYSTEM - DIESEL, 

REPAIRS, Pump - integral - fuel tank - rear.

11. Connect battery earth lead.

FUEL DELIVERY SYSTEM - DIESEL

19-1-22 REPAIRS

Filler neck 

$% 19.55.07

Remove

1. Disconnect battery earth lead.
2. Ensure fuel tank is less than half full. If not, 

drain fuel tank to less than half full.
 

 + 

 FUEL DELIVERY SYSTEM - DIESEL, 

ADJUSTMENTS, Fuel tank - drain.

3. Remove RH rear wheel arch liner.


 + 

 EXTERIOR FITTINGS, REPAIRS, 

Liner - rear wheel arch.

4. Remove fuel filler cap. 

CAUTION: Before disconnecting any part of 
the fuel system, it is imperative that all dust, 
dirt and debris is removed from around 
components to prevent ingress of foreign 
matter into fuel system.

5. Unclip escutcheon from fuel filler neck.

WARNING: Fuel vapour is highly flammable 
and in confined spaces is also explosive 
and toxic. Always have a fire extinguisher 
containing foam, CO

2

, gas or powder close 

at hand when handling or draining fuel.

6. Remove 3 nuts securing fuel filler neck to body.

7. Release clip from breather hose and 

disconnect breather hose from filler neck.

8. Release fuel tank vent pipe from filler neck.
9. Disconnect Lucar connector from fuel filler 

neck.

10. Remove bolt securing filler neck to body.
11. Remove tamper proof cover from filler hose clip 

and loosen clip.

12. Disconnect hose from filler neck and remove 

filler neck assembly.

Refit

1. Position filler neck assembly, connect to hose, 

secure clip and fit tamper proof cover.

2. Fit bolt securing filler neck to body and tighten 

to 9 Nm (7 lbf.ft).

3. Connect Lucar connector to fuel filler neck.

M19 3230


Content   ..  115  116  117  118   ..