Discovery 2. Manual - part 627


  Index      Land Rover     Land Rover Discovery 2 - service manual 1999 year


Search            


Content   ..  625  626  627  628   ..


Discovery 2. Manual - part 627


REAR SUSPENSION

REPAIRS

64-39

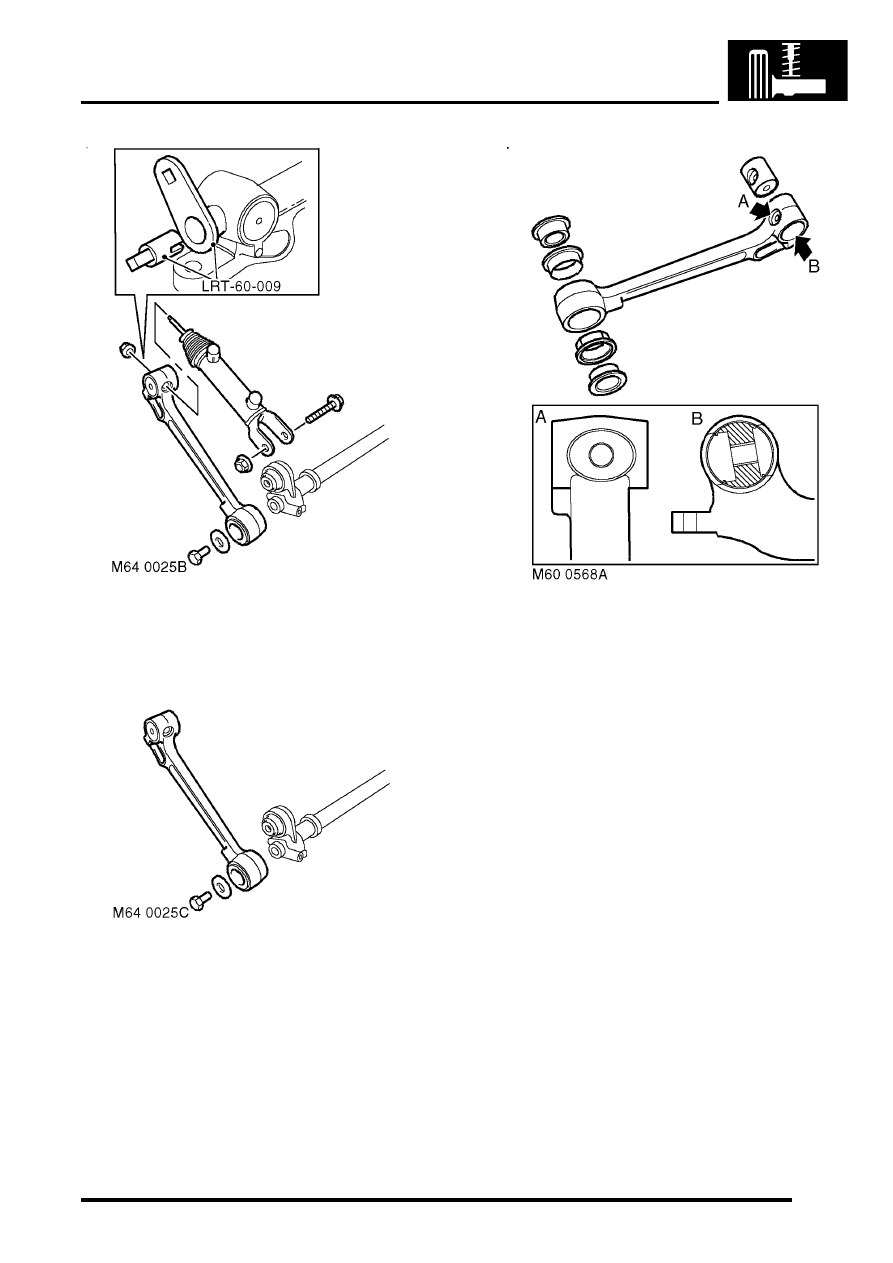
8. Use LRT-60-009 to remove nut securing 

actuator push rod to long arm.

9. Remove nut and bolt securing actuator to short 

arm and remove actuator.

10. Restrain torsion bar and remove long arm 

securing bolt and washer. Remove long arm 
from torsion bar. 

CAUTION: The short arm and torsion bar 
are supplied as an assembly and must not 
be separated.

11. Use a suitable drift to remove both halves of 

slipper bush from long arm.

12. Use suitable adaptors to press actuator rod end 

bush from long arm.

REAR SUSPENSION

64-40

REPAIRS

Refit

1. Clean bush locations in long arm. 
2. Use suitable adaptors to press new actuator 

rod end bush into long arm. Ensure bush is 
correctly aligned.

3. Align slots in new slipper bush halves with 

those in long arm. Carefully press both halves 
of slipper bush into long arm. Ensure the 
sealing rings on the bush faces are not 
damaged.

4. Clean long arm and mating face on torsion bar. 
5. Fit long arm to torsion bar. Restrain torsion bar 

and tighten bolt to 180 Nm (133 lbf.ft). 

6. Ensure actuator and bushes are clean.
7. Fit actuator and tighten nut and bolt securing 

actuator to short arm to 180 Nm (133 lbf.ft).

8. Using LRT-60-009 , fit and tighten nut securing 

actuator push rod to long arm to 48 Nm (35 
lbf.ft).

9. With assistance, position torsion bar and 

actuator to vehicle and fit torsion bar clamps. 
Tighten torsion bar clamp bolts to 45 Nm (33 
lbf.ft).

10. Connect pipes to actuator with cap nuts and 

new sealing washers. Tighten cap nuts to 29 
Nm (21 lbf.ft). Ensure pipes are not under 
tension or kinked.

11. Fit anti-roll bar links to torsion bar and tighten 

nuts to 50 Nm (37 lbf.ft).

12. Ensure washer is in place on lower ball joint of 

each anti-roll bar link and connect lower ball 
joints to axle. Tighten nuts to 100 Nm (74 lbf.ft).

13. Renew ACE high pressure filter


 FRONT SUSPENSION, REPAIRS, 

Filter - high pressure - ACE.

14. Lower vehicle.
15. Bleed ACE hydraulic system. 


 FRONT SUSPENSION, 

ADJUSTMENTS, ACE hydraulic system 
bleeding.

BRAKES

DESCRIPTION AND OPERATION

70-1

BRAKES

DESCRIPTION AND OPERATION

Brake system control component layout

RH drive shown, LH drive similar

Hill descent switch
ABS sensor
SLABS ECU

BRAKES

70-2

DESCRIPTION AND OPERATION

Brake system control diagram


Content   ..  625  626  627  628   ..