Discovery 2. Manual - part 611


  Index      Land Rover     Land Rover Discovery 2 - service manual 1999 year


Search            


Content   ..  609  610  611  612   ..


Discovery 2. Manual - part 611


FRONT SUSPENSION

REPAIRS

60-41

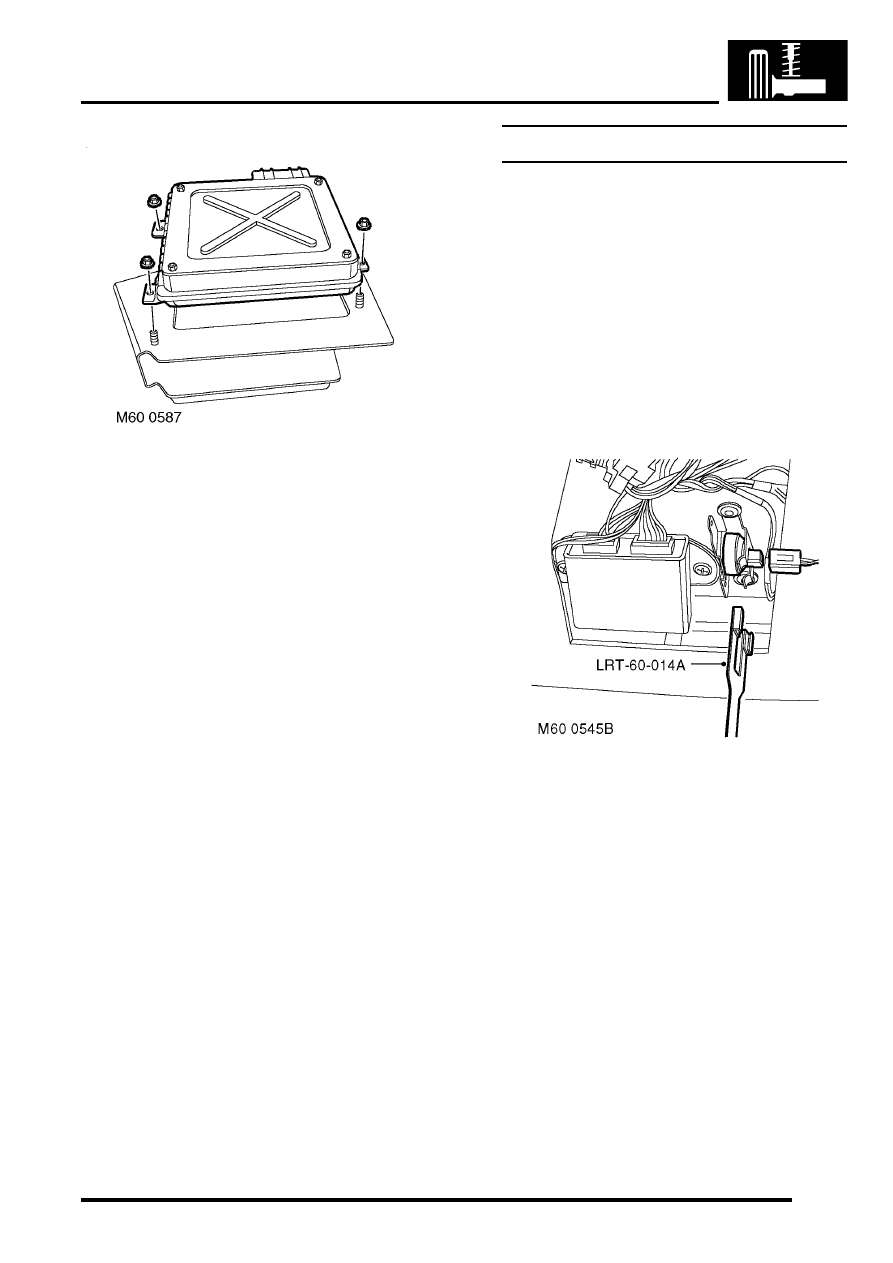
6. Remove 3 nuts securing ACE ECU and remove 

ACE ECU. 

Refit

1. Fit ACE ECU to bracket and  secure with nuts. 
2. Fit ECU's and bracket assembly to body  and 

secure with nuts. 

3. Connect multiplugs to ACE ECU and   SLABS 

ECU. 

4. Fit BCU.


 + 

 BODY CONTROL UNIT, REPAIRS, 

Body control unit (BCU).

5. If a replacement ACE ECU has been fitted, use 

TestBook to calibrate ACE system.

Accelerometer - ACE - upper  

$% 60.60.02  

CAUTION: The accelerometer is an extremely 
delicate component and can easily be rendered 
unserviceable. Never use an accelerometer 
which has been dropped or subjected to 
mistreatment of any type.

Remove

1. Remove front stowage pocket.


 INTERIOR TRIM COMPONENTS, 

REPAIRS, Stowage pocket - front.

2. Disconnect multiplug from accelerometer. 

3. Use LRT-60-014A to release clip  and remove 

accelerometer. 

Refit

1. Using LRT-60-014A, fit accelerometer fully into 

clip.

2. Connect accelerometer multiplug.
3. Fit front stowage pocket.


 INTERIOR TRIM COMPONENTS, 

REPAIRS, Stowage pocket - front.

4. If a replacement accelerometer has been fitted, 

use TestBook to calibrate ACE system.

FRONT SUSPENSION

60-42

REPAIRS

Accelerometer - ACE - lower  

$% 60.60.03  

CAUTION: The accelerometer is an extremely 
delicate component and can easily be rendered 
unserviceable. Never use an accelerometer 
which has been dropped or subjected to 
mistreatment of any type.

Remove

1. Raise vehicle on a ramp. 
2. Disconnect multiplug from accelerometer. 

3. Use  LRT-60-014A  to release clip and remove 

accelerometer. 

Refit

1. Use LRT-60-014A, fit accelerometer fully into 

clip.

2. Connect accelerometer multiplug. 
3. Lower vehicle.
4. If a replacement accelerometer has been fitted, 

use TestBook to calibrate ACE system.

Pump - ACE - V8

$% 60.60.10  

CAUTION: The ACE hydraulic system is 
extremely sensitive to the ingress of dirt or 
debris. The smallest amount could render the 
system unserviceable. It is imperative that the 
following precautions are taken. 

l

ACE components are thoroughly cleaned 
externally before work commences;

l

all opened pipe and module ports are 
capped immediately;

l

all fluid is stored in and administered 
through clean containers.

Remove

1. Remove auxiliary drive belt.  


 + 

 CHARGING AND STARTING, 

REPAIRS, Belt - auxiliary drive.

2. Loosen 3 clips securing air intake hose. 

Release air intake hose and position aside. 

Note: Pre 03 MY air intake hose illustrated.

FRONT SUSPENSION

REPAIRS

60-43

3. Position container to catch spillage. 
4. Release clip on pump suction hose and 

disconnect hose. 

CAUTION: Always fit plugs to open 
connections to prevent contamination.

5. Remove banjo bolt and disconnect pressure 

pipe from ACE pump. Discard sealing washers. 

CAUTION: Always fit plugs to open 
connections to prevent contamination.

6. Remove 3 bolts securing ACE pump to  

mounting and remove ACE pump. 

7. Restrain pulley, remove 3  securing bolts and 

remove pulley from ACE pump.  

Refit

1. Clean mating faces of pulley and ACE pump. 
2. Position pulley to ACE pump and fit bolts. 

Restrain pulley and tighten bolts to 25 Nm (18 
lbf.ft).   

3. Clean mating faces of ACE pump and 

mounting. 

4. Connect suction hose to ACE pump and secure 

with clip.

5. Ensure there is sufficient fluid in ACE/PAS 

reservoir to prime ACE pump.

6. Position ACE pump below level of ACE/PAS 

reservoir, with suction hose uppermost, and 
allow fluid from ACE/PAS reservoir to 
completely fill ACE pump.

7. Position ACE pump to mounting, fit bolts and  

tighten to 25 Nm (18 lbf.ft).  

8. Rotate ACE pump clockwise (viewed from 

pulley end) until a steady flow of fluid runs from 
outlet port.

9. Connect pressure pipe to ACE pump with banjo 

bolt and new sealing washers. Tighten banjo 
bolt to 28 Nm (21 lbf.ft).

10. Position air intake hose and secure  clips. 
11. Fit auxiliary drive belt.


 + 

 CHARGING AND STARTING, 

REPAIRS, Belt - auxiliary drive.

12. Renew ACE high pressure filter.


 + 

 FRONT SUSPENSION, REPAIRS, 

Filter - high pressure - ACE.

FRONT SUSPENSION

60-44

REPAIRS

Pump - ACE - diesel

$% 60.60.10  

CAUTION: The ACE hydraulic system is 
extremely sensitive to the ingress of dirt or 
debris. The smallest amount could render the 
system unserviceable. It is imperative that the 
following precautions are taken. 

l

ACE components are thoroughly cleaned 
externally before work commences;

l

all opened pipe and module ports are 
capped immediately;

l

all fluid is stored in and administered 
through clean containers.

Remove

1. Remove auxiliary drive belt.


 + 

 CHARGING AND STARTING, 

REPAIRS, Belt - auxiliary drive.

2. Disconnect multiplugs from mass air flow 

sensor and ambient air pressure sensor. 

3. Release clips and disconnect mass air flow 

sensor from air cleaner. 

4. Loosen hose clip, disconnect inlet air hose  

from turbo charger and move hose aside. 

5. Release ACE/PAS reservoir from bracket  and 

move aside. 

6. Loosen clip and disconnect inlet hose  from 

intercooler. 

7. Position container to catch spillage. 


Content   ..  609  610  611  612   ..