Discovery 2. Manual - part 463


  Index      Land Rover     Land Rover Discovery 2 - service manual 1999 year


Search            


Content   ..  461  462  463  464   ..


Discovery 2. Manual - part 463


EMISSION CONTROL - V8

REPAIRS 17-2-51

Air Manifold - LH - Secondary Air 
Injection (SAI) 

$% 17.25.17

Remove

1. Remove SAI control valve. 


 + 

 EMISSION CONTROL - V8, 

REPAIRS, Control Valve - Secondary Air 
Injection (SAI).

2. Loosen 2 union nuts securing air manifold to 

cylinder head adaptors.

3. Remove 2 nuts securing air manifold bracket to 

inlet manifold.

4. Remove air manifold.

Refit

1. Clean air manifold and cylinder head adaptors.
2. Fit air manifold and start union nuts. 
3. Fit nuts securing air manifold to inlet manifold.
4. Tighten air manifold unions to 25 Nm.
5. Fit SAI control valve. 


 + 

 EMISSION CONTROL - V8, 

REPAIRS, Control Valve - Secondary Air 
Injection (SAI).

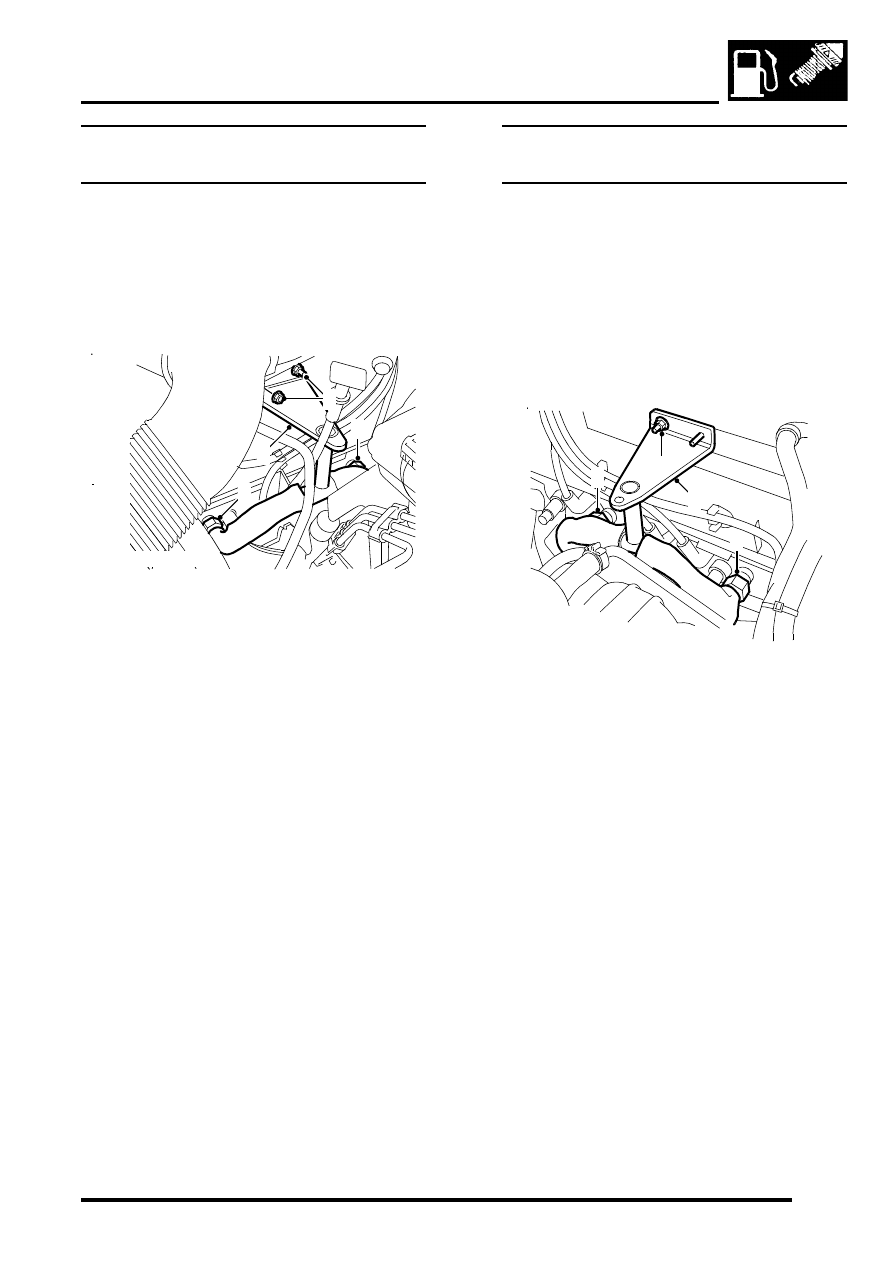
Air Manifold - RH - Secondary Air 
Injection (SAI) 

$% 17.25.18

Remove

1. Remove SAI control valve. 


 EMISSION CONTROL - V8, 

REPAIRS, Control Valve - Secondary Air 
Injection (SAI).

2. Remove heater feed pipe


 HEATING AND VENTILATION, 

REPAIRS, Pipe - Heater - Feed.

3. Loosen 2 union nuts securing air manifold to 

cylinder head adaptors.

4. Remove nut securing air manifold bracket to 

inlet manifold.

5. Remove air manifold.

Refit

1. Clean air manifold and cylinder head adaptors.
2. Fit air manifold and start union nuts. 
3. Fit nut securing air manifold to inlet manifold.
4. Tighten air manifold unions to 25 Nm.
5. Fit heater feed pipe. 


 HEATING AND VENTILATION, 

REPAIRS, Pipe - Heater - Feed.

6. Fit SAI control valve. 


 EMISSION CONTROL - V8, 

REPAIRS, Control Valve - Secondary Air 
Injection (SAI).

M17 0234

4

3

2

2

M17 0223

4

3

3

5

EMISSION CONTROL - V8

17-2-52 REPAIRS

Solenoid - Vacuum - Secondary Air  
Injection (SAI) 

$% 17.25.47

Remove

1. Release multiplug from solenoid.
2. Disconnect 2 vacuum hoses from solenoid. 
3. Release solenoid from mounting bracket and 

remove.

Refit

1. Secure solenoid to mounting bracket.
2. Connect vacuum hoses and multiplug to 

solenoid.

Pipe - Secondary Air Injection (SAI) 

$% 17.25.59

Remove

1. Loosen clip securing RH SAI control valve hose 

to air injection pipe.

2. Release hose from air injection pipe.
3. Loosen clip securing SAI pump hose to air 

injection pipe.

4. Release hose from air injection pipe.

5. Loosen clip securing LH SAI control valve hose 

to air injection pipe.

6. Release hose from air injection pipe.
7. Disconnect multiplug from SAI vacuum 

solenoid.

M17 0236

1

2

2

3

M17 0230

EMISSION CONTROL - V8

REPAIRS 17-2-53

8. Remove 2 nuts securing air injection pipe to air 

intake plenum.

9. Release pipe from clip on rear of air intake 

plenum.

10. Release 3 clips securing harness to engine bay 

bulkhead.

11. Position container to collect any coolant 

spillage.

12. Release clips securing heater hoses to heater.
13. Release hoses from heater.
14. With assistance, manoeuvre air injection  pipe 

from engine bay.

Refit

1. With assistance, manoeuvre air injection  pipe 

into engine bay and secure onto clip at rear of 
air intake plenum.

2. Connect heater hoses to heater and secure 

with clips.

3. Reposition harness along engine bay bulkhead 

and secure with clips.

4. Fit and tighten nuts securing air injection pipe to 

air intake plenum.

5. Connect multiplug to SAI vacuum solenoid.
6. Connect air pump hose to air injection pipe and 

secure with clip.

7. Connect LH and RH SAI control valve hoses to 

air  injection pipe and secure with clips.

8. Remove container.
9. Top up engine coolant.


 + 

 MAINTENANCE, PROCEDURES, 

Cooling system.

M17 0231

M17 0232

M17 0233

EMISSION CONTROL - V8

17-2-54 REPAIRS

Pump - Fuel Leak Detection - up to 03MY

$% 17.45.41

Remove

1. Raise the vehicle on lift.

2. Disconnect multiplug from fuel leak detection 

pump.

3. Release leak detection air filter hose from top of 

pump.

4. Remove 3 Torx screws securing pump to 

mounting bracket.

5. Remove clip securing EVAP canister hose to 

pump.

6. Release EVAP canister hose from pump.
7. Remove pump.

Refit

1. Connect EVAP canister hose to pump and 

secure with clip.

2. Position pump to mounting bracket and secure 

with Torx screws.

3. Connect leak detection air filter hose to top of 

leak detection pump.

4. Connect multiplug to pump.
5. Lower vehicle.

Pump - fuel leak detection - from 03MY

$% 17.45.41

Remove

1. Raise the vehicle on lift.

2. Disconnect multiplug from the fuel leak 

detection pump.

3. Remove 3 screws securing the fuel leak 

detection pump to the chassis mounting 
bracket.

4. Position absorbent cloth around fuel hoses to 

collect any fuel spillage.

5. Disconnect the fuel leak detection filter pipe 

from the fuel leak detection pump.

CAUTION: Always fit plugs to open 
connections to prevent contamination.

6. Remove and discard clip securing EVAP pipe 

to the fuel leak detection pump and disconnect 
the pipe.

7. Remove the fuel leak detection pump.

Refit

1. Connect the EVAP pipe to the fuel leak 

detection pump and secure with a new clip.

2. Connect the fuel leak detection filter pipe to the 

fuel leak detection pump.

3. Remove absorbent cloth.
4. Fit and tighten 3 screws securing the fuel leak 

detection pump to the chassis mounting 
bracket.

5. Connect multiplug to the fuel leak detection 

pump.

6. Lower the vehicle lift.

M17 0235

2

3

4

5

7


Content   ..  461  462  463  464   ..