Discovery 2. Manual - part 461
EMISSION CONTROL - V8
REPAIRS 17-2-43
REPAIRS
Canister - EVAP
$% 17.15.13
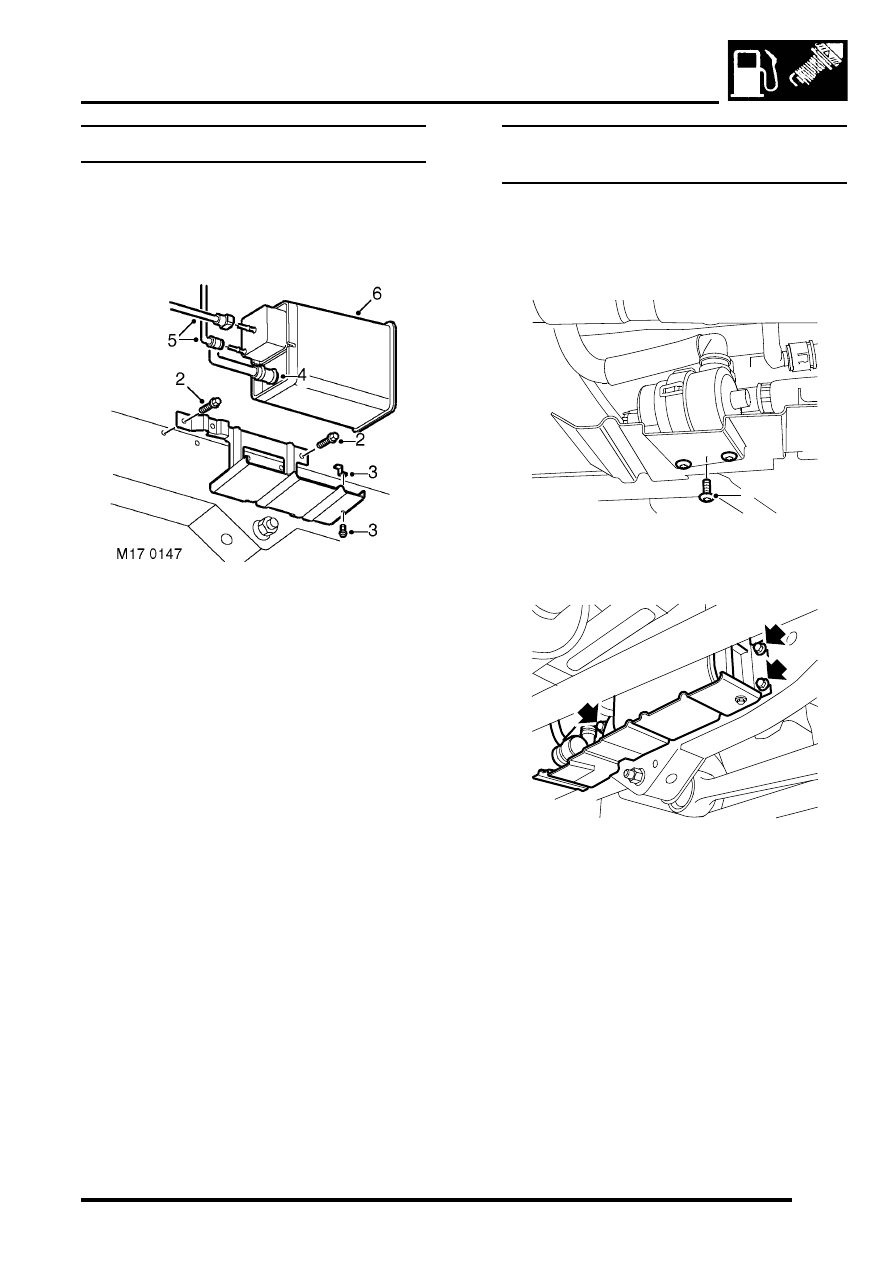
Remove
1. Raise vehicle on lift.
2. Remove 2 bolts securing canister bracket to
chassis.
3. Remove bolt securing canister to bracket and
remove bracket.
4. Release clip and disconnect atmosphere vent
pipe from canister.
5. Release and remove purge and tank vent pipes
from canister.
6. Remove EVAP canister.
CAUTION: Always fit plugs to open
connections to prevent contamination.
Refit
1. Ensure all connections are clean.
2. Position new canister and connect purge and
tank vent pipes.
3. Connect atmospheric vent pipe to canister and
secure with clip.
4. Fit bracket to canister and secure with bolt.
5. Fit canister and bracket and secure with bolts.
Canister - EVAP - Models with Fuel Leak
Detection Pump - up to 03MY
$% 17.15.13
Remove
1. Raise vehicle on lift.
2. Remove 3 Torx screws securing fuel leak
detection pump to mounting bracket.
3. Remove 3 bolts securing EVAP canister
mounting bracket to chassis longitudinal.
M17 0219
2
M17 0220