Discovery 2. Manual - part 266
PANEL REPAIRS
REPAIRS 77-2-25
Headlamp mounting panel - RH
Remove
1. Disconnect both battery leads, negative lead
first.
2. Disconnect leads/multiplug from alternator.
3. Remove front bumper assembly.
4. Models with A/C: Remove condensor.
5. Diesel models: Remove gearbox fluid cooler.
6. Remove RH headlamp.
LIGHTING, REPAIRS, Headlamp - up
7. Remove RH repeater lamp.
LIGHTING, REPAIRS, Lamp - front
8. Release headlamp levelling motor and position
aside.
9. Release headlamp wiring and position aside.
10. Remove battery and battery tray.
11. Remove horn.
12. Remove RH crush can.
13. Remove 2 bolts securing front bulkhead
assembly to chassis.
14. Remove RH centre brace.
Repair
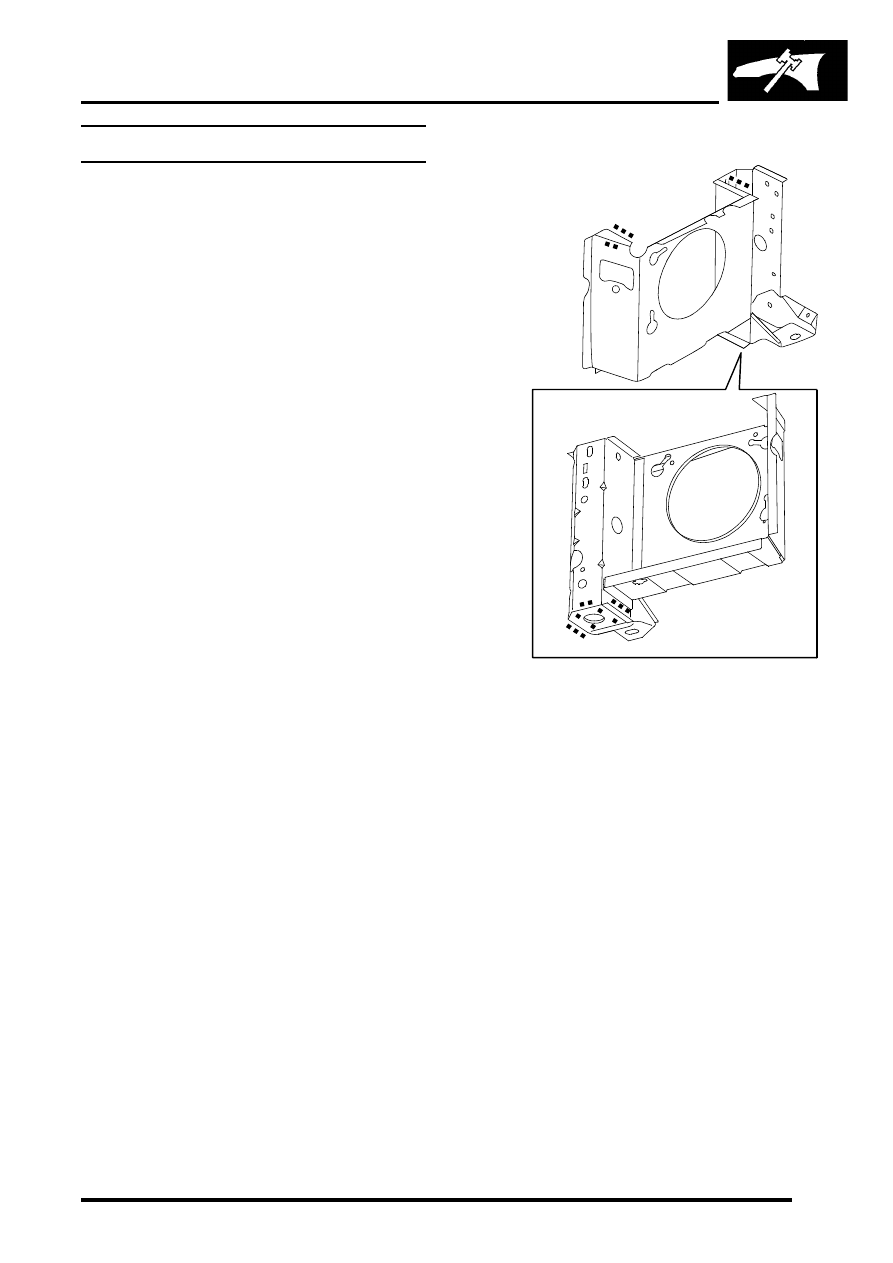
1. Remove existing panel(s), prepare panel joint
faces and install new panel(s) in accordance
with Panel Replacement Procedure. Punch or
drill holes in new panel for plug welding as
shown.
Refit
1. Fit centre brace.
2. Fit 2 bolts securing bulkhead to chassis and
tighten bolts to 45 Nm (33 lbf.ft).
3. Fit crush can.
4. Models with A/C: Fit A/C pipes.
5. Fit horn.
6. Fit battery and battery tray. Do not connect
7. Fit headlamp wiring and headlamp levelling
motors.
8. Fit repeater lamp.
LIGHTING, REPAIRS, Lamp - front
M77 1741A