Discovery 2. Manual - part 96
FUEL DELIVERY SYSTEM - V8
REPAIRS 19-2-15
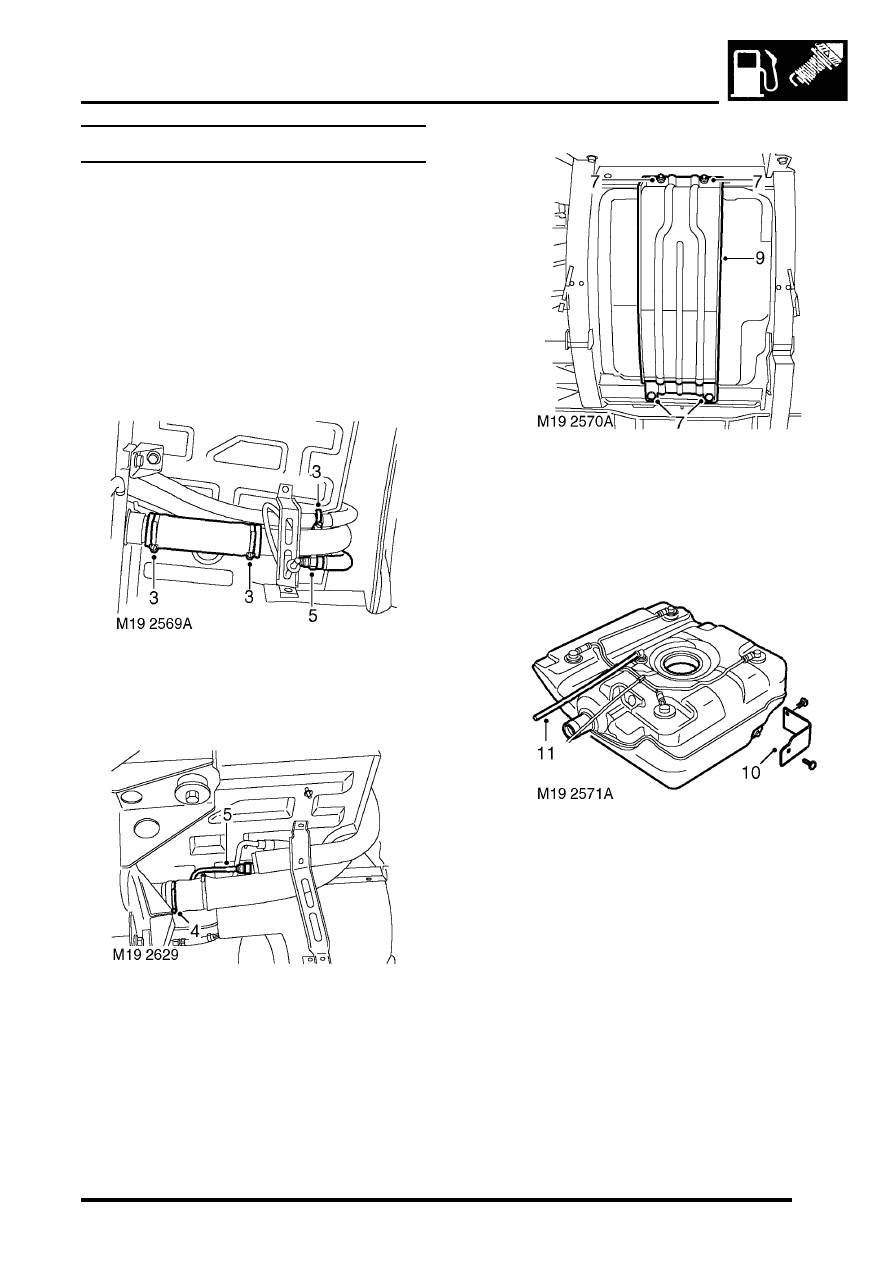
Tank - fuel
$% 19.55.01
Remove
1. Drain fuel tank.
ADJUSTMENTS, Fuel tank - drain.
2. Raise rear of vehicle.
WARNING: Do not work on or under a
vehicle supported only by a jack. Always
support the vehicle on safety stands.
3. All except NAS models:Release clips
securing filler and breather hoses. Release
hoses from filler tube.
4. NAS models: Loosen securing clip and
release filler tube from fuel tank.
5. Disconnect fuel tank vent pipe from filler tube.
6. Support weight of fuel tank underneath cradle.
7. Remove 2 nuts and 2 bolts securing cradle to
chassis.
8. With assistance, lower LH side of fuel tank then
remove fuel tank from chassis.
9. Remove cradle from fuel tank.
Non NAS fuel tank
10. Remove 2 scrivets securing heat shield and
remove heat shield.
11. All except NAS models: Release securing clip
and remove breather hose from fuel tank.
Refit
1. Fit breather hose to fuel tank and secure with
clip.
2. Position heat shield and secure with scrivets.
3. With assistance, position fuel tank and cradle.
4. Fit nuts and bolts securing cradle to chassis.
Tighten bolts to 45 Nm (33 lbf.ft) and nuts to 26
Nm (19 lbf.ft).
5. Connect vent hose.
6. Connect breather and filler hoses and secure
with clips.