Discovery (1995+): Body Repair Manual - part 20
76
CHASSIS AND BODY
18
REPAIR
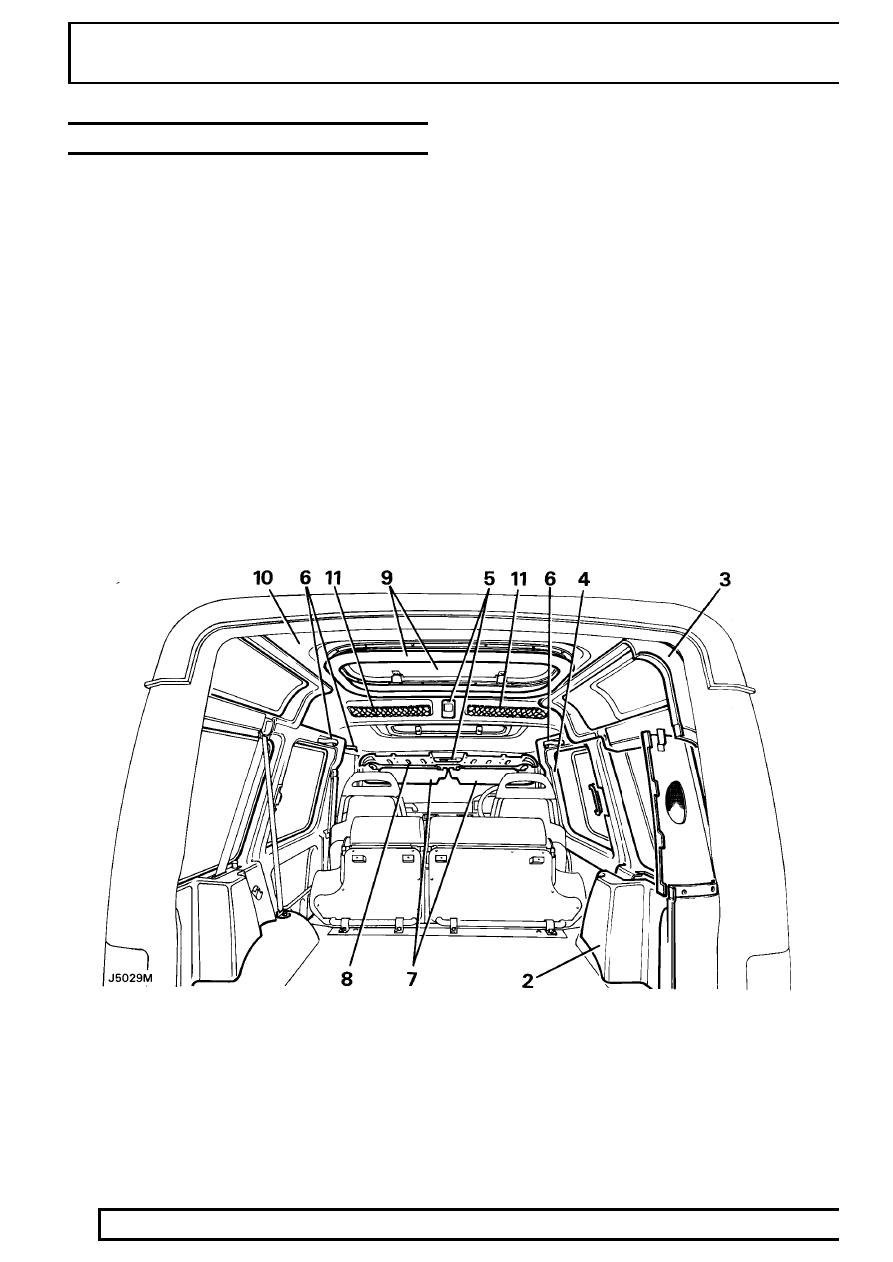
HEADLINING
Service repair no - 76.64.01/14
Remove
1. Disconnect battery negative lead.
2. Remove the lower trim panels from the rear
compartment.
See this section.
3. Remove the alpine light trim casing.
See this
section.
4. Remove the front bodyside trim casing.
See
this section.
5. Remove the roof lights from the headlining
pocket and from the headlining.
6. Remove the front grab handles.
7. Remove the sun visors and their retaining clips.
8. Remove the front headlining pocket.
9. Remove the finishers from the sun roof
apertures.
10. Release the headlining from the channel above
the rear door and manoeuvre it from the vehicle
through the rear door.
11. If the existing headlining is being replaced, if
fitted, remove the passenger net pockets and fit
them to the new headlining.
Refit
12. Reverse removal procedure.