Land Rover Discovery. Manual - part 91
 

  Index      Land Rover     Land Rover Discovery - service 1995-1996 year


Search            


Content   ..  89  90  91  92   ..


Land Rover Discovery. Manual - part 91


26

COOLING SYSTEM

2

ADJUSTMENT

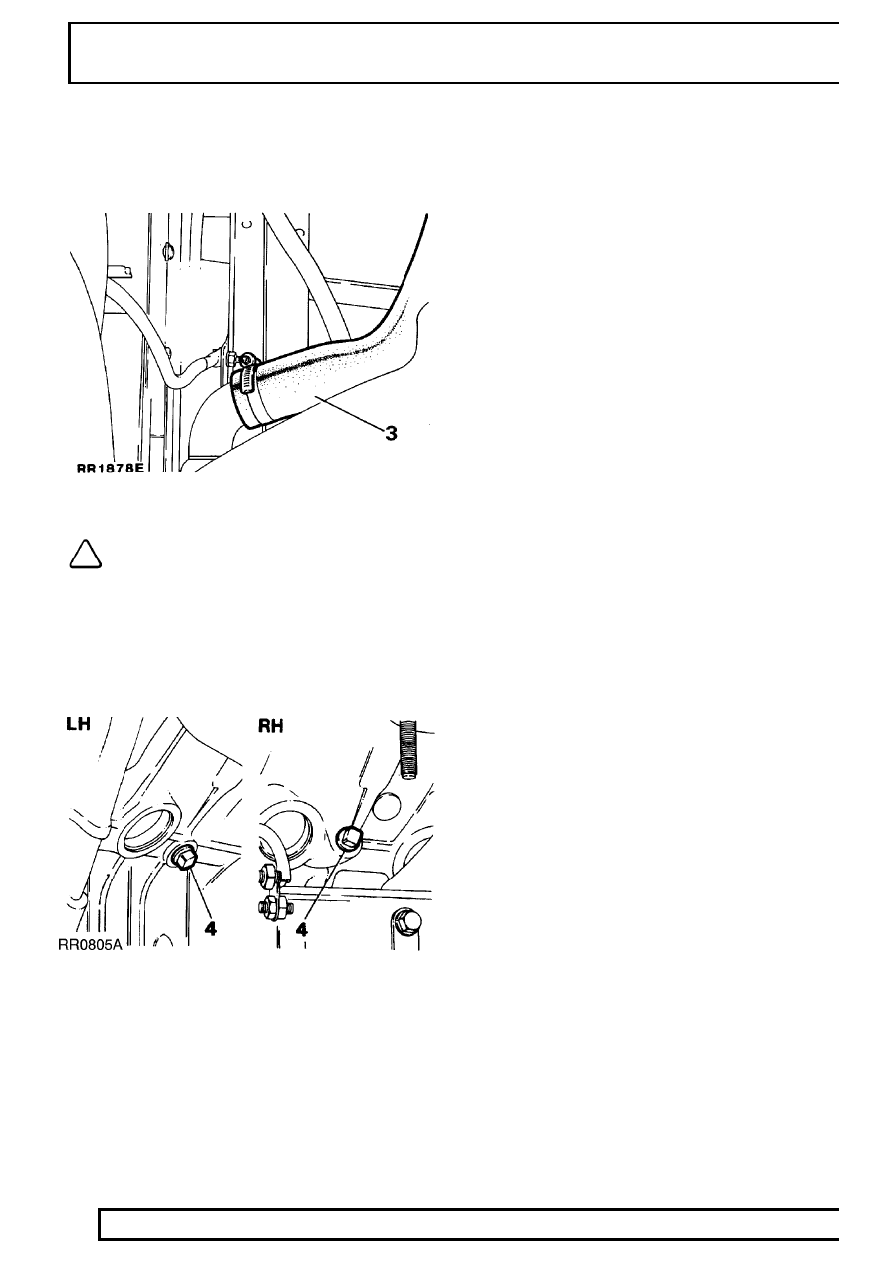
3. Disconnect bottom hose from radiator. Drain

coolant into a clean container. Reconnect bottom
hose, re-tighten hose clamp.

NOTE: It is not possible to drain all coolant
retained in heater system. It is not
desirable to flush through system, after

draining.

4. Remove engine drain plugs, one each side of

cylinder block, beneath exhaust manifolds. Drain
coolant, refit and tighten plugs.

5. Pour correct solution of water and anti-freeze

into expansion tank until radiator is full.

6. Start engine, run it until normal operating

temperature is attained, topping up as
necessary.

7. Refit radiator filler plug and ’O’ ring, with new ’O’

ring if required. Tighten to

6 Nm.

8. Fit expansion tank filler cap.
9. Allow engine to cool, check coolant level. Finally

top up expansion tank until level reaches seam
of expansion tank.

V8i

1

REPAIR

EXPANSION TANK

Service repair no - 26.15.01

Remove

WARNING: Do not remove expansion tank
filler cap when engine is hot. The cooling
system is pressurised and personal

scalding could result.

1. Remove expansion tank filler cap by first turning

it slowly anti-clockwise, pause to allow pressure
to escape. Continue turning in same direction
and lift off.

2. Disconnect two hoses from bottom of expansion

tank, allowing coolant to drain into a suitable
container.

3. Remove three fixing bolts, remove expansion

tank.

Refit

4. Reverse removal procedure.
5. Replenish cooling system.
6. Check for leaks around all hose connections.

VISCOUS COUPLING, FAN BLADES, PULLEY AND
COWL

Service repair no - 26.25.19 - Viscous coupling
and fan assembly
Service repair no - 26.25.03 - Water pump pulley
Service repair no - 26.25.05 - Fan blades

Special tools:
LRT-12-093
LRT-12-094 - Viscous coupling removal

Remove

1. Disconnect battery negative lead.

NOTE: 4.0 V8 only:
Release coolant hose from cooling fan upper
cowl.

2. Release 2 clips securing cooling fan upper cowl.

Remove cowl.

26

COOLING SYSTEM

2

REPAIR

3. Use LRT-12-093 to prevent coolant pump pulley

from turning and using LRT-12-094, unscrew
viscous coupling from water pump.

NOTE: Nut securing viscous unit to water
pump has a right hand thread. Release by
turning anti-clockwise when viewed from

front of viscous unit.

4. Remove fan and coupling assembly.

Do not carry out further dismantling if component
is removed for access only.

NOTE: Mark fan with reference to assist
refitting.

5. Remove 4 Allen screws securing blades to

coupling. Remove coupling.

6. Remove serpentine drive belt.
7. Remove pulley fixings, remove pulley.

Refit

8. Clean fan blades and mating faces.
9. Fit fan blades to coupling. Secure with screws.

Tighten to

24 Nm.

10. Using LRT-12-093 and LRT-12-094, fit fan

assembly to pump. Tighten to

56 Nm.

11. Fit cooling fan upper cowl. Secure with clips.
12. 4.0 V8 only:Fit coolant hose to cooling fan upper

cowl.

13. Fit serpentine drive belt.
14. Fit pulley fixings, remove pulley.
15. Reconnect battery negative lead.

V8i

3

REPAIR

THERMOSTAT

Service repair no - 26.45.01

Remove

1. Partially drain cooling system, until coolant level

is below thermostat housing.

2. Disconnect hose from thermostat housing.
3. Disconnect electrical connections to water

temperature switch.

4. Remove outlet elbow.
5. Withdraw thermostat.

Test

6. Note rating of thermostat is 88

°

C. Place

thermostat in a container half full of water. Heat
water, observe temperature at which thermostat
opens. Thermostat is satisfactory if it opens
between 85

°

C and 89

°

C.

Refit

7. Insert thermostat with jiggle pin/vent hole

uppermost (12 o’clock position).

8. Fit the outlet elbow and new joint washer.

Tighten to

28 Nm.

9. Reverse removal procedure. 1 to 3.

10. Check for coolant leaks around all connections

and joint faces.


Content   ..  89  90  91  92   ..