Defender (1999-2002). Manual - part 117


  Index      Land Rover     Defender - service manual 1999-2002 year


Search            


Content   ..  115  116  117  118   ..


Defender (1999-2002). Manual - part 117


77

PANEL REPAIRS

4

REPAIR

SCREEN APERTURE

Remove

1. Disconnect both battery leads, negative lead

first.

2. Raise side of vehicle.
3. Remove front and centre headlining sections.
4. Remove both ’A’ post upper trims.
5. Remove front door aperture seals.
6. Release upper front corner of rear door aperture

seal.

7. Remove both wiper arms. See WIPERS AND

WASHERS, Repair.

8. Remove front screen.
9. Remove all roof fixings, back to the ’B/C’ post.

10. Release sealant securing front edge of roof.

11. Insert wedges into top of both ’B/C’ posts. This

will allow access for removal of screen aperture.

12. With assistance remove screen aperture.

Refit

13. Prepare and clean panel joint faces.
14. Reverse removal procedure. Fit new foam seal

to top edge of aperture.

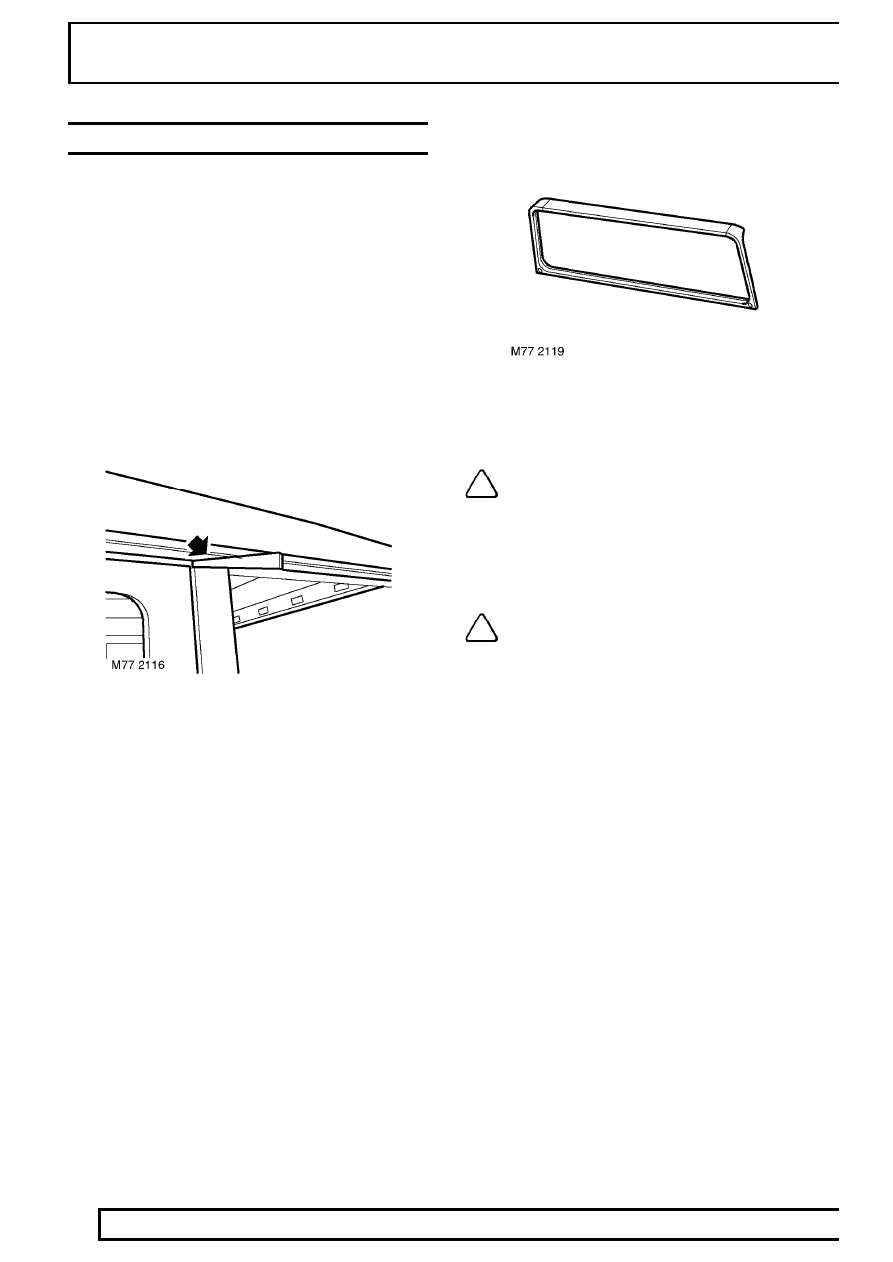
NOTE: When refitting, ensure screen
aperture is correctly fitted onto location
pins in bulkhead.

15. When applying sealant to top edge of aperture,

the correct colour sealant must be used, see
note below.

NOTE: White roof vehicles use a white
sealant. Coloured roof vehicles use a
black sealant.

PANEL REPAIRS

5

REPAIR

SILL - FRONT

Remove

NOTE: The procedure to replace the rear
sill section is the same as the front.

1. Remove bolts securing sill to body, discard seal.

Refit

NOTE: Front sill

NOTE: Rear sill

2. Prepare and clean panel joint faces. Refit new

seal.

3. Reverse removal procedure.

’B/C’ & ’D’ POST

Remove

1. Disconnect both battery leads, negative lead

first.

2. Remove rear door and striker.
3. Remove front seat belt reel. See CHASSIS

AND BODY, Repair.

4. Remove front and rear carpets.
5. Remove front seat.
6. Remove rear seat.
7. Remove front, centre and rear sections of

headlining.

NOTE: Assembly is held on with bolts.

Refit

8. Prepare and clean panel joint faces.
9. Reverse removal procedure.

77

PANEL REPAIRS

6

REPAIR

CORNER CAPPING

The Corner Capping is not replaced as a single panel.
It is replaced in conjunction with either the Body Side
Lower Panel or Body Side Assembly. The procedure
to replace the Corner Capping is shown in the Body
Side Lower Panel procedure.

BODY SIDE CAPPING

The Body Side Capping is not replaced as a single
panel. It is replaced in conjunction with either the
Body Side Lower Panel or Body Side Assembly. The
procedure to replace the Body Side Capping is shown
in the Body Side Lower Panel procedure.

BODY SIDE REAR - UPPER

Remove

1. Disconnect both battery leads, negative lead

first.

2. Remove front, centre and rear sections of

headlining.

3. Release upper edge of front door aperture seal.
4. Release upper edge of rear door aperture seal.
5. Remove fixings from front edge of roof, and

along side being replaced.

6. Release sealant securing front edge of roof.

7. Insert wedges into top of both ’B/C’ posts. This

will allow access for removal of body side.

8. RH side: Remove tail door. See CHASSIS

AND BODY, Repair.

9. Remove side window.

10. Remove rear sixth light.
11. Remove all bolts securing upper body side.

Refit

12. Prepare and clean panel joint faces.
13. Reverse removal procedure.

NOTE: When refitting, ensure body side
upper is correctly fitted onto location pins.

PANEL REPAIRS

7

REPAIR

BODY SIDE REAR - LOWER - ASSEMBLY

In this procedure the Body Side Capping and the
Corner Capping are also changed.

Remove

1. Disconnect both battery leads, negative lead

first.

2. Remove body side upper rear. See this

Section.

3. Remove all rear lamps and reflectors.
4. LH side: Remove number plate and lamp.
5. LH side: Remove tail door striker.
6. RH side: Remove fuel filler and grommet.
7. Remove all bolts and rivets securing lower body

side assembly.

Refit

8. Prepare and clean panel joint faces.
9. Reverse removal procedure.

NOTE: When refitting, ensure body side
upper is correctly fitted onto location pins.


Content   ..  115  116  117  118   ..