Defender (1993+). Manual - part 88
CHASSIS AND BODY
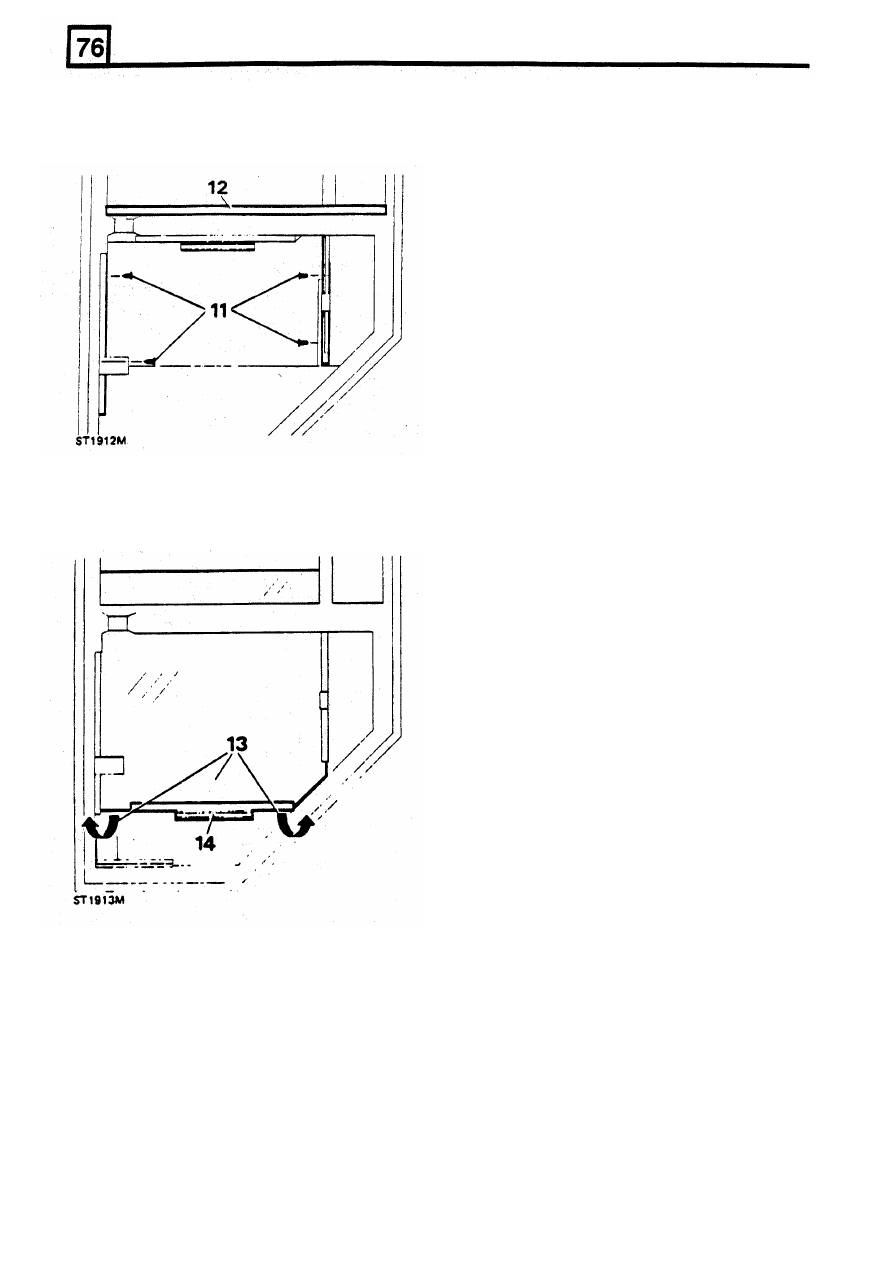
11.
Remove the four self-tapping screws
-
two
Fitting g l a s s
12. Remove the inner and outer weather strips
each side - securing the glass lower channel.
from the door sill
15.
Fit the lift channel to the new glass if not
supplied already
fitted.
16. Insert the glass into the lower channels and
carefully push the glass up
to
the
top of the
frame.
17. Secure the lower channels with the four self-
tapping screws. Ensure that the screw heads
are screwed down firmly below the bottom
of
the channels
to prevent damage
to
the glass.
18.
Fit the door check rod and bend the end stop
back
to the closed position.
19.
Fit check stop torsion bar and secure with the
two
nuts and bolts.
20. Fit the water channel and secure
with
the
single self-tapping screw.
21.
Fit the mounting panel complete with rods and
remote control lever.
22. Connect the control rods to the latch and door
outer handle mechanism.
13.
Lower the glass down to the bottom of the
23.
Fit the door locking button and connect the
control rad.
door, lift the glass over the lower edge and
24.
Fit the window regulator.
withdraw from the door
14. Remove the lift channel from the glass, if
25. Fit the door inner and outer sill weather strips
necessary.
26.
Fit and re-seal the weather protection sheet.
27.
Fit the door trim, regulator handle, door pull
and
bezels.
28. Connect the door check rod
to
the door post.
12
REVISED:
OCT 1993