Jeep Commander (2010 year). Instruction - part 26
NOTE:
Numbers refer to commercial bulb types that
can be purchased from your authorized dealer.
If a bulb needs to be replaced, visit your authorized
dealer or refer to the applicable Service Manual.
BULB REPLACEMENT
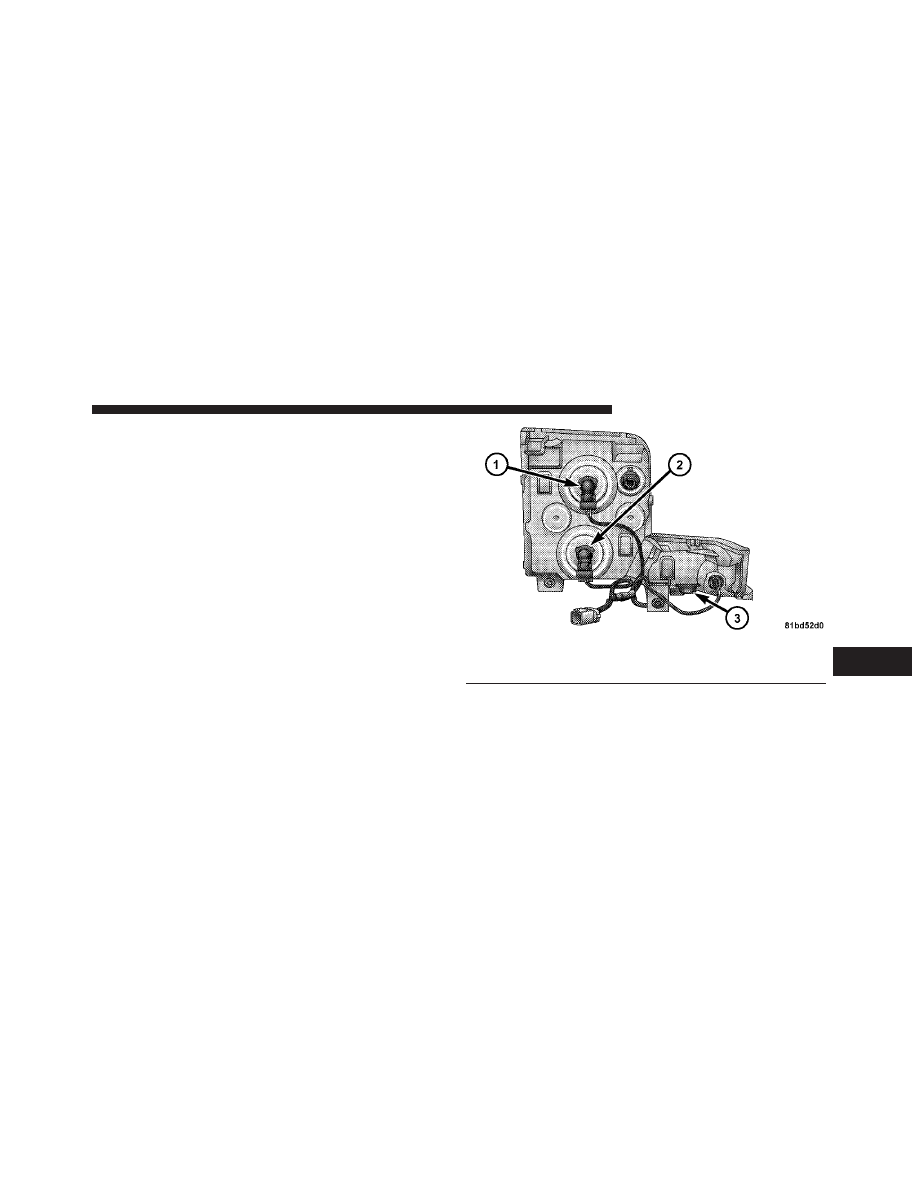
Head Lamp
1. Open the hood.
2. Disconnect the electrical connector.
3. Turn the low or high beam bulb 1/4 turn counterclock-
wise to unlock it from the housing.
4. Pull the bulb and base straight out from the opening in
the reflector.
1 — Low Beam Bulb
2 — High Beam Bulb
3 — Front Park/Turn Signal Bulb
7
MAINTAINING YOUR VEHICLE
401