Iveco EuroCargo (12 to 26 t). Manual - part 136
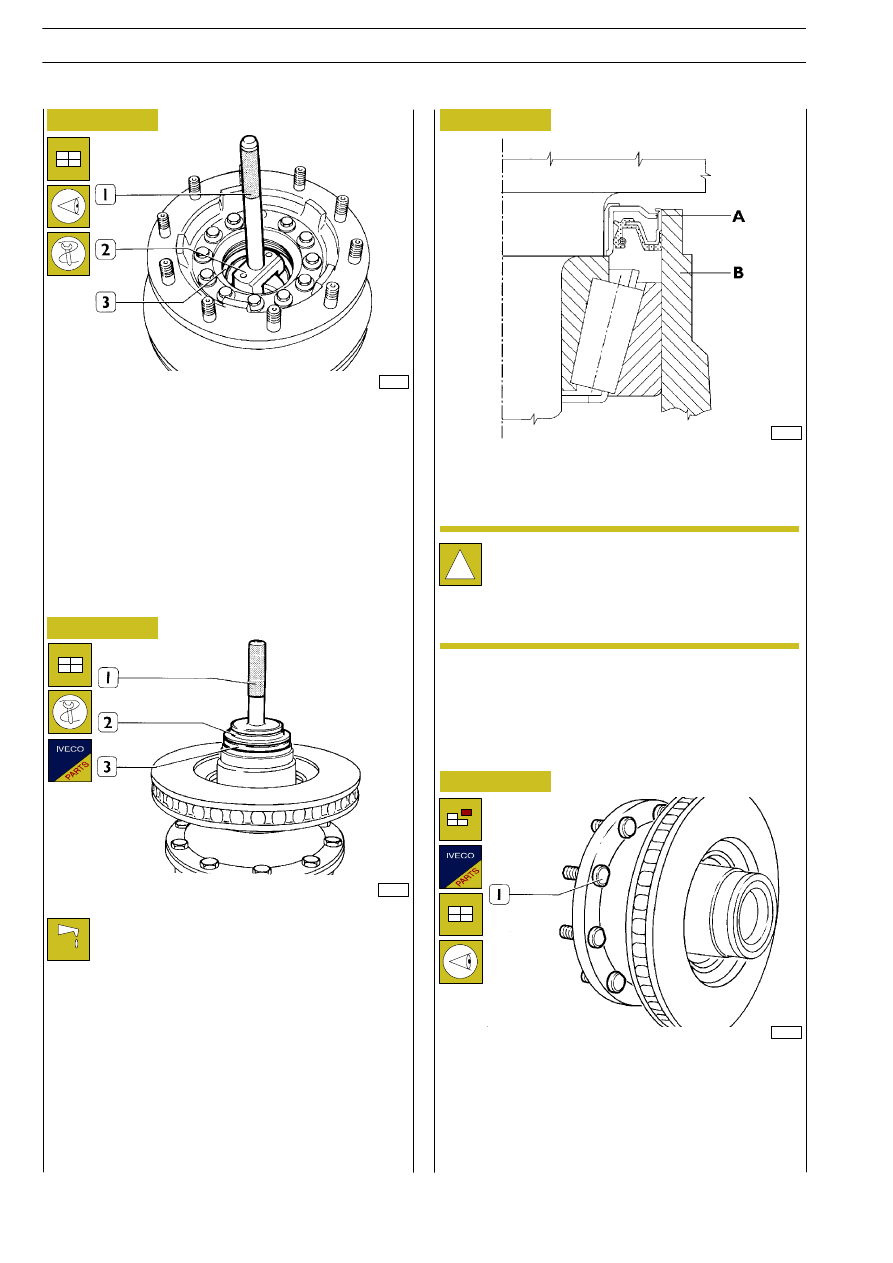
Figure 30
Figure 31
Figure 32
36413
Use drift 99374093 (2) to press-fit the outer race of the front
hub bearing without pushing fully home. Repeat the
operation on the opposite side for the rear bearing outer
race.
Complete the operation of press-fitting the outer bearing
races manually using drift 99374093 (2) with handle
99370007 (1).
Heat the phonic wheel (1) to a temperature of 150
° (3,
Figure 28) for 15 minutes, then fit it on the wheel hub (1) and
let it cool down.
Lubricate the inner bearing with SAE W 140M-DA
oil and position it in its housing in the wheel hub.
Using drift 99374232 (1) and handle 99370006 (2)
fit in place the seal ring (3) on the wheel hub checking
the assembly position (Figure 32).
ASSEMBLY POSITION OF THE SEAL RING (A) IN THE
WHEEL HUB (B)
49142
36415
Use ordinary tools to remove studs (1) from wheel hub.
Check that the stud head mating surface is free of burrs.
Press-fit studs carefully by applying a load of not more than
2500 kg to their heads.
Once the operation is complete, check there is no play
between the disc surface and stud head undersides.
Replacing wheel studs
!
Cleaning the wheel hub cap. To prevent the
polycarbonate transparent part from getting opaque,
we advise you to wash it with cleaning products
normally used for the body. Never use chlorotene
solvents because they etch the polycarbonate.
Figure 33
36410
Replacing seal
E
URO
C
ARGO
T
ECTOR
12-26 t
88
FRONT AXLE 5871/5
Base - February 2003