Infiniti QX80 (2021 year). Manual in english - page 15
 

  Index      Manuals     Infiniti QX80 (2021 year). Manual in english


Search            copyright infringement  


Content      ..     13      14      15      16     ..


Infiniti QX80 (2021 year). Manual in english - page 15


4-20

Monitor, climate, audio, phone and voice recognition systems

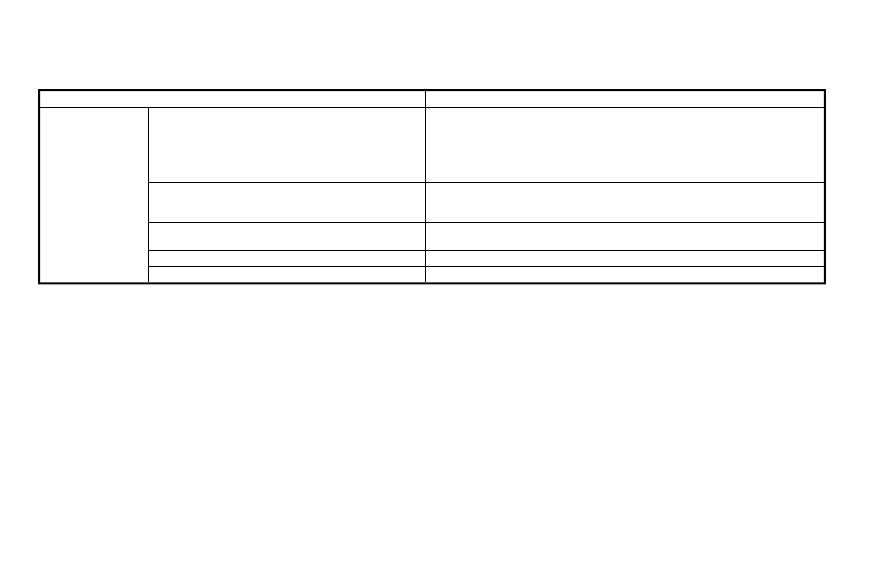
Available setting items:

Setting item

Action

Parking Sonar

Parking Sonar

When this item is turned on, the front and rear sonar is activated.
When this item is turned off (indicator turns off), the front and rear sonar is
deactivated. The amber markers are displayed at the corners of the vehicle icon.
When the Around View

®

Monitor is activated next time after placing the

ignition switch in the ON position, a gray sonar icon will briefly flash on the
upper display, indicating that the sonar system is off.

Auto Show Sonar Image

When the sonar detects an object while this item is turned on, the Around View

®

Monitor will interrupt the current view in the display to show the surround area
of the vehicle.

Front Only

When this item is turned on, only the front sonar is activated. The amber
markers are displayed at the rear corners of the vehicle icon.

Distance

Adjust the sensitivity level of the sonar.

Volume

Adjust the tone volume of the sonar.

NOTE:

Do not adjust any of the Parking Sonar settings while the vehicle is moving. Make sure the parking brake is firmly applied.

-------------------------------------------------------------------------------------------------------------------------------------------------------------

SONAR SYSTEM LIMITATIONS

WARNING

Listed below are the system limitations
for the sonar function. Failure to operate
the vehicle in accordance with these
system limitations could result in serious
injury or death.

.

Inclement weather or ultrasonic
sources such as an automatic car
wash, a truck’s compressed-air
brakes or a pneumatic drill may affect
the function of the system, including
reduced performance or a false acti-
vation.

.

The system is not designed to pre-
vent contact with small or moving
objects.

.

The system will not detect small
objects below the bumper, and may
not detect objects close to the bum-
per or on the ground.

.

The system may not detect the
following objects:

— Fluffy objects such as snow,

cloth, cotton, grass or wool.

— Thin objects such as rope, wire or

chain.

— Wedge-shaped objects.

.

If your vehicle sustains damage to the
bumper fascia, leaving it misaligned
or bent, the sensing zone may be
altered causing inaccurate measure-
ment of objects or false alarms.

CAUTION

Excessive noise (such as audio system
volume or an open vehicle window) will
interfere with the tone and it may not be
heard.

System temporarily unavailable

When the amber markers are displayed at
the corners of the vehicle icon and the
function cannot be activated from the
Parking sonar settings menu (the setting
items are grayed out), the sonar system may
be malfunctioning.

SYSTEM MAINTENANCE

CAUTION

Keep the surface of the sonar (located on
the front and rear bumper fascia) free
from accumulations of snow, ice and dirt.
Do not scratch the surface of the sonar
when cleaning. If the sensors are cov-
ered, the accuracy of the sonar function
will be diminished.

Monitor, climate, audio, phone and voice recognition systems

4-21

-------------------------------------------------------------------------------------------------------------------------------------------------------------

4-22

Monitor, climate, audio, phone and voice recognition systems

WAE0244X

1. Upper touch screen display (upper dis-

play)

2. Lower touch screen display (lower dis-

play)

3. MENU button

4. CAMERA button

WARNING

Failure to follow the warnings and
instructions for proper use of the Mov-
ing Object Detection system could result
in serious injury or death.

.

The MOD system is not a substitute
for proper vehicle operation and is
not designed to prevent contact with
the objects surrounding the vehicle.
When maneuvering, always use the
outside mirror and rearview mirror
and turn and check the surrounding
to ensure it is safe to maneuver.

.

The system is deactivated at speeds
above 6 MPH (10 km/h). It is reacti-
vated at lower speeds.

.

The MOD system is not designed to
detect the surrounding stationary
objects.

The Moving Object Detection (MOD) system
can inform the driver of the moving objects
surrounding the vehicle when driving out of
garages, maneuvering into parking lots and
in other such instances.
The MOD system detects moving objects by
using image processing technology on the
image shown on the display.

MOVING OBJECT DETECTION (MOD)

-------------------------------------------------------------------------------------------------------------------------------------------------------------

MOD SYSTEM OPERATION

The MOD system will turn on automatically
under the following conditions:

.

When the shift lever is in the R (Reverse)

position.

.

When the CAMERA button is pushed to

activate the camera view on the display.

.

When vehicle speed decreases below

approximately 5 MPH (8 km/h) and the
camera screen is displayed.

The MOD system operates in the following
conditions when the camera view is dis-
played:

.

When the shift lever is in the P (Park) or N

(Neutral) position and the vehicle is
stopped, the MOD system detects mov-
ing objects in the bird’s-eye view. The
MOD system will not operate if the
outside mirrors are moving in or out, in
the stowed position, or if either front
door is opened.

.

When the shift lever is in the D (Drive)

position and the vehicle speed is below
approximately 5 MPH (8 km/h), the
MOD system detects moving objects in
the front view or front-wide view.

.

When the shift lever is in the R (Reverse)

position and the vehicle speed is below
approximately 5 MPH (8 km/h), the
MOD system detects moving objects in

the rear view or rear-wide view.

The MOD system will not operate if the
liftgate is open.
The MOD system does not detect moving
objects in the front-side view. The MOD icon
is not displayed on the screen when in this
view.

WAE0253X

Bird’s-eye view

WAE0254X

Front view / rear view

Monitor, climate, audio, phone and voice recognition systems

4-23

-------------------------------------------------------------------------------------------------------------------------------------------------------------

4-24

Monitor, climate, audio, phone and voice recognition systems

WAE0238X

Rear and front-side views

WAE0239X

Front-wide view / rear-wide view

When the MOD system detects moving
objects near the vehicle, a chime will be
heard and a yellow frame will be displayed
on the view where the objects are detected.
While the MOD system continues to detect
moving objects, the yellow frame continues
to be displayed.

NOTE:

While the sonar/Back-up Collision Inter-
vention (BCI) system is beeping, the MOD
system does not chime.

In the bird’s-eye view, the yellow frame

is

displayed on each camera image (front, rear,
right, left) depending on where moving
objects are detected.
The yellow frame

is displayed on each

view in the front view, front-wide view, rear
view and rear-wide view modes.
A green MOD icon

is displayed in the view

where the MOD system is operative. A white
MOD icon

is displayed in the view where

the MOD system is not operative.
If the MOD system is turned off, the MOD
icon

is not displayed.

WAE0250X

TURNING ON AND OFF THE MOD
SYSTEM

When the MOD is active and the “Sonar/
MOD” key

is touched, the MOD system

will turn off temporarily and the indicator
will turn off. (A camera-aiding sonar will turn
off at the same time.) When the “Sonar/
MOD” key

is touched again, the indicator

will turn on and the MOD system will turn
back on.
To enable or disable the MOD system, use
the camera settings menu.

-------------------------------------------------------------------------------------------------------------------------------------------------------------

MOD function settings

The MOD function settings can be changed
using the following procedures.
1. Push the MENU button.
2. Touch the “Settings” key on the lower

display.

3. Touch the “Camera” key.
4. Touch the “Camera” key.

Available setting items:

MOD:

When this item is turned on, the MOD
system is activated. When this item is turned
off (indicator turns off), the MOD system is
deactivated.

WAE0258X

When the MOD system is deactivated, the
MOD icon

will disappear.

When the sonar is turned off on the settings
menu as well, the “Sonar/MOD” key

will

disappear.

MOD Volume:

Adjust the volume of the chime.

MOD SYSTEM LIMITATIONS

WARNING

Listed below are the system limitations
for MOD. Failure to operate the vehicle
in accordance with these system limita-
tions could result in serious injury or
death.

.

Do not use the MOD system when
towing a trailer. The system may not
function properly.

.

Excessive noise (for example, audio
system volume or open vehicle win-
dow) will interfere with the chime
sound, and it may not be heard.

.

The MOD system performance will be
limited according to environmental
conditions and surrounding objects
such as:

— When there is low contrast be-

tween background and the mov-
ing objects.

— When there is blinking source of

light.

— When strong light such as an-

other vehicle’s headlight or sun-
light is present.

Monitor, climate, audio, phone and voice recognition systems

4-25

-------------------------------------------------------------------------------------------------------------------------------------------------------------

4-26

Monitor, climate, audio, phone and voice recognition systems

— When camera orientation is not in

its usual position, such as when
mirror is folded.

— When there is dirt, water drops or

snow on the camera lens.

— When the position of the moving

objects in the display is not chan-
ged.

.

The MOD system might detect flow-
ing water droplets on the camera
lens, white smoke from the muffler,
moving shadows, etc.

.

The MOD system may not function
properly depending on the speed,
direction, distance or shape of the
moving objects.

.

If your vehicle sustains damage to the
parts where the camera is installed,
leaving it misaligned or bent, the
sensing zone may be altered and the
MOD system may not detect objects
properly.

.

When the temperature is extremely
high or low, the screen may not
display objects clearly. This is not a
malfunction.

WAE0291X

SYSTEM MAINTENANCE

CAUTION

.

Do not use alcohol, benzine or thinner
to clean the camera. This will cause
discoloration.

.

Do not damage the camera as the
monitor screen may be adversely
affected.

If dirt, rain or snow accumulates on any of
the cameras

, the MOD system may not

operate properly. Clean the camera by
wiping with a cloth dampened with a diluted

mild cleaning agent and then wiping with a
dry cloth.

-------------------------------------------------------------------------------------------------------------------------------------------------------------

WAE0169X

CENTER VENTILATORS

Open/close the ventilators by moving the
control to either direction.
Adjust the air flow direction of the ventila-
tors by moving the center knob (up/down,
left/right) until the desired position is
achieved.

WAE0170X

SIDE VENTILATORS

Open/close the ventilators by moving the
control to either direction.
Adjust the air flow direction of the ventila-
tors by moving the center knob (up/down,
left/right) until the desired position is
achieved.

JVH1313X

REAR VENTILATORS

Open/close the ventilators by moving the
control to either direction.

:

This symbol indicates that the ventila-
tors are closed. Moving the side control
to this direction will close the ventilators.

:

This symbol indicates that the ventila-
tors are open. Moving the side control to
this direction will open the ventilators.

Monitor, climate, audio, phone and voice recognition systems

4-27

VENTILATORS

-------------------------------------------------------------------------------------------------------------------------------------------------------------

4-28

Monitor, climate, audio, phone and voice recognition systems

SAA3055

Adjust the air flow direction of the ventila-
tors by moving the center knob (up/down,
left/right) until the desired position is
achieved.

WARNING

.

The air conditioner cooling function
operates only when the engine is
running.

.

Do not leave children or adults who
would normally require the support
of others alone in your vehicle. Pets
should not be left alone either. On
hot, sunny days, temperatures in a
closed vehicle could quickly become
high enough to cause severe or
possibly fatal injuries to people or
animals.

.

Do not use the recirculation mode for
long periods as it may cause the
interior air to become stale and the
windows to fog up.

.

Do not adjust the heating and air
conditioning controls while driving so
that full attention may be given to
vehicle operation.

Start the engine and operate the climate
control system.

NOTE:

.

Odors from inside and outside the

vehicle can build up in the air conditioner
unit. Odor can enter the passenger

compartment through the ventilators.

.

When parking, set the heater and air

conditioner controls to turn off air
recirculation to allow fresh air into the
passenger compartment. This should
help reduce odors inside the vehicle.

HEATER AND AIR CONDITIONER

-------------------------------------------------------------------------------------------------------------------------------------------------------------

WAE0259X

1.

” Temperature control increase

button (driver’s side)

2.

” Temperature control decrease

button (driver’s side)

3.

AUTO button

4.

” Fan speed increase button

5.

” Fan speed decrease button

6.

” Manual air flow control button

7.

Lower touch screen display (lower dis-
play)

(See “Operations on touch panel

screen” (P.4-31).)

8.

MENU button

9.

CLIMATE button

10. “

” Temperature control increase

button (front passenger’s side)

11. “

” Temperature control decrease

button (front passenger’s side)

12. “

” Air recirculation button

13. “

” Front defroster button

14. “

” Rear defroster button

(See “Rear window and outside mirror

defroster switch” (P.2-39).)

15. ON/OFF button

AUTOMATIC AIR CONDITIONER

NOTE:

The heater and air conditioning system
settings can be linked and memorized for
each of the Intelligent Keys. For more
details, see “Setting memory function”
(P.3-41).

Automatic operation (AUTO)

The AUTO mode may be used year-round as
the system automatically controls the air
conditioner to a constant temperature, air
flow distribution and fan speed after the
desired temperature is set manually.

Cooling and dehumidified heating (AUTO):

1. Push the AUTO button.

The indicator light on the button will
illuminate. The Climate screen will be
displayed on the lower display and

Monitor, climate, audio, phone and voice recognition systems

4-29

-------------------------------------------------------------------------------------------------------------------------------------------------------------

4-30

Monitor, climate, audio, phone and voice recognition systems

“AUTO” will appear on the Climate
screen.

2. Push the temperature control buttons

(driver’s side) to set the preferred tem-
perature.

.

When the DUAL mode is turned on,

you can individually set temperatures
for the driver’s side and front passen-
ger’s side, using the temperature
control buttons on the corresponding
side. (To turn on the DUAL mode,
touch the "DUAL" key.)

.

The temperature of the passenger

compartment will be maintained
automatically. Air flow distribution
and fan speed will also be controlled
automatically.

A visible mist may be seen coming from the
ventilators in hot, humid conditions as the air
is cooled rapidly. This does not indicate a
malfunction.

Heating (A/C off):

The air conditioner does not activate in this
mode. Use this mode when you only need to
heat.
1. Push the CLIMATE button.

The Climate screen will be displayed on
the lower display.

2. Touch the "A/C" key. The "A/C" indica-

tor will turn off. See “Operations on

touch panel screen” (P.4-31).

3. Push the temperature control buttons

(driver’s side) to set the preferred tem-
perature.

.

When the DUAL mode is turned on,

you can individually set temperatures
for the driver’s side and front passen-
ger’s side, using the temperature
control buttons on the corresponding
side. (To turn on the DUAL mode,
touch the "DUAL" key.)

.

The temperature of the passenger

compartment will be maintained
automatically. Air flow distribution
and fan speed will also be controlled
automatically.

NOTE:

.

Do not set the temperature lower than

the outside air temperature. Otherwise
the system may not work properly.

.

This mode is not recommended if the

windows fog up.

Dehumidified defrosting/defogging:

1. Push the “

” front defroster button.

The indicator light on the button will
illuminate.

2. Push the temperature control buttons on

the driver’s side to set the preferred
temperature.

NOTE:

.

To quickly remove ice from the outside

of the windows, push the “

” fan

speed increase button and set it to the
maximum position.

.

As soon as possible after the windshield

is cleaned, push the AUTO button to
return to the AUTO mode.

.

When the “

” front defroster button

is pushed, the air conditioner will auto-
matically be turned on at outside tem-
peratures above 23°F (-5°C) to defog
the windshield, and the air recirculate
mode will automatically be turned off.
The outside air circulation mode will be
selected to improve the defrosting per-
formance.

Manual operation

The manual mode can be used to control the
heater and air conditioner to your desired
settings.

Fan speed control:

Push the “

” fan speed increase button

to increase the fan speed.
Push the “

” fan speed decrease button to

decrease the fan speed.
Push the AUTO button to change the fan
speed to the automatic mode.

-------------------------------------------------------------------------------------------------------------------------------------------------------------

Air flow control:

Push the “

” manual air flow control

button to change the air flow mode.

:

Air flows from the center and side
ventilators.

:

Air flows from the center and side
ventilators, and foot outlets.

:

Air flows mainly from the foot outlets.

:

Air flows from the defroster and foot
outlets.

Temperature control:

Push the “

” temperature control increase

button or the “

” temperature control

decrease button to set the desired tempera-
ture.
When the DUAL mode is on, you can
individually set temperatures for the driver’s
side and front passenger’s side.

Air intake control:

.

Push the “

” air recirculation button to

recirculate interior air inside the vehicle.
The indicator light on the “

” air

recirculation button will illuminate.

.

Push the “

” air recirculation button

twice to draw outside air into the
passenger compartment. The indicator
light on the “

” air recirculation button

will turn off.

.

To control the air intake automatically,

push and hold the “

” air recirculation

button. The indicator light will blink, and
then the air intake will switch to auto-
matic control.
The air intake mode can also be con-
trolled automatically by touching the
"Auto Recirc" key (if so equipped). The
indicator light on the "Auto Recirc" key
will illuminate. (See “Advanced Climate
Control System” (P.4-32).)

Turning the system off

Push the ON/OFF button.

Operations on touch panel screen

Heater and air conditioner can be operated
on the touch panel screen. Push the CLI-
MATE button and switch the lower display
to the Climate screen.
For details of the touch panel operation on
the lower display, see the separate INFINITI
InTouch

TM

Owner’s Manual.

WAE0263X

Example

The following control keys are available.
(Availability of the item depends on the
model and specifications.)

Available items:

.

Touch to change the air flow mode.

.

“-

” / “

+”

Touch to change the fan speed.

.

“Rear CLIMATE”

Touch to display the Rear climate screen.
(See “Touch panel operation” (P.4-34).)

.

“DUAL”

Touch to turn the DUAL mode on/off.
(See “DUAL mode setting” (P.4-32).)

Monitor, climate, audio, phone and voice recognition systems

4-31

-------------------------------------------------------------------------------------------------------------------------------------------------------------

4-32

Monitor, climate, audio, phone and voice recognition systems

.

“A/C”

Touch to turn the air conditioner on/off.
(See “Automatic operation (AUTO)”
(P.4-29).)

.

“Auto Recirc” (if so equipped)

Touch to turn the auto-recirculation
mode on/off. (See “Advanced Climate
Control System” (P.4-32).)

.

“Upper Vent”

Touch to turn the upper vent system on/
off. (See “Upper vent system ” (P.4-32).)

DUAL mode setting

Touch the "DUAL" key on the Climate screen
to turn on/off the DUAL mode. When the
DUAL mode is set, the temperature for the
driver seat and the front passenger seat can
be adjusted independently. When the DUAL
mode is on, the indicator light is on and
“DUAL” appears.

Upper vent system

When the “Upper Vent” key on the Climate
screen is touched, the air flow against the
driver’s or passenger’s upper body becomes
gentle. The indicator light on the key will
illuminate.
In this mode, air from the upper ventilator
flows in order to control the cabin tempera-
ture without blowing air directly on the
occupants.

The upper vent system is useful when you
want the air conditioner to work quickly.
To turn the system off, touch the “Upper
Vent” key to turn the indicator light off.

Advanced Climate Control System
(if so equipped)

The Advanced Climate Control System
keeps the air inside of the vehicle clean,
using the automatic air circulation control
with the exhaust gas/outside odor detection
sensor and with ion control.

WAE0260X

“Auto Recirc” key:
Touch to turn on the automatic air
recirculation mode.
Plasmacluster

®

icon:

Indicates the Plasmacluster

®

ion emis-

sion status.

Plasmacluster

®

and Plasmacluster

®

ion are

registered trademarks of Sharp Corporation.

Automatic air recirculation control with the
exhaust gas/outside odor detection sensor:

The Advanced Climate Control system
comes with an exhaust gas detection/out-
side odor sensor. When the automatic air
circulation control is activated, the sensor

-------------------------------------------------------------------------------------------------------------------------------------------------------------

detects odors outside the vehicle such as
pulp or chemicals, and exhaust gas such as
gasoline or diesel. When such odors or gases
are detected, the display and the system
automatically change from the fresh air
mode to the recirculation mode.
When the automatic air circulation control
mode is on, for the first 5 minutes, the air
recirculation mode is selected to prevent
dust, dirt and pollen from entering the
vehicle and to clean the air inside of the
vehicle.
After 5 minutes, the sensor detects exhaust
gas and automatically alternates between
the air recirculation mode and the fresh air
mode.

NOTE:

The automatic air recirculation mode can be
activated under the following conditions.

.

The air flow control is not in the wind-

shield defrosting mode (the indicator
light on the “

” front defroster but-

ton is turned off).

.

The outside temperature is approxi-

mately 32 °F (0 °C) or above.

Ion control:

The Advanced Climate Control system unit
generates highly concentrated Plasmaclus-
ter

®

ions into the air blown from the

ventilators to reduce odor absorbed into

the interior trim and to suppress airborne
bacteria. The high-density Plasmacluster

®

ions also have a proven skin moisture
preserving effect.
The Plasmacluster

®

icon on the Climate

screen indicates the status of the Plas-
macluster

®

ion emission from the system

and changes with the amount of the air flow.

REAR AUTOMATIC AIR CONDI-
TIONING SYSTEM

The front air conditioning system must be
turned on to activate the rear air condition-
ing system.
The rear air conditioning system can be
operated with the buttons on the front air
conditioner control panel, the touch panel
screen and the buttons on the rear air
conditioner control panel at the rear of the
center console.
To turn on and off the rear air conditioning
system from the front seats, touch the “Rear
CLIMATE” key on the Climate screen and
then touch the “ON/OFF” key on the Rear
climate screen.
When the Rear climate screen is displayed,
the rear air conditioning system can also be
controlled on the front air conditioner con-
trol panel. (See “Automatic air conditioner”
(P.4-29).)

The front air conditioner control panel
cannot be used to operate the front air
conditioning system when the Rear climate
screen is shown on the lower display. To use
the front air conditioner control panel for the
front air conditioning system operation,
push the CLIMATE button or touch the

” key on the Rear climate screen so that

the Rear climate screen is not shown on the
lower display. (See “Operations on touch
panel screen” (P.4-31).)
This table shows the relation between the
front air conditioner control panel and the
rear air conditioner control panel.

Display status

Rear climate
screen is dis-
played.

Rear climate
screen is not dis-
played (Climate
screen).

Front air
condition-
er control
panel

Only the rear
automatic air
conditioning
system can be
operated.

Only the front air
conditioner can
be operated.

Rear air
condition-
er control
panel

Cannot be op-
erated.

Only the rear
automatic air
conditioning sys-
tem can be oper-
ated.

Monitor, climate, audio, phone and voice recognition systems

4-33

-------------------------------------------------------------------------------------------------------------------------------------------------------------

4-34

Monitor, climate, audio, phone and voice recognition systems

Front air conditioner control panel
operation

Automatic operation:

1. Push the AUTO button on the front air

conditioner control panel. (The “AUTO”
indicator light will illuminate and “AUTO”
will appear on the display.)

2. If the “A/C” indicator light is not illumi-

nated, touch the “A/C” key on the
Climate screen.

3. Push the temperature control buttons

(driver’s side) to set the desired tempera-
ture.

Cooling and dehumidified heating:

1. Push the temperature control buttons

(driver’s side) to set the desired tempera-
ture.

2. Switch the air flow mode to “

” by

pushing the “

” manual air flow con-

trol button.

3. If the “A/C” indicator light is not illumi-

nated, touch the “A/C” key on the
Climate screen.

NOTE:

When the front air conditioner is off, the
rear automatic air conditioning system only
operates the fan. When you use the air
conditioner, be sure to turn on the front air

conditioner and that the “A/C” indicator
light is illuminated on the Climate screen.
Manual operation:

.

Temperature control

Push the temperature control buttons to
set the desired temperature.

.

Fan speed control

Push the “

” fan speed increase

button or the “

” fan speed decrease

button to manually control the fan
speed.

.

Air flow control

Push the “

” manual air flow control

button to change the air flow mode.

: The air outlet is fixed at foot level.
: The air outlet is fixed at both the head and

foot levels.

: The air outlet is fixed at the head level.

Touch panel operation

The rear automatic air conditioning system
can also be controlled on the Rear climate
screen.
Touch the “Rear CLIMATE” key on the
Climate screen to display the Rear climate
screen.

WAE0264X

Rear climate screen

Available items:

.

“Temp Down”

Touch to decrease the temperature.

.

“Temp Up”

Touch to increase the temperature.

.

“ON/OFF”

Touch to turn the rear automatic air
conditioning system on/off.

.

“Fan Down”

The fan speed of the air from the
ventilators can be decreased.

.

“Fan Up”

The fan speed of the air from the
ventilators can be increased.

-------------------------------------------------------------------------------------------------------------------------------------------------------------

.

“Auto”

Touch to turn the auto mode on/off.

.

“Mode”

Touch to select different air flow mode.

WAE0470X

1.

” on/off button

2.

” fan speed control button

3.

AUTO button

4.

Display

5.

MODE button

6.

TEMP button

Rear air conditioner control panel
operation

Rear control buttons:

The rear seat passengers can adjust the rear
automatic air conditioning system using the
control switches on the rear of the center
console.
The rear control buttons do not function
when the Rear climate screen is shown on
the front display. To activate the rear control
buttons, push the CLIMATE button and
switch the screen to the Climate screen.

.

” on/off button:

Rear automatic air conditioning system
on and off

.

” fan speed control button:

Rear fan speed control up/down

.

AUTO button:

Rear automatic air conditioning system
on, AUTO mode on

.

MODE button:

Rear air flow control change

.

TEMP button:

Rear temperature control up/down

Monitor, climate, audio, phone and voice recognition systems

4-35

-------------------------------------------------------------------------------------------------------------------------------------------------------------


Content      ..     13      14      15      16     ..