Infiniti QX60 (2019 year). Manual - part 26


  Index      Infiniti     Infiniti QX60 (2019 year) - manual in english


Search            copyright infringement  


Content      ..     24      25      26      27     ..


Infiniti QX60 (2019 year). Manual - part 26


SYSTEM MAINTENANCE

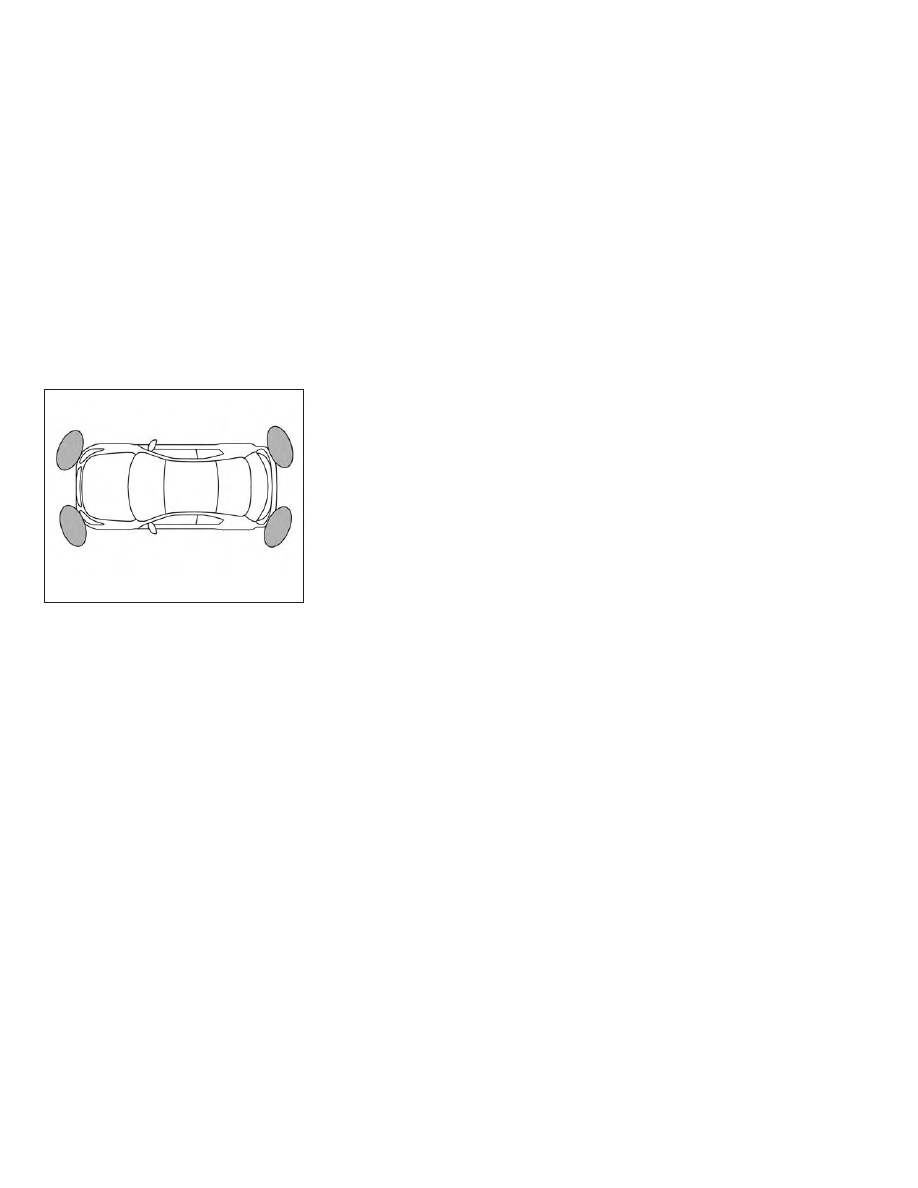
The sonar sensors are located on the front
and rear bumpers. Always keep the area near
the sonar sensors clean.

The sonar sensors may be blocked by tempo-
rary ambient conditions such as splashing
water, mist or fog.

The blocked condition may also be caused by
objects such as ice, frost or dirt obstructing
the sonar sensors.

Check for and remove objects obstructing
the area around the sonar sensors.

Do not attach stickers (including transparent
material), install accessories or apply addi-
tional paint near the sonar sensors.

Do not strike or damage the area around the
sonar sensors. It is recommended that you
visit an INFINITI retailer if the area around
the sonar sensors is damaged due to a colli-
sion.

FREEING A FROZEN DOOR LOCK

To prevent a door lock from freezing, apply
de-icer through the key hole. If the lock be-
comes frozen, heat the key before inserting it
into the key hole, or use the INFINITI Intelli-
gent Key.

ANTIFREEZE

In the winter when it is anticipated that the
temperature will drop below 32°F (0°C),
check the antifreeze to assure proper winter
protection. For additional information, refer
to “Engine cooling system” in the “Do-it-
yourself” section of this manual.

BATTERY

If the battery is not fully charged during ex-
tremely cold weather conditions, the battery
fluid may freeze and damage the battery. To
maintain maximum efficiency, the battery
should be checked regularly. For additional
information, refer to “Battery” in the “Do-it-
yourself” section of this manual.

LSD2135

COLD WEATHER DRIVING

5-144

Starting and driving

-------------------------------------------------------------------------------------------------------------------------------------------------------------

DRAINING OF COOLANT WATER

If the vehicle is to be left outside without
antifreeze, drain the cooling system, including
the engine block. Refill before operating the
vehicle. For additional information, refer to
“Changing engine coolant” in the “Do-it-
yourself” section of this manual.

TIRE EQUIPMENT

1. SUMMER tires have a tread designed to

provide superior performance on dry
pavement. However, the performance of
these tires will be substantially reduced
in snowy and icy conditions. If you oper-
ate your vehicle on snowy or icy roads,
INFINITI recommends the use of MUD &
SNOW or ALL SEASON TIRES on all
four wheels. It is recommended that you
visit an INFINITI retailer for the tire type,
size, speed rating and availability infor-
mation.

2. For additional traction on icy roads,

studded tires may be used. However,
some U.S. states and Canadian prov-
inces prohibit their use. Check local,
state and provincial laws before install-
ing studded tires.

Skid and traction capabilities of studded
snow tires on wet or dry surfaces may be
poorer than that of non-studded snow tires.

3. Tire chains may be used. For additional

information, refer to “Tire chains” in the
“Do-it-yourself” section of this manual.

SPECIAL WINTER EQUIPMENT

It is recommended that the following items
be carried in the vehicle during winter:

∙ A scraper and stiff-bristled brush to re-

move ice and snow from the windows
and wiper blades.

∙ A sturdy, flat board to be placed under

the jack to give it firm support.

∙ A shovel to dig the vehicle out of snow-

drifts.

∙ Extra

washer

fluid

to

refill

the

windshield-washer fluid reservoir.

DRIVING ON SNOW OR ICE

WARNING

∙ Wet ice (32°F, 0°C and freezing rain),

very cold snow or ice can be slick and very
hard to drive on. The vehicle will have
much less traction or “grip” under these
conditions. Try to avoid driving on wet
ice until the road is salted or sanded.

∙ Whatever the condition, drive with cau-

tion. Accelerate and slow down with
care. If accelerating or downshifting too
fast, the drive wheels will lose even more
traction.

∙ Allow more stopping distance under

these conditions. Braking should be
started sooner than on dry pavement.

∙ Allow greater following distances on

slippery roads.

∙ Watch for slippery spots (glare ice).

These may appear on an otherwise clear
road in shaded areas. If a patch of ice is
seen ahead, brake before reaching it. Try
not to brake while on the ice, and avoid
any sudden steering maneuvers.

∙ Do not use the cruise control on slippery

roads.

Starting and driving

5-145

-------------------------------------------------------------------------------------------------------------------------------------------------------------

∙ Snow can trap dangerous exhaust gases

under your vehicle. Keep snow clear of
the exhaust pipe and from around your
vehicle.

ENGINE BLOCK HEATER
(if so equipped)

Engine block heaters are used to assist with
cold temperature starting.

The engine block heater should be used when
the outside temperature is 20°F (-7°C) or
lower.

WARNING

∙ Do not use your engine block heater with

an ungrounded electrical system or a
2-pronged adapter. You can be seriously
injured by an electrical shock if you use an
ungrounded connection.

∙ Disconnect and properly store the engine

block heater cord before starting the en-
gine. Damage to the cord could result in
an electrical shock and can cause serious
injury.

∙ Use a heavy-duty 3-wire, 3-pronged ex-

tension cord rated for at least 10 A. Plug
the extension cord into a Ground Fault
Interrupt (GFI) protected, grounded
110-VAC outlet. Failure to use the
proper extension cord or a grounded out-
let can result in a fire or electrical shock
and cause serious personal injury.

To use the engine block heater:

1. Turn the engine off.

2. Open the hood and unwrap the engine

block heater cord.

3. Plug the engine block heater cord into a

grounded 3-wire, 3-pronged extension
cord.

4. Plug the extension cord into a Ground

Fault

Interrupt

(GFI)

protected,

grounded 110-volt AC (VAC) outlet.

5. The engine block heater must be

plugged in for at least 2 - 4 hours, de-
pending on outside temperatures, to
properly warm the engine coolant. Use
an appropriate timer to turn the engine
block heater on.

6. Before starting the engine, unplug and

properly store the cord to keep it away
from moving parts.

5-146

Starting and driving

-------------------------------------------------------------------------------------------------------------------------------------------------------------

-------------------------------------------------------------------------------------------------------------------------------------------------------------

Push the switch on to warn other drivers
when you must stop or park under emer-
gency conditions. All turn signal lights flash.

WARNING

∙ If stopping for an emergency, be sure to

move the vehicle well off the road.

∙ Do not use the hazard warning flashers

while moving on the highway unless un-
usual circumstances force you to drive so
slowly that your vehicle might become a
hazard to other traffic.

∙ Turn signals do not work when the haz-

ard warning flasher lights are on.

The flashers will operate with the ignition
switch placed in any position.

Some jurisdictions may prohibit the use of
the hazard warning flasher switch while
driving.

In the event of a roadside emergency, road-
side assistance service is available to you.
Please refer to your Warranty Information
Booklet (U.S.) or the Warranty & Roadside
Assistance Information Booklet (Canada) for
details.

LIC0394

HAZARD WARNING FLASHER
SWITCH

ROADSIDE ASSISTANCE PROGRAM

6-2

In case of emergency

-------------------------------------------------------------------------------------------------------------------------------------------------------------

To shut off the engine in an emergency situ-
ation while driving, perform the following
procedure:

– Rapidly push the push-button ignition

switch three consecutive times in less than
1.5 seconds, or

– Push and hold the push-button ignition

switch for more than 2 seconds.

TIRE PRESSURE MONITORING
SYSTEM (TPMS)

This vehicle is equipped with Tire Pressure
Monitoring System (TPMS). It monitors tire
pressure of all tires except the spare. When
the low tire pressure warning light is lit, and
the “Tire Pressure Low - Add Air” warning
appears in the vehicle information display,
one or more of your tires is significantly
under-inflated. If equipped, the system also
displays pressure of all tires (except the spare
tire) on the display screen by sending a signal
from a sensor that is installed in each wheel. If
the vehicle is being driven with low tire pres-
sure, the TPMS will activate and warn you of
it by the low tire pressure warning light. This
system will activate only when the vehicle is
driven at speeds above 16 mph (25 km/h).
For additional information, refer to “Warning
lights, indicator lights and audible reminders”
in “Instruments and controls” section and the
“Tire Pressure Monitoring System (TPMS)” in
the “Starting and driving” sections of this
manual.

WARNING

∙ Radio waves could adversely affect elec-

tric medical equipment. Those who use a
pacemaker should contact the electric
medical equipment manufacturer for the
possible influences before use.

EMERGENCY ENGINE SHUT OFF

FLAT TIRE

In case of emergency

6-3

-------------------------------------------------------------------------------------------------------------------------------------------------------------

∙ If the low tire pressure warning light illu-

minates while driving, avoid sudden
steering maneuvers or abrupt braking,
reduce vehicle speed, pull off the road to
a safe location and stop the vehicle as
soon as possible. Driving with under-
inflated tires may permanently damage
the tires and increase the likelihood of
tire failure. Serious vehicle damage could
occur and may lead to an accident and
could result in serious personal injury.
Check the tire pressure for all four tires.
Adjust the tire pressure to the recom-
mended COLD tire pressure shown on
the Tire and Loading Information label to
turn the low tire pressure warning light
OFF. If the light still illuminates while
driving after adjusting the tire pressure,
a tire may be flat or the TPMS may be
malfunctioning. If you have a flat tire, re-
place it with a spare tire as soon as pos-
sible, If no tire is flat and all tires are
properly

inflated,

have

the

vehicle

checked. It is recommended that you visit
a INFINITI retailer for this service.

∙ When replacing a wheel without TPMS

such as the spare tire, TPMS will not
function and the low tire pressure warn-
ing light will flash for approximately
1 minute. The light will remain on after
1 minute. Have your tires replaced
and/or TPMS system reset as soon as
possible. It is recommended that you visit
a INFINITI retailer for these services.

∙ Replacing tires with those not originally

specified by INFINITI could affect the
proper operation of the TPMS.

∙ Do not inject any tire liquid or aerosol tire

sealant into the tires, as this may cause a
malfunction of the tire pressure sensors.

CHANGING A FLAT TIRE

If you have a flat tire, follow the instructions
below:

Stopping the vehicle

1. Safely move the vehicle off the road and

away from traffic.

2. Turn on the hazard warning flashers.

3. Park on a level surface and apply the

parking brake. Move the shift lever to
P (Park).

4. Turn off the engine.

5. Raise the hood to warn other traffic and

to signal professional road assistance
personnel that you need assistance.

6. Have all passengers get out of the ve-

hicle and stand in a safe place, away
from traffic and clear of the vehicle.

WARNING

∙ Make sure the parking brake is securely

applied and the Continuously Variable
Transmission

(CVT)

is

shifted

into

P (Park).

∙ Never change tires when the vehicle is on

a slope, ice or slippery areas. This is
hazardous.

∙ Never change tires if oncoming traffic is

close to your vehicle. Wait for profes-
sional road assistance.

6-4

In case of emergency

-------------------------------------------------------------------------------------------------------------------------------------------------------------

A.

Blocks

B.

Flat tire

Blocking wheels

Place suitable blocks at both the front and
back of the wheel diagonally opposite the flat
tire to prevent the vehicle from moving when
it is jacked up.

WARNING

Be sure to block the wheel as the vehicle
may move and result in personal injury.

Getting the spare tire and tools

1. Open the liftgate and lift the luggage

board in the cargo area using the handle.

2. Remove the jack and tool kit cover by

lifting up using the handles.

LCE2142

LCE2407

LCE2036

In case of emergency

6-5

-------------------------------------------------------------------------------------------------------------------------------------------------------------

It should not be necessary to remove or dislo-
cate the Bose subwoofer (if so equipped)

A

when removing the jack and tool kit cover

B

.

3. Remove the tool kit

C

by releasing the

Velcro straps

D

.

4. Remove the jack.

∙ The jack is secured by a fastener

E

. To

release the fastener, assemble the
jacking rod

F

into the wheel nut

wrench

G

and rotate counterclock-

wise to release.

∙ Insert the flat end of the wheel nut

wrench

G

into the slot of the fastener

E

, and rotate counterclockwise to re-

lease the jack.

5. The lowering mechanism for the spare

tire is located on the passenger side of
the cargo area. Remove the cover

H

to

access the lowering mechanism.

LCE2340

LCE2348

LCE2350

6-6

In case of emergency

-------------------------------------------------------------------------------------------------------------------------------------------------------------

6. Attach the spare tire winch socket

I

to

the lowering mechanism nut.

7. To lower the spare tire, insert the wheel

nut wrench

G

into the jacking rod

F

and insert the T-shaped end of the jack-
ing rod into the winch socket

I

and

rotate counterclockwise.

8. Once the spare tire is lowered, release it

from the vehicle by guiding the lowering
cable and winch through the center of
the tire.

NOTE:

Fully lower the spare tire below the vehicle
before attempting to remove the winch from
the spare tire.

9. After removing the spare tire from under

the vehicle, be sure to crank the cable up
by rotating the winch socket clockwise
to stow it.

CAUTION

∙ Make sure safety cable is coiled above

spare

tire

when

reinstalling

spare

tire/wheel.

∙ When re-installing the spare tire under

the vehicle after use, be sure to secure it
with the tire stem facing down toward
the ground. If the spare tire is improperly
secured with the tire stem facing up to-
wards the bottom of the vehicle, there is
an increased risk of separating from the
vehicle in the event of a crash which may
pose a hazard in traffic or risk of injury to
others.

Jacking up vehicle and removing
the damaged tire

WARNING

∙ Never get under the vehicle while it is

supported only by the jack. If it is neces-
sary to work under the vehicle, support it
with safety stands.

∙ Use only the jack provided with your ve-

hicle to lift the vehicle. Do not use the jack
provided with your vehicle on other ve-
hicles. The jack is designed for lifting only
your vehicle during a tire change.

∙ Use the correct jack-up points. Never use

any other part of the vehicle for jack
support.

∙ Never jack up the vehicle more than

necessary.

∙ Never use blocks on or under the jack.

∙ Do not start or run the engine while ve-

hicle is on the jack. It may cause the ve-
hicle to move. This is especially true for
vehicles with limited slip differentials.

∙ Do not allow passengers to stay in the

vehicle while it is on the jack.

LCE2351

In case of emergency

6-7

-------------------------------------------------------------------------------------------------------------------------------------------------------------

∙ Never run the engine with a wheel(s) off

the ground. It may cause the vehicle to
move.

Always refer to the illustration for the correct
placement and jack-up points for your spe-
cific vehicle model and jack type.

Carefully read the caution label attached to
the jack body and the following instructions.

LCE2385

6-8

In case of emergency

-------------------------------------------------------------------------------------------------------------------------------------------------------------

1. Loosen each wheel nut one or two turns

by turning counterclockwise with the
wheel nut wrench. Do not remove the
wheel nuts until the tire is off the
ground.

2. Place the jack directly under the jack-up

point so the top of the jack contacts the
vehicle at the jack-up point. The jack-up
points are indicated by stamped arrows
on the side of the frame.

The jack should be used on firm and level
ground.

3. Install the assembled jacking rod into the

jack.

4. To lift the vehicle, securely hold the jack

lever and rod. Carefully raise the vehicle
until the tire clears the ground.

NOTE:

If the lug nut wrench/jack handle contacts
the ground while raising the vehicle, disas-
semble the lug nut wrench from the jack ex-
tension rod, rotate it 90 degrees and reas-
semble.

5. Remove the wheel nuts and then remove

the tire.

LCE0087

LCE2043

In case of emergency

6-9

-------------------------------------------------------------------------------------------------------------------------------------------------------------

Installing the spare tire

The spare tire is designed for emergency use.
For additional information, refer to “Wheels
and tires” in the “Do-it-yourself” section of
this manual.

1. Clean any mud or dirt from the surface

between the wheel and hub.

2. Carefully put the spare tire on and

tighten the wheel nuts finger tight.

3. With the wheel nut wrench, tighten

wheel nuts alternately and evenly in the
sequence illustrated (

A

,

B

,

C

,

D

,

E

)

until they are tight.

4. Lower the vehicle slowly until the tire

touches the ground. Then, with the
wheel nut wrench, tighten the wheel
nuts securely in the sequence illustrated
(

A

,

B

,

C

,

D

,

E

). Lower the vehicle

completely.

WARNING

∙ Incorrect wheel nuts or improperly tight-

ened wheel nuts can cause the wheel to
become loose or come off. This could
cause an accident.

∙ Do not use oil or grease on the wheel

studs or nuts. This could cause the nuts to
become loose.

∙ Retighten the wheel nuts when the ve-

hicle has been driven for 621 miles
(1,000 km) (also in cases of a flat tire,
etc.).

As soon as possible, tighten the wheel nuts
to the specified torque with a torque wrench.

Wheel nut tightening torque:

83 ft-lb (113 N·m)

The wheel nuts must be kept tightened to
specification at all times. It is recommended
that wheel nuts be tightened to specifica-
tions at each lubrication interval.

Adjust tire pressure to the COLD pressure.

COLD pressure: After vehicle has been
parked for 3 hours or more or driven less
than 1 mile (1.6 km).

COLD tire pressures are shown on the Tire
and Loading Information label affixed to the
driver side center pillar.

5. Securely store the flat tire, tools and

jacking equipment in the vehicle.

6. Close the liftgate.

WARNING

∙ Always make sure that the spare tire and

jacking equipment are properly secured
after use. Such items can become danger-
ous projectiles in an accident or sudden
stop.

∙ The spare tire is designed for emergency

use. For additional information, refer to
“Wheels

and

tires”

in

the

“Do-it-

yourself” section of this manual.

WCE0056

6-10

In case of emergency

-------------------------------------------------------------------------------------------------------------------------------------------------------------

To start your engine with a booster battery,
the instructions and precautions below must
be followed.

WARNING

∙ If done incorrectly, jump starting can lead

to a battery explosion, resulting in severe
injury or death. It could also damage your
vehicle.

∙ Explosive hydrogen gas is always present

in the vicinity of the battery. Keep all
sparks and flames away from the
battery.

∙ Do not allow battery fluid to come into

contact with eyes, skin, clothing or
painted surfaces. Battery fluid is a corro-
sive sulfuric acid solution which can cause
severe burns. If the fluid should come into
contact with anything, immediately flush
the contacted area with water.

∙ Keep battery out of the reach of children.

∙ The booster battery must be rated at

12 volts. Use of an improperly rated bat-
tery can damage your vehicle.

∙ Whenever working on or near a battery,

always wear suitable eye protectors (for
example, goggles or industrial safety
spectacles) and remove rings, metal
bands, or any other jewelry. Do not lean
over the battery when jump starting.

∙ Do not attempt to jump start a frozen

battery. It could explode and cause seri-
ous injury.

∙ Your vehicle has an automatic engine

cooling fan. It could come on at any time.
Keep hands and other objects away from
it.

JUMP STARTING

In case of emergency

6-11

-------------------------------------------------------------------------------------------------------------------------------------------------------------

WARNING

Always follow the instructions below. Fail-
ure to do so could result in damage to the
charging system and cause personal injury.

1. If the booster battery is in another ve-

hicle, position the two vehicles to bring
their batteries near each other.

Do not allow the two vehicles to touch.

2. Apply the parking brake. Move the shift

lever to P (Park). Switch off all unneces-
sary electrical systems (lights, heater, air
conditioner, etc.).

3. Connect the jumper cables in the se-

quence illustrated (

A

,

B

,

C

,

D

).

CAUTION

∙ Always connect positive (

) to positive

(

) and negative () to body ground (for

example, strut mounting bolt, engine lift
bracket, etc.) — not to the battery.

∙ Make sure the jumper cables do not touch

moving parts in the engine compartment
and that the cable clamps do not contact
any other metal.

4. Start the engine of the booster vehicle

and let it run for a few minutes.

5. Keep the engine speed of the booster

vehicle at about 2,000 rpm and start the
engine of the vehicle being jump started.

CAUTION

Do not keep the starter motor engaged for
more than 10 seconds. If the engine does
not start right away, place the ignition
switch in the OFF position and wait 3 to
4 seconds before trying again.

6. After starting the engine, carefully dis-

connect the negative cable and then the
positive cable.

LCE2223

6-12

In case of emergency

-------------------------------------------------------------------------------------------------------------------------------------------------------------

CAUTION

∙ Continuously

Variable

Transmission

(CVT) models cannot be push-started or
tow-started. Attempting to do so may
cause transmission damage.

∙ Do not push start this vehicle. The three-

way catalyst may be damaged.

WARNING

∙ Do not continue to drive if your vehicle

overheats. Doing so could cause engine
damage or a vehicle fire.

∙ To avoid the danger of being scalded,

never remove the radiator or coolant res-
ervoir cap while the engine is still hot.
When the radiator or coolant reservoir
cap is removed, pressurized hot water
will spurt out, possibly causing serious
injury.

∙ Do not open the hood if steam is coming

out.

If your vehicle is overheating (indicated by an
extremely high temperature gauge reading),
or if you feel a lack of engine power, detect
abnormal noise, etc. take the following steps.

1. Move the vehicle safely off the road,

apply the parking brake and move the
shift lever to P (Park).

Do not stop the engine.

2. Turn off the air conditioner. Open all the

windows, move the heater or air condi-
tioner temperature control to maximum
hot and fan control to high speed.

3. Get out of the vehicle. Look and listen for

steam or coolant escaping from the ra-
diator before opening the hood. (If
steam or coolant is escaping, turn off the
engine.) Do not open the hood further
until no steam or coolant can be seen.

4. Open the engine hood.

WARNING

If steam or water is coming from the engine,
stand clear to prevent getting burned.

5. Visually check drive belts for damage or

looseness. Also check if the cooling fan is
running. The radiator hoses and radiator
should not leak water. If coolant is leak-
ing, the water pump belt is missing or
loose, or the cooling fan does not run,
stop the engine.

WARNING

Be careful not to allow your hands, hair,
jewelry or clothing to come into contact
with, or get caught in, engine belts or the
engine cooling fan. The engine cooling fan
can start at any time.

PUSH STARTING

IF YOUR VEHICLE OVERHEATS

In case of emergency

6-13

-------------------------------------------------------------------------------------------------------------------------------------------------------------


Content      ..     24      25      26      27     ..