Infiniti QX80 (2018 year). Manual - part 4
1-36
Safety — seats, seat belts and supplemental restraint system
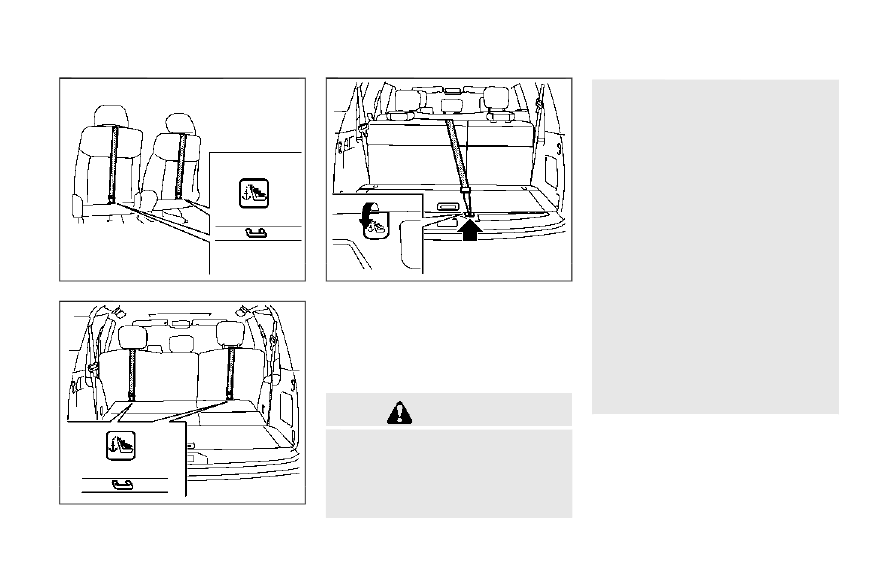
JVR0136X
2nd row captain’s seat
JVR0137X
2nd row bench seat
SSS1073
3rd row bench seat
TOP TETHER STRAP CHILD RE-
STRAINT
If the manufacturer of your child restraint
requires the use of a top tether strap, it must
be secured to an anchor point.
WARNING
. In the 3rd row bench seat, a child
restraint with a top tether strap can
only be used in the center position.
Do not place in an outboard seating
position and attempt to angle the
tether strap to the center position.
. Child restraint anchorages are de-
signed to withstand only those loads
imposed by correctly fitted child
restraints. Under no circumstances
are they to be used to attach adult
seat belts, or other items or equip-
ment to the vehicle. Doing so could
damage the child restraint an-
chorages. The child restraint will not
be properly installed using the da-
maged anchorage, and a child could
be seriously injured or killed in a
collision.
. Properly secure cargo and do not
allow it to contact the top tether
strap when it is attached to the top
tether anchor. Cargo that is not
properly secured or cargo that con-
tacts the top tether strap may da-
mage the top tether strap during a
collision. Your child could be seriously
injured or killed in a collision if the
child restraint top tether strap is
damaged.
Top tether anchor point locations
Anchor points are located in the following
locations:
. 2nd row bench seat (if so equipped) on
the seatback of the outboard seating
positions as shown.