Hyundai Ioniq 6 (2024 year). Manual in english - page 1
OWNER’S MANUAL
Operation
Maintenance
Specifications
All information in this Owner’s Manual is current at the time of
publication. However, HYUNDAI reserves the right to make
changes at any time so that our policy of continual product
improvement may be carried out.
This manual applies to all models of this vehicle and includes
descriptions and explanations of optional as well as standard
equipment.
As a result, you may find material in this manual that does not
apply to your specific vehicle.
Introduction
CAUTION: MODIFICATIONS TO YOUR
HYUNDAI
Your HYUNDAI should not be modified in any way. Such modifications may adversely
affect the performance, safety or durability of your HYUNDAI and may, in addition,
violate conditions of the limited warranties covering the vehicle. Certain modifications
may also be in violation of regulations established by the Department of Transportation
and other government agencies in your country.
TWO-WAY RADIO INSTALLATION
Your vehicle is equipped with a Tire Pressure Monitoring System, Passenger Occupant
Classification System and other CAN bus systems. It is possible for an improperly
installed/adjusted high powered two-way radio to adversely affect electronic systems.
For this reason, we recommend that you carefully follow the radio manufacturer’s
instructions if you choose to install one of these devices.
F4
01
SAFETY AND VEHICLE DAMAGE WARNING
This manual includes information titled as DANGER, WARNING, CAUTION and NOTICE.
These titles indicate the following:
DANGER
DANGER indicates a hazardous situation which, if not avoided, will result in death or
serious injury.
WARNING
WARNING indicates a hazardous situation which, if not avoided, could result in death or
serious injury.
CAUTION
CAUTION indicates a hazardous situation which, if not avoided, could result in minor or
moderate injury.
NOTICE
NOTICE indicates a situation which, if not avoided, could result in vehicle damage.
F5
Introduction
HYUNDAI VEHICLE OWNER PRIVACY POLICY
Your Hyundai vehicle may be equipped with technologies and services that use
information collected, generated, recorded or stored by the vehicle. Hyundai has created
a Vehicle Owner Privacy Policy to explain how these technologies and services collect
use and share this information.
You may read our Vehicle Owner Privacy Policy on the Hyundaiusa.com website at:
If you would like to receive a hard copy of our Vehicle Owner Privacy Policy, please
contact the Hyundai Customer Care Center at:
Hyundai Customer Care
P.O. Box 20850
Fountain Valley, CA 92728
800-633-5151
consumeraffairs@hmausa.com
Hyundai’s Customer Care representatives are available Monday through Friday, between
the hours of 6:00 AM and 5:00 PM PST and Saturday between 6:30 AM and 3:00 PM PST
(English).
For Customer Care assistance in Spanish or Korean, representatives are available
Monday through Friday between 6:30 AM and 3:00 PM PST.
F6
Table of contents
Introduction/Getting started with Your
1
Electric Vehicle
Vehicle Information, Consumer
2
Information, and Reporting Safety Defects
Seats & Safety System
3
Instrument Cluster
4
Convenience Features
5
Driving Your Vehicle
6
Driver Assistance System
7
Emergency Situations
8
Maintenance
9
Index
I
1. Introduction/Getting started
with Your Electric Vehicle
1
Introduction
1-3
HYUNDAI Motor America
1-3
Guide to HYUNDAI Genuine Parts
1-4
How to Use This Manual
1-5
Safety Messages
1-6
Vehicle Modifications
1-7
Vehicle Data Collection and Event Data Recorders
1-7
About "Getting Started With Your Electric Vehicle"
1-8
Understanding Your Electric Vehicle
1-9
Characteristics of Your Electric Vehicle
1-9
Precautions When Using the High Voltage Battery
1-10
Other Precautions for Electric Vehicle Management
1-11
Charging Your Electric Vehicle
1-13
Safety Precautions for Charging Your Electric Vehicle
1-13
Checking Basic Information on Charging Your Electric Vehicle
1-16
Using an AC Charger
1-22
Using a DC Charger
1-25
Using a Portable Charger (ICCB)
1-27
Using EV Mode Functions
1-34
Checking the EV Mode Screen Configuration
1-34
Checking Energy Information
1-35
Setting the Next Departure Time
1-37
Setting Scheduled Charging and Climate
1-38
Setting a Battery Discharging Limit When Using Vehicle to Load (V2L)
1-40
Setting Electric Vehicle Specialized Functions
1-41
Using V2L Function
1-46
Safety Precautions When Using the V2L Function
1-46
Using Electricity Outside the Vehicle
1-48
Using Electricity Inside the Vehicle
1-49
Solving V2L Problems
1-51
1
Aux. Battery Saver+
1-52
Driving Your Electric Vehicle
1-53
Starting and Stopping the Vehicle
1-53
Checking Electric Vehicle Driving Information
1-54
Countermeasures For Accidents Or Fire
1-65
If the Electric Vehicle Catches Fire
1-65
If the Electric Vehicle Is Submerged
1-65
If the Electric Vehicle Needs Towing
1-66
Other Precautions for Electric Vehicle Accidents
1-67
1
Introduction
Congratulations, and thank you for choosing HYUNDAI. We are pleased to welcome you
to the growing number of discerning people who drive HYUNDAIs. We are very proud of
the advanced engineering and high-quality construction of each HYUNDAI we build.
Your Owner’s Manual will introduce you to the features and operation of your new
HYUNDAI. To become familiar with your new HYUNDAI, so that you can fully enjoy it,
read this Owner’s Manual carefully before driving your new vehicle.
This manual contains important safety information and instructions intended to
familiarize you with your vehicle’s controls and safety features so you can safely operate
your vehicle.
This manual also contains information on maintenance designed to enhance safe
operation of the vehicle. It is recommended that all service and maintenance on your car
be performed by an authorized HYUNDAI dealer. HYUNDAI dealers are prepared to
provide high-quality service, maintenance and any other assistance that may be
required.
This Owner’s Manual should be considered a permanent part of your vehicle, and should
be kept in the vehicle so you can refer to it at any time. The manual should stay with the
vehicle if you sell it to provide the next owner with important operating, safety and
maintenance information.
HYUNDAI MOTOR AMERICA
CAUTION
Severe vehicle damage may result from the use of poor quality lubricants that do not
meet HYUNDAI specifications. You must always use high quality lubricants that meet the
specifications listed in the Vehicle Specifications section of the Owner’s Manual.
may be reproduced, stored in any retrieval system or transmitted in any form or by any
means without the prior written permission of HYUNDAI Motor America.
1-3
Introduction/Getting started with Your Electric Vehicle
GUIDE TO HYUNDAI GENUINE PARTS
1. What are HYUNDAI Genuine Parts?
HYUNDAI Genuine Parts are the same parts used by HYUNDAI Motor Company to
manufacture vehicles. They are designed and tested for the optimum safety,
performance, and reliability for our customers.
A100A01L
A100A02L
2. Why HYUNDAI Genuine Parts?
HYUNDAI Genuine Parts are engineered and built to meet rigid manufacturing
requirements.
Damage caused by using imitation, counterfeit or used salvage parts is not covered
under the HYUNDAI New Vehicle Limited Warranty or any other HYUNDAI warranty.
In addition, any damage to or failure of HYUNDAI Genuine Parts caused by the
installation or failure of an imitation, counterfeit or used salvage part is not covered by
any HYUNDAI Warranty.
1-4
1
A100A04L
3. How can you tell if you are purchasing HYUNDAI Genuine Parts?
Look for the HYUNDAI Genuine Parts Logo on the package (see below).
HYUNDAI Genuine Parts exported to the U.S. are packaged with labels written only in
English.
HYUNDAI Genuine Parts are only sold through authorized HYUNDAI Dealerships.
A100A03L
HOW TO USE THIS MANUAL
We want to help you get the greatest possible driving pleasure from your vehicle. Your
Owner’s Manual can assist you in many ways. We strongly recommend that you read the
entire manual. In order to minimize the chance of death or injury, you must read the
WARNING and CAUTION sections in the manual.
Illustrations complement the words in this manual to best explain how to enjoy your
vehicle. By reading your manual, you will learn about features, important safety
information, and driving tips under various road conditions.
The general layout of the manual is provided in the Table of Contents. Use the index when
looking for a specific area or subject; it has an alphabetical listing of all information in
your manual.
Sections: This manual has nine chapters plus an index. Each section begins with a brief
list of contents so you can tell at a glance if that section has the information you want.
1-5
Introduction/Getting started with Your Electric Vehicle
SAFETY MESSAGES
Your safety, and the safety of others, is very important. This Owner’s Manual provides you
with many safety precautions and operating procedures. This information alerts you to
potential hazards that may hurt you or others, as well as damage your vehicle.
Safety messages found on vehicle labels and in this manual describe these hazards and
what to do to avoid or reduce the risks.
Warnings and instructions contained in this manual are for your safety. Failure to follow
safety warnings and instructions can lead to serious injury or death.
Throughout this manual DANGER, WARNING, CAUTION, NOTICE and the SAFETY ALERT
SYMBOL will be used.
This is the safety alert symbol. It is used to alert you to potential physical injury hazards.
Obey all safety messages that follow this symbol to avoid possible injury or death. The
safety alert symbol precedes the signal words DANGER, WARNING and CAUTION.
DANGER
DANGER indicates a hazardous situation that, if not avoided, will result in death or serious
injury.
WARNING
WARNING indicates a hazardous situation that, if not avoided, could result in death or
serious injury.
CAUTION
CAUTION indicates a hazardous situation that, if not avoided, could result in minor or
moderate injury.
NOTICE
NOTICE indicates a situation that, if not avoided, could result in vehicle damage.
1-6
1
VEHICLE MODIFICATIONS
• This vehicle should not be modified. Modification of your vehicle could affect its
performance, safety or durability and may even violate governmental safety and
emissions regulations.
In addition, damage or performance problems resulting from any modification may not
be covered under warranty.
• If you use unauthorized electronic devices, it may cause the vehicle to operate
abnormally, wire damage, battery discharge and fire. For your safety, do not use
unauthorized electronic devices.
NOTICE
Some vehicle interior sounds (including welcome sound, navigation alerts, or warning
sound) may be generated from the interior speakers and amplifier. Do not replace these
components with anything other than the original HYUNDAI factory parts. Any
unauthorized product may cause a malfunction of the vehicle interior sounds that may
affect the intended operation of the vehicle.
VEHICLE DATA COLLECTION AND EVENT DATA
RECORDERS
This vehicle is equipped with an event data recorder (EDR). The main purpose of an EDR
is to record, in certain crash or near crash-like situations, such as an airbag deployment
or hitting a road obstacle, data that will assist in understanding how a vehicle’s systems
performed. The EDR is designed to record data related to vehicle dynamics and safety
systems for a short period of time, typically 30 seconds or less.
The EDR in this vehicle is designed to record such data as:
• How various systems in your vehicle were operating;
• Whether or not the driver and passenger safety belts were buckled/ fastened;
• How far (if at all) the driver was depressing the accelerator and/or brake pedal; and,
• How fast the vehicle was traveling.
These data can help provide a better understanding of the circumstances in which
crashes and injuries occur.
NOTE: EDR data are recorded by your vehicle only if a nontrivial crash situation occurs;
no data are recorded by the EDR under normal driving conditions and no personal data
(for example, name, gender, age, and crash location) are recorded. However, other
parties, such as law enforcement, could combine the EDR data with the type of
personally identifying data routinely acquired during a crash investigation.
To read data recorded by an EDR, special equipment is required, and access to the
vehicle or the EDR is needed. In addition to the vehicle manufacturer, other parties, such
as law enforcement, that have the special equipment, can read the information if they
have access to the vehicle or the EDR.
1-7
Introduction/Getting started with Your Electric Vehicle
About "Getting Started With Your Electric Vehicle"
"Getting started with your electric vehicle" provides information about new technologies
applied to the vehicle and explains how to use the main features. "Getting started with
your electric vehicle" allows you to quickly and easily understand new vehicle features
and how to operate them conveniently.
• Before driving, carefully read the manual provided with the vehicle and follow all safety
information and precautions for every vehicle feature.
• "Getting started with your electric vehicle" covers all optional specifications. It may
include descriptions for features that are not equipped in the vehicle.
• Images of the exterior and interior of the vehicle in "Getting started with your electric
vehicle" may differ from the actual vehicle.
1-8
1
Understanding Your Electric Vehicle
Electric vehicles are driven using a battery and an electric motor. Understand the
characteristics of your electric vehicle and check the features that you must know before
driving it.
Characteristics of Your Electric Vehicle
The characteristics that differentiate electric vehicles from gasoline vehicles are as
follows:
• Electric vehicles are eco-friendly because they do not use fossil fuels for driving.
Additionally, unlike gasoline vehicles, noise and vibration are minimal, and the
vehicle’s lifespan is relatively long.
• When slowing down or driving downhill, regenerative braking is used. Regenerative
braking charges the high voltage battery and minimizes energy loss.
• If the high voltage battery is running low, you can charge the vehicle using the AC
charger, DC charger, or portable charging cables. For more information, refer to the
"Charging Your Electric Vehicle" section in this chapter.
Information
Regenerative braking uses an electric motor when decelerating and braking, and it
transforms kinetic energy to electrical energy in order to charge the high voltage battery.
Battery information
The batteries used in the electric vehicle are as follows:
• High voltage battery (high capacity): Drives the motor and operates the air
conditioner and heater. It can be charged via an AC charger, DC charger, or portable
charger.
•
12 V battery: Operates all lights, wipers, and audio system. The 12 V battery charge can
also be maintained by the high voltage battery at parked condition at certain
conditions.
Main components of your electric vehicle
The main components of your electric vehicle and their functions are as follows:
• On-Board Charger (OBC): Charges the high voltage battery by converting the power
grid’s AC power to DC power.
• Inverter: Converts power from direct current (DC) to alternating current (AC) and
supplies power to the motor, and converts power from AC to DC to charge the high
voltage battery during deceleration and braking.
• Low Voltage DC-DC Converter (LDC): Converts the high voltage battery’s power
source to a low voltage (12 V) power source for supply of power to the electrical devices
on the vehicle.
• Vehicle Control Unit (VCU): Controls the various controllers and sensors on the
vehicle.
1-9
Introduction/Getting started with Your Electric Vehicle
• Motor: Uses electricity accumulated on the high voltage battery to drive the vehicle
(same role as an engine in gasoline vehicles).
• Gear: Delivers the rotational force of the motor to the tires at appropriate speeds and
torque.
• High voltage battery (Lithium-ion battery): Stores and supplies power necessary for
the electric vehicle to operate. (The separately installed 12 V battery provides power to
the vehicle when the vehicle is in ACC or OFF.)
WARNING
• Do not remove or disassemble any high voltage battery’s connectors and wires. Doing
so may lead to accidents, such as electric shock, and result in serious injury and
significantly degrade the vehicle’s performance and durability.
• When the high voltage battery or its related components require inspection and
maintenance, contact an authorized HYUNDAI dealer.
Precautions When Using the High Voltage Battery
Precautions for high voltage battery when driving and storing the vehicle are as follows:
CAUTION
• Keep the gauge of the high voltage battery from going below 10 %. Storing the vehicle
while the battery level is too low for a long time may damage the battery or reduce the
battery’s capacity.
• If a collision occurs and the vehicle is impacted, have the vehicle inspected by an
authorized HYUNDAI dealer and check the battery connection status.
• Using the V2L function may reduce the driving distance due to the use of high voltage
battery energy, and repeated use of the V2L function may impact battery life.
• Frequent use of DC charging may impact battery life.
• The high voltage battery level may reduce naturally even if the vehicle is not driven.
• Storing the vehicle in temperatures that are too hot or cold may degrade the battery
performance.
• The distance to empty or power output may vary depending on the driving conditions,
such as the outside temperature. Driving on highway at high speeds or uphill will
increase battery consumption, resulting in a shorter distance to empty.
• If you use the air conditioner or heater, which is powered by the high voltage battery,
the distance to empty will be reduced. Maintain reasonable temperature when using
the air conditioner or heater to maximize distance to empty.
• Depending on the vehicle’s period of use, natural degradation of the battery may occur
that reduces distance to empty over long period of vehicle life. When the charge
capacity and distance to empty keep failing, have the vehicle inspected by an
authorized HYUNDAI dealer.
1-10
1
• If you do not use the vehicle for a long time, charge the vehicle at least once every three
months to prevent both the high voltage and the 12 V battery from fully discharging.
When the battery level has low level, immediately charge the vehicle.
• Using AC charging as much as possible can help keep the battery in optimal condition.
Fully charging the battery when it is 20 % or lower helps to keep the battery in optimal
condition. (Charging once a month or more is recommended.)
• The charging level value displayed on the instrument cluster may decrease according
to the charging conditions (charger status, outside temperature, battery temperature,
etc.). For longer battery life and safety, after a certain charging level is reached, the
charging current is gradually lowered to fully charge the battery.
Other Precautions for Electric Vehicle Management
CAUTION
• When heat treatment after repairs or painting is applied to the vehicle due to an
accident, the high voltage battery’s performance may be degraded. If heat treatment
is required, contact an authorized HYUNDAI dealer.
• When cleaning the motor compartment, do not use a high pressure washer. Doing so
may result in electric shock, due to a discharge in high voltage electricity, or damage
the vehicle’s electric system.
• Do not install third-party parts or modified parts on the vehicle. Doing so may damage
the electric power system. Only use or install genuine parts.
High voltage cut-off switch
High voltage cut-off switch is a device located inside the motor compartment to block
the battery’s high voltage when your vehicle is inspected at an authorized HYUNDAI
dealer.
B0003101
1-11
Introduction/Getting started with Your Electric Vehicle
WARNING
• Never touch the high voltage cut-off switch. This could result in serious injury or death
in a collision or electric shock.
• If the high voltage cut-off switch requires an inspection or repair, contact an
authorized HYUNDAI dealer.
• Never disconnect or cut the high voltage cut-off switch except in an emergency
situation. Serious problems may occur, such as the vehicle may not start.
1-12
1
Charging Your Electric Vehicle
Check the detailed information about charging an electric vehicle and charge your
vehicle.
Electric vehicles can be charged via an AC charger or DC charger installed at public
charging stations. If the vehicle cannot be moved to a public charging station in the event
of an emergency, you can charge the vehicle via the In-Cable Control Box (ICCB) with a
power source (AC 120 V).
To find a nearby public charging station, refer to the “Searching for nearby charging
stations” in this chapter.
Safety Precautions for Charging Your Electric Vehicle
Before charging your electric vehicle, read and comply with all the safety information
below. Failure to do so may cause electric shock or fire and result in a serious injury,
death, vehicle malfunction, or property damage.
Precautions for electric medical devices
WARNING
Electromagnetic waves that are generated from the charger can seriously impact electric
medical devices, such as an implantable cardiac pacemaker. When using such devices,
make sure to consult with your doctor and the manufacturer to find out whether charging
your electric vehicle will impact the operation of your device.
Basic safety precautions for charging
WARNING
• Before charging, apply the Electronic Parking Brake (EPB) with the brake pedal
pressed, shift to P (Park) and turn off the vehicle. Movement of the vehicle while
charging may result in death, serious injury, or property damage.
• Use specified electric vehicle charger only. Failure to do so may damage the charger,
charging cable, or vehicle. Also, it may lead to safety hazards, such as fire, explosion,
etc.
• To avoid death, serious injury, or property damage electric shock and fire, follow the
instructions below:
- Do not touch the interior of the charging connector, charging plug, or the vehicle
charging inlet when connecting the cable to the charger and the charging inlet on
the vehicle.
- Do not touch the charging connector and charging plug with wet hands, or when
standing in water or snow while connecting the charging cable.
- When connecting or removing the charging cable, you must hold the charging
connector handle and charging plug.
1-13
Introduction/Getting started with Your Electric Vehicle
- Use a waterproof charger. Do not charge the vehicle in a place where rainwater may
come in contact with the joints of the charging cable connector and the charging
plug.
- Ensure there is no water, dust, or other contaminants on the charging cable
connector and the charging plug.
- Immediately stop charging if you feel abnormal conditions, such as odor or smoke.
- Do not charge the vehicle if there is a risk of lightning.
Information
• While charging, the gear cannot be shifted from P (Park) to any other gear.
• Ensure the vehicle door is unlocked before disconnecting the charging connector. The
release button on the charging connector does not work when the vehicle door is
locked.
• To control the temperature of the high voltage battery while charging or when the
battery temperature is high, the air conditioning is used to cool down the battery. It
may generate noise or vibration from operation of the air conditioning compressor and
cooling fan, but this is a normal condition when charging the high voltage battery.
• The cooling system may be operated when using the air conditioner during charging.
This may degrade the air conditioner’s performance temporarily.
• Depending on the condition and durability of the high voltage battery, charger
specifications and condition, and ambient temperature, the time required for charging
the battery and distance to empty may vary.
• In rare cases, you might hear high-frequency noise (a small beeping sound) outside the
vehicle when charging with a 400 V DC charger that has deteriorated or has long
communication delay. The high-frequency noise can be generated only when the
vehicle tries to reduce its own electromagnetic waves to keep DC charging as stable as
possible. This beep sound does not affect the charging performance or the vehicle
itself.
Precautions for operating the cooling fan
WARNING
WL_MotorRoomHotCaution
Do not put your hand near the cooling fan in the motor compartment while charging. It
may operate automatically to control the battery temperature, even if the vehicle is
turned off.
1-14
1
Precautions for operating the charging door
Before operating the charging door, carefully read and follow all the safety information
below.
CAUTION
• Before opening the charging door in the opening direction, ensure that there is no
interference with nearby objects.
• When opening and closing the charging door, be careful not to get your hands or other
body parts caught in the door.
• If you cannot open the charging door due to freezing weather, lightly tap or remove any
ice near the charging door.
• Do not try to forcibly open the charging door. It may cause damage to the charging
door or cause a malfunction.
• Do not hold the parts that support the charging door. Damage to parts or deformation
of parts may cause vehicle damage and accidents.
Precautions for using, handling, and storing the charging cable
Precautions when using the charging cable
CAUTION
• To prevent electric shock, replace the charging cable if the coating or the connector is
damaged.
• Do not modify or disassemble the charging cable. Doing so may result in fire, electric
shock, or injury.
• Do not pull or twist the charging cable excessively, and ensure that the cable is not
twisted. Power cuts or damage to the cable's insulation sheath may result in electric
shock or fire.
• Do not drag the charging cable on the floor or place objects on it. Damage to the
insulation of the cable may result in electric shock or fire.
• Do not use the charging cable near a heat source or heating appliance.
• Do not drop or subject the charging cable to a strong impact. Also, ensure no water or
liquid comes into contact with the cable.
• Use the charging cable only when there are no children around.
• If there is any sign of damage, corrosion, or rust on the charging connector and plug,
or if the connection of the charging connector and plug feels loose, do not use the
cable. Have the vehicle inspected by an authorized HYUNDAI dealer.
1-15
Introduction/Getting started with Your Electric Vehicle
Precautions when handling and storing the charging cable
CAUTION
• Always keep the charging connector and plug dry and clean.
• Ensure that the connectors, plugs, and control box (portable charger) of the charging
cable are not submerged or in contact with water.
• Keep the charging cable free from water or moisture, and keep it in the cargo storage
compartment.
• Do not keep the charging cable near heat source or heating appliances.
• Keep the charging cable away from children.
• If there is dust or contaminants inside the charging connector or plug, remove it using
the air gun.
• If the charging cable is contaminated, completely disconnect the cable from the
charger or power, and remove the contaminants.
- Wipe the charging cable lightly with the soft cloth soaked with a 3 % neutral
detergent aqueous solution, then use a clean cloth to completely remove moisture
and dry the cable in a well-ventilated shade.
- When removing contaminants, ensure the charging connector and charging plug are
not in contact with water.
- Do not use organic solvents, such as benzene, paint thinner, or detergent. Doing so
may cause deformation, discoloration, or malfunction of charging cable.
- When using a vehicle decontamination agent, ensure that the product does not
contain organic solvents, such as benzene, paint thinner, or detergent.
Checking Basic Information on Charging Your Electric Vehicle
Before charging your vehicle, check and understand the information such as the
expected charging time according to the charge type, checking the State of Charge
(SOC), and setting the charger lock mode.
Checking charging type and charging time
The charge types for electric vehicle are as follows:
• AC charge: The electric vehicle is charged via a Level 2 AC public charger or
professionally installed home charger.
• DC charge: You can charge at high speeds at public charging stations. Refer to the
respective company’s charger app or online information that is provided for each DC
charger type.
• Portable charge: If the vehicle cannot be moved to a public charging station due to a
lack of battery power, the vehicle can be charged with household electricity, using the
120 V ICCB portable charger included with the vehicle.
1-16
1
Information
Type 3R enclosure satisfies the requirements of UL 50E standard when the charging
connector is connected to the vehicle side charging inlet. An additional Type 3R
enclosure should be provided in the end installation of the vehicle side charging inlet. The
"Type 3R" marking can be found on the charging inlet.
• What is type 3R?: Performance requirement for enclosures intended for outdoor use
that provides a degree of protection against falling dirt, rain, sleet, and/or snow.
CAUTION
• Risk of electric shock. Do not disconnect under load.
• Suitable for use on a circuit capable of delivering not more than 5,000 rms symmetrical
Amperes, 120 V AC Maximum.
• Suitable for use on a circuit capable of delivering not more than 30,000 rms
symmetrical Amperes, 1,000 V DC Maximum.
CAUTION
• Battery performance and life may deteriorate if the DC charger is used constantly. It is
best to occasionally use AC charger to optimize battery life.
• The electrical outlet at home must comply with regulations and can safely
accommodate the Voltage, Current (Amps), and Power (Watts) ratings specified on the
portable charger. If not, the vehicle may not be charged or safety hazards, such as fire,
may occur.
• If the power distributor exceeds its capacity while charging the vehicle with a portable
charger at home, the power to home may be cut off or a fire may occur.
• If you use a portable charger to charge your electric vehicle with household electricity,
you will be charged on your household electricity bill.
1-17

Introduction/Getting started with Your Electric Vehicle
The estimated charging time for each charging type is as follows:
Charging Time
Charge Level
Charging
Charging Type
Standard
(Minimum-Maxim
Condition
Extended
Battery
um)
(Temperature)
Battery Type
Type
About 5
About 7
AC charge
hours 20
hours 10
10-100 %
minutes
minutes
About 18
About 18
350 kW
10-80 %
minutes
minutes
DC
Room
charge
temperature(77 °F)
About 58
About 66
50 kW
10-80 %
minutes
minutes
Portable charge
About 46
About 68
(ICCB: In-Cable
hours 40
10-100 %
hours
Control Box)
minutes
Information
• The DC charging time may be longer at cold temperature below 20 ? (-17 ?).
• Depending on the condition and durability of the high voltage battery, charger
specifications, and ambient temperature, the time required for charging the high
voltage battery may vary.
• If the charger is worn out, exposed, or there exists any type of damage, charging may
stop for your safety. Use another charger that works normally.
• When charging the battery, an additional 3 minutes may be required to check battery
condition.
1-18
1
Checking the charging status
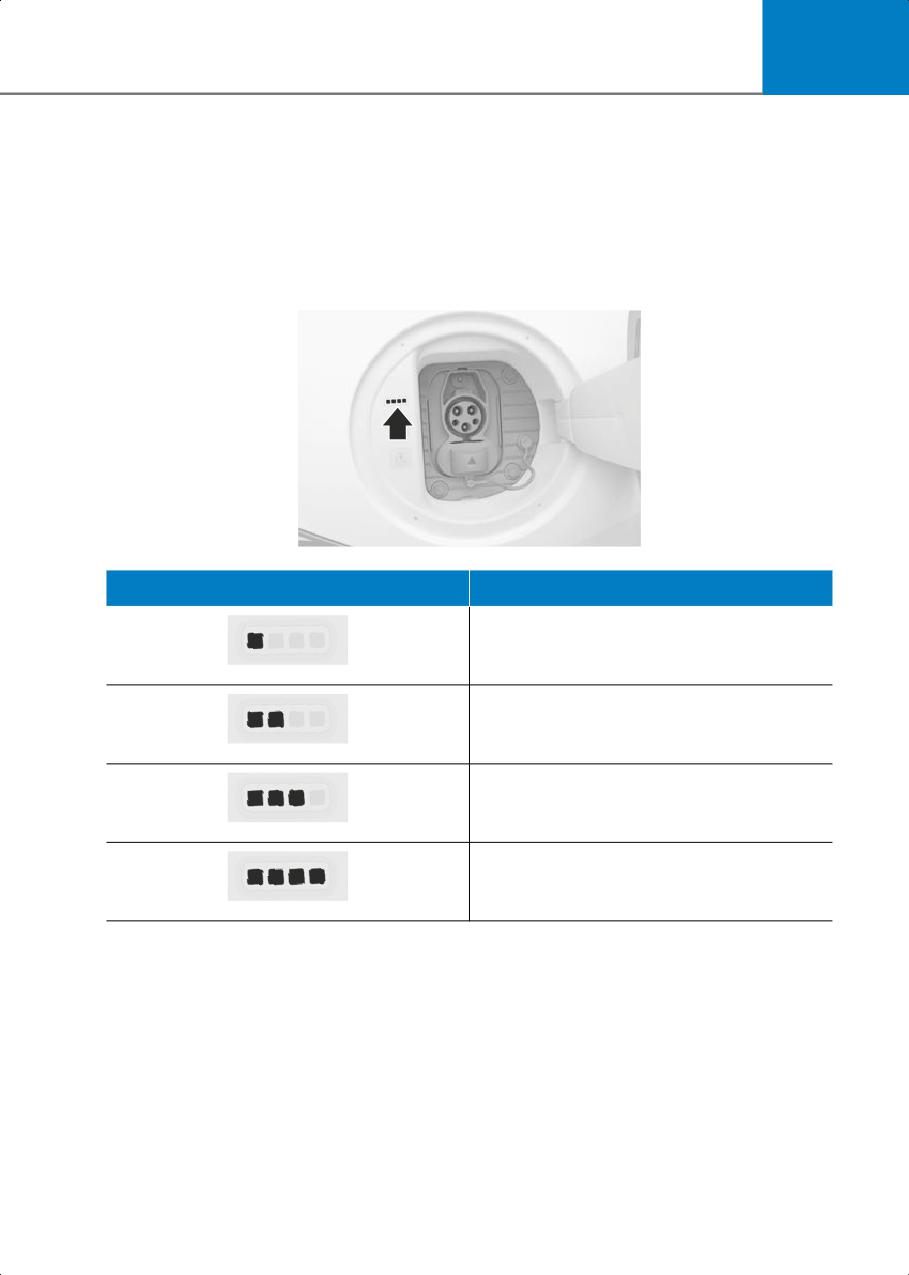
Check the State of Charge (SOC) of the high voltage battery via the charge indicator light
inside the charging door.
1. With the vehicle door unlocked, press the open indicator on the charging door to open
the charging door.
2. Check the SOC referring to the charge indicator light inside the charging door.
• SOC is indicated in 4 levels.
B0000901
Charge indicator light
SOC [%]
0-24 %
Quick_Guide_01_1
25-49 %
Quick_Guide_01_2
50-74 %
Quick_Guide_01_3
75-100 %
Quick_Guide_01_4
1-19
Introduction/Getting started with Your Electric Vehicle
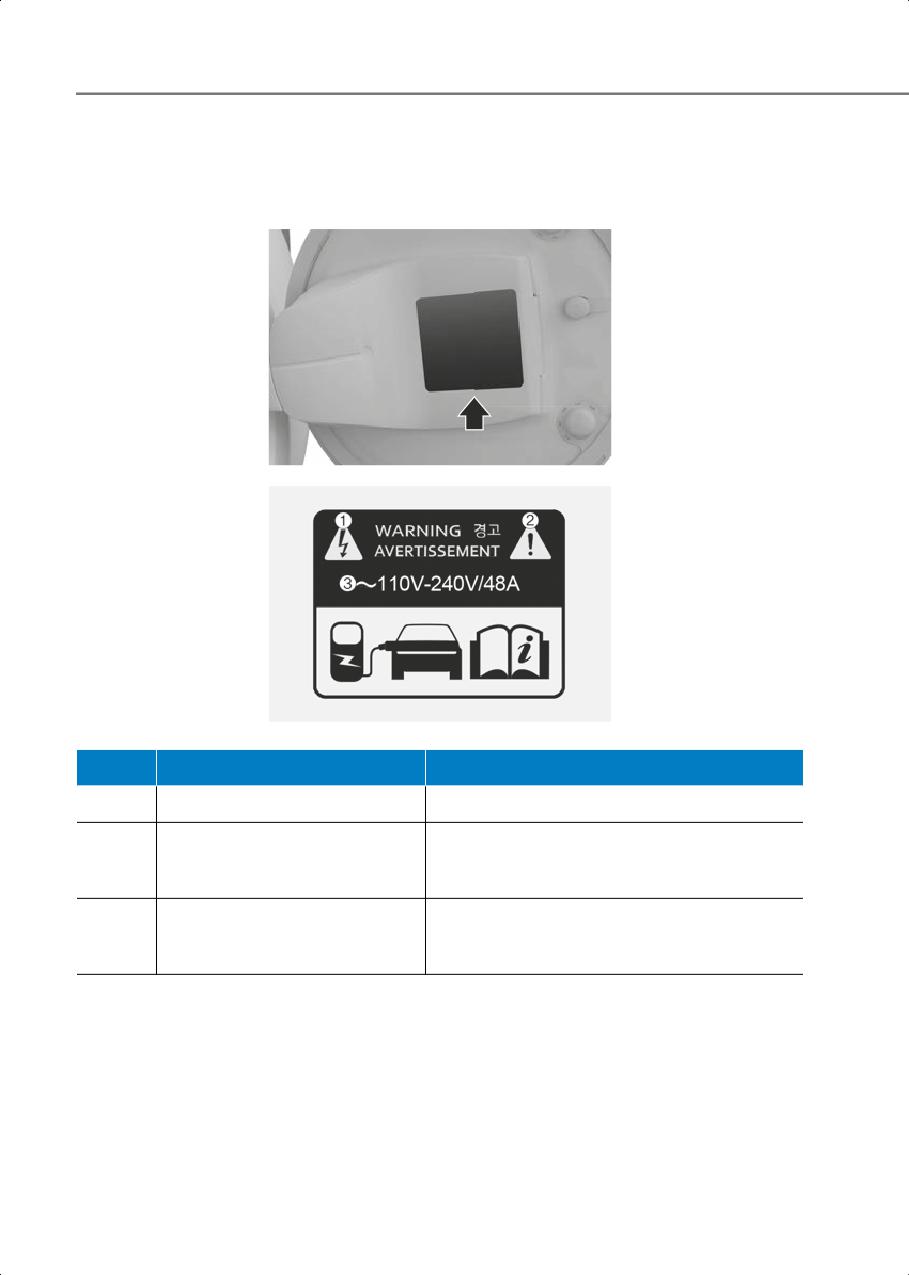
Checking information on the charging label
Open the charging door and check the information on the charging label on the right side
of the charging connector. The charging label shows safety symbols and the rated input
specifications for charging.
B0000902
B0000903
No.
Name
Description
(1)
Warning for high voltage
Indicates a device with a risk of electric shock.
Indicates a device that may cause property
(2)
Warning/Caution symbol
damage, serious injury or death if not
operated carefully.
Indicates the type of input current (~, AC) and
Rated voltage and maximum
(3)
the rated voltage range (V) and charging
charging current
current (A) when AC charging.
1-20
1
When the electric charging door closes automatically
if equipped
The electric charging door closes automatically after certain time in the following
conditions. Check the operation conditions and reset the charging door if it does not
open under normal use conditions.
• When the charging connector is disconnected.
• When the charging door is opened and charging has not started.
• When the gear is shifted to D (Drive), N (Neutral), or R (Reverse).
Resetting the electric charging door
If the electric charging door malfunctions or if the 12 V battery has been replaced, reset
the charging door by turning the vehicle on and off once.
• If the charging door malfunctions continuously after resetting the charging door, have
the vehicle inspected by an authorized HYUNDAI dealer.
Setting charging connector locking mode
You can lock the charging connector during AC charging to prevent unintended
detachment of the charging connector from the vehicle.
Information
The connector is automatically locked during DC charging or while using the V2L
function, regardless of the settings of charging connector locking mode applied to the
vehicle.
• When DC charging is complete, the charging connector will be unlocked
automatically.
• After using electricity, you can unlock the charging connector by pressing the switch
on the V2L connector to turn off the power and unlock the vehicle door.
On the infotainment system, select EV > (EV Setting) > Charging Connector Locking
Mode to set the locking mode of the charging connector.
The available locking mode options are as follows:
• Always: Locks the connector automatically whenever the charging connector is
plugged into the charging inlet.
• While Charging: Locks the connector automatically only while charging is in progress
after the charging connector is properly connected to the vehicle. This is the preferred
setting when using public stations to allow for other customers to use charger after
your vehicle is done charging.
• Do Not Lock: Unlocks the connector regardless of the charging state. Be careful of
portable charging cable theft.
1-21
Introduction/Getting started with Your Electric Vehicle
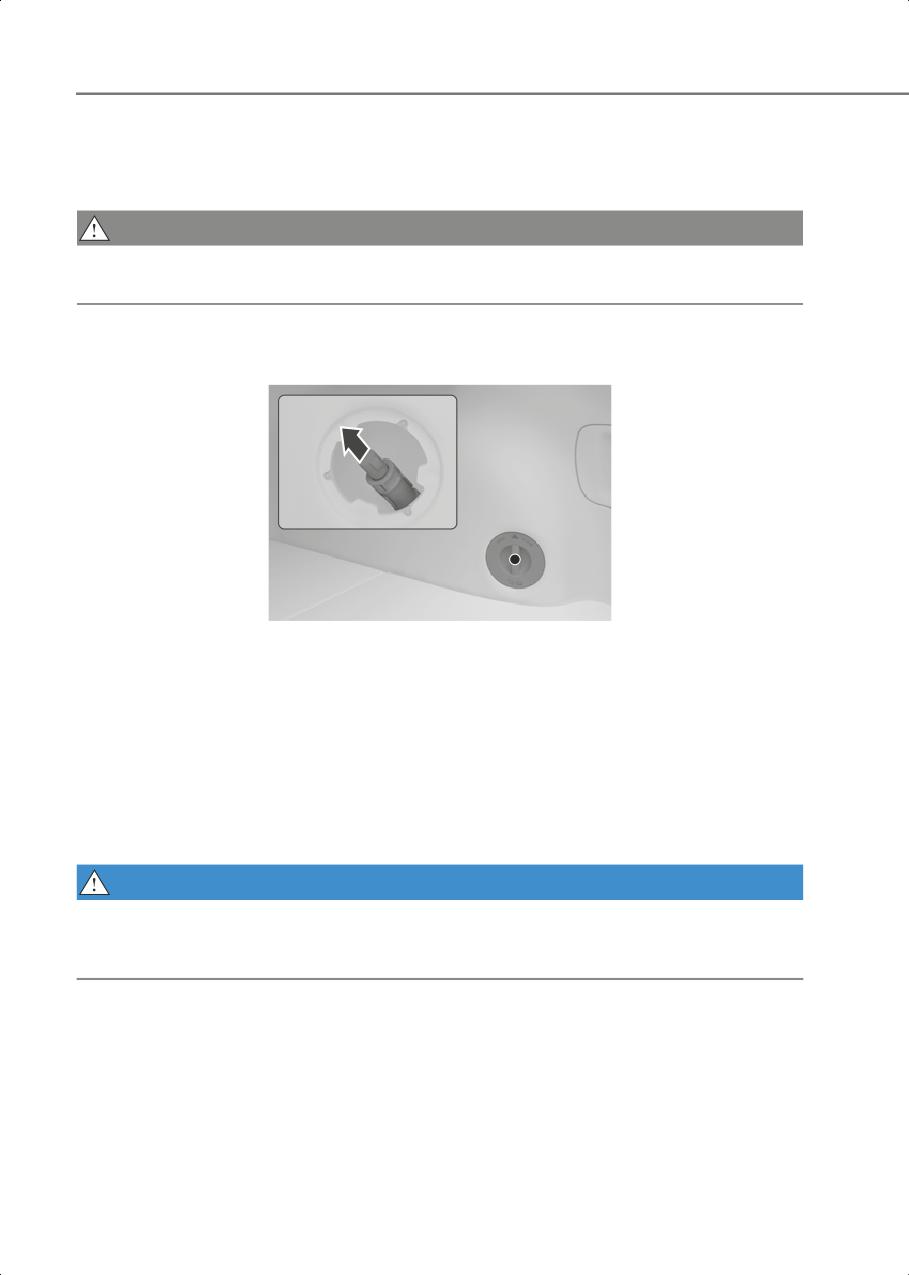
Disconnecting the charging connector in an emergency
If the unlock button is not functioning properly due to a discharged battery or abnormal
electrical wiring, the charging connector cannot be disconnected from the vehicle.
CAUTION
Do not disconnect the charging connector forcibly. Doing so may damage the charging
connector or the charging inlet on the vehicle.
If the charging door does not open due to battery being fully discharged or a wiring
failure, open the trunk and pull the emergency cable on the trunk’s right wall.
B0000904
• If the unlock button still does not operate after pulling the emergency cable, have the
vehicle inspected by an authorized HYUNDAI dealer.
Using an AC Charger
AC charging is the most common charging method for electric vehicles. Charge your
electric vehicle using an AC charging cable installed in public charging stations or at your
professionally installed Level 2 AC home charger.
• To find a nearby public charging station, refer to the "Searching for nearby charging
stations" section in this chapter.
WARNING
Before charging the vehicle, carefully read and follow the instructions in “Safety
Precautions for Charging Your Electric Vehicle” to prevent property damage or injury due
to electric shock, fire, explosion, etc.
1-22

1
CAUTION
To prevent property damage or injury due to fire or explosion, follow the instructions
below.
• Only use the genuine AC charging cable provided by the manufacturer (if equipped).
• Try to avoid using an extension cord, but if you must use to reach a 120 V outlet, ensure
it is a medium to heavy duty grounded extension cord rated at 15 A minimum.
• Check the rated voltage and maximum charging current required for charging, and
ensure that the charger power you are using meets the requirements.
• Immediately stop charging if you discover abnormal conditions, such as odor or
smoke.
Understanding the AC charging cable
The exterior and configuration of the AC charging cable are as follows:
1
2
B0001001
(1) Charging connector (Vehicle side)
(2) Charging plug (Charger side)
Charging with an AC charger
Follow the instructions below to charge the vehicle with an AC charger.
1. With the vehicle started, apply the Electronic Parking Brake (EPB) while pressing the
brake pedal.
2. Turn all switches off, shift to P (Park), and stop the vehicle.
3. With the vehicle door unlocked, press the open indicator on the charging door to open
the charging door.
4. Open the charging inlet cover and check the charging connector and charging inlet for
dust or other contaminants
• If there is any dirt or contaminants, remove it using the air gun.
1-23

Introduction/Getting started with Your Electric Vehicle
WARNING
Do not touch the charging connector of the charging cable or the charging inlet on the
vehicle.
5. Remove the charging connector protection cap of the AC charging cable, hold the
charging connector handle, and connect it to the AC charging inlet on the vehicle. Push
it until you hear a click.
6.[If using separately purchased charging cable] Remove the charging plug protection
cap of the AC charging cable, hold the charging plug handle, and connect it to the
electric outlet (120 V) of the AC charger.
• This process is required only when using a separately purchased AC charging cable.
If you use a charging cable installed in an AC charger, a separate charging plug
connection is not required.
• When charging starts, the estimated charging time will be displayed on the
instrument cluster for about one minute.
Information
• If you open the driver’s door while charging, the estimated charging time will also be
displayed on the instrument cluster for about one minute.
• When scheduled charging is set, a message saying "Waiting to charge at scheduled
time" will be displayed.
• When scheduled air conditioner or heater operates while waiting for the scheduled
charging, the estimated charging time will be displayed as “-”.
7. [If using a separately purchased charging cable] When charging is complete, hold the
charging plug handle, disconnect the charging plug from the electric outlet (120 V) of
the AC charger, and close the protection cap of the charging plug.
• This process is required only when using an AC charging cable purchased separately.
If you use a charging cable installed in an AC charger, a separate charging plug
disconnection is not required.
8.Hold the charging connector handle with the unlock button pressed, and pull the
charging connector to disconnect it from the charging inlet.
CAUTION
Do not forcibly disconnect the charging connector without pressing the unlock button
on the charging connector. It may damage the charging connector or the charging
inlet on the vehicle.
9.Close the charging inlet cover and press the charging door to completely close it.
1-24

1
Information
• If the charging connector locking mode is set to Always or While Charging, unlock
the door by pressing the button on the smart key or the button on the driver’s door,
and disconnect the charging connector from the charging inlet.
- For more information, refer to the "Setting charging connector locking mode"
section in this chapter.
• During AC charging, the quality of radio reception may degrade in some areas.
Using a DC Charger
If you need to charge the vehicle in a shorter time, you can charge at high speeds using
a DC charger installed in public charging stations.
• To find a nearby charging station, refer to the "Searching for nearby charging stations"
section in this chapter.
WARNING
Before charging the vehicle, carefully read and follow the instructions in “Setting
charging connector locking mode” to prevent property damage or injury due to electric
shock, fire, explosion, etc.
CAUTION
Battery performance and life may deteriorate if the DC charger is used constantly. Use
AC charging unless DC charging is necessary.
1-25
Introduction/Getting started with Your Electric Vehicle
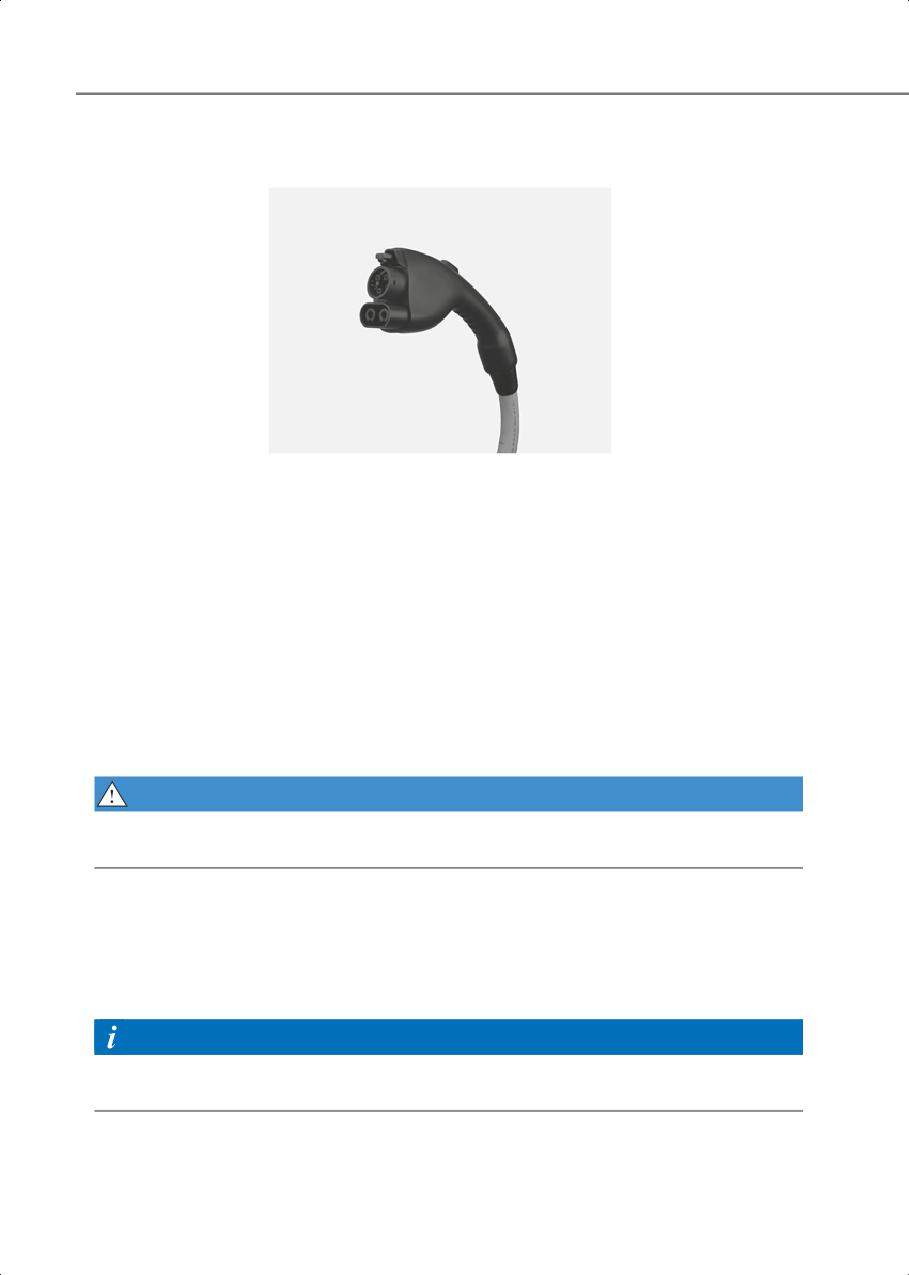
Understanding the DC charging connector
The exterior of the DC charging cable is as follows:
B0001101
(1) DC charging connector (Vehicle side)
Charging with a DC charger
Follow the instructions below to charge the vehicle with a DC charger.
1. With the vehicle started, apply the Electronic Parking Brake (EPB) while pressing the
brake pedal.
2. Turn all switches off, shift to P (Park), and stop the vehicle.
3. With the vehicle door unlocked, press the open indicator on the charging door to open
the charging door.
4. Open the charging inlet cover and check the charging connector and charging inlet for
dust or other contaminants.
• If there is any dirt or contaminants, remove it using the air gun.
WARNING
Do not touch the interior of the charging connector of the charging cable or the
charging inlet on the vehicle.
5. Remove the charging connector protection cap of the DC charging cable, hold the
charging connector handle, and connect it to the DC charging inlet on the vehicle. Push
it until you hear a click.
• When charging starts, the estimated charging time will be displayed on the
instrument cluster for a minute.
Information
If you open the driver’s door while charging, the estimated charging time will also be
displayed on the instrument cluster for a minute.
1-26

1
6.When charging is complete, hold the charging connector handle with the unlock
button pressed and pull on the charging connector to disconnect it from the charging
inlet.
• Depending on the DC charger types, some DC chargers may not have a charger
connector unlock button so it may be necessary to stop at the DC charger control
panel or by charger company's app.
CAUTION
Before disconnecting the charging connector, check if there is an unlock button on the
connector handle. If the connector handle is equipped with an unlock button, forcibly
disconnecting the connector without pressing the button may damage the charging
connector or charging inlet on the vehicle.
NOTICE
• For more information, refer to the “Setting charging connector locking mode”
section in this chapter.
7. Close the charging inlet cover.
8.Press the charging door to completely close it.
Using a Portable Charger (ICCB)
If the vehicle cannot be moved to a public charging station, you can charge the vehicle
using a separately purchased In-Cable Control Box (ICCB) in places where general power
(AC 120 V) is supplied.
WARNING
Before charging the vehicle, carefully read and follow the instructions in “Setting
charging connector locking mode” to prevent property damage or injury due to electric
shock, fire, explosion, etc.
CAUTION
To prevent property damage or injury due to fire or explosion, follow the instructions
below.
• Only use a genuine HYUNDAI portable charger (if equipped).
• Do not let children operate or touch the portable charger. Doing so may lead to
unexpected accidents.
• Try to avoid using an extension cord, but if you must use to reach a 120 V outlet, ensure
it is a medium to heavy duty grounded extension cord rated at 15 A minimum.
• The charger power you are using must comply with regulations and safely
accommodate the Voltage, Current (Amps), and Power (Watts) ratings. If not, the
vehicle may not be charged or safety hazards, such as fire, may occur.
1-27
Introduction/Getting started with Your Electric Vehicle
• If the power distributor exceeds its capacity while charging the vehicle with a portable
charger at home, the power to the home may be cut off or a fire may occur.
• Immediately stop charging if you discover abnormal conditions, such as odor or
smoke.
• Use a portable charger only in emergencies, and do not use it to fully charge the
battery.
• If you charge the vehicle with household electricity, you will be charged electricity bill
according to the home rate system, not the electric vehicle rate system.
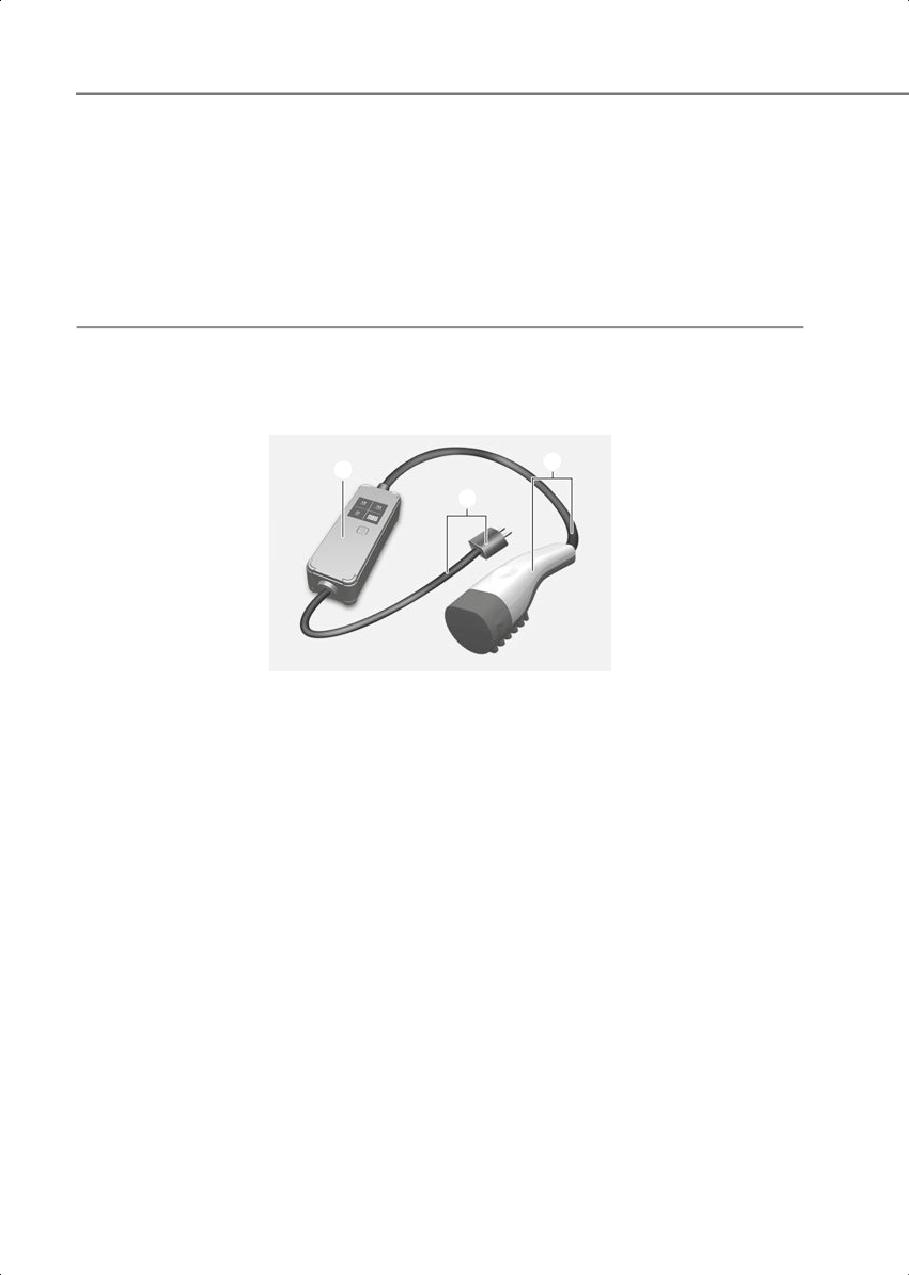
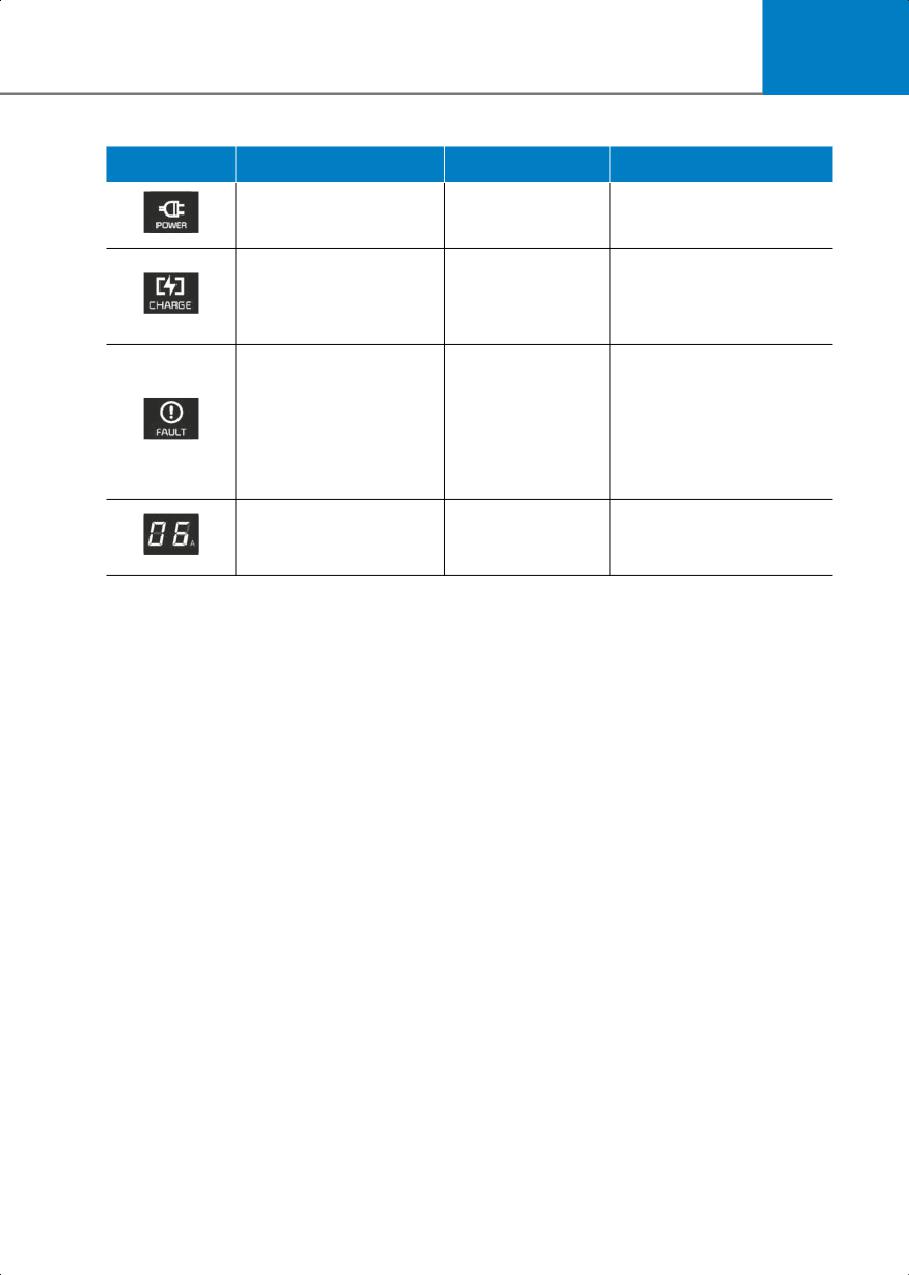
Understanding portable chargers
The configuration of a portable charger and the display of the operation indicator are as
follows:
3
1
2
B0001201
(1) Control box
(2) Power plug and cord (cord set)
(3) Charging cable and charging connector
1-28
1
Icon
Name
Color
Description
Turns on when the power
POWER
Green
is on.
Turns on while charging
and blinks when current is
CHARGE
Blue
limited (Forcibly switched
to 6 A).
Blinks when a leakage
current, communication
error, or overcurrent error
FAULT
Red
occurs, or when the
high-temperature
protection inside the plug
and charger is activated.
Displays the present
CHARGE LEVEL
-
charging current setting
(6 A, 8 A, 10 A, or 12 A).
1-29
Introduction/Getting started with Your Electric Vehicle
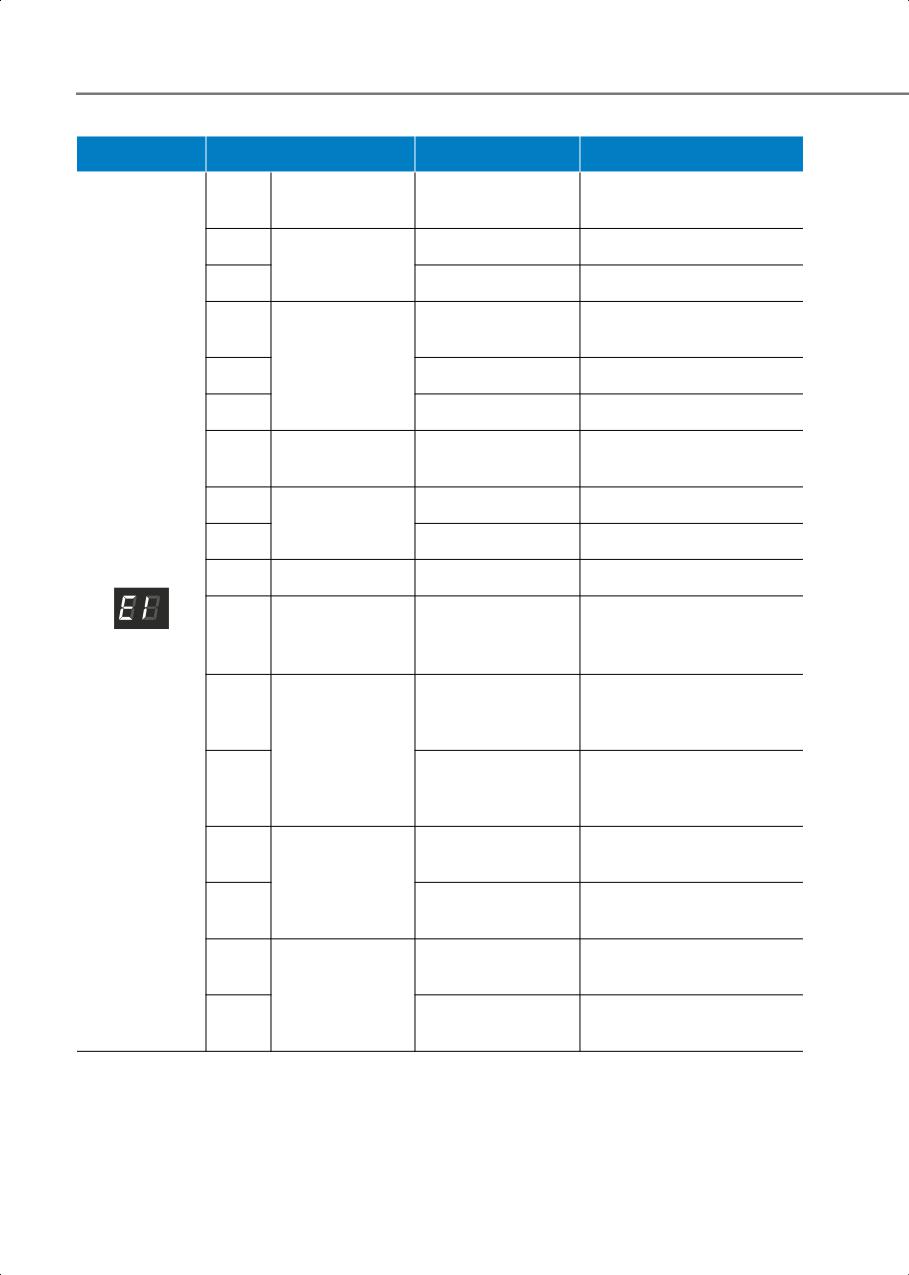
Icon
Name
Color
Description
Control pilot
Vehicle communication
E1
-
communication
error
E2
-
Current leakage
Leakage
E3
-
Charger error
Plug overtemperature
E4
-
warning
Plug
E5
temperature
-
Plug temperature failure
E6
-
Charger error
Charging overcurrent
E7
Overcurrent
-
warning
E8
-
Charger overheating
Internal
temperature
E9
-
Charger error
F1
Relay fusion
-
Charger error
A
Ground
F2
Monitoring/
-
Poor grounding of outlet
Interrupt
Switched mode power
F3
-
supply error (voltage
Switched mode
failure)
power supply
power failure
Switched mode power
F4
-
supply error (abnormal
voltage)
Control Pilot (-) voltage
F5
-
error
Control Pilot
voltage error
Control Pilot (+) voltage
F6
-
error
Plug temperature sensor
F7
-
error
Temperature
sensor error
PCB internal temperature
F8
-
sensor error
1-30

1
• If an error occurs, you can reset the portable charger by disconnecting and
reconnecting the power plug, and then pressing the button on the control box for more
than two seconds.
• If the same symptom repeats after resetting the portable charger, have the vehicle
inspected by an authorized HYUNDAI dealer.
• If there is no status change for more than one minute, the portable charger will be
switched to power saving mode, and the display light will be turned off.
Charging with a portable charger
Follow the instructions below to charge the vehicle with a portable charger.
1. Connect the power plug of the portable charger to the electrical outlet at tour home.
• The power indicator light on the control box will turn green.
2. Set the charging current by pressing the button on the back of the control box for more
than two seconds until the number on the charging current indicator blinks.
NOTICE
An example of a portable charger charging current setting suitable for the rated current
of the power supplied is as follows. However, the appropriate charging current may
vary depending on the environment, such as the power usage inside the building.
Outlet Current
ICCB Charge level
14-16 A
12 A
12-13 A
10 A
10-11 A
8 A
8-9 A
6 A
• The charging current is changed each time the button is pressed, in the order of "6 A
- 8 A - 10 A - 12 A."
• If 10 seconds have passed without pressing any button, the blinking will stop and the
charging current will be finished.
3. With the vehicle started, apply the Electronic Parking Brake (EPB) while pressing the
brake pedal.
4. Turn all switches off, shift to P (Park), and stop the vehicle.
5. With the vehicle door unlocked, press the open indicator on the charging door to open
the charging door.
6.Open the charging inlet cover and check the charging connector and charging inlet for
dust or other contaminants.
• If there is any dirt or contaminants, remove it using the air gun.
1-31

Introduction/Getting started with Your Electric Vehicle
WARNING
Do not touch interior of the charging connector of the charging cable or the charging
inlet of the vehicle.
7. Remove the charging connector protection cap of the portable charging cable, hold
the charging connector handle, and connect it to the AC charging inlet of the vehicle.
Push it until you hear a click.
• When charging starts, the estimated charging time will be displayed on the
instrument cluster for about one minute.
Information
• If you open the driver’s door while charging, the estimated charging time will also be
displayed on the instrument cluster for about one minute.
• When scheduled charging is set, a message saying “Waiting to charge at scheduled
time” will be displayed.
• When scheduled air conditioner or heater operates while waiting for the scheduled
charging, the estimated charging time will be displayed as ‘-’.
8.When charging is complete, hold the charging connector handle with the unlock
button pressed and pull on the charging connector to disconnect it from the charging
inlet.
Information
If you have set the charging connector locking mode as Alwaysor While Charging,
unlock the door by pressing the button on the smart key or the button on the driver’s
door, and disconnect the charging connector from the charging inlet.
• For more information, refer to the “Setting charging connector locking mode”
section in this chapter.
9.Close the charging inlet cover.
10.Press the charging door to completely close it.
1-32

1
Using the scheduled charging function
The scheduled charging function allows you to charge your vehicle using low cost, late
night power until the next departure time.
Information
You can use the scheduled charging function only when using an AC charger or the
portable charger (ICCB: In-Cable Control Box). For more information about connecting
an AC charger and portable charger, refer to the “Using an AC Charger”and “Using a
Portable Charger (ICCB)” section in this chapter.
On the infotainment system, select EV > Scheduled Charging and Climate > Scheduled
Charging, set the date and time of when to charge the battery, and select an option.
• For more information, refer to the “Setting Scheduled Charging and Climate” section
in this chapter.
• When scheduled charging is set and the AC charger or the portable charger (ICCB) is
connected for charging, the indicator light gradually illuminates for three minutes to
indicate that scheduled charging is set.
• When scheduled charging is set, charging is not started immediately when the AC
charger or portable charger (ICCB) is connected. To charge the vehicle immediately,
select EV > Scheduled Charging and Climate > Scheduled Charging on the screen and
deactivate the scheduled charge setting.
Information
• You can set up or cancel scheduled charging using the HYUNDAI BlueLink app on your
smartphone. For more information, refer to the user's manual provided in the
infotainment system and the quick reference guide.
• Charging may start immediately after a charger is connected to the vehicle, depending
on the charging time calculated when setting up the scheduled charging.
1-33
Introduction/Getting started with Your Electric Vehicle
Using EV Mode Functions
EV mode provides driving information and high voltage battery information. You can set
various electric vehicle functions in EV mode.
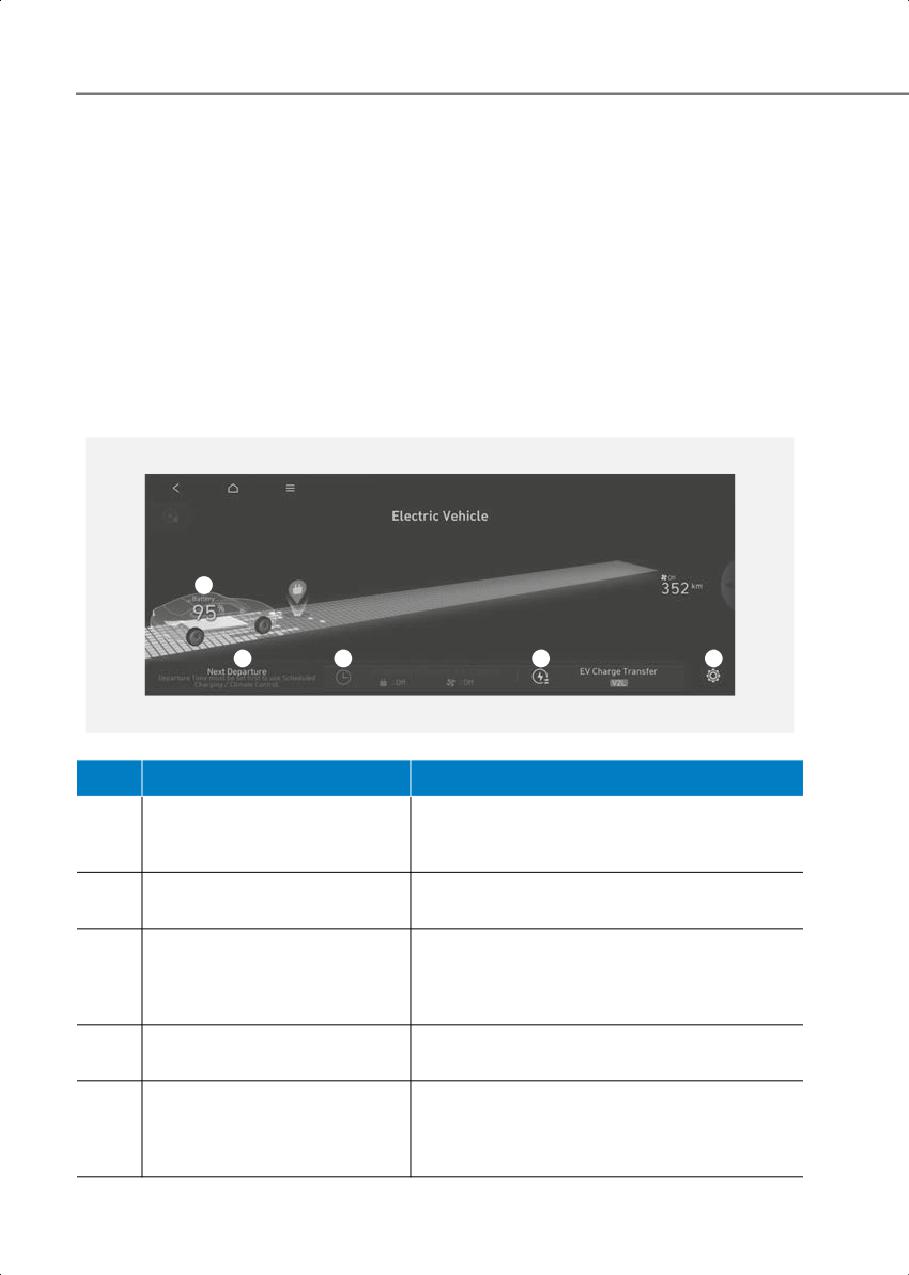
Checking the EV Mode Screen Configuration
Follow the instruction below to enter EV mode and check the screen configuration.
1. On the infotainment system, swipe the Home screen to the left to display the All menus
screen.
2. On the All menus screen, select EV.
• The EV mode screen appears.
The details of the EV mode screen is as follows:
1
2
3
4
5
A0001601
No.
Name
Description
You can check the distance to empty, total
(1)
Energy information
battery power remaining, and expected
charging time for each charge type.
You can set anticipated departure time for
(2)
Next departure time
scheduled charging and target temperature.
You can set the date and time of when to charge
Scheduled charging and climate
the battery and the climate control
(3)
control
temperature. Also, you may select the time to
start charging using the off-peak time setting.
You can set the battery discharging limit (%) for
(4)
Vehicle to Load (V2L) setting
the high voltage battery for driving.
You can set various electric vehicle specialized
functions. For more information, refer to the
(5)
EV setting
“Setting Electric Vehicle Specialized Functions”
section in this chapter.
1-34

1
Checking Energy Information
Check the distance to empty, State of Charge (SOC), and expected charging time and
charge the vehicle if necessary.
• For more information about charging the vehicle, refer to the “Charging Your Electric
Vehicle” section in this chapter.
1. On the infotainment system, swipe the Home screen to the left to display the All menus
screen.
2. On the All menus screen, select EV and select the vehicle image.
3. On the Energy Information screen, select each item to check the vehicle energy
information.
B0001701
Checking the battery status
On the Energy Information screen, select Battery Status.
• You can check the current charge level, expected distance to empty, and charging
time for each charge type.
• For more information about setting target battery charge level, refer to the “Setting the
target battery charge level” section in this chapter.
B0001702
1-35
Introduction/Getting started with Your Electric Vehicle
Information
• The distance to empty is calculated based on the electric energy economy history and
outside temperature while driving. The distance may change if the driving pattern
changes.
• The distance to empty may vary depending on the change of the driving pattern even
if the same target battery charge level is set.
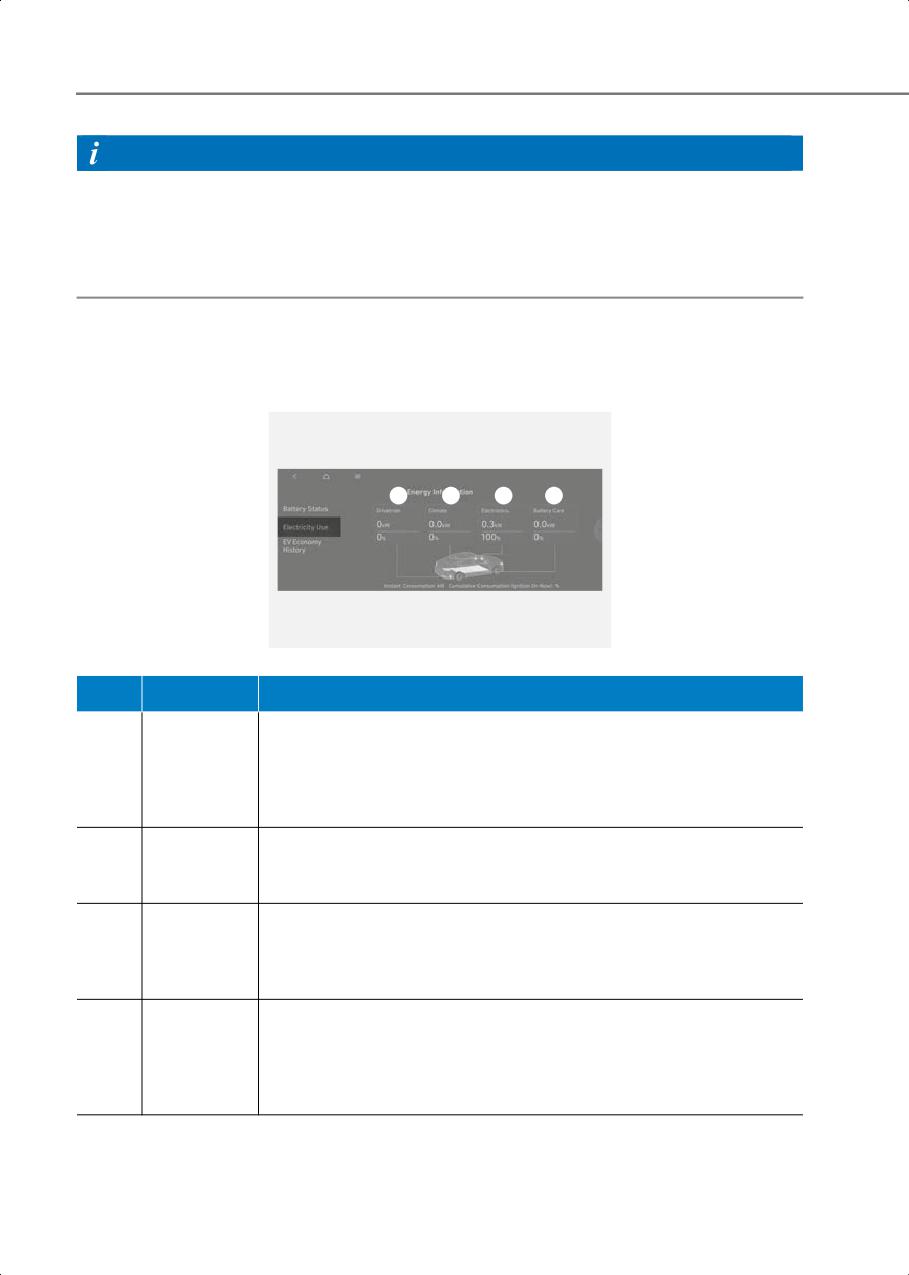
Checking electricity use
On the Energy Information screen, select Electricity Use.
• You can check the current energy consumption for each vehicle system.
1
2
3
4
B0001703
No.
Name
Description
Shows the power and energy consumption used by the vehicle
system, including the instrument cluster, infotainment system
(1)
Electronics
(speaker and navigation), headlight, vehicle control unit, etc., and
the percentage of the power vehicle system used in total power
used since starting the vehicle.
Shows the power and energy consumption used by the air
(2)
Climate
conditioner or heater and the percentage of the power climate
system used in total power used since starting the vehicle.
Shows the percentage of instantaneous and regenerative energy
consumed by the motor to drive the vehicle and the percentage of
(3)
Drive train
the power driving system used in total power used since starting
the vehicle.
Shows the momentary power and energy consumption used when
increasing and cooling down the battery temperature to maintain
(4)
Battery Care
optimal battery performance and the percentage of battery
temperature control mode (Battery Care mode) used in the total
power used since starting the vehicle.
1-36
1
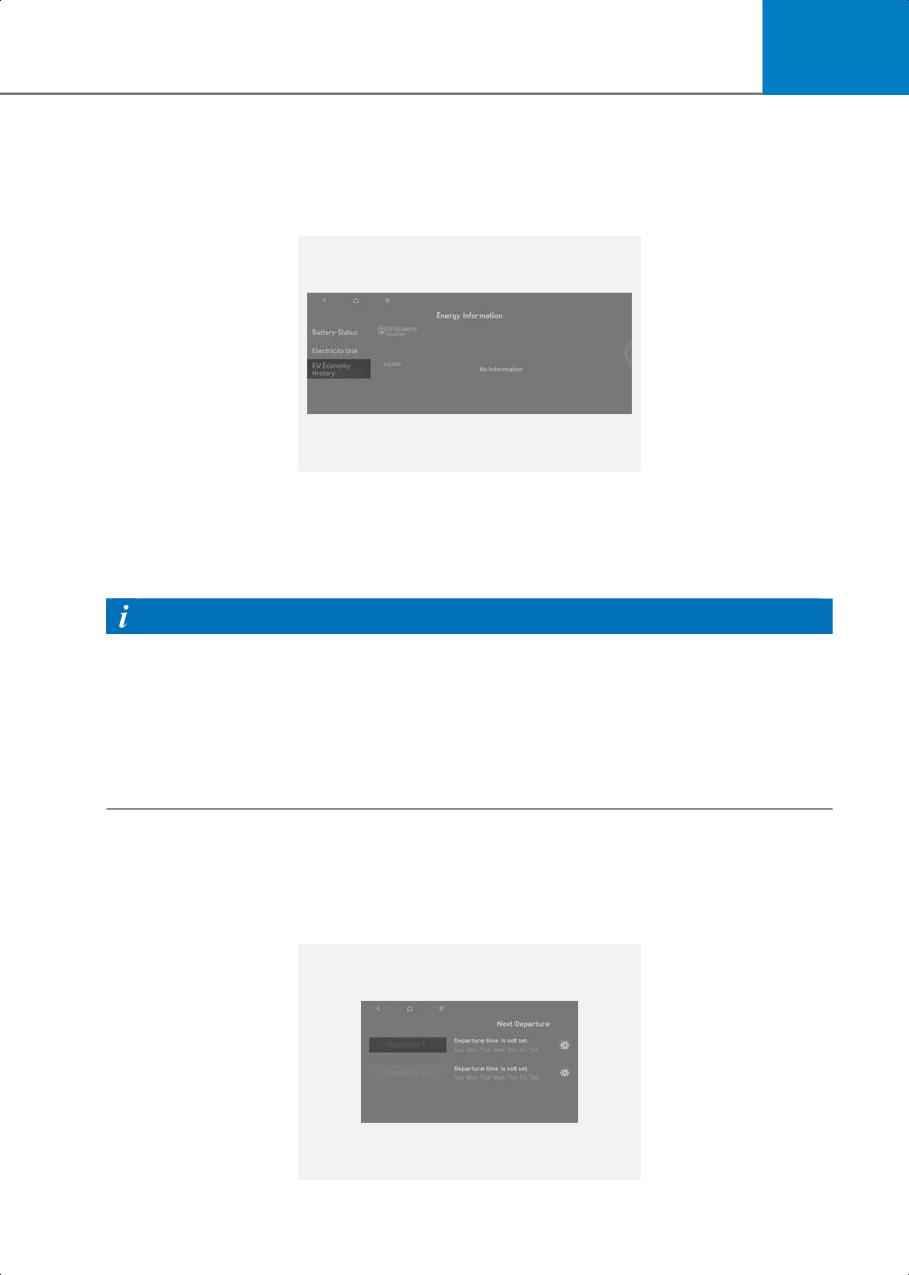
Checking the electric energy economy history
On the Energy Information screen, select EV Electricity History.
• You can check the history of electric energy economy with the date and distance of
previous driving.
B0001704
Setting the Next Departure Time
You can set an anticipated departure time for scheduled charging and target
temperature.
Information
• Scheduled charging and climate will be activated based on the departure time.
• To use scheduled charging and climate function, the vehicle must be connected to the
charger at the scheduled time.
• The scheduled climate function directly uses the power of the connected charger. It
can maintain a pleasant environment and enhance vehicle performance by controlling
the temperature of the vehicle and the battery without using the high voltage battery
power.
1. On the infotainment system, swipe the Home screen to the left to display the All menus
screen.
2. On the All menus screen, select EV > Next Departure Time.
3. Set the anticipated departure schedule.
B0001801
1-37
Introduction/Getting started with Your Electric Vehicle
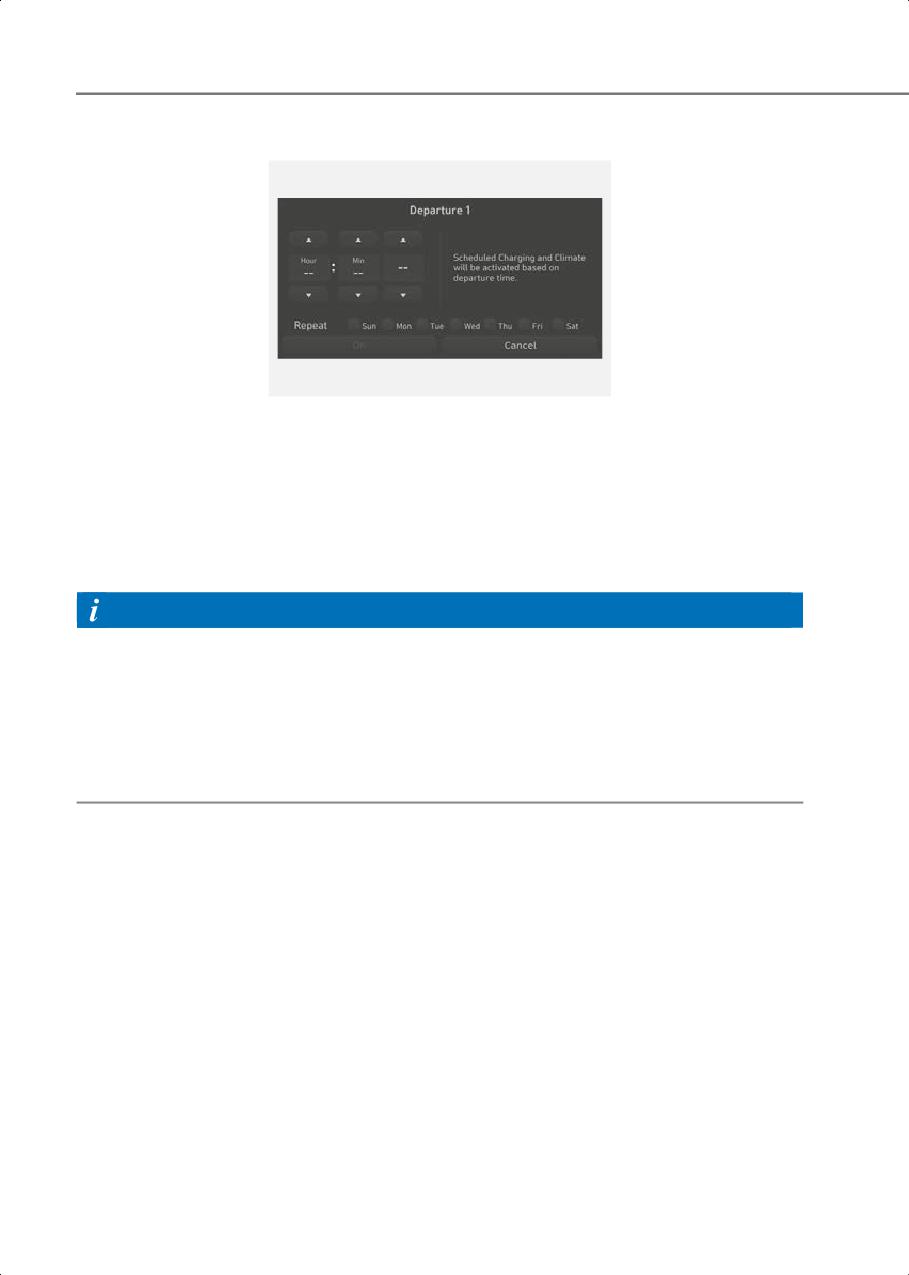
4. Set anticipated time the vehicle will departure after charging.
B0001802
5. At Repeat option, select the day of the week to activate scheduled charging and target
temperature for the departure time.
Setting Scheduled Charging and Climate
You can set the date and time of when to charge the battery and the climate control
temperature. Also, you may select the time to start charging using the off-peak time
setting.
Information
• Scheduled charging and climate can be activated based on the departure time.
• To use scheduled charging and climate function, the vehicle must be connected to the
charger at the scheduled time.
• The scheduled climate function directly uses the power of the connected charger. It
can maintain a pleasant environment and enhance vehicle performance by controlling
the temperature of the vehicle and the battery without using the high voltage battery
power.
1-38
1
Setting scheduled charging
Follow the instructions below to set the off-peak time and scheduled charging option.
1. On the infotainment system, swipe the Home screen to the left to display the All menus
screen.
2. On the All menus screen, EV > Scheduled Charging and Climate > Scheduled
Charging.
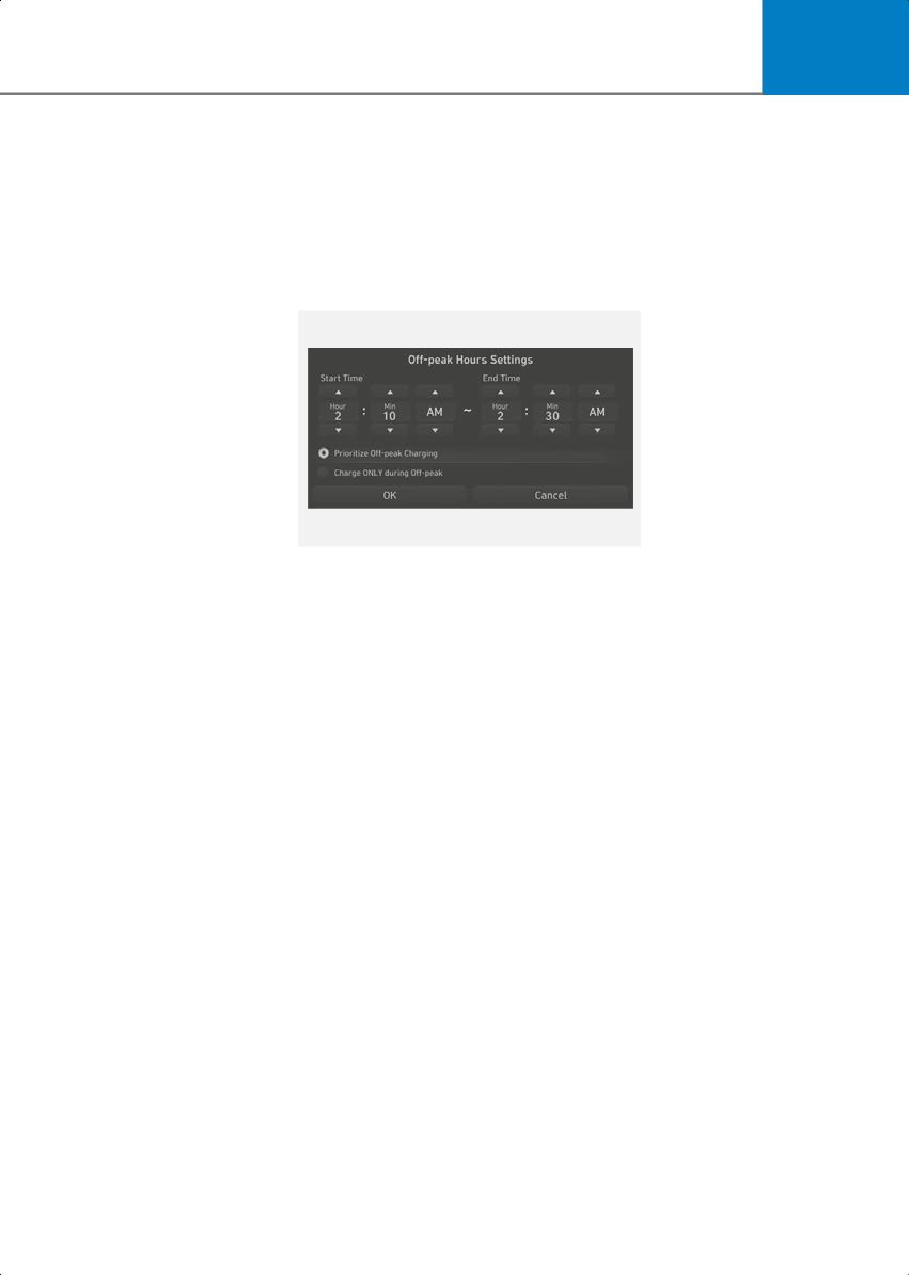
3. Set the off-peak hours at Start Time and End Time.
B0001901
4. Select the charging option.
• Prioritize Off-peak Charging: Charging is activated during the off-peak time. It may
keep on charging past off-peak time to reach the target battery charge level.
• Charge ONLY during Off-peak: Charging is activated only during the off-peak time.
It may not be able to reach the target battery charge level.
• For more information about setting the target battery charge level, refer to the
“Setting the target battery charge level” section in this chapter.
1-39
Introduction/Getting started with Your Electric Vehicle
Setting a scheduled climate
Follow the instructions below to set the scheduled climate control temperature.
1. On the infotainment system, swipe the Home screen to the left to display the All menus
screen.
2. On the All menus screen, select EV > Scheduled Charging and Climate > Scheduled
Charging.
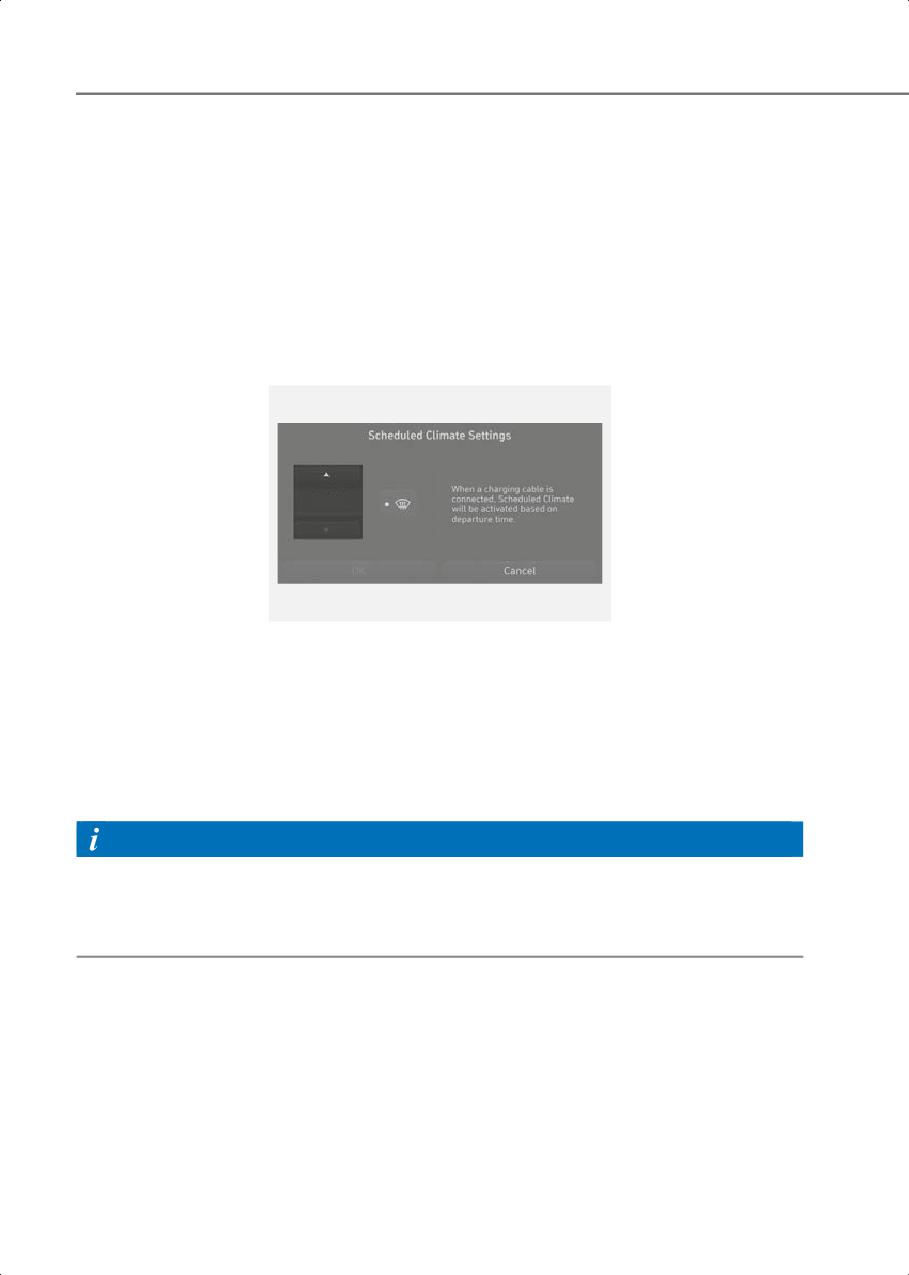
3. Set the desired temperature.
• The air conditioning system is activated at the departure time.
• For more information about setting the departure time, refer to the “Setting the Next
Departure Time” section in this chapter.
10×
B0001902
Setting a Battery Discharging Limit When Using Vehicle to Load
(V2L)
Setting battery discharging limit (%) can prevent the battery from discharging when
operating home appliances or electronic devices using the high voltage battery.
• For more information about V2L function, refer to the “Setting the Next Departure
Time” section in this chapter.
Information
V2L is the system provides AC power using the high voltage battery for driving to operate
several electronic devices. You can operate home appliances and electronic devices, or
charge another electric vehicle in emergency using the charged electricity from the
vehicle’s battery while camping or doing other outdoor activities.
1. On the infotainment system, swipe the Home screen to the left to display the All menus
screen.
2. On the All menus screen, select EV > Electricity Use.
3. Set the desired battery discharging limit (%).
• The battery discharging limit can only be set below the current high voltage battery
level.
• When the high voltage battery level reaches the set battery discharging limit, V2L
function automatically cuts off electrical supply.
1-40

1
B0002001
Setting Electric Vehicle Specialized Functions
You can set various EV specialized functions such as target battery charge level, charging
current, battery conditioning mode, and utility mode from the EV Settings screen.
Setting the target battery charge level
Follow the instructions below to set the target battery charge level when charged with an
AC charger or a DC charger.
1. On the infotainment system, swipe the Home screen to the left to display the All menus
screen.
2. On the All menus screen, select EV > EV Settings > Max. % Charge.
B0002101
3. Set each of the target battery charge level for AC charging and DC charging.
• The charging level can be changed by 10 %.
• If the target battery charge level is lower than the current high voltage battery
charge level, the battery will not be charged.
1-41
Introduction/Getting started with Your Electric Vehicle
Setting the charging current
Follow the instructions below to set the charging current when using an AC charger or a
portable charger.
1. On the infotainment system, swipe the Home screen to the left to display the All menus
screen.
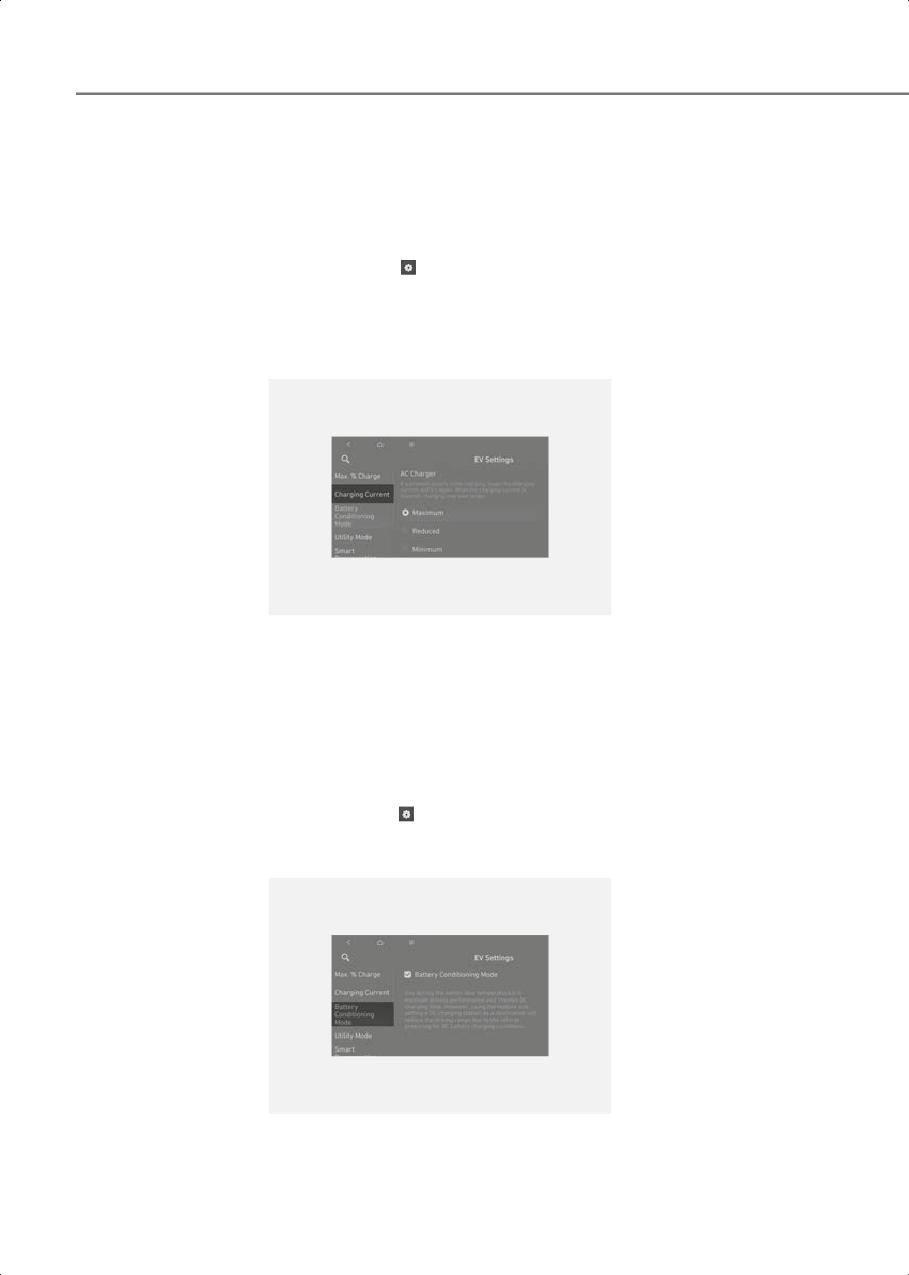
2. On the All menus screen, select EV > (EV Settings) > Charging Current
• If the charging stops before reaching the target battery charge level while charging
with an AC charger or a portable charger, reduce the size of the input current and
retry charging.
• The charging time may differ depending on which charging current is selected.
B0002102
Setting battery conditioning mode
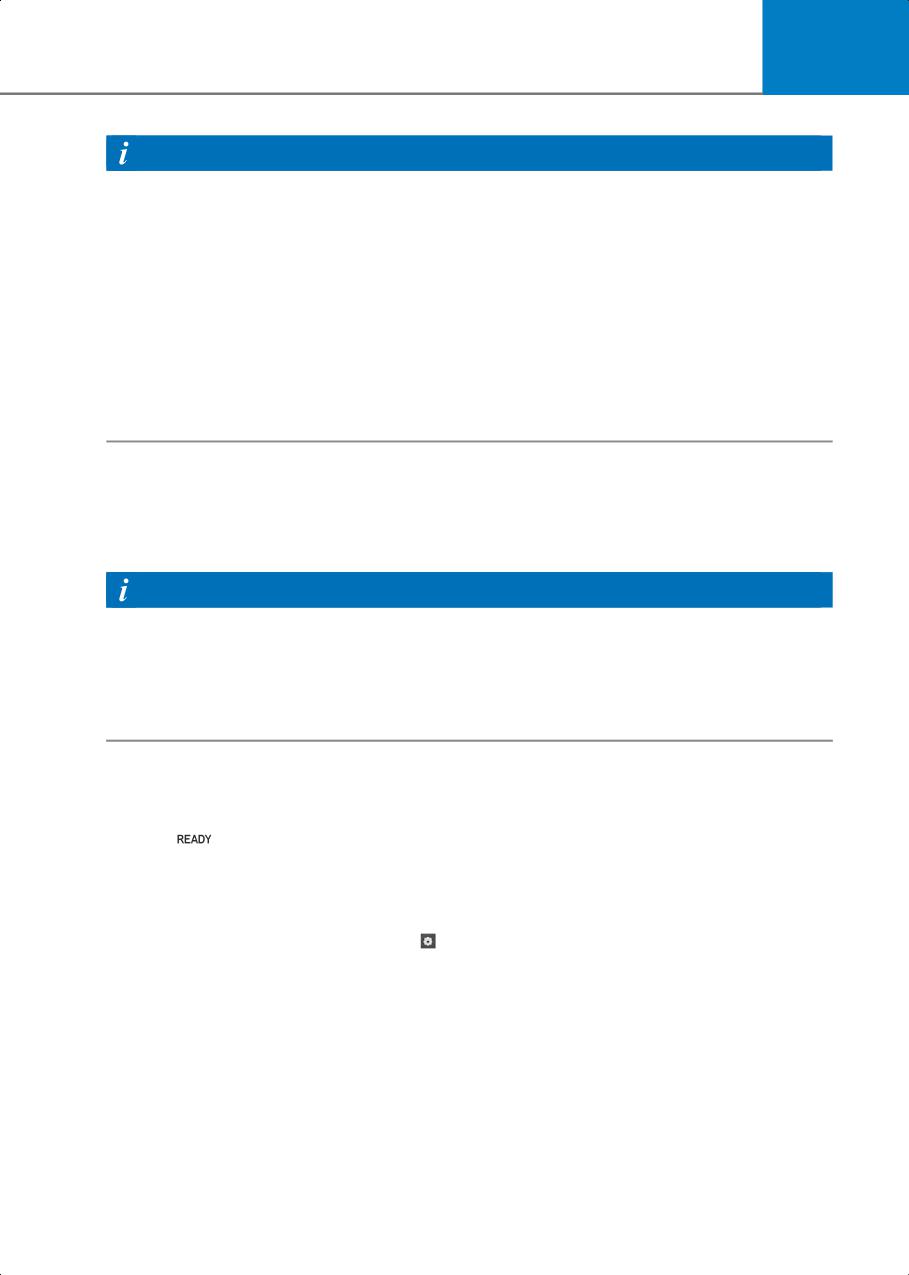
You can raise the battery temperature to maintain optimal driving performance and DC
charging performance at conditions when the low temperature of the high voltage
battery temperature may degrade the battery performance.
1. On the infotainment system, swipe the Home screen to the left to display the All menus
screen.
2. On the All menus screen, select EV > (EV Settings) and select Battery Conditioning
Mode.
• The battery temperature while driving will be maintained adequately.
B0002103
1-42
1
Information
Be aware of the followings when using battery conditioning mode.
• The driving distance may be reduced as energy is required to increase the battery
temperature.
• If the battery temperature is low during driving or when the scheduled air
conditioner/heater is activated, the battery conditioning mode is operated to improve
driving performance. To ensure driving distance the battery conditioning mode will not
be operated when the battery level is too low.
• If you set the DC charging station as your destination while using the battery
conditioning mode, the battery temperature is optimized for charging and you can
shorten the charging time after you arrive and start charging.
• Battery conditioning mode is available for vehicles equipped with the battery heater.
Setting Utility Mode
Utility mode allows the high voltage battery to be used instead of the 12 V auxiliary
battery for purposes other than driving. You can use the audio and lights of the vehicle
without discharging the 12 V auxiliary battery and even use the indoor V2L feature.
Information
• You cannot drive the vehicle while the utility mode is activated, and the gear can only
be shifted to P (Park).
• You can use every electric device in the vehicle while the utility mode is activated.
• When the utility mode is activated, the Electronic Parking Brake (EPB) is applied
automatically.
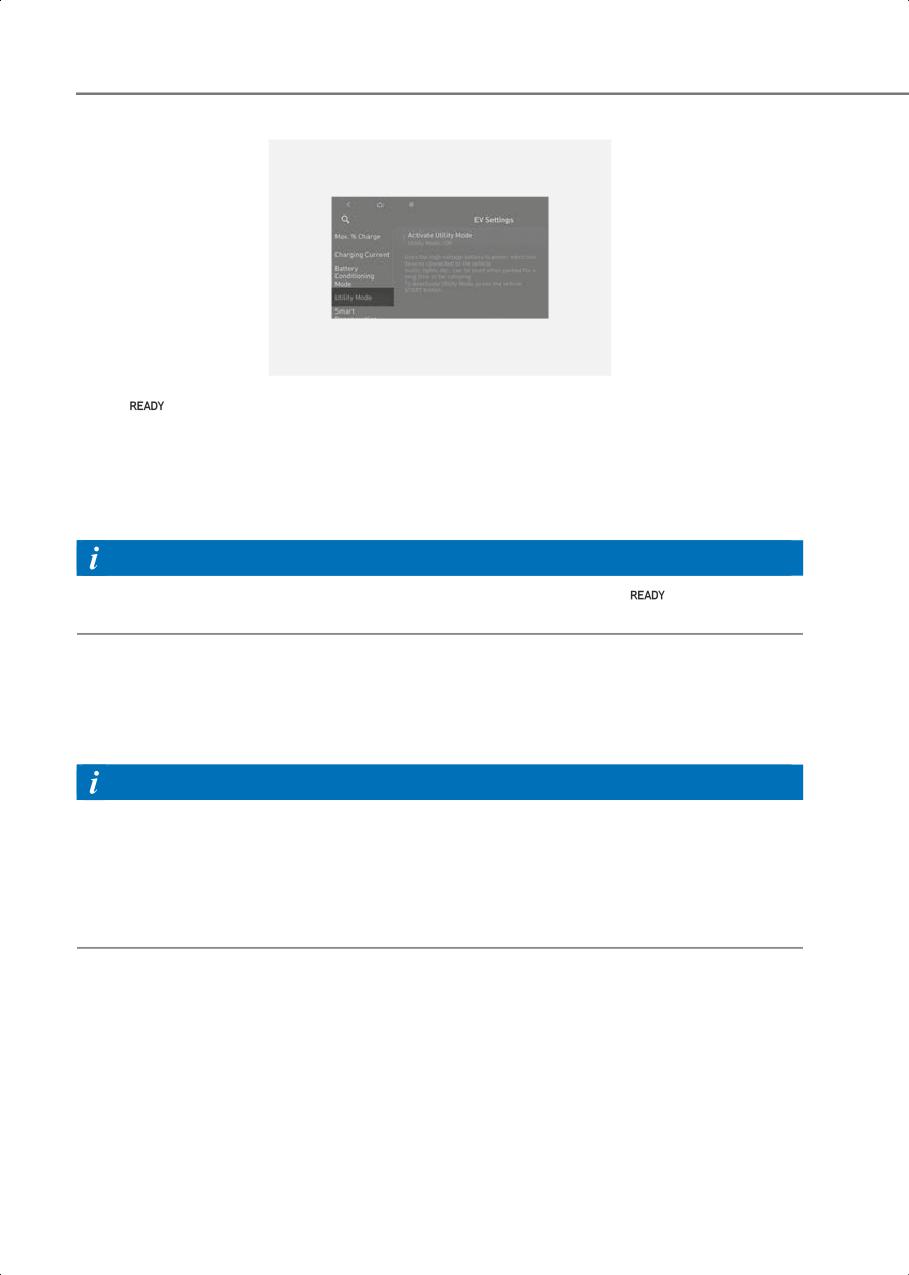
Follow the instructions below to set the utility mode.
1. Check the operation conditions of the utility mode.
• The
(ready indicator) is displayed on the instrument cluster.
• The gear is shifted to P (Park).
2. On the infotainment system, swipe the Home screen to the left to display the All menus
screen.
3. On the All menus screen, select EV > (EV Settings) > Utility mode and select Activate
Utility mode to activate the function (Utility Mode: ON).
1-43
Introduction/Getting started with Your Electric Vehicle
B0002104
• The
(ready indicator) turns off and the UTIL (utility indicator) illuminates on the
instrument cluster and the EPB is applied.
• The utility mode can be deactivated by pressing the Start/Stop button to the OFF
position.
• If you want to utilize V2L function in the vehicle while the utility mode is activated, refer
to the “Using Electricity Inside the Vehicle” section in this chapter.
Information
If the utility mode is not activated when the vehicle is in the ready (
) mode and the
gear is shifted to P (Park), inspect the operation status of EPB.
Searching for nearby charging stations
Around the course, around the current site, around the selected destination or charging
stations of interest can be searched. If you choose the charging station, the detailed
information is provided.
Information
• When you sign up HYUNDAI BlueLink service, the available chargers at each charging
station are displayed.
• The HYUNDAI Carpay function in the in-vehicle payment app allows for convenient
payments to affiliated charging stations and parking lots without using physical cards.
For more information, refer to the user's manual provided in the infotainment system
and the quick reference guide.
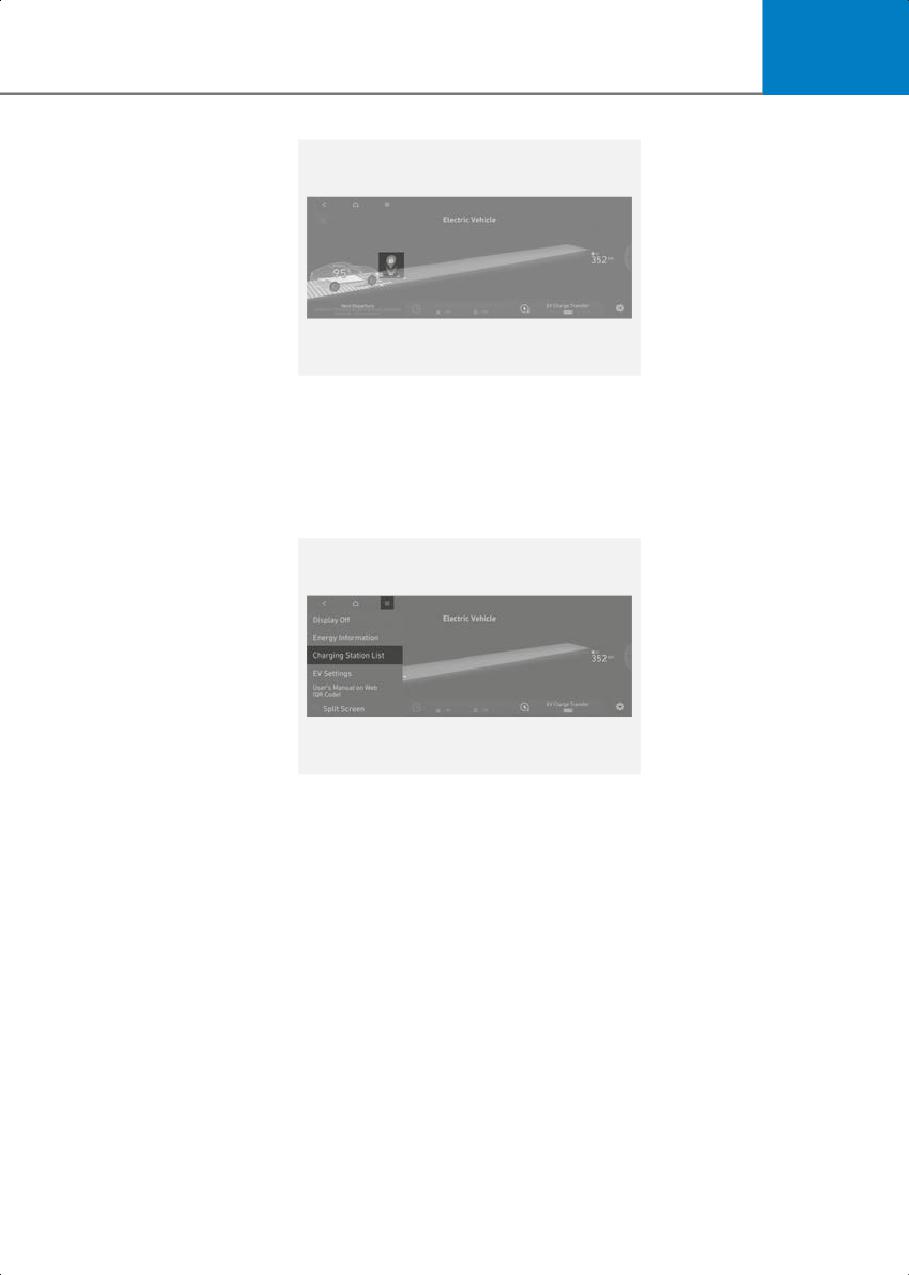
1. On the infotainment system, swipe the Home screen to the left to display the All menus
screen.
2. On the All menus screen, select EV and select the charging station icon next to the
vehicle
1-44
1
B0002105
3. Choose a searching option from the list on the left side of the screen.
• You can choose among Along Route, Near My Location, Near Destination, Near
Center of Map and Favorite Station.
• The direction (arrow) and distance, charger type, address, and location on the map
of the charging stations corresponding to the selected option are displayed on the
right side of the screen.
B0002106
4. Select the charging station on the list and check the detailed information.
1-45

Introduction/Getting started with Your Electric Vehicle
Using V2L Function
Using the Vehicle to Load (V2L) feature, you can turn on electronic devices by connecting
them to the high voltage battery.
Safety Precautions When Using the V2L Function
Before using the V2L function, read and comply with all the safety information below.
Failure to do so may cause electric shock or fire and result in serious injury, death, vehicle
malfunction, or property damage.
Precautions when using the V2L function
WARNING
• Do not use the V2L function if the V2L connector, charging inlet, power plug, or cable
is damaged, corroded, or rusted.
• Do not touch the V2L connector, charging inlet, or power plug with wet hands.
• Do not use the V2L function if the connection part of the V2L connector and the
charging inlet is loose.
• Check if there is no water, dust, or other contaminants before connecting the
connector and the power plug. They may cause electric shock or fire.
• Do not put metal objects or touch the V2L connector or charging inlet with bare hands.
• For electric devices used outdoors in a vehicle, use a product that is waterproof or use
it in a waterproof environment. If rain or humidity intrude into electric devices,
multi-outlets, extension cords, etc., it may cause electric shock or damage the vehicle
or devices.
• If there is a risk of lightning, do not use the V2L function outside the vehicle.
• Do not use electric heating appliances such as an electric kettle, toaster, or iron in the
vehicle. Doing so may result in a fire and injury.
Precautions when the cooling fan operates
WARNING
WL_MotorRoomHotCaution
When using the V2L, the cooling fan in the vehicle motor compartment can operate
automatically even if the vehicle is turned off. Do not put your hand near the cooling fan
when the V2L is operating.
1-46

1
Precautions for handling and using the V2L connector
CAUTION
• Do not modify or disassemble the V2L connector. It may cause fire, electric shock, or
injury. Damage to your vehicle caused by modification and disassembling is not
covered by warranty.
• Be careful when connecting or disconnecting the power plug to the V2L connector or
when opening or closing the V2L connector cover. You may scratch your hand.
• Be sure to disconnect the V2L connector from the vehicle when you are finished using
V2L.
• Do not charge the vehicle using the V2L connector. If you charge the vehicle arbitrarily
by remodeling the power cable of the connector, etc., it may damage the vehicle.
• Do not place objects on the V2L connector. It may damage the cable and cause electric
shock or fire.
• Do not drop the V2L connector or apply any impact on it. Keep it clean in a dry place
without water or humidity.
NOTICE
• Be sure to disconnect the V2L connector from the vehicle when you are finished using
the V2L function.
• Do not charge the vehicle using the V2L connector. If you charge the vehicle by
modifying the power cable of the connector, etc., it may damage the vehicle.
Precautions when using electric/electronic products
CAUTION
• Before using the product, check the precautions and how to use the product referring
to the product manual.
• Only use products that have obtained national safety certification.
• Only use an electric device that does not exceed the maximum power capacity that the
vehicle can supply. However, some of the electric devices may not operate normally
even if the product has power consumption less than the maximum power capacity
provided by the vehicle.
- Electric devices that require high power during initial operation.
- Measuring devices that need to process accurate data.
- Electric devices that are sensitive to inverter type AC charger.
• Do not use products that require a continuous power supply, such as medical
equipment. The power supply may be interrupted depending on the vehicle’s
condition.
• The V2L discharging mode is blocked automatically in the event of overheating. When
the discharging mode is blocked, check whether the V2L connector or power plug is
contaminated, worn, corroded or broken.
1-47
Introduction/Getting started with Your Electric Vehicle
- If the temperature falls to a proper level after it is left unattended, you can use it
again.
- If overheating repeats when using a certain electric device, do not use the electric
device.
• Do not connect more than two extension cords or multi-outlet. Also, when using the
extension cable, ensure that the cable is not twisted. Heat from the overlapped cable
may cause fire.
• Do not hang home appliances on the wire.
• Do not use if the sheath of home appliance cables is damaged or broken.
• Fully insert the power plug when connecting it to the power.
• Only use qualified power plug with ground connection that meets the standard. Do not
use worn, corroded, or broken power plug or improper power plug that does not meet
the standard.
Using Electricity Outside the Vehicle
Before using V2L function, carefully read all the safety information and precautions on
the “Safety Precautions When Using the V2L Function” section and follow the
instructions.
Follow the instructions below to connect the V2L connector to the charging inlet on the
vehicle and supply power to an electronic product.
1. Open the cover of the V2L connector.
2. Close the cover after connecting the plug of an electronic product to the power outlet
of the connector.
WARNING
Some types of plugs may not fit into the outlet cover of the V2L connector, causing
incomplete closing of the cover. Do not use the V2L connector on a rainy or snowy day
if the outlet cover is not completely closed. There is a risk of fire and/or injury.
3. Open the connection terminal protection cap of the connector with the open switch
pressed.
4. Open the charging door and connect the V2L connector to the charging inlet on the
vehicle.
• Connect the V2L connector to the charging inlet within 60 seconds after opening the
charging door.
5. Press the power switch of the V2L connector.
1-48
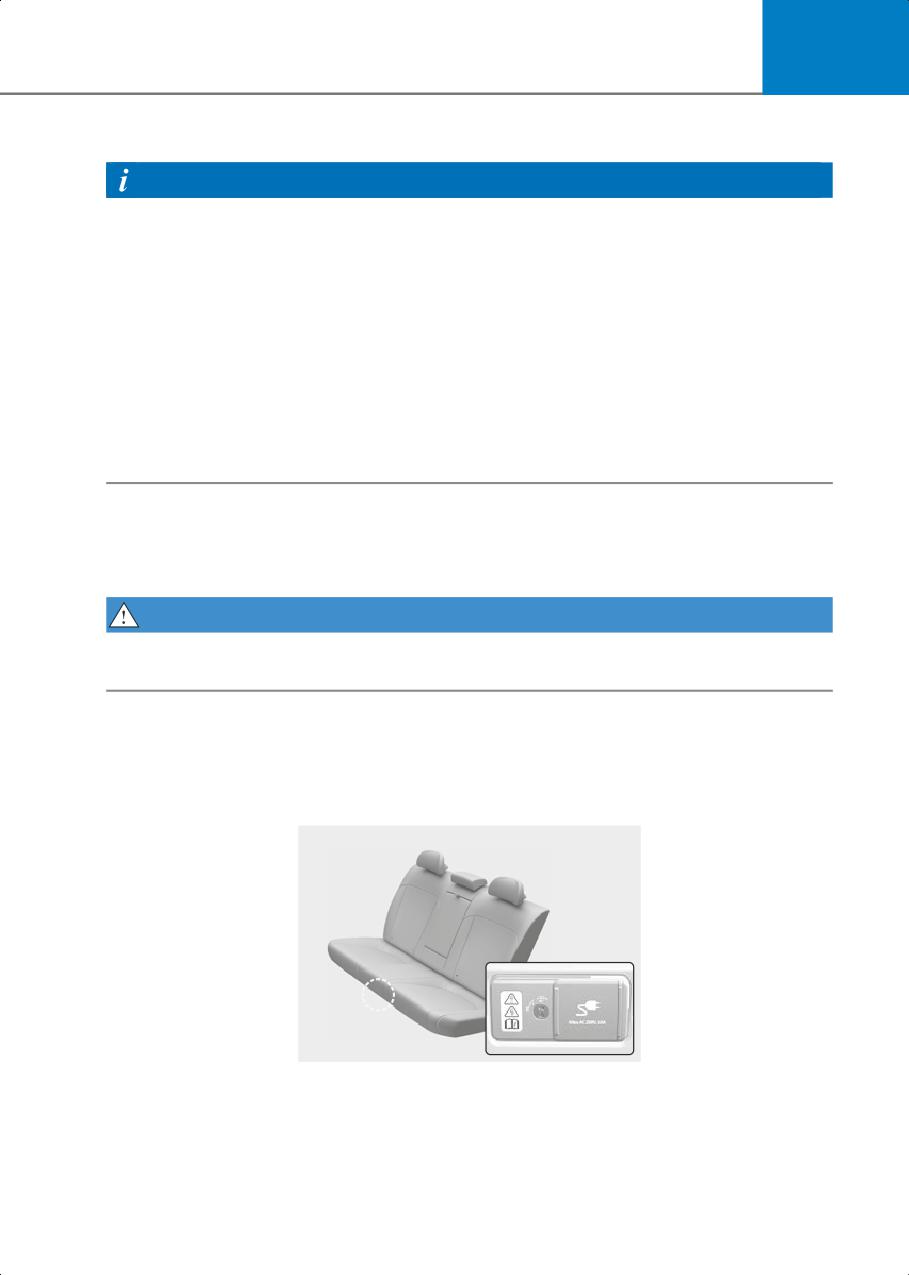
1
• The power is supplied and the indicator on the V2L connector is turned on.
Information
• When the V2L connector is connected to the charging inlet of the vehicle, all doors and
connectors will be automatically locked to prevent theft and separation. To disconnect
the V2L connector, unlock the door and pull the connector with the open switch
pressed.
• Before using the V2L function, deactivate the scheduled climate setting referring to the
“Setting Scheduled Charging and Climate”. The V2L function may be cut off depending
on the scheduled climate setting.
• To check and change the V2L setting, refer to the “Setting a Battery Discharging Limit
When Using Vehicle to Load (V2L)”.
• If an electric device that exceeds the maximum power capacity is connected, a
warning message appears on the instrument cluster and the power supply shuts off
immediately.
Using Electricity Inside the Vehicle
You can connect home appliances or electric devices to the power outlet inside the
vehicle.
WARNING
Do not use an electric heating appliances like electric kettle, toaster, or iron in the vehicle.
It may cause a fire or injury.
1. Press the Start/Stop button to the ON position or activate the utility mode.
• For more information about the utility mode, refer to the “Setting Utility Mode”
section in this chapter.
2. Use the smart key to unlock the power outlet cover.
B0002501
1-49
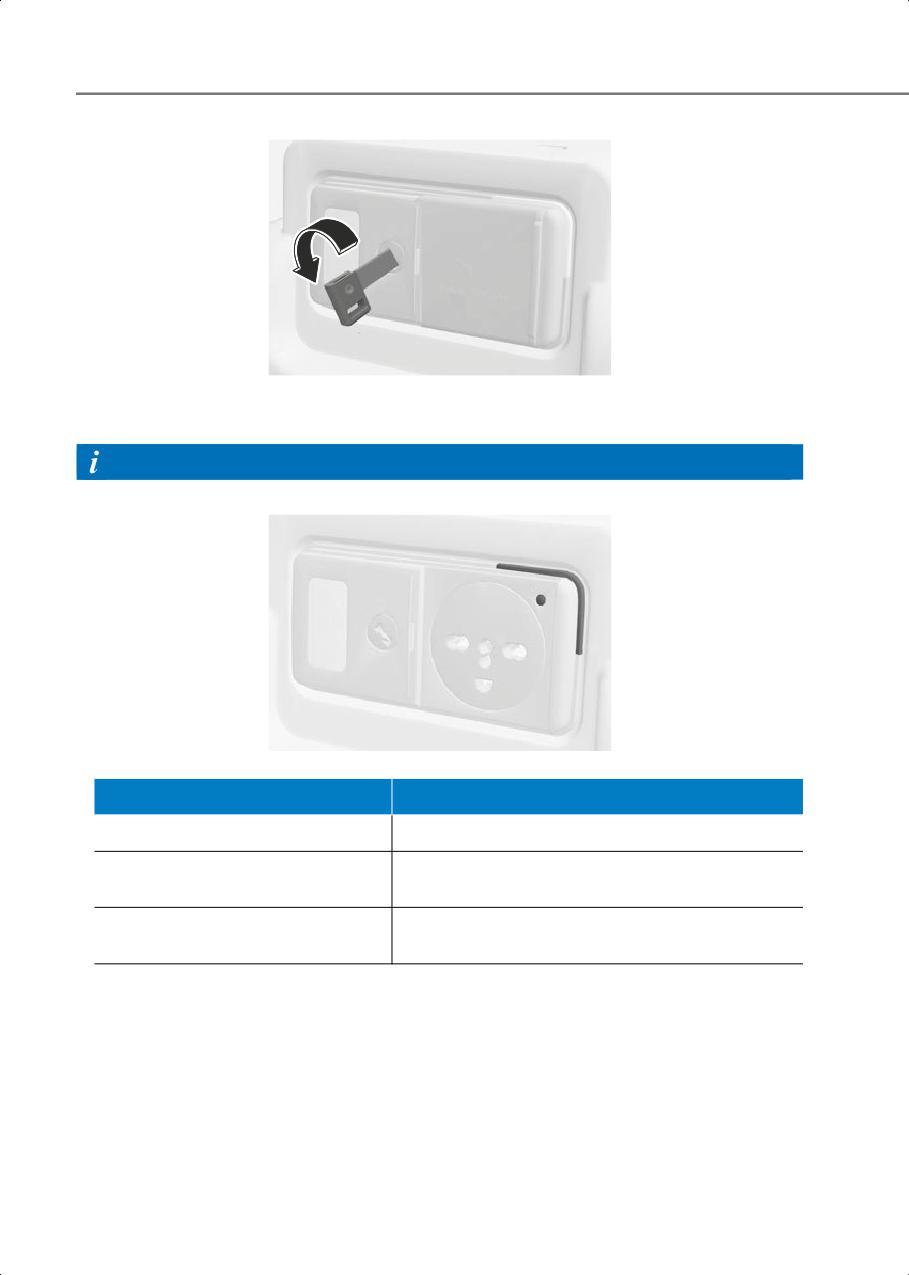
Introduction/Getting started with Your Electric Vehicle
B0002502
3. Open the power outlet cover by sliding it to the left, and connect the power plug of the
electric device to the power socket.
Information
• The indicator on the power outlet indicates the operation status.
B0002503
Indicator Status
Description
Blue
Standby
The power outlet is connected but no power is
Red
supplied.
The power outlet is connected, and the power is
Green
supplied normally.
• V2L discharging mode shuts off if the vehicle turns off while using indoor V2L when the
vehicle is ON.
• Opening the charging door or connecting the V2L connector to the charging inlet, the
V2L discharging mode shuts off.
• If you want to use the indoor and outdoor V2L simultaneously, first connect the V2L
connector to the charging inlet and then use the indoor V2L.
• When the high voltage battery charge level reaches the set discharging limit (%), the
operation stops, and a warning message appears on the instrument cluster. If you want
V2L operation, set the discharging limit (%) lower than the current battery charge.
1-50
1
- For more information about the discharging limit, refer to the “Setting a Battery
Discharging Limit When Using Vehicle to Load (V2L)” section in this chapter.
- For more information about warnings, refer to the “Checking the warning and
indicator lights” section in this chapter.
Solving V2L Problems
If a problem occurs while using the V2L function, the V2L stops and a related messages
appears on the instrument cluster.
Check the cause of the message and take an appropriate measure referring to the table
below.
Message
Cause
Measure
V2L finished. Defined
To use the V2L continuously,
charge level reached
make the discharging limit set
level lower than the present
The high voltage battery level
battery level. (For more
reaches the discharging limit
%FGJOFE DIBSHF
information, refer to the
MFWFM SFBDIFE
set level.
“Setting a Battery Discharging
Limit When Using Vehicle to
Load (V2L)”.)
B0002601
Energy consumption
too high. V2L
cancelled
Check the total power
An electrical appliance that
consumption of the electrical
exceeds the maximum power
appliance and replace it a
&OFSHZ
output the vehicle can supply is
DPOTVNQUJPO UPP
product within the V2L
IJHI
connected.
7 - DBODFMMFE
maximum power output.
B0002602
V2L conditions not
met
V2L is stopped for the following
reasons:
Make sure there are no
• V2L connector switch off
problems with the V2L
7 - DPOEJUJPOT
• V2L connector overheating
connector and the vehicle
OPU NFU
• Opening the charging door
indoor outlet.
while using the V2L indoor
outlet
B0002603
1-51
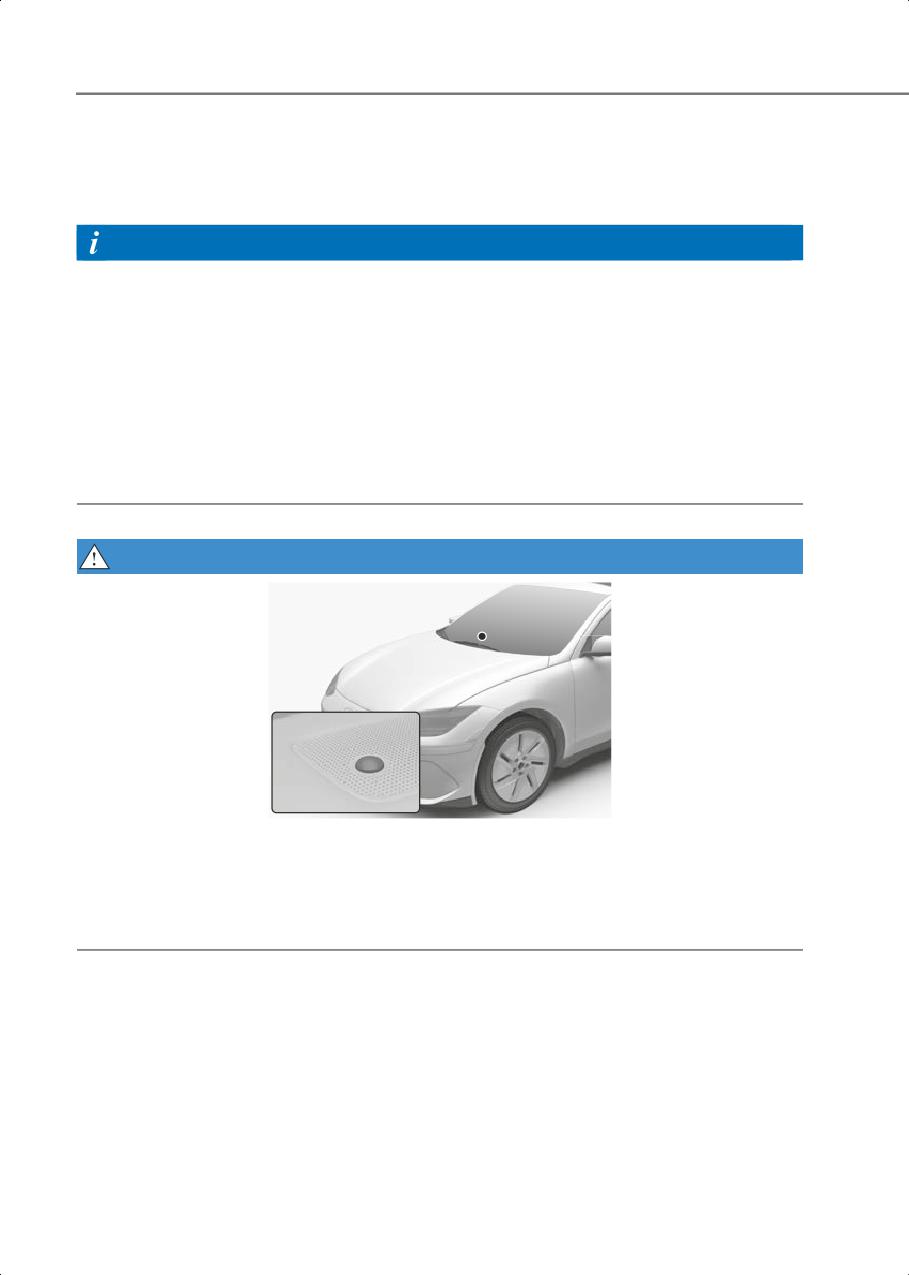
Introduction/Getting started with Your Electric Vehicle
Aux. Battery Saver+
The Aux. Battery Saver+ is a function that monitors the charging status of the 12 V battery.
If the 12 V battery level is low, the main high voltage battery charges the 12 V battery.
Information
• The Aux. Battery Saver+ activates maximum of 20 minutes. If the Aux. Battery Saver+
function activates more than 10 times consecutively, in the Automatic Mode the
function will stop activating, judging that there is a problem with the auxiliary battery.
In this case, drive the vehicle for some period of time. The function will start activating
if the auxiliary battery returns to normal.
• The Aux. Battery Saver+ function cannot prevent battery discharge if the auxiliary
battery is damaged, worn out, used as a power supply or unauthorized electronic
devices are used.
• If the Aux. Battery Saver+ function was activated the high voltage battery level may
have decreased.
WARNING
B5019903_1
When the function is activating the indicator light illuminates and high voltage electricity
flows into the vehicle. Do not touch the high voltage electric wire (orange), connector,
and all electric components and devices. This may cause electric shock and lead to
injuries. Also, do not modify your vehicle in any way. This may affect your vehicle
performance and lead to an accident.
1-52
1
Driving Your Electric Vehicle
Check how to use the devices inside the vehicle that you must know for driving, such as
starting, braking, and shifting the electric vehicle.
Starting and Stopping the Vehicle
Follow the instructions below to start or stop the vehicle.
CAUTION
• Always fasten the seat belt before starting the vehicle for safety.
• Check if the EBP is applied before starting the vehicle.
Starting the vehicle
1. Holding the smart key, sit in the driver’s seat.
2. Press the Start/Stop button while pressing the brake pedal.
• On the instrument cluster,
(ready indicator) is displayed.
Information
While the
(ready indicator) is displayed, press the brake pedal, shift to D (Drive) or R
(Reverse), and release the EBP and the brake pedal to start moving the vehicle forward
or backward. You can start driving by pressing the accelerator pedal slowly and
decelerate or stop by pressing the brake pedal.
Stopping the vehicle
1. Stop the vehicle completely by pressing the brake pedal.
2. Apply the EPB while pressing the brake pedal, and press the gear’s P button to shift to
P (Park).
3. Press the Start/Stop button.
• The
(ready indicator) on the instrument cluster turns off.
Information
There are other Start/Stop button positions besides the ON/OFF. Use it appropriately
paying attention to the discharging of the 12 V battery.
• ACC: The 12 V battery power is turned on, allowing some devices, such as infotainment
system and air conditioning system to operate. Press the Start/Stop button when it is
in the OFF position to turn on ACC.
• ON: The 12 V battery power is turned on, allowing to check the instrument cluster and
use all the electric devices inside the vehicle. Press the Start/Stop button when it is in
the ACC position to turn it ON.
1-53
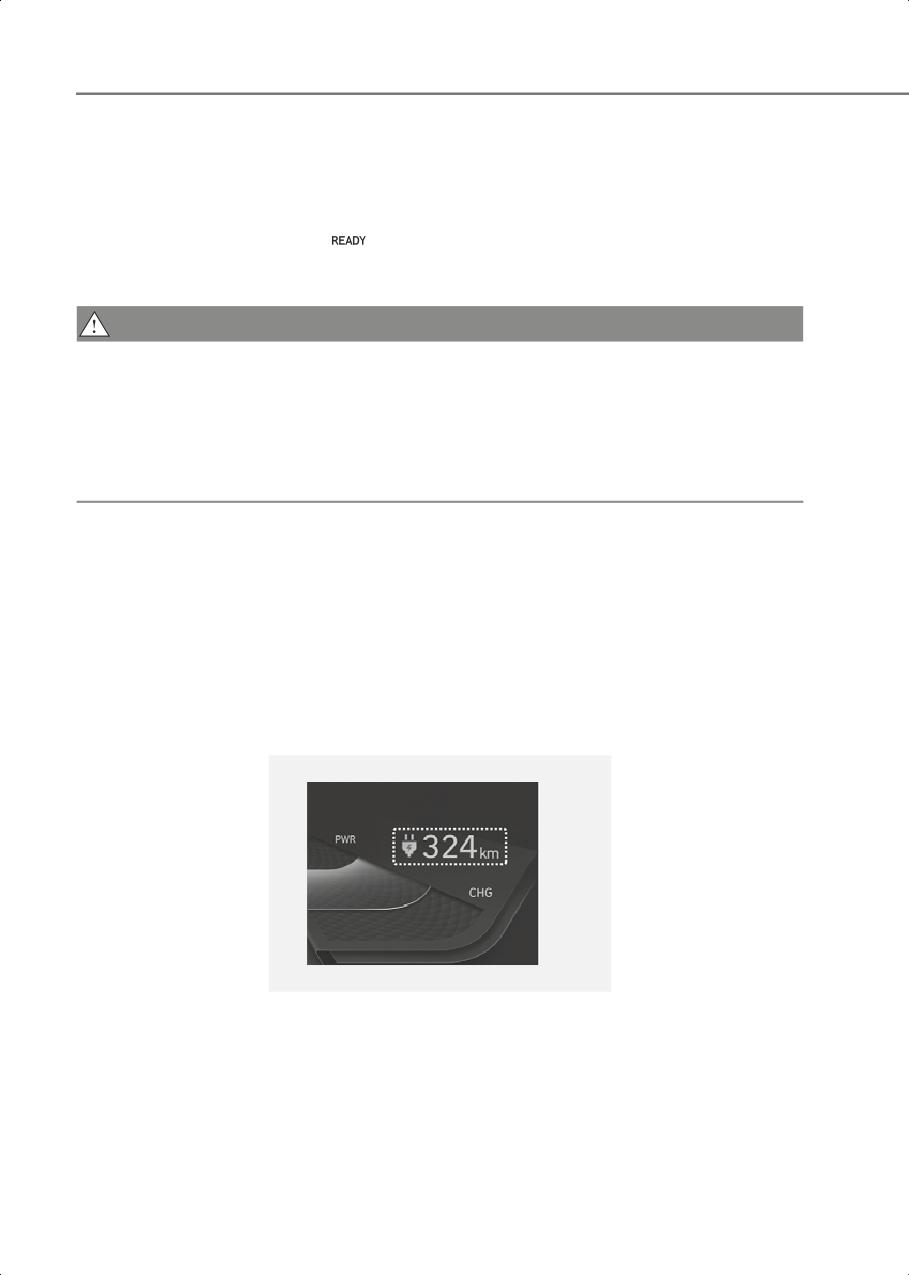
Introduction/Getting started with Your Electric Vehicle
Understanding virtual engine sound system
Electric vehicles do not use an internal combustion engine, so there is no engine noise
while driving. The Virtual Engine Sound System (VESS) generates engine sound to make
pedestrians aware of the approaching vehicle when driving.
• If the vehicle is in the ready (
) mode and the gear is not in P (Park), the VESS is
operated.
• When the gear is shifted to R (Reverse), an additional warning sound will be heard.
CAUTION
• Be aware that the vehicle does not make engine noise while driving.
• Pay attention to the surrounding environment and drive carefully.
• After parking or waiting for a traffic light, please check around for children, or other
obstacles before departure.
• When reversing, check directly behind you before driving. Pedestrians may not be able
to recognize vehicle sounds.
Checking Electric Vehicle Driving Information
During vehicle operation, the instrument cluster displays the main information, such as
distance to empty, real-time energy status, battery charge level, and warning messages,
via the user interface and indicators.
Factors affecting the distance to empty
The distance to empty refers to the distance that can be driven by the current charged
battery level and is displayed on the bottom of the instrument cluster while driving the
electric vehicle.
B0002901
The distance to empty vary depending on many factors such as driving habits, power
usage, driving conditions, and high voltage battery. The distance to empty may be
increased or decreased from the certified figures as it reflects all the factors
comprehensively. Check the distance to empty considering the following:
1-54
1
• The driving habits: The driving speed and tendency of accelerating and decelerating.
High speed driving or frequent accelerating and decelerating reduces the distance to
empty.
• The power usage: Additional power use, such as the air conditioner, heater, lights, etc.
As the power usage increases, the distance to empty reduces.
• The driving conditions: The weather, temperature, and terrain. If you drive in
snow/rain/strong wind or low temperature, the distance to empty will be reduced. The
distance to empty will also be reduced when driving uphill or on slippery or rough
roads.
• The high voltage battery energy: Proportional to the State of Charge (SOC), but may
vary depending on the battery temperature and the State of Health (SOH) of a battery.
Change in the distance to empty when 100 % charged
In case the distance to empty has been reduced due to learning of the driving habit or the
driving conditions, you can increase the distance to empty again by continuously driving
following the “Tips for enhancing the distance to empty”.
• Resetting the previously learned driving patterns at the service center may increase
the distance to empty displayed on the bottom of the instrument cluster, but it does
not increase the actual distance to empty. The distance to empty may not be accurate
until the learning proceeds.
• If the high voltage battery temperature is low in winter, the distance to empty reduces
but it is not a permanent change. The distance to empty will increase again once the
temperature rises.
• If you reduce the power usage, the distance to empty will increase.
• Natural degradation may occur with the high voltage battery depending on the
number of years the vehicle is used. This may reduce the distance to empty.
When setting a destination
When the destination is set, the distance to empty may change because the distance to
empty is recalculated using the information of the destination instead of the learned
electric energy economy history.
Information
The distance to empty may vary significantly based on traffic conditions or driving speed.
1-55
Introduction/Getting started with Your Electric Vehicle
Tips for enhancing the distance to empty
The distance to empty vary depending on the charge level of the high voltage battery,
weather, temperature, duration of the battery use, terrain, driving habits, etc.
You can increase the distance to empty by driving the vehicle following the instructions
below.
• The air resistance increases rapidly as the electric vehicle drives faster, so avoid
speeding to increase the distance to empty and the electric energy economy.
• Rapid acceleration consumes a lot of driving energy and rapid deceleration limits the
regenerative braking. Gradually depress and release the accelerator pedal when
accelerating or decelerating to maintain speed.
• If you operate the air conditioner or heater too much, the high voltage battery uses
excessive electricity. This may reduce the distance to empty. Therefore, set the cabin
temperature to 72 °F (22 °C) AUTO level 2. Various assessment tests have been used to
verify that this setting maintains optimal energy consumption rates. Especially in
winter, reducing heating and using heated seats instead can significantly increase the
distance to empty. Turn off the air conditioner or heater if you do not need them.
• When using the air conditioner or heater, the energy consumption is reduced if
recirculation mode is selected instead of fresh mode. Fresh mode requires a large
amount of energy consumption as the outside air has to be reheated or cooled.
• Close the windows while driving. Driving with the windows open increases air
resistance and the usage of the air conditioner or heater.
• When using the air conditioner or heater while driving alone, use the DRIVER ONLY
function.
• Always maintain specified tire pressures and use tires for electric vehicles.
• Do not use unnecessary electrical components while driving.
• Do not load unnecessary items in the vehicle.
• Do not mount parts that may increase air resistance.
When the distance to empty is insufficient
• When the High voltage battery level warning light is displayed, immediately charge the
vehicle at a nearby charging station.
• Drive energy efficiently following the “Tips for enhancing the distance to empty.”
• When the battery level is 0 %, do not try to drive. Move to a safe place and call for help.
1-56
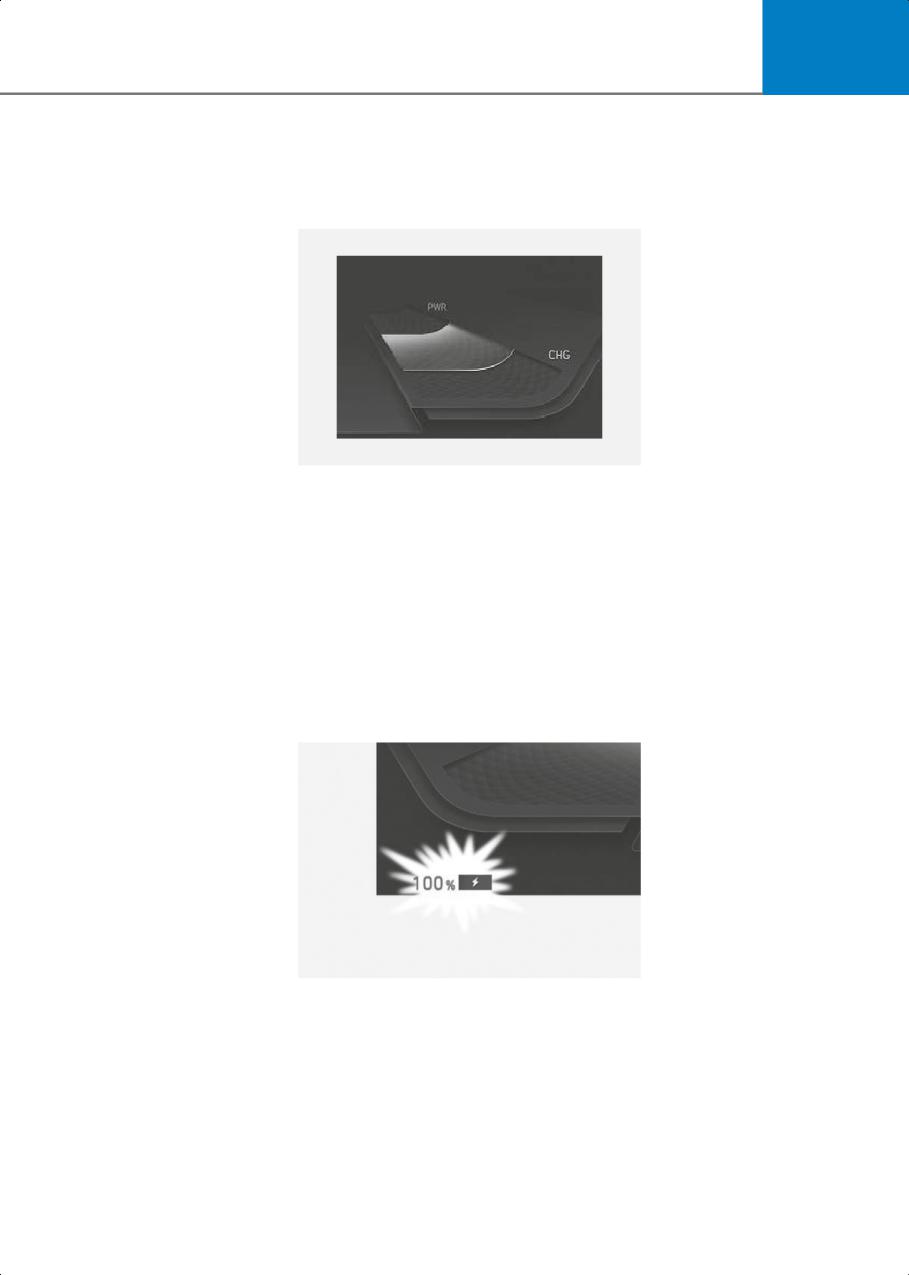
1
Checking the real time energy status (CHARGE/POWER gauge)
The CHARGE/POWER gauge displays the charging and discharging status of the electric
energy produced by the regenerative braking and the energy consumption of the electric
motor.
B0002902
• CHARGE: Shows the charging status of the electric motor when vehicle is decelerating
or driving on a downhill road (being charged by the regenerative brakes). The more
electric energy is charged, the lower the gauge level.
• POWER: Shows discharging status of the electric motor when vehicle is accelerating or
driving on an uphill road. The more electric energy is discharged (used), the higher the
gauge level.
Checking the State of Charge (SOC)
The SOC indicator is displayed at the bottom of the CHARGE/POWER gauge and shows
the charge level of the high voltage battery as a percentage. The lower the number, the
more the vehicle needs to be charged, and 100 % indicates a full charge.
B0002903
1-57
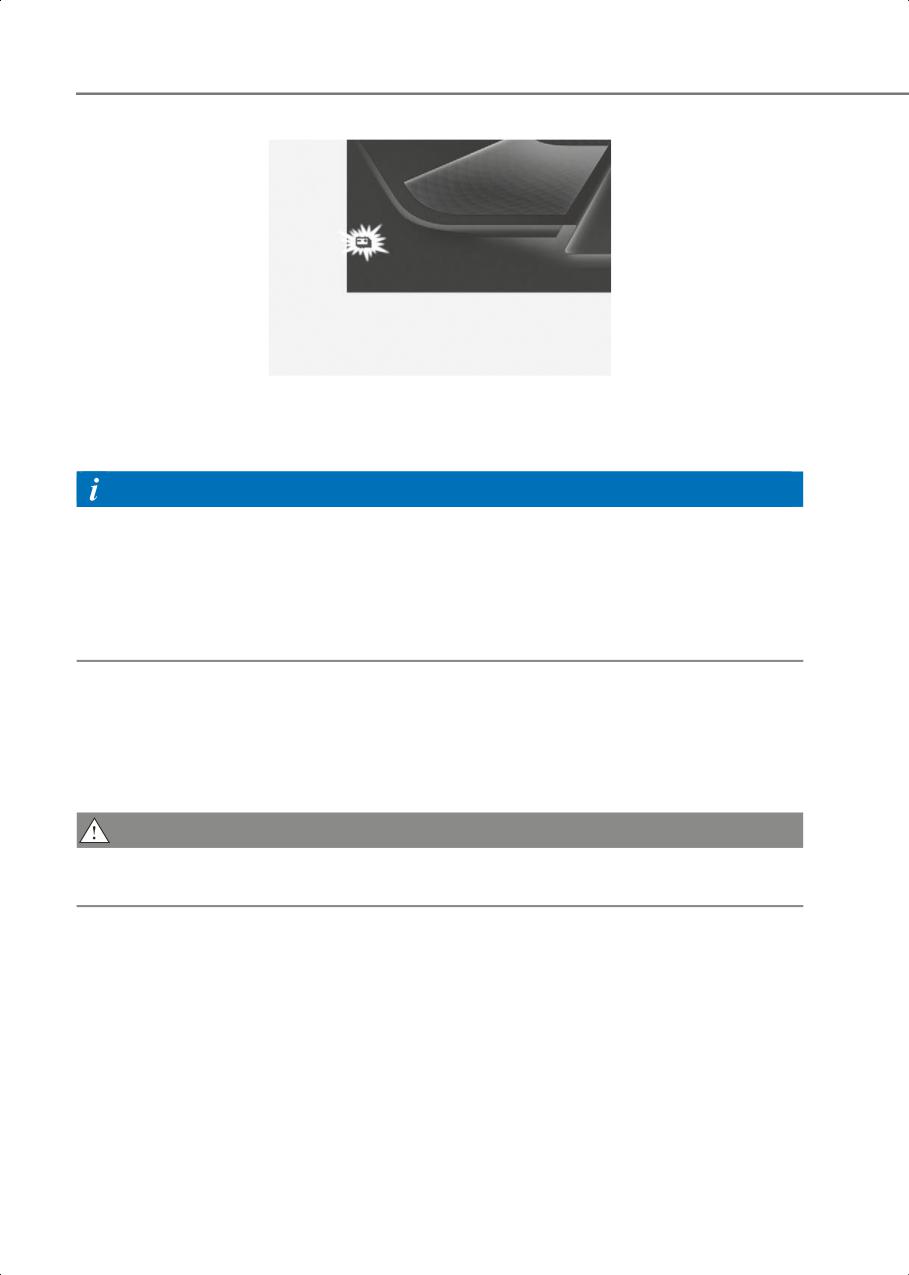
Introduction/Getting started with Your Electric Vehicle
B0002904
• When the remaining battery of the high voltage battery is lower than 10 %, the warning
light will be displayed.
• When the warning light is displayed, charge the vehicle.
Information
• To find a nearby charging station, refer to the “Searching for nearby charging stations”
in this chapter.
• Check if the SOC is enough before driving on highways.
• After the warning light is displayed, immediately charge the vehicle at a nearby
charging station. The vehicle may not operate properly depending on the driving
speed, weather, and other driving conditions.
Checking the warning and indicator lights
The warning and indicator lights are displayed in the middle of the instrument cluster
before or while driving, depending on the status of the electric vehicle. Understand the
meaning of the warning and indicator lights referring to the instructions below and drive
safely.
CAUTION
If the warning light illuminates while driving or does not go off, have the vehicle
inspected by an authorized HYUNDAI dealer.
1-58
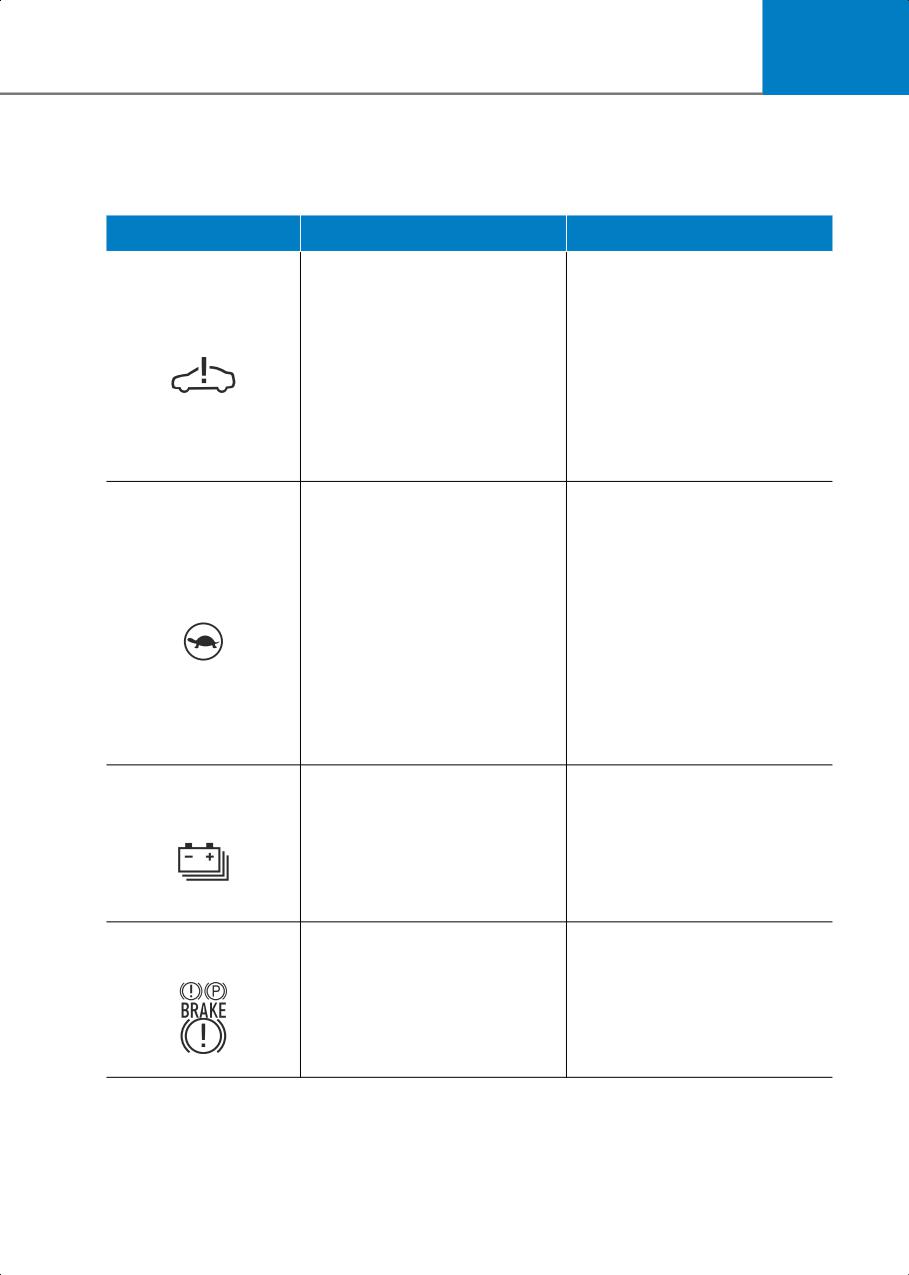
1
Checking the warning lights
Check the cause of the warning lights referring to the table below and take appropriate
measures.
Warning Light
Cause
Measure
In a normal condition, it
This warning light illuminates:
illuminates for about 3 seconds
when the Start/Stop button is in
• When there is a problem with
related parts of the electric
the ON position and then goes
Service warning light
vehicle control system, such
off.
as sensors, etc.
• When the warning light
• When an actuator, electric
illuminates while driving, or
compressor for air
does not go off after starting
conditioning, etc.
the vehicle, have your vehicle
malfunctions.
inspected by an authorized
HYUNDAI dealer.
If it illuminates alone, it is not
This warning light illuminates:
failure.
• When the high voltage
• If both Power down indicator
battery level is too low or
light and Service warning
voltage is decreasing.
light illuminate at the same
Power down indicator
(Output limit occurs when the
time, have the vehicle
light
charge level is insufficient.)
inspected by an authorized
• When the temperature of the
HYUNDAI dealer.
high voltage battery is too
• When the indicator is
high or too low.
illuminating, immediately
• When the driving system
charge the vehicle. The
temperature is overheated
driving speed may be limited
and requires protection.
and the vehicle may not
properly drive uphill.
Immediately charge the
vehicle. The vehicle can drive
High voltage battery
This warning light illuminates
an additional 18-31 mi. (30-50
level warning light
when the high voltage battery
km).
level is low.
• The actual distance to empty
depends on the driving
conditions.
Drive safely and have your
Regenerative brake
This warning light illuminates
vehicle inspected by an
warning light
when the regenerative brake
authorized HYUNDAI dealer.
does not operate and the brake
does not perform well due to
• The operation of the brake
pedal may feel deeper than
the malfunction of the brake
normal or the braking
system.
distance may increase.
1-59
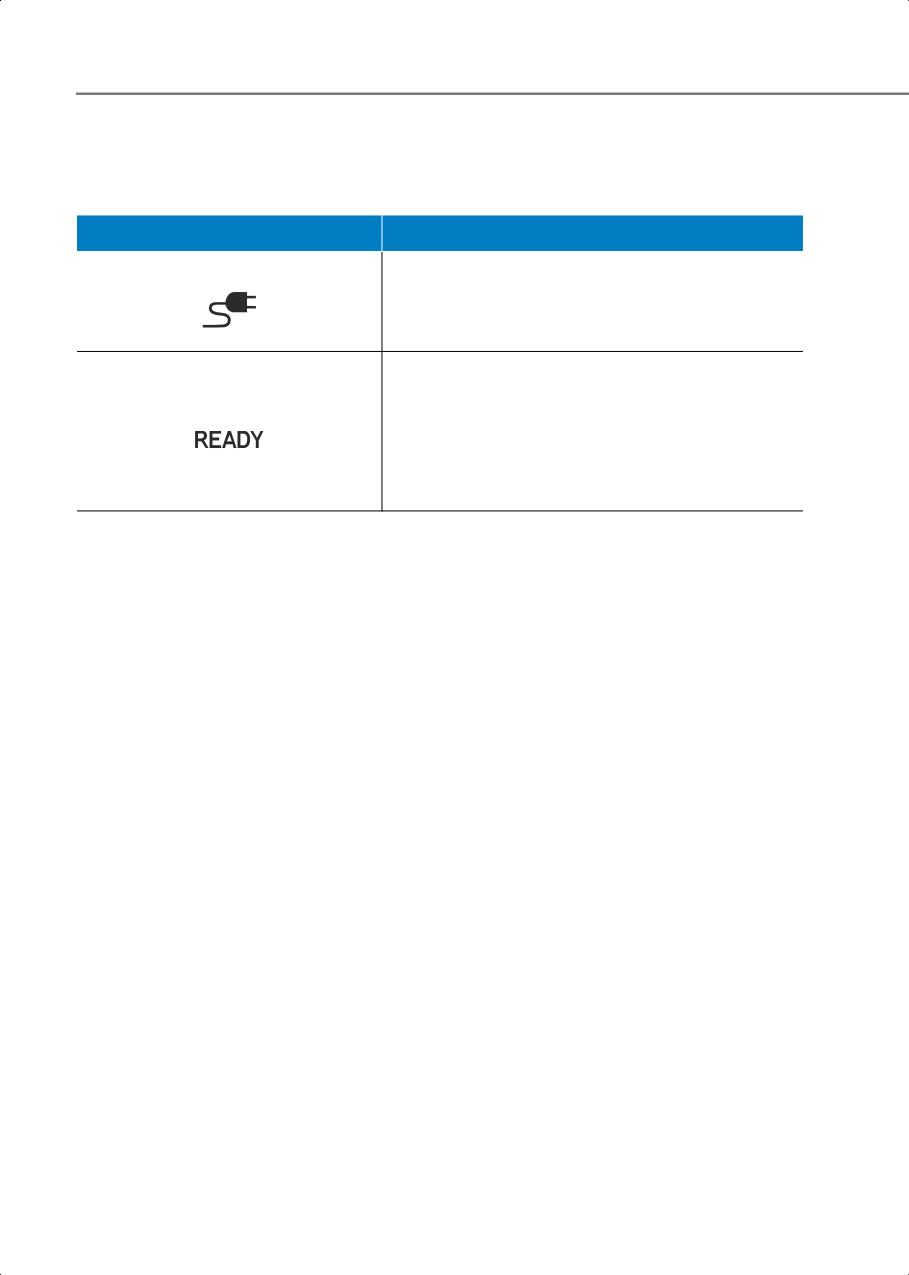
Introduction/Getting started with Your Electric Vehicle
Checking the indicator lights
Check the meaning of the indicator lights referring to the table below and take
appropriate measures if necessary.
Indicator Light
Meaning
Indicates the charging connector is connected to
Charging connector indicator light the high voltage battery.
• When the charging connector is connected, it
turns green.
Illuminates when the electric vehicle is ready to be
driven, and indicates that the vehicle is operable.
• When the vehicle malfunctions, the indicator goes
Ready indicator light
off or blinks.
• If the indicator is turned off or blinks, have the
vehicle inspected and repaired by an authorized
HYUNDAI dealer.
1-60
1
Checking warning messages
Check the meaning of the warning messages referring to the table below and take
appropriate measures.
WARNING
• Do not drive with a warning message displayed.
• If a warning message does not go off after taking measures, have the vehicle
immediately inspected and repaired by an authorized HYUNDAI dealer.
Warning Message
Cause
Measure
Low EV battery
The high voltage battery level
-PX CBUUFSZ
reaches below 20 %.
Charge the vehicle
• The warning light on the
immediately.
instrument cluster turns on
simultaneously.
TM_WarningLCDMessageInfo
Charge immediately.
Power limited
The high voltage battery level
reaches below 10 %.
• The warning light on the
$IBSHF
instrument cluster turns on
JNNFEJBUFMZ
Charge the battery
1PXFS MJNJUFE
simultaneously.
immediately.
• The vehicle’s power may be
reduced to minimize the
energy consumption of the
high voltage battery.
TM_WarningLCDMessageInfo_2
Check electric vehicle
system
• Do not drive when the warning
$IFDL FMFDUSJD
message is displayed.
WFIJDMF TZTUFN
There is a problem with the
• Have the vehicle inspected by
electric vehicle control system.
an authorized HYUNDAI
dealer.
TM_WarningLCDMessageInfo_3
1-61
Introduction/Getting started with Your Electric Vehicle
Warning Message
Cause
Measure
If it illuminates alone, it did not
fail.
This warning message is
•
Charge the vehicle is the
displayed when the power of
charge level is low.
the vehicle is limited to ensure
Power limited
•
If both Power down indicator
the safety of high-powered
light and Service warning
components for the reasons
light illuminate at the same
below:
time, have the vehicle
1PXFS MJNJUFE
• The high voltage battery level
inspected by an authorized
is too low or voltage is
HYUNDAI dealer.
decreasing.
•
Do not accelerate or start the
• The temperature of the high
vehicle suddenly when the
voltage battery is too high or
warning message is
too low.
displayed.
TM_WarningLCDMessageInfo_4
• When the driving system is
•
Be careful when the Power
overheated and requires
down indicator light is
protection.
displayed. The vehicle may
not properly drive uphill and
roll back on a slope.
Low EV battery
If you start or turn off the
temperature. Power
vehicle when the outside
limited
•
Charging the battery before
temperature is low, both
driving helps increase power.
warning messages appear to
•
If these warning messages are
protect electric vehicle system.
still displayed even after the
• If the high voltage battery
ambient temperature has
-PX CBUUFSZ
UFNQFSBUVSF
charge level is low and parked
1PXFS MJNJUFE
increased, have the vehicle
outside for a long time,
inspected and repaired by an
vehicle power could be
authorized HYUNDAI dealer.
limited due to the low battery
temperature.
TM_WarningLCDMessageInfo_5
EV Battery
•
Stop the vehicle in a safe place
Overheated! Stop
and turn off the Start/Stop
vehicle
button and wait until the
battery temperature
decreases.
#BUUFSZ
The high voltage battery
PWFSIFBUFE
•
If these warning messages are
4UPQ TBGFMZ
temperature is too high.
still displayed even after
turning off the engine and
waiting for a sufficient time,
immediately have the vehicle
inspected by an authorized
HYUNDAI dealer.
TM_WarningLCDMessageInfo_6
1-62
1
Warning Message
Cause
Measure
Stop vehicle and
check power supply
Immediately stop the vehicle in
4UPQ TBGFMZ BOE
a safe place. Have the vehicle
DIFDL QPXFS
A failure occurs in the power
TVQQMZ
towed to an authorized
supply system.
HYUNDAI dealer for inspection
and maintenance.
TM_WarningLCDMessageInfo_7
Unplug vehicle to
start
6OQMVH WFIJDMF
You have started the vehicle
UP TUBSU
Unplug the charging cable and
with the charging connector
start the vehicle.
plugged in.
TM_WarningLCDMessageInfo_8
Charging Door Open
$IBSHJOH EPPS
PQFO
Check if the charging door is
You have started the vehicle
completely closed after
with the charging door opened.
charging the vehicle.
TM_WarningLCDMessageInfo_9
• Check whether there is any
Charging Stopped.
These warning messages are
problem with the external AC
Check the AC charger
displayed when charging is
or DC charger and charging
cable.
stopped for the reasons below:
• Charge the vehicle with an AC
$IBSHJOH TUPQQFE
• There is a problem with the
1MFBTF DIFDL
charger that has been
UIF "$ DIBSHFS
external AC charger or DC
approved for proper operation
charger.
or a genuine HYUNDAI
• The external AC charger
portable charger.
stopped the charging.
• If the same problem occurs,
• The charging cable is
have the vehicle inspected by
TM_WarningLCDMessageInfo_1
damaged.
an authorized HYUNDAI
0
dealer.
1-63
Introduction/Getting started with Your Electric Vehicle
Warning Message
Cause
Measure
• Separate the charging
connector from the vehicle
Charging Stopped.
and reconnect it.
Check the cable
• Check whether there is any
These warning messages are
connection
problem, such as external
displayed when charging is
damage, foreign substances,
stopped for the reasons below:
etc., with the charging
connector and charging inlet.
• The charging connector is not
$IBSHJOH
correctly connected to the
• Charge the vehicle with a
JOUFSSVQUFE
1MFBTF DIFDL UIF
charging inlet.
charger that has been
DBCMF DPOOFDUJPO
approved for proper operation
• The unlock button on the
or a genuine HYUNDAI
charging connector is
portable charger.
pressed.
• If the same problem occurs,
TM_WarningLCDMessageInfo_1
1
have the vehicle inspected by
an authorized HYUNDAI
dealer.
1-64

1
Countermeasures For Accidents Or Fire
When an accident occurs while driving the electric vehicle, turn on the hazard warning
flasher, move the vehicle to a safe place, and do not let other people approach the site.
WARNING
When an accident occurs, and the high voltage battery is damaged, harmful gas and
electrolytes may leak.
• Be careful not to touch the leaked liquid.
• When you suspect leakage of inflammable gas and other harmful gases, open the
windows and immediately evacuate to a safe location.
• If any leaked fluid comes in contact with your eyes or skin, immediately clean the
affected area thoroughly with tap water or saline solution and have doctors inspect it
as soon as possible.
If the Electric Vehicle Catches Fire
If a fire occurs, evacuate to a safe place and do not let other people approach the site.
•
• Contact the fire department, report an electric vehicle fire, and then follow its
instructions.
CAUTION
• If a fire occurs, evacuate to a safe place and wait until the firefighters arrive.
• If the lower part of the vehicle where the high voltage battery is located catches fire,
large amount of water must be supplied continuously for a long time to completely
extinguish the fire. It is hard to extinguish the fire without sufficient water and
appropriate fire extinguishers. If you approach the vehicle carelessly, it may cause
accidents, such as electric shock, and result in serious injury.
If the Electric Vehicle Is Submerged
If the electric vehicle is submerged while driving, follow the instructions below:
• Immediately turn off the vehicle and evacuate to a safe place with your key.
• Contact the emergency rescue service such as a fire department, or an authorized
HYUNDAI dealer.
WARNING
Never touch the submerged electric vehicle. This may lead to an accident such as an
electric shock or fire.
1-65
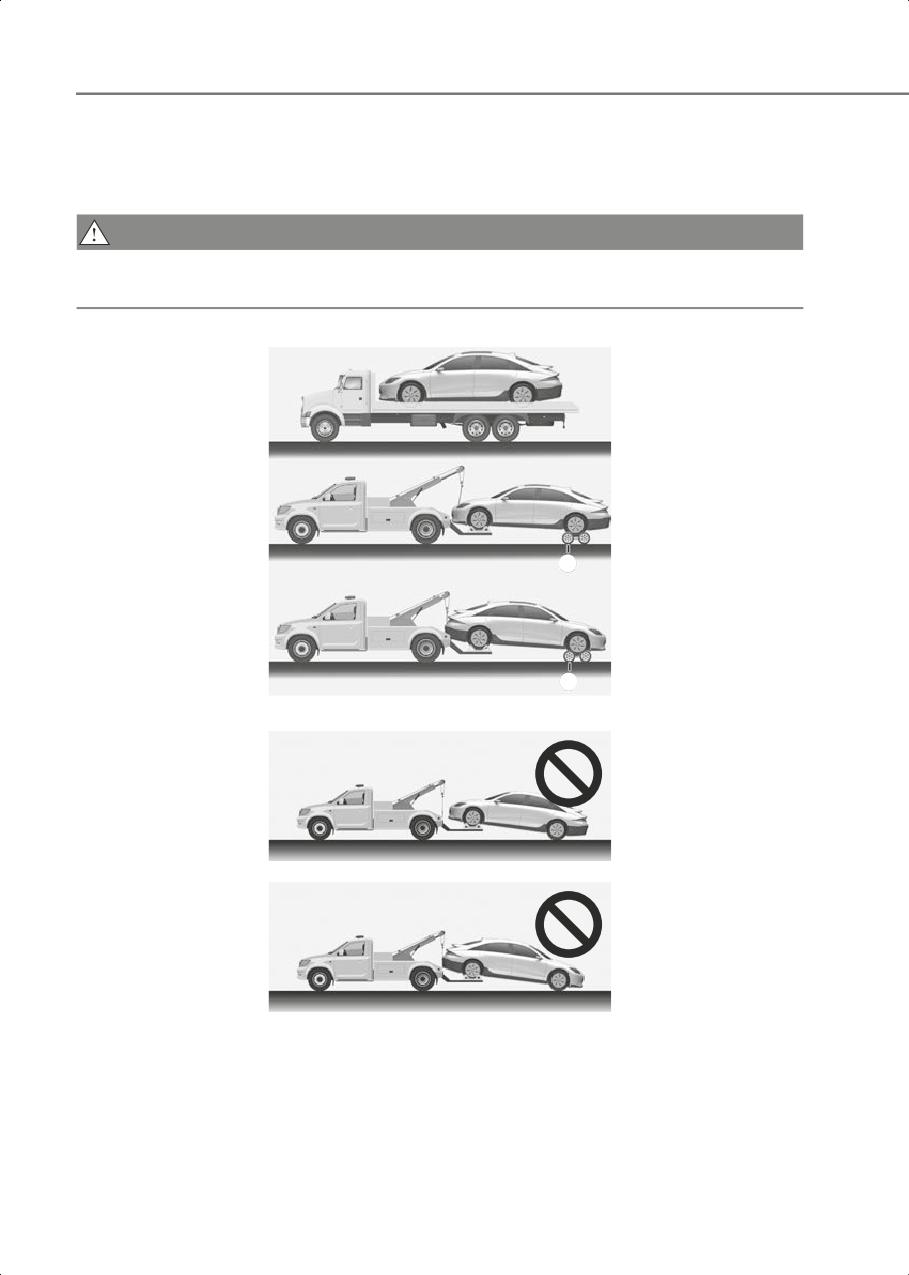
Introduction/Getting started with Your Electric Vehicle
If the Electric Vehicle Needs Towing
If towing is required, lift all wheels to tow. Towing with the wheels on the ground may
damage the vehicle’s motor components.
CAUTION
When a vehicle fire occurs due to the battery, there is a risk of a second fire. Contact the
fire department when towing the vehicle.
A
A
B0003401
[A] Dollies
B0003402
B0003403
1-66
1
Other Precautions for Electric Vehicle Accidents
CAUTION
• Be extremely cautious for electricity safety. An electric shock accident may occur due
to a short circuit in high voltage power.
• When you paint or apply heat treatment to the vehicle as a result of an accident, the
performance of the high voltage battery can be reduced. If heat treatment is required,
contact an authorized HYUNDAI dealer.
• Use or install only genuine parts. Third-party parts or modified parts may damage the
electric power system
1-67
2. Vehicle Information,
Consumer Information, and
Reporting Safety Defects
Exterior Overview (Front View)
2-2
Exterior Overview (Rear View)
2-3
Interior Overview
2-4
2
Center Console Overview
2-5
Steering Wheel Control Overview
2-7
Motor Compartment Overview
2-8
Dimensions
2-9
Electric Vehicle Specifications
2-9
Bulb Wattage
2-10
Tires And Wheels
2-11
Air Conditioning System
2-12
Vehicle Weight And Luggage Volume
2-12
Available Front Trunk Weight
2-12
Recommended Lubricants And Capacities
2-13
Vehicle Identification Number (VIN)
2-14
Vehicle Certification Label
2-14
Tire Specification And Pressure Label
2-14
Motor Number
2-15
Air Conditioner Compressor Label
2-15
Refrigerant Label
2-15
Consumer Information
2-16
Reporting Safety Defects
2-17
Open Source Software Notice
2-18
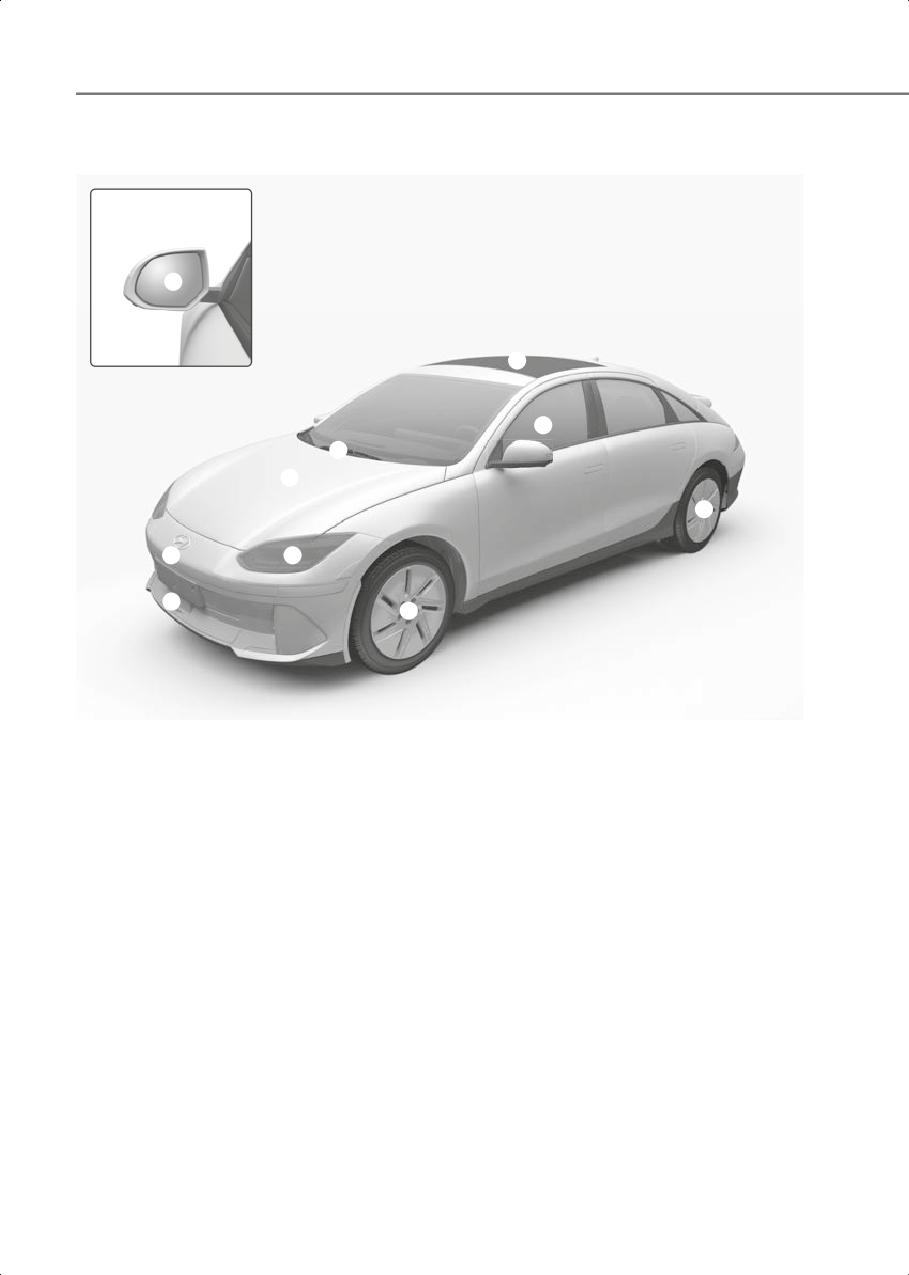
Vehicle Information, Consumer Information, and Reporting Safety Defects
Exterior Overview (Front View)
4
5
7
6
1
3
8
2
9
3
A1000201
The actual shape may differ from the illustration.
(1) Hood
5-57
(2) Headlight
9-47
(3) Tires and wheels
9-23
(4) Side view mirror
5-47
(5) Wide sunroof
5-54
(6) Front windshield wiper blades
9-17
(7) Window
5-50
(8) Wide-front view camera
7-132
(9) Front radar
7-7
2-2
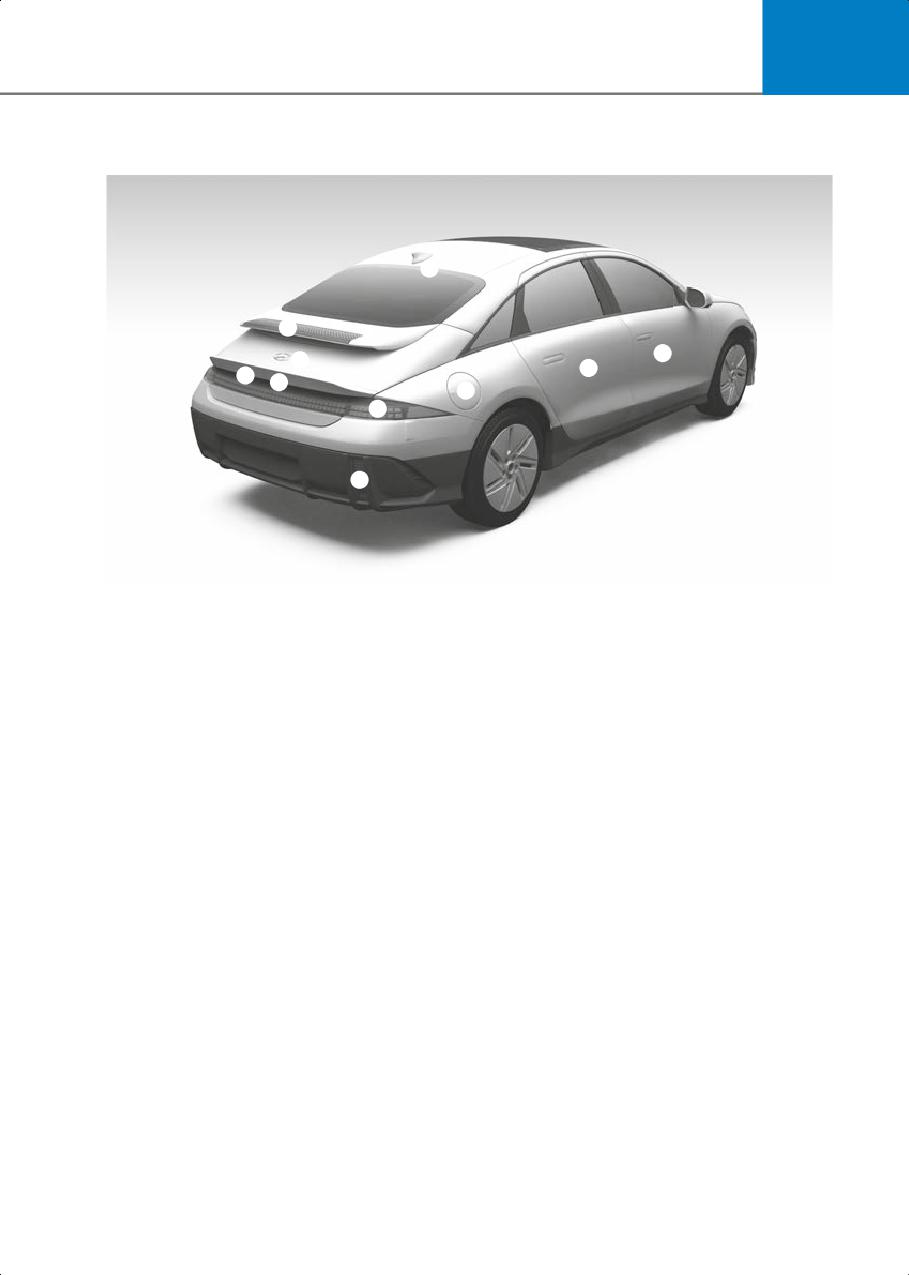
2
Exterior Overview (Rear View)
7
6
1
4
1
8
5
2
3
9
A1000301
The actual shape may differ from the illustration.
(1) Door
5-22
(2) Electric charging door
5-66
(3) Rear combination light
9-48
(4) Trunk
5-59
(5) Trunk open/close button
5-61
(6) High mounted stop light
9-48
(7) Antenna
5-114
(8) Wide-rear view camera
7-105
(9) Reverse light
9-48
2-3
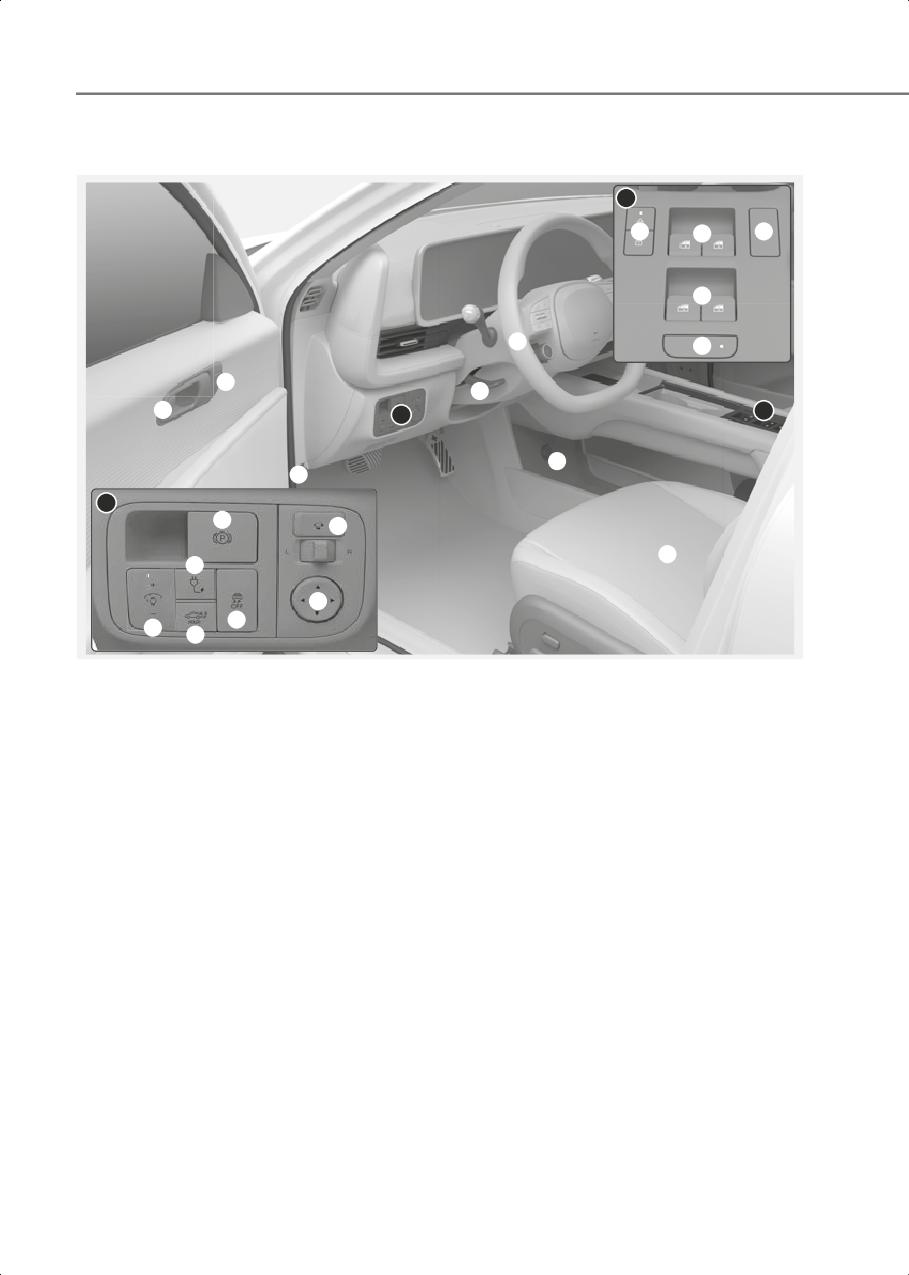
Vehicle Information, Consumer Information, and Reporting Safety Defects
Interior Overview
B
15
16
18
16
11
17
2
12
1
A
B
13
14
A
4
9
3
6
10
8
5
7
A1000501
The actual shape may differ from the illustration.
(1) Inside door handle
5-27
(2) Integrated memory system
5-32
(3) Seat
3-3
(4) EPB (Electronic Parking Brake) switch
6-24
(5) Instrument panel illumination
4-3
(6) Charging door open/close button
5-66
(7) Power trunk open/close button
5-60
(8) ESC (Electronic Stability Control) OFF button
6-32
(9) Side view mirror folding button
5-47
(10)Side view mirror control switch
5-47
(11) Steering wheel
5-35
(12)Steering wheel tilt/telescopic lever
5-35
(13)Power outlet
5-108
(14)Hood release lever
5-57
(15)Central door lock switch
5-27
(16)Power window switches
5-50
(17)Power window lock button
5-51
(18)AUTO Hold button
6-28
2-4
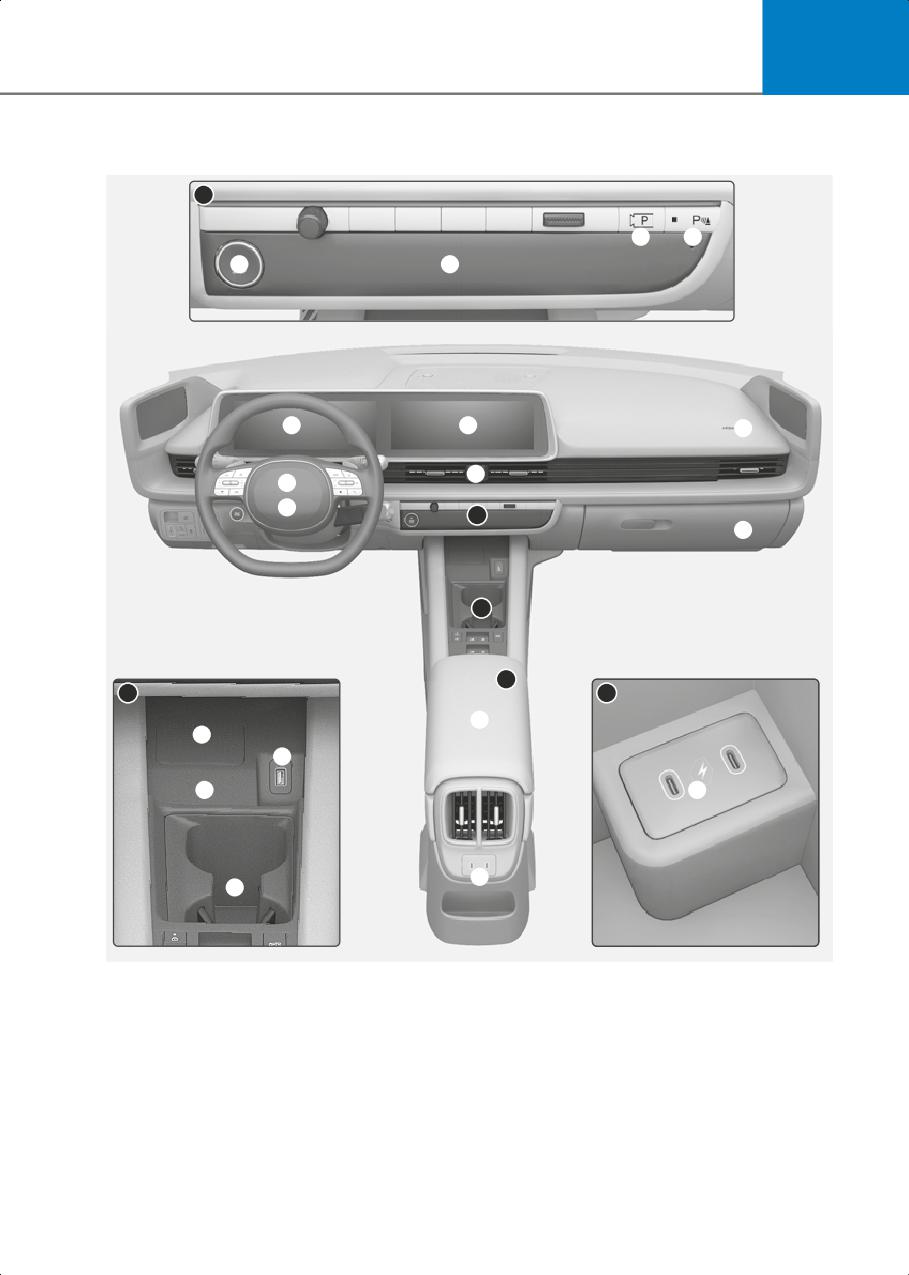
2
Center Console Overview
A
8
9
6
7
1
4
10
5
2
3
A
11
B
C
B
C
16
12
14
13
17
18
15
A1000601
The actual shape may differ from the illustration.
(1) Instrument cluster
4-2
(2) Horn
5-36
(3) Driver’s front airbag
3-40
(4) Infotainment system
5-113
(5) Hazard warning flasher button
8-2
(6) Start/Stop button
6-4
(7) Automatic climate control system
5-85
2-5
Vehicle Information, Consumer Information, and Reporting Safety Defects
(8) Parking/View button
7-106
(9) Parking Safety button
7-123
(10)Passenger’s front airbag
3-40
(11) Glove box
5-106
(12)Wireless charging system pad
5-110
(13)Wireless charging system
5-110
(14)USB port
5-113
(15)Cup holder
5-107
(16)Center console
5-106
(17)USB charger
5-109
(18)Rear seat USB charger
5-109
2-6
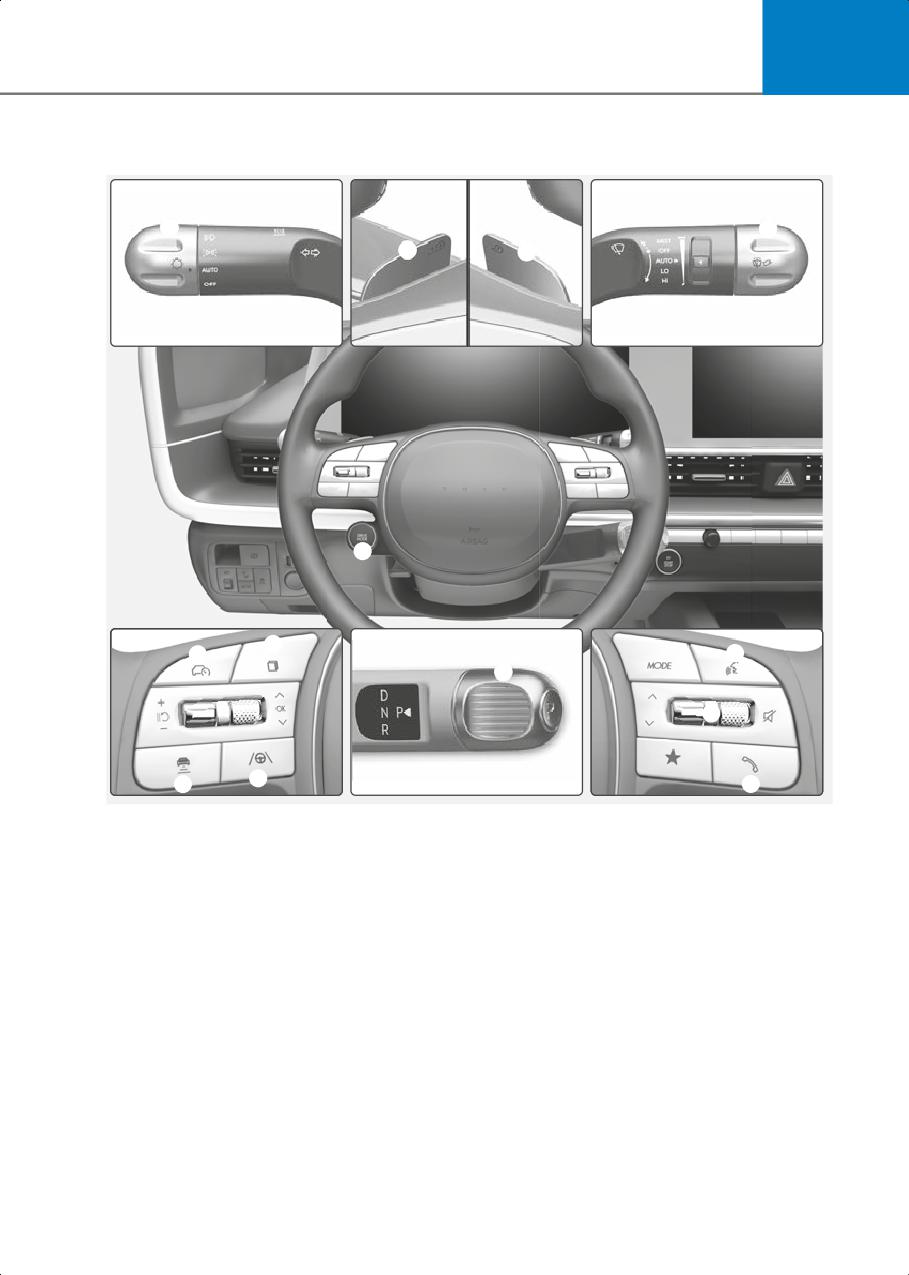
2
Steering Wheel Control Overview
1
2
4
4
12
8
10
5
3
6
9
11
7
A1000701
The actual shape may differ from the illustration.
(1) Lighting control lever
5-72
(2) Wiper and washer control lever
5-82
(3) Rotary shifter(Rotary gearshift dial)
6-8
(4) Paddle shifter
6-14
(5) Voice recognition button
5-115
(6) Steering wheel audio controls
5-114
(7) Bluetooth® wireless technology hands-free button
5-116
(8) Cluster display control
4-24
(9) Lane Driving Assist button
7-31
(10)Driving Assist button
7-71
(11) Vehicle Distance button
7-71
(12)Drive mode button
6-42
2-7
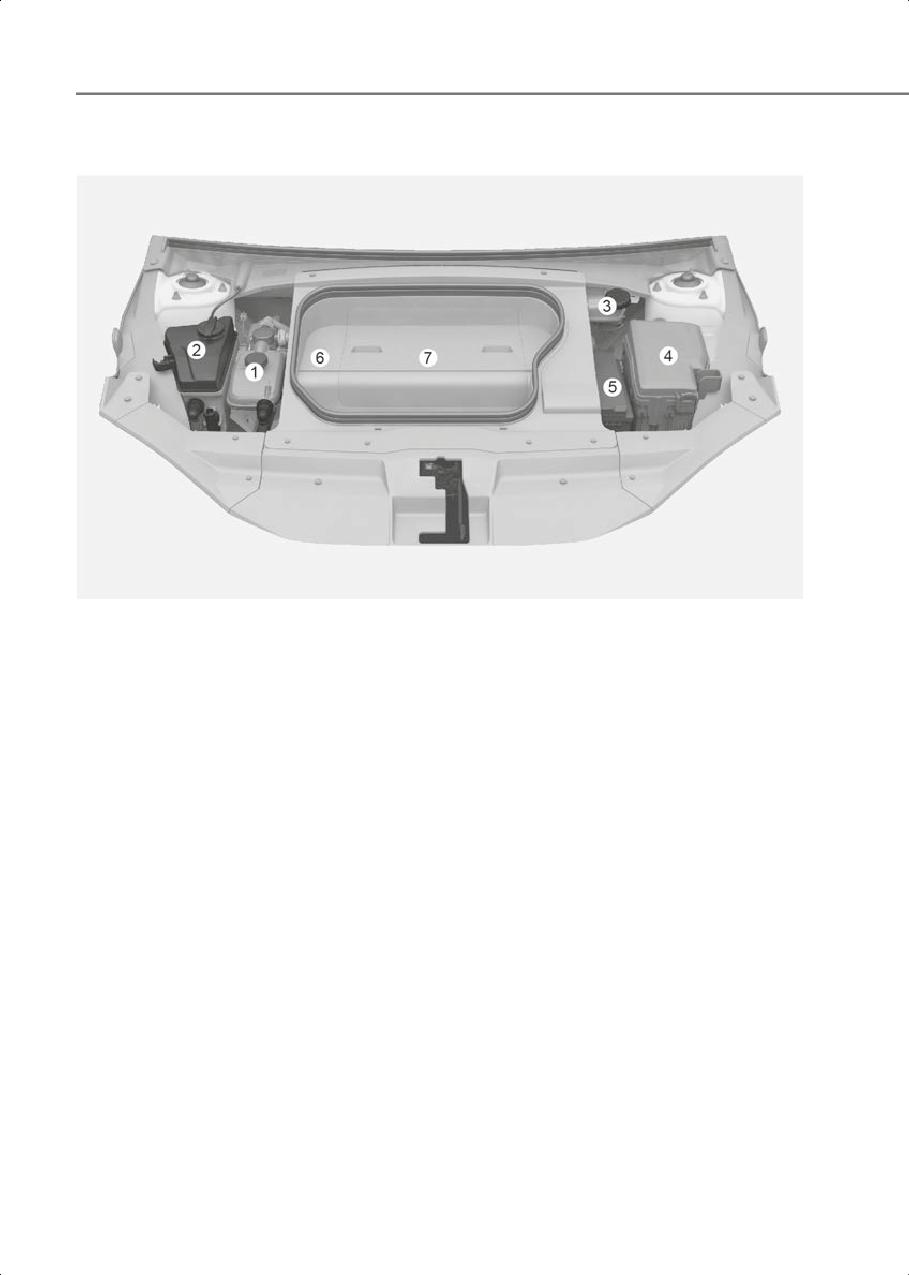
Vehicle Information, Consumer Information, and Reporting Safety Defects
Motor Compartment Overview
A1000901
The actual motor compartment in the vehicle may differ from the illustration.
(1) Coolant reservoir
9-13
(2) Windshield washer fluid reservoir
9-16
(3) Brake fluid reservoir
9-14
(4) Fuse box
9-36
(5) Battery (12 V)
9-21
(6) Front trunk
5-58
(7) Cabin air filter
9-16
2-8
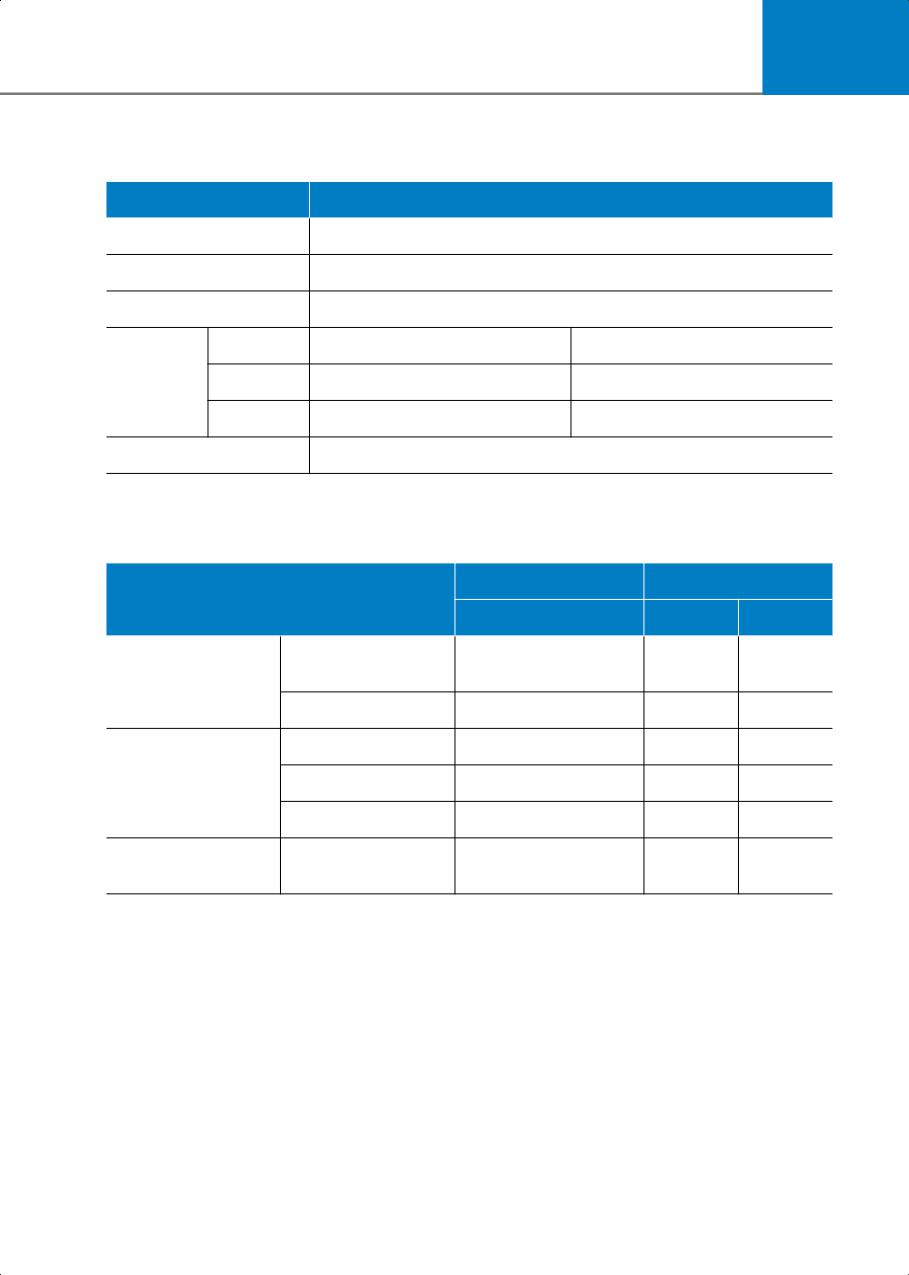
2
Dimensions
Items
in. (mm)
Overall length
191.14 (4,855)
Overall width
74.02 (1,880)
Overall height
58.86 (1,495)
Tire size
Front
Rear
Tread
18 in.
64.37 (1,635)
64.72 (1,644)
20 in.
64.17 (1,630)
64.53 (1,639)
Wheelbase
116.14 (2,950)
Electric Vehicle Specifications
Standard type
Extended type
Items
2WD
2WD
AWD
73.9+165.
Max. output (kW)
111.4
168.1
4
Motor
Max. torque (Nm)
350
350
255 + 350
Capacity (kWh)
53
77.4
77.4
Battery
Power output (kW)
173
277
277
(Lithium-ion)
Voltage (V)
480
697
697
Charger (On-Board
Max. output (kW)
10.9
10.9
10.9
Battery Chargers)
2-9

Vehicle Information, Consumer Information, and Reporting Safety Defects
Bulb Wattage
Light Bulb
Bulb Type
Wattage
Low
LED
LED
Headlight
High
LED
LED
Turn signal light
LED
LED
Parking light
LED
LED
Front
Daytime Running light (DRL)
LED
LED
Side marker
LED
LED
Front trunk light
LED
LED
Side repeater light
LED
LED
Stop light
LED
LED
Tail light
LED
LED
Turn signal light
LED
LED
Rear
Reverse light
LED
LED
Side marker
LED
LED
License plate light
LED
LED
High mounted stop light
LED
LED
Front seat map and room lamp
LED
LED
Rear seat room lamp
LED
LED
Vanity mirror lamp
LED
LED
Interior
Glove box lamp
LED
LED
Door mood lamp
LED
LED
Luggage compartment lamp
LED
LED
2-10
2
Tires And Wheels
Inflation Pressure psi (kPa)
Wheel Lug
Wheel
Battery
Maximum
Nut Torque
Items
Tire Size
Normal Load
Size
Type
Load
lbf-ft (kgf-m,
N-m)
Front
Rear
Front
Rear
2WD
38
38
38
38
225/55R18
7.5J X 18
Standard
(260)
(260)
(260)
(260)
2WD
38
38
38
38
225/55R18
7.5J X 18
Extended
(260)
(260)
(260)
(260)
Full
AWD
36
36
36
36
79-94 (11-13,
Size
225/55R18
7.5J X 18
Extended
(250)
(250)
(250)
(250)
108-127)
Tire
2WD
36
37
36
37
245/40R20
8.5J X 20
Extended
(250)
(255)
(250)
(255)
AWD
36
37
36
37
245/40R20
8.5J X 20
Extended
(250)
(255)
(250)
(255)
NOTICE
• It is permissible to add 3 psi (20 kPa) to the standard tire pressure specification if colder
temperatures are expected soon. Tires typically lose 1 psi (7 kPa) for every 12 °F (7 °C)
temperature drop. If extreme temperature variations are expected, recheck your tire
pressure as necessary to keep them properly inflated.
• Tire inflation pressures may vary depending on changes in elevation. If driving in areas
of higher or lower elevation, be sure to check and adjust for proper tire inflation.
• Do not exceed the maximum inflation pressure, as found on the sidewall of the tire(s).
CAUTION
When replacing tires, ALWAYS use the same size, type, brand, construction and tread
pattern supplied with the vehicle. If not, it can damage the related parts or make it work
irregularly.
2-11
Vehicle Information, Consumer Information, and Reporting Safety Defects
Air Conditioning System
Item
Weight of Volume
Classification
With heat pump
32±0.9 oz. (900±25 g)
Refrigerant
R-1234yf
Without heat
25±0.9 oz. (700±25 g)
pump
With heat pump
6.11±0.35 oz. (190±10 g)
Compressor lubricant
POE
Without heat
5.29±0.35 oz. (150±10 g)
pump
Contact an authorized HYUNDAI dealer for more information.
Vehicle Weight And Luggage Volume
Gross Vehicle Weight
Luggage Volume
Standard Type
Extended Type
2WD: 5,313 lbs. (2410 kg)
2WD: 4,894 lbs. (2220 kg)
14.2 cu.ft (401 ℓ)
AWD: 5,556 lbs. (2520 kg)
Available Front Trunk Weight
2WD / AWD
25 lbs. (10 kg)
2-12

2
Recommended Lubricants And Capacities
To help achieve proper vehicle performance and durability, use only lubricants of the
proper quality.
These lubricants and fluids are recommended for use in your vehicle.
Lubricant
Volume
Classification
3.6-3.7 US qt.
2WD
Rear
(3.4-3.5 ℓ)
3.4-3.5 US qt.
Gear fluid
Front
HK ATF 65 SP4M-1
(3.2-3.3 ℓ)
AWD
3.6-3.7 US qt.
Rear
(3.4-3.5 ℓ)
2WD
18.51 US qt. (17.52 ℓ)
with heat
pump
18.74 US qt.
AWD
(17.73 ℓ)
Standard
type
17.85 US qt.
2WD
(16.89 ℓ)
without
heat pump
18.20 US qt.
Mixture of antifreeze
AWD
(17.22 ℓ)
and water
(Phosphate-based
Coolant
20.63 US qt.
Ethylene glycol coolant
2WD
(19.52 ℓ)
Battery for aluminum
with heat
radiator)
pump
20.90 US qt.
AWD
(19.78 ℓ)
Extended
type
19.96 US qt.
2WD
(18.89 ℓ)
without
heat pump
20.36 US qt.
AWD
(19.27 ℓ)
SAE J1704 DOT-4 LV,
about 24 oz.
Brake fluid
FMVSS 116 DOT-4, ISO
(700 cc)
4925 CLASS-6
2-13
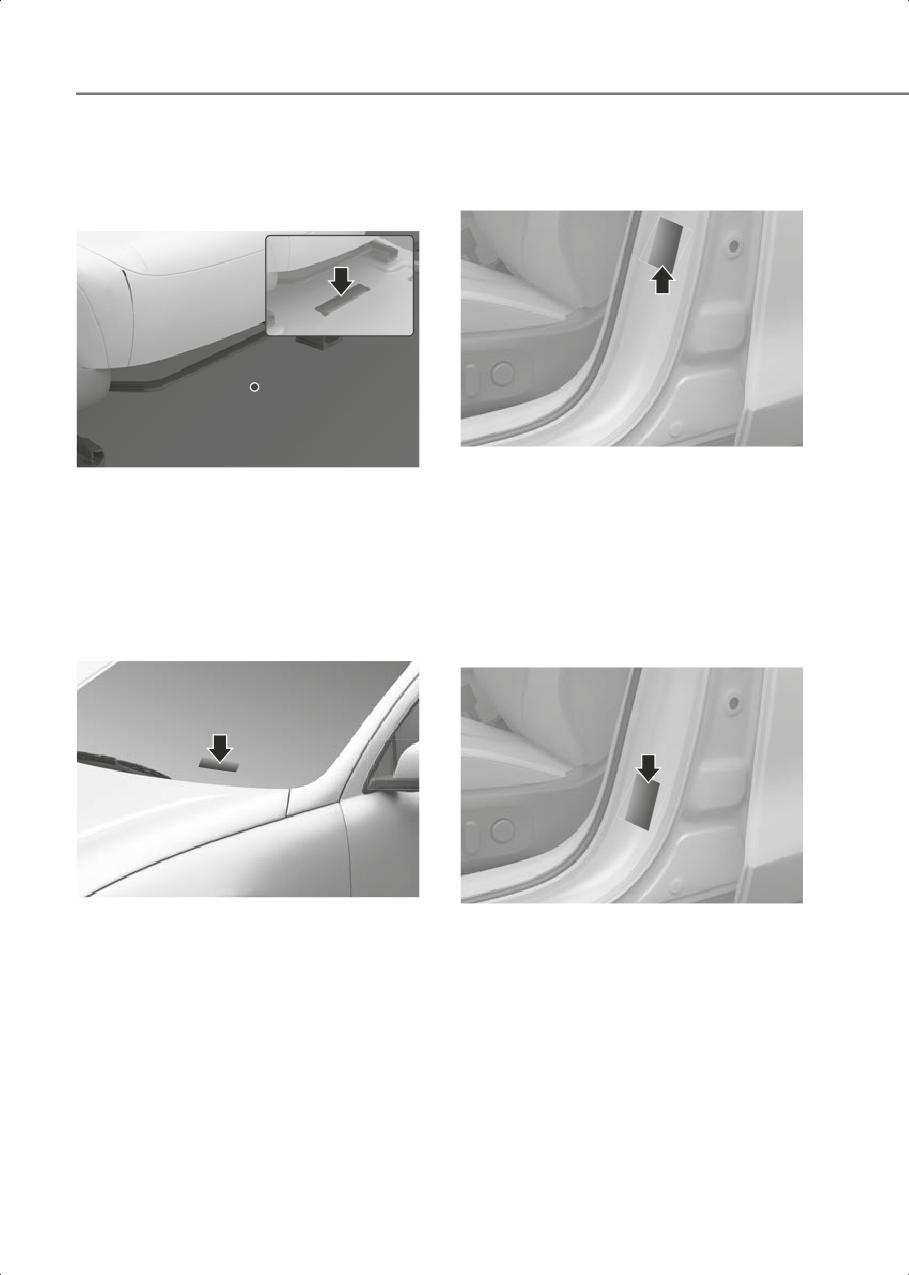
Vehicle Information, Consumer Information, and Reporting Safety Defects
Vehicle Identification
Vehicle Certification
Number (VIN)
Label
Frame number
ONE1011022
B1002101
The vehicle certification label attached on
The vehicle identification number (VIN) is
the driver’s (or front passenger’s) side
the number used in registering your
center pillar gives the vehicle
vehicle and in all legal matters pertaining
identification number (VIN).
to its ownership, etc.
The number is punched on the floor under
the right front seat. To check the number,
Tire Specification And
open the cover.
Pressure Label
VIN label (if equipped)
ONE1011021
ONE1011025L
The VIN is also on a plate attached to the
The tires supplied on your new vehicle are
top of the left side dashboard. The
chosen to provide the best performance
number on the plate can easily be seen
for normal driving.
through the windshield from outside.
The tire label located on the driver’s side
center pillar gives the tire pressures
recommended for your vehicle.
2-14
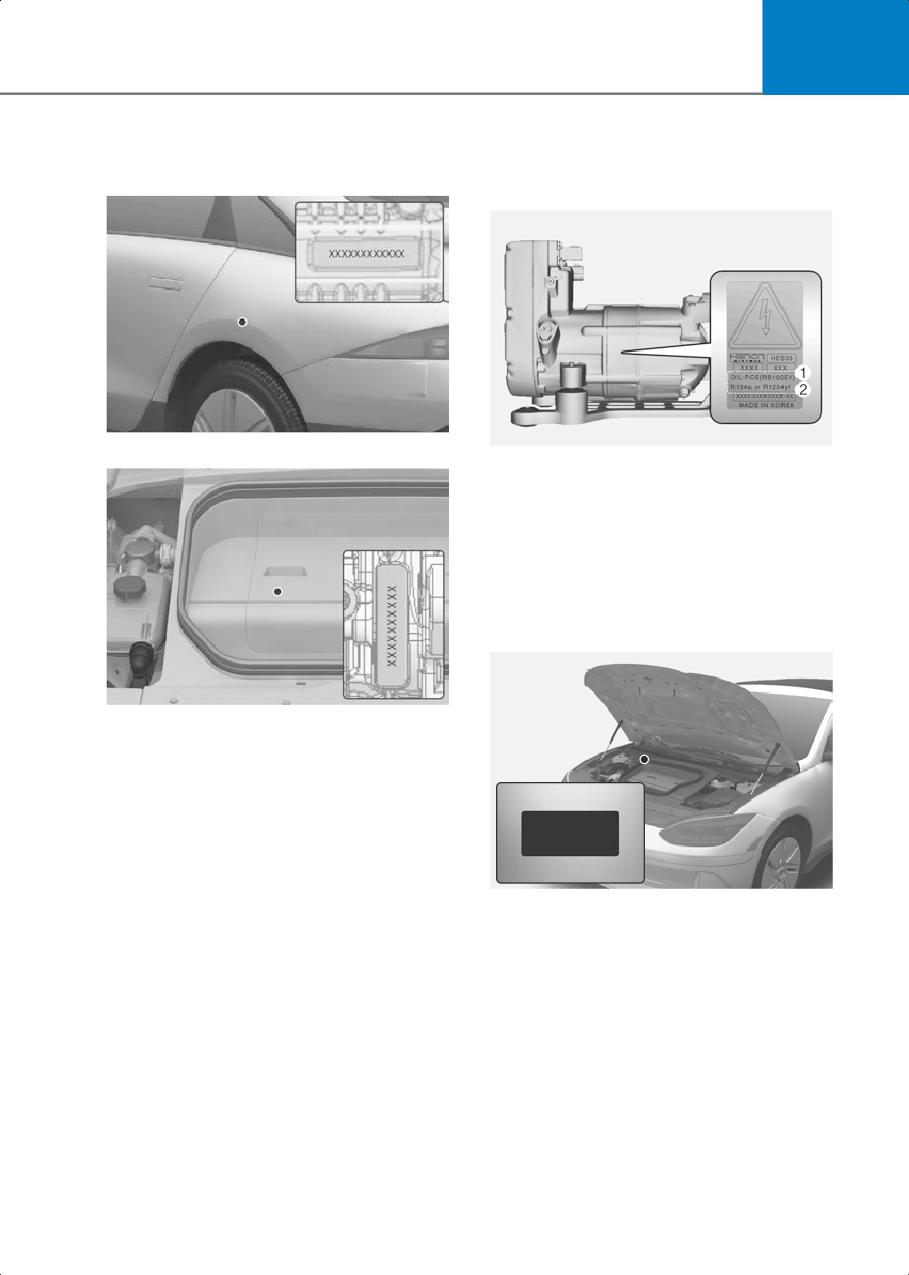
2
Motor Number
Air Conditioner
2WD/AWD
Compressor Label
B1002401
AWD
ONE1011026L
A compressor label informs you the type
of compressor your vehicle is equipped
with such as model, supplier part number,
production number, refrigerant oil (1) and
refrigerant (2).
Refrigerant Label
B1002402
The motor numbers can be checked at
the bottom of the vehicle.
B5020201
The refrigerant label provides information
such as refrigerant type and amount.
(R-1234yf)
2-15
Vehicle Information, Consumer Information, and Reporting Safety Defects
Consumer Information
This consumer information has been prepared in accordance with regulations issued by
the National Highway Traffic Safety Administration of the U.S. Department of
Transportation. Your HYUNDAI dealer will help answer any questions you may have as
you read this information.
HYUNDAI motor vehicles are designed and manufactured to meet or exceed all
applicable safety standards.
For your safety, however, we strongly urge you to read and follow all directions in this
Owner’s Manual, particularly the information under the headings “NOTICE”, “CAUTION”
and “WARNING”.
If, after reading this manual, you have any questions regarding the operation of your
vehicle, please contact the Hyundai Customer Care Center.
Hyundai Customer Care
P.O. Box 20850
Fountain Valley, CA 92728
800-633-5151
consumeraffairs@hmausa.com
Hyundai’s Customer Care representatives are available Monday through Friday,
between the hours of 6:00 AM and 5:00 PM PST
and Saturday between 6:30 AM and 3:00 PM PST (English).
For Customer Care assistance in Spanish or Korean, representatives are available
Monday through Friday between 6:30 AM and 3:00 PM PST.
2-16
2
Reporting Safety Defects
If you believe that your vehicle has a defect which could cause a crash or could
cause injury or death, you should immediately inform the National Highway
Traffic Safety Administration (NHTSA) in addition to notifying HYUNDAI MOTOR
AMERICA.
To contact NHTSA, you may call the Vehicle Safety Hotline toll-free at
1-888-327-4236 (TTY: 1-800-424-9153);
go to http://www.safercar.gov;
download the SaferCar mobile application;
or write to:
Administrator, NHTSA1200 New Jersey Ave, SE,West Building Washington, D.C.
20590.
You can also obtain other information about motor vehicle safety from
If NHTSA receives similar complaints, it may open an investigation, and if it finds
that a safety defect exists in a group of vehicles, it may order a recall and remedy
campaign. However, NHTSA cannot become involved in individual problems
between you, your dealer, or HYUNDAI MOTOR AMERICA.
2-17
Vehicle Information, Consumer Information, and Reporting Safety Defects
Open Source Software Notice
This vehicle contains software with open source licenses. Open source software
information including the source code, copyright notices and referred license terms may
be obtained on the website
HYUNDAI Motor Company will provide the open source code to you in storage medium
such as CD-ROM for minimum charge covering the cost of performing source
distribution upon email request to opensource@hyundai.com within a period of 3 years
from the date of product purchase.
2-18
3. Seats & Safety System
Important Safety Precautions
3-2
Always Wear Your Seat Belt
3-2
Restrain All Children
3-2
Airbag Hazards
3-2
Driver Distraction
3-2
Control Your Speed
3-2
Keep Your Vehicle In Safe Condition
3-2
3
Seats
3-3
Safety Precautions
3-5
Front Seats
3-5
Rear Seats
3-9
Head Restraint
3-11
Seat Warmers
3-15
Air Ventilation Seats
3-18
Seat Belts
3-19
Seat Belt Safety Precautions
3-19
Seat Belt Warning Light
3-20
Seat Belt Restraint System
3-22
Additional Seat Belt Safety Precautions
3-27
Care of Seat Belts
3-29
Child Restraint System (CRS)
3-29
Children Always in the Rear
3-29
Selecting a Child Restraint System (CRS)
3-30
Installing a Child Restraint System (CRS)
3-32
Airbag - Supplemental Restraint System
3-38
Where are the Airbags?
3-40
How does the Airbags System Operate?
3-43
What to Expect After an Airbag Inflates
3-46
Occupant Classification System (OCS)
3-46
Why didn’t My Airbag Go Off in a Collision?
3-52
SRS Care
3-56
Additional Safety Precautions
3-57
Airbag Warning Labels
3-57
Seats & Safety System
wide array of potential distractions, such
Important Safety
as drowsiness, reaching for objects,
Precautions
eating, personal grooming, other
passengers, and using mobile phones.
You will find many safety precautions and
Drivers can become distracted when they
recommendations throughout this
take their eyes and attention off the road
section, and throughout this manual. The
or their hands off the wheel to focus on
safety precautions in this section are
activities other than driving. To reduce
among the most important.
your risk of distraction and an accident:
• Set up your mobile devices (for
Always Wear Your Seat Belt
example, mp3 players, phones,
A seat belt is your best protection in all
navigation units, etc.) only when your
types of accidents. Airbags are designed
vehicle is parked or safely stopped.
to supplement seat belts, not to replace
• Only use your mobile device when
them. So even though your vehicle is
allowed by laws and conditions permit
equipped with airbags, always make sure
safe use. Never text or email while
you and your passengers wear your seat
driving. Most countries have laws
belts, and wear them properly.
prohibiting drivers from texting. Some
countries and cities also prohibit
drivers from using handheld phones.
Restrain All Children
• Never let the use of a mobile device
All children under age 13 should ride in
distract you from driving. You have a
your vehicle properly restrained in a rear
responsibility to your passengers and
seat, not the front seat. Infants and small
others on the road to always drive
children should be restrained in an
safely with your hands on the wheel as
appropriate child restraint system. Larger
well as your eyes and attention on the
children should use a booster seat with
road.
the lap/shoulder belt until they can use
the seat belt properly without a booster
seat.
Control Your Speed
Excessive speed is a major factor in crash
injuries and deaths. Generally, the higher
Airbag Hazards
the speed the greater the risk, but serious
While airbags can save lives, they can also
injuries can also occur at lower speeds.
cause serious or fatal injuries to
Never drive faster than is safe for current
occupants who sit too close to them, or
conditions regardless of the maximum
who are not properly restrained. Infants,
speed posted.
young children, and short adults are at the
greatest risk of being injured by an
inflating airbag. Follow all instructions
Keep Your Vehicle In Safe
and warnings in this manual.
Condition
Having a tire blowout or a mechanical
Driver Distraction
failure can be extremely hazardous. To
reduce the possibility of such problems,
Driver distraction presents a serious and
check your tire pressures and condition
potentially deadly danger, especially for
frequently and perform all regularly
inexperienced drivers. Safety should be
scheduled maintenance.
the primary concern when behind the
wheel and drivers need to be aware of the
3-2
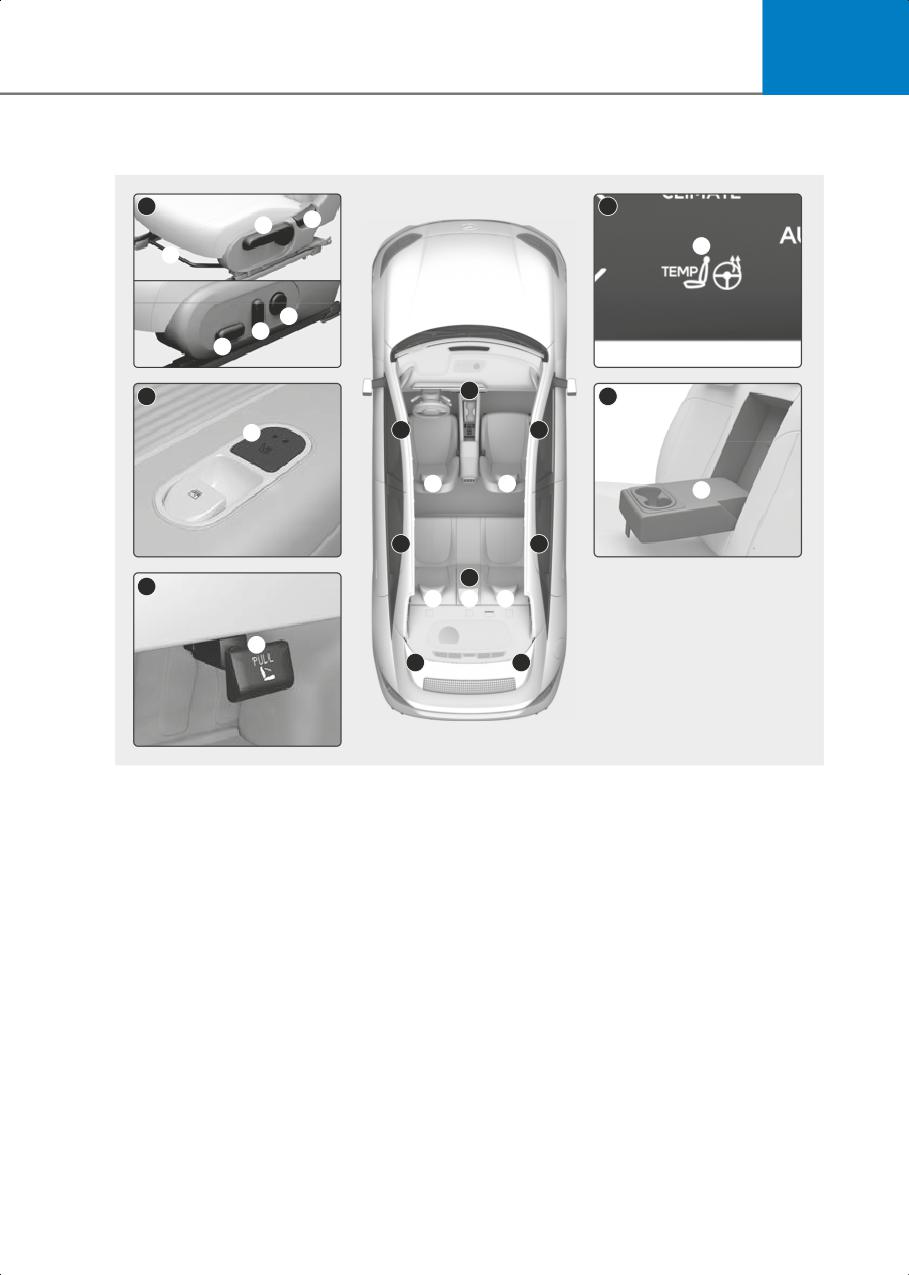
3
Seats
A
B
2
1
4
1
3
2
1
C
B
D
6
A
A
5
5
7
C
C
D
E
9
9
9
8
E
E
A3000101
The actual shape may differ from the illustration.
(1) Front seat sliding forward or rearward/Cushion height/Seat cushion angle
(2) Front seatback angle
(3) Front seat lumbar support
(4) Front seat warmer/Air ventilation seat
(5) Front head restraints
(6) Rear seat warmer
(7) Rear armrest
(8) Rear seatback folding lever
(9) Rear head restraints
3-3
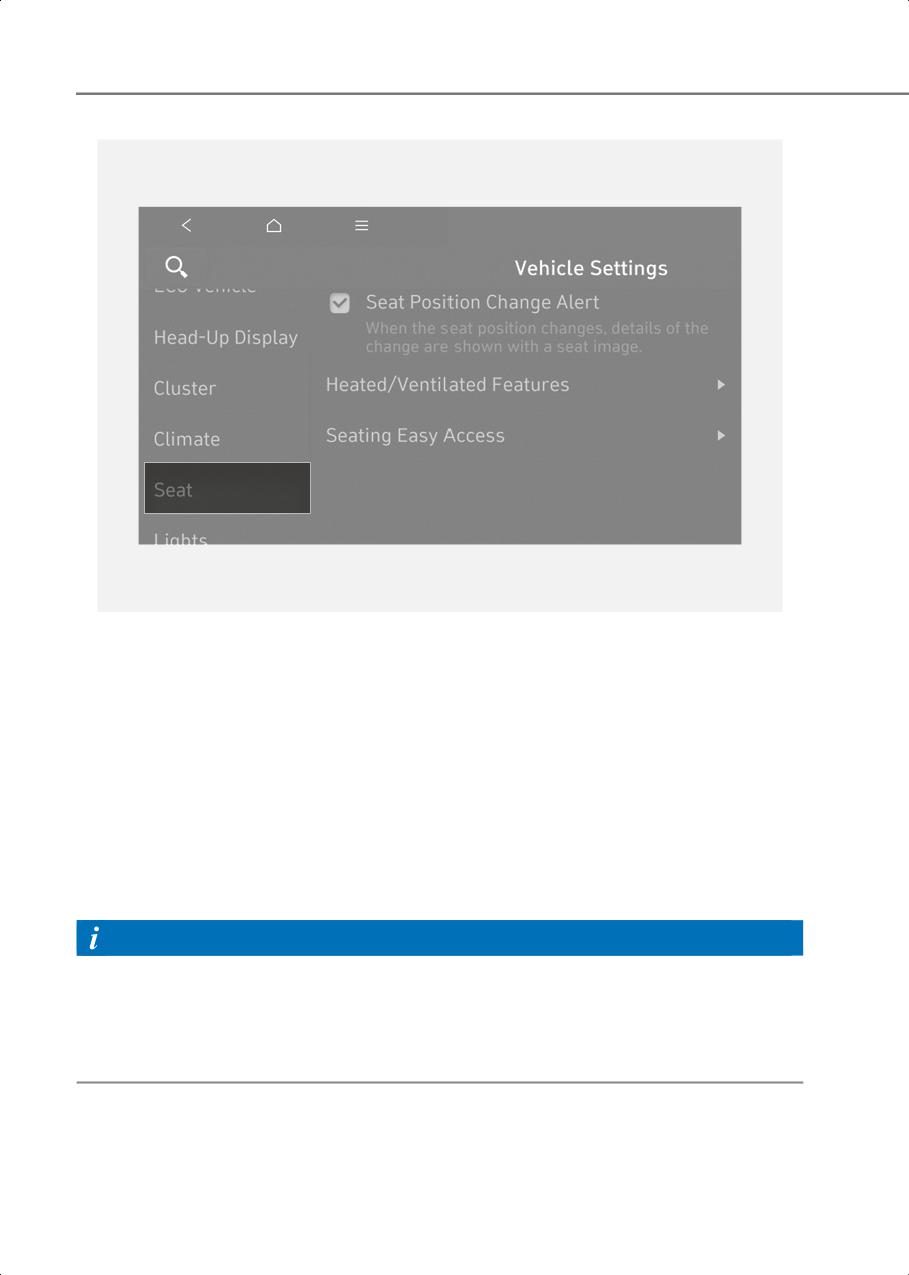
Seats & Safety System
ONE1031077L
Infotainment system
Select Setup > Vehicle > Seat from the Settings menu in the infotainment system, you
may use various convenience functions.
• Seat Position Change Alert: When the seat position changes, details of the change are
shown with a seat image.
• Heated/Ventilated Features
- Auto. Controls That Use Climate Control Settings (for driver’s seat): The seat
temperature is automatically controlled.
• Seating Easy Access
- Driver Seat Easy Access: The distance (Normal/Extended/Off) the seat automatically
moves when the driver enters or leaves the vehicle may be selected.
Information
• The information provided may differ depending on which functions are applicable to
your vehicle.
• The infotainment system may change after software updates. For more information,
refer to the user's manual provided in the infotainment system and the quick reference
guide.
3-4
3
Safety Precautions
Seat belts
Adjusting the seats so that you are sitting
Always fasten your seat belt before
in a safe and comfortable position plays
starting any trip. At all times, passengers
an important role for the safety of the
should sit upright and be properly
driver and passengers as much as seat
restrained. Infants and small children
belts and airbags when in an accident.
must be restrained in appropriate Child
Restraint Systems. Children who have
WARNING
outgrown a booster seat and adults must
be restrained using the seat belts.
Do not use a cushion that reduces friction
between the seat and the passenger. The
WARNING
passenger’s hips may slide under the lap
portion of the seat belt during an accident
Take the following precautions when
or a sudden stop.
adjusting your seat belt:
Serious or fatal internal injuries could
• NEVER use one seat belt for more than
result because the seat belt cannot
one occupant.
operate properly.
• Always position the seatback upright
with the lap portion of the seat belt
snug and low across the hips.
Airbags
• NEVER allow children or small infants,
You can take steps to reduce the risk of
or pets to ride on a passenger’s lap.
being injured by an inflating airbag.
• Do not route the seat belt across your
Sitting too close to an airbag greatly
neck, across sharp edges, or reroute
increases the risk of injury in the event the
the shoulder strap away from your
airbag inflates. Move your seat as far back
body.
as possible from front airbags while still
• Do not allow the seat belt to become
maintaining control of the vehicle.
caught or jammed.
WARNING
To reduce the risk of serious injury or
Front Seats
death from an inflating airbag, take the
following precautions:
WARNING
• Adjust the driver’s seat as far to the rear
Take the following precautions when
as possible while maintaining the ability
adjusting your seat:
to control the vehicle.
• NEVER attempt to adjust the seat while
• Adjust the front passenger seat as far to
the vehicle is moving. The seat could
the rear as possible.
respond with unexpected movement
• Hold the steering wheel by the rim with
and may cause loss of vehicle control
your hands at the 9 o’clock and 3
resulting in an accident.
o’clock positions to minimize the risk of
• Do not place anything under the front
injuries to your hands and arms.
seats. Loose objects in the driver’s foot
• NEVER place anything or anyone
area could interfere with the operation
between you and the airbag.
of the foot pedals, causing an accident.
• Do not allow the front passenger to
• Do not allow anything to interfere with
place feet or legs on the dashboard to
the normal position and proper locking
minimize the risk of leg injuries.
of the seatback.
3-5
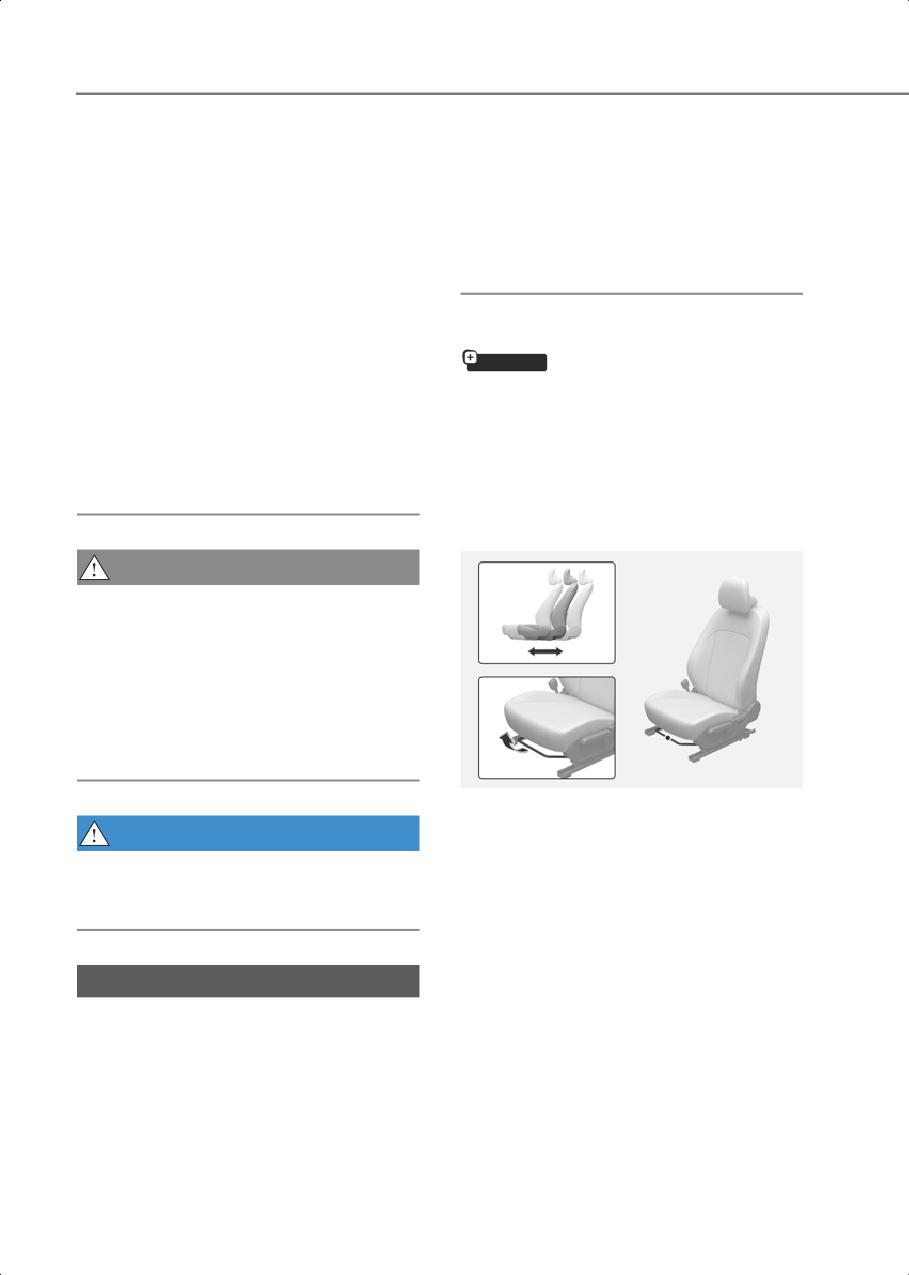
Seats & Safety System
• Do not place a cigarette lighter on the
• Do not adjust the seats longer than
floor or seat. When you operate the
necessary when the vehicle is turned
seat, gas may exit out of the lighter
off. This may result in unnecessary
causing a fire.
battery drain.
• Use extreme caution when picking up
• Do not operate two or more seats at the
small objects trapped under the seats
same time. This may result in an
or between the seat and the center
electrical malfunction.
console. Your hands might be cut or
injured by the sharp edges of the seat
mechanism.
Manual adjustment
• If there are occupants in the rear seats,
if equipped
be careful while adjusting the front seat
The front seat can be adjusted by using
position.
the levers located underneath the seat
• Make sure that the seat is locked in
cushion. Before driving, adjust the seat to
place after the adjustment. If not, the
the proper position so that you can easily
seat might move unexpectedly
control the steering wheel, foot pedals
resulting in an accident.
and controls on the instrument panel.
Forward and rearward adjustment
CAUTION
To prevent injury:
• Do not adjust your seat while wearing
your seat belt. Moving the seat cushion
forward may cause strong pressure on
your abdomen.
• Do not allow your hands or fingers to
get caught in the seat mechanisms
while the seat is moving.
B3000201
To move the seat forward or rearward:
WARNING
1. Pull up the seat slide adjustment lever
NEVER allow children in the vehicle
and hold it.
unattended. The power seats are
2. Slide the seat to the position you desire.
operable when the vehicle is turned off.
3. Release the lever and make sure the
seat is locked in place. Move forward
and rearward without using the lever. If
NOTICE
the seat moves, it is not locked
properly.
To prevent damage to the seats:
• Always stop adjusting the seats when
the seat has been adjusted as far
forward or rearward as possible.
3-6
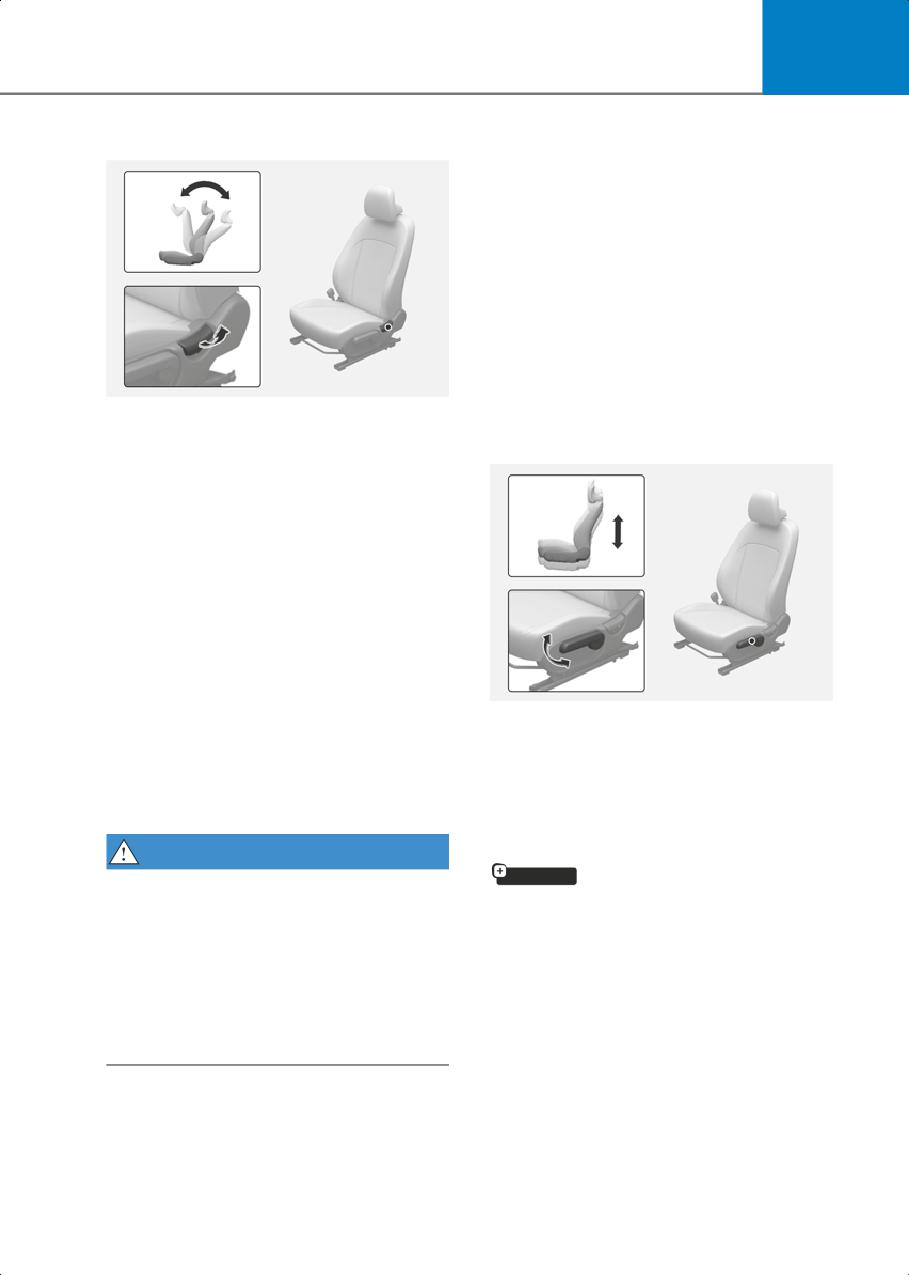
3
Seatback angle
Seat belts must be snug against your hips
and chest to work properly. When the
seatback is reclined, the shoulder belt
cannot do its job because it will not be
snug against your chest. Instead, it will be
in front of you. During an accident, you
could be thrown into the seat belt,
causing neck or other injuries.
The more the seatback is reclined, the
greater chance the passenger’s hips will
slide under the lap belt or the passenger’s
neck will strike the shoulder belt.
B3000202
To recline the seatback:
Seat height
1. Lean forward slightly and lift up the
To change the height of the seat cushion:
seatback lever.
2. Carefully lean back on the seat and
adjust the seatback to the position you
desire.
3. Release the lever and make sure the
seatback is locked in place. (The lever
MUST return to its original position for
the seatback to lock.)
Reclining seatback
Sitting in a reclined position when the
B3000203
vehicle is in motion can be dangerous.
• Push down the lever several times, to
Even when buckled up, the protections of
lower the seat cushion.
your restraint system (seat belts and/or
• Pull up the lever several times, to raise
airbags) is greatly reduced by reclining
the seat cushion.
your seatback.
WARNING
Power adjustment
if equipped
NEVER ride with a reclined seatback
The front seat can be adjusted by using
when the vehicle is moving.
the control switches located on the
Riding with a reclined seatback increases
outside of the seat cushion. Before
your chance of serious or fatal injuries in
driving, adjust the seat to the proper
the event of a collision or sudden stop.
position so that you can easily control the
Drivers and passengers should ALWAYS
steering wheel, foot pedals and controls
sit well back in their seats, properly
on the instrument panel.
belted, and with the seatbacks upright.
3-7
//////////////////////////////////////////