Hyundai Santa Fe (2006 year). Manual - part 57
AT -180
AUTOMATIC TRANSAXLE (F4A51)
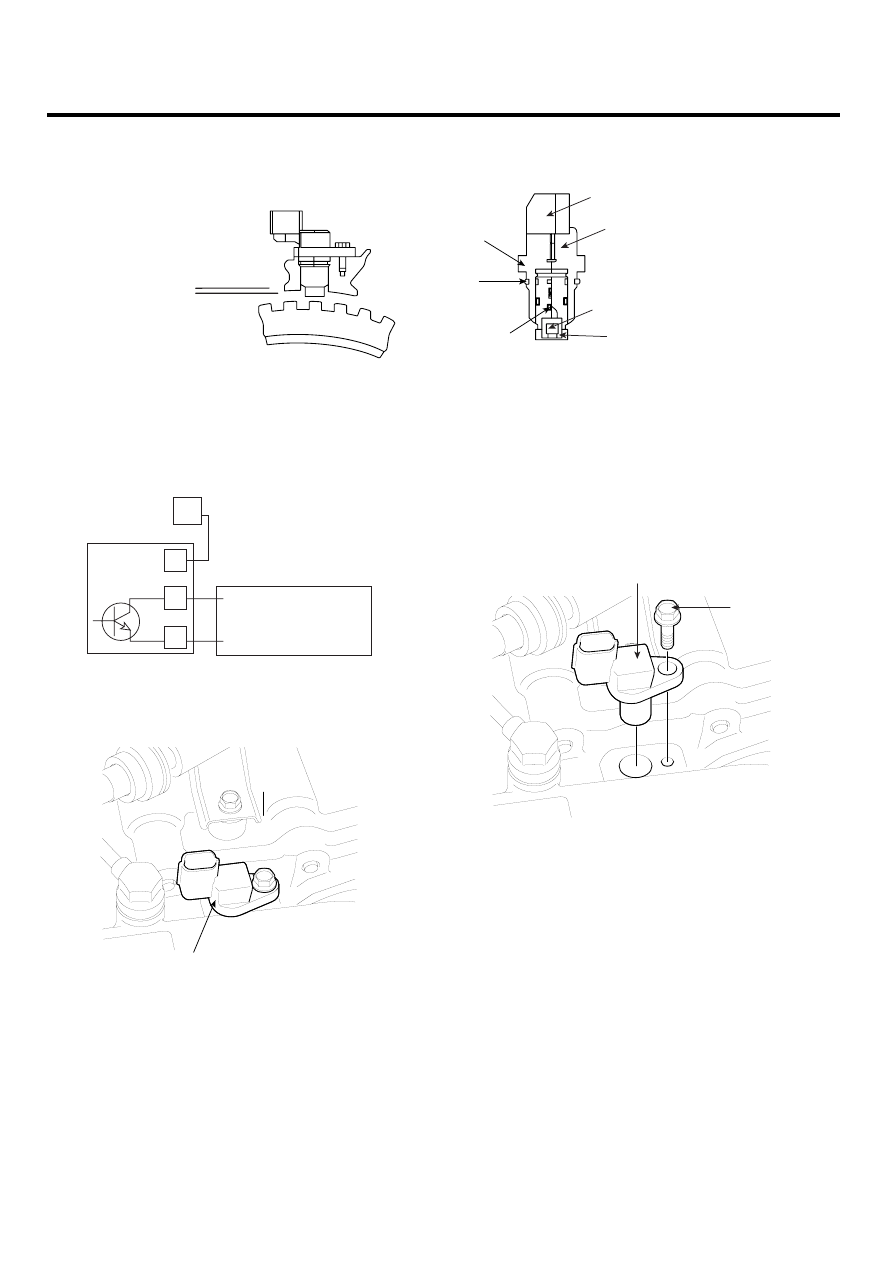
HALL TYPE SENSOR: STRUCTURE & INTERFACE
Connector
Terminal
Mould
cover
O-ring
Circuit parts
Magnet
Hall IC
Air gap
EKRF018E
3
1
2
TCM(PCM)
Input/Output
shaft
speed sensor
IG1
Sensor
Ground
EKRF018C
INPUT SHAFT
SPEED SENSOR
EKRF018D
REPLACEMENT
E437642C
1.
Remove the battery and air cleaner (see "Transaxle
range switch replacement").
2.
Remove the transaxle range switch connector.
3.
Remove the control cable to transaxle range switch
mounting nut.
4.
Remove the input shaft speed sensor(A).
1)
Disconnect the input shaft speed sensor connec-
tor.
2)
Remove the bolt(B).
A
B
EKRF009F
3)
Inspect the input shaft speed sensor bore.
5.
Apply a light coat of automatic transaxle fluid to the
O-ring seal before installation.
6.
Install the input shaft speed sensor.
7.
Install the control cable mounting bracket.
8.
Connect the input shaft speed sensor connector.
9.
Install the holder of the control cable.
10. Adjust the control cable to transaxle range switch and
tighten the transaxle manual lever to the control cable
mounting nut. (see "Automatic transaxle shift control
installation")
11. Installation is the reverse of removal.