Hyundai Santa Fe (2006 year). Manual - part 54
 

  Index      Hyundai     Hyundai Santa Fe - service repair manual 2006 year


Search            


Content   ..  52  53  54  55   ..


Hyundai Santa Fe (2006 year). Manual - part 54


AT -168

AUTOMATIC TRANSAXLE (F4A51)

INSTALLATION

EE2647DD

Installation is in the reverse order of removal.
Perform the following :

• Adjust the shift cable.
• Refill the transaxle with fluid.
• Refill the radiator with engine coolant.
• Bleed air from the cooling system with the heater

valve open.

• Clean the battery posts and cable terminals with

sandpaper, assemble them, and apply grease to
prevent corrosion.

1.

Lowering the vehicle or lifting up a jack, install the
transaxle assembly.

2.

Tighten the transaxle lower mounting bolts (B-4EA).

TORQUE:
65~85 Nm(6.5~8.5 kgf.m, 47.0~61.5 lb-ft)

3.

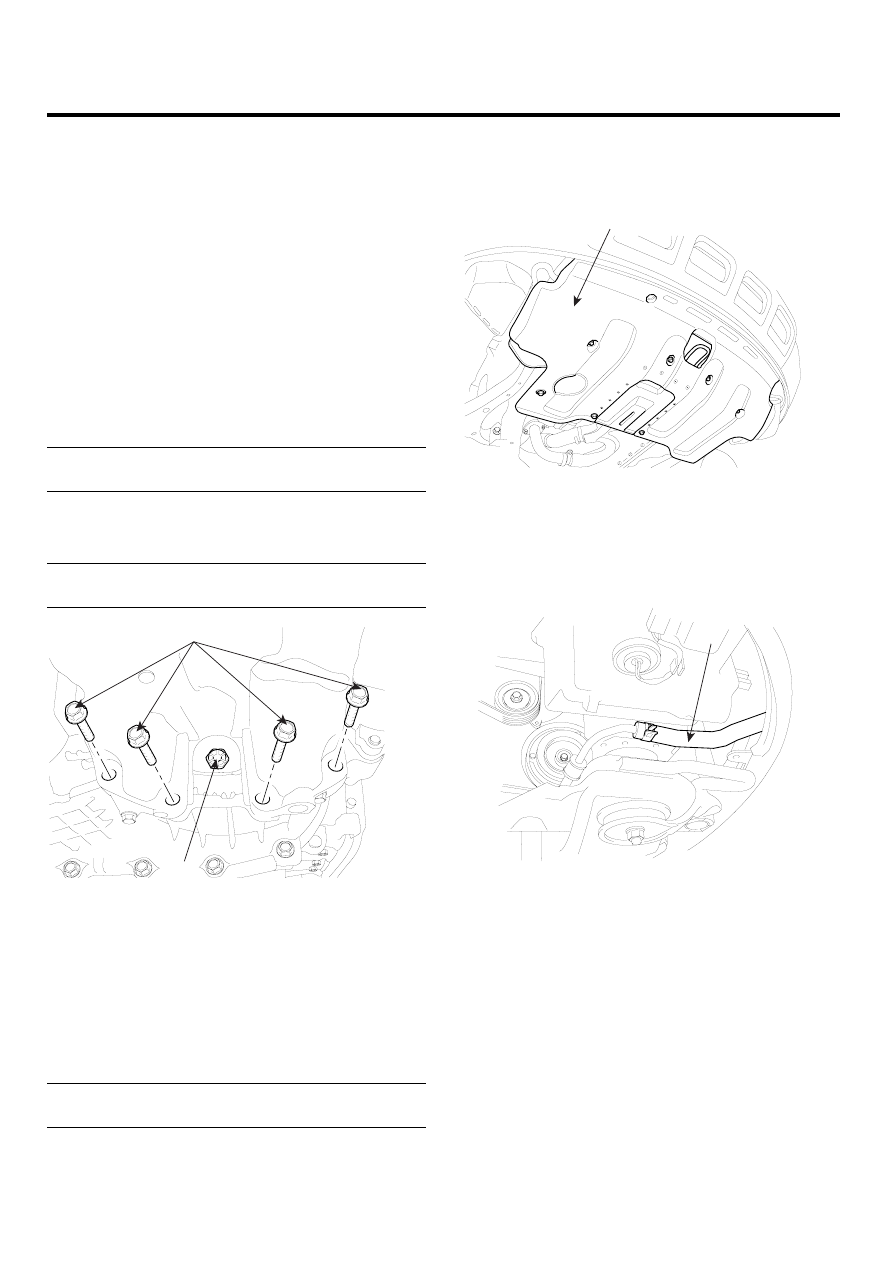
Install the drive plate bolts (A) by turning the timing
gear.

TORQUE:
46~53 Nm(4.6~5.3 kgf.m, 33.3~38.3 lb-ft)

A

B

SCMAT6019D

4.

In case of 4WD, install the transfer case assembly.
(see MT group’s ’Transfer case’)

5.

After removing a jack, insert the drive shafts. (see DS
group)

6.

Install the sub frame. (see SS group).

7.

Tighten the roll stopper mounting bolts.

TORQUE:
90~110 Nm(9~11 kgf.m, 65.1~79.5 lb-ft)

8.

Connect the lower arm, the tie rod end ball joint, the
stabilizer bar link to the front knuckle. (see SS group)

9.

Install the under cover (A).

A

SCMAT6505L

10. Install the steering column joint bolt and the EPS con-

nector. (see ST group)

11. Connect the return tube(A) with a clamp. (see ST

group)

A

SCMAT6010L

12. Install the front wheels and tires.

AUTOMATIC TRANSAXLE SYSTEM

AT -169

13. Tighten the transaxle insulator mounting bolt (A).

TORQUE:
90~110 Nm(9~11 kgf.m, 65.1~79.5 lb-ft)

A

SCMAT6504L

14. Tighten the transaxle mounting bolts (A).

TORQUE:
65~85 Nm(6.5~8.5 kgf.m, 47.0~61.5 lb-ft)

A

AKKF002O

15. Remove the SST (09200-38001) holding the engine

and transaxle assembly.

09200-38001

SCMAT6503L

16. Install the starter motor. (see EE group).

TORQUE:
65~85 Nm(6.5~8.5 kgf.m, 47.0~61.5 lb-ft)

17. Connect the power steering pressure tube (A) to the

power steering oil pump.

A

SCMAT6506L

18. Connect the transaxle oil cooler hoses (A) to the tubes

by fastening the clamps (B).

A

B

SCMAT6013D

AT -170

AUTOMATIC TRANSAXLE (F4A51)

19. Install the control cable assembly(C) by tightening the

nut (A) and clip (B).

TORQUE:
8~12 Nm(0.8~1.2 kgf.m, 5.8~8.6 lb-ft)

A

C

B

SCMAT6012D

20. Connect the transaxle wire harness connectors.

1)

Install the inhibiter switch connector (A).

A

SCMAT6007D

2)

Install the solenoid valve connector (A).

A

SCMAT6008D

3)

Install the input speed sensor connector (A).

A

SCMAT6009D

4)

Install the output speed sensor connector (A).

A

SCMAT6502L

AUTOMATIC TRANSAXLE SYSTEM

AT -171

5)

Install the vehicle speed sensor connector (A).

A

SCMAT6011D

21. Install the battery tray (B) by tightening the four mount-

ing bolts (A).

A

B

SCMAT6006D

22. Install the air cleaner lower part (A) by installing the

two mounting bolts.

A

SCMAT6005D

23. Install the air cleaner upper cover (B) by installing the

clips (A).

B

A

SCMAT6004D

24. Connect the air cleaner hose (B) and tighten the

clamp bolt (A).

B

A

SCMAT6003D

25. Connect the AFS connector (A).

A

SCMAT6002D


Content   ..  52  53  54  55   ..