Hummer H2. Manual - part 723


  Index      Hummer     Hummer H2 - service repair manual 2004 year


Search            


Content   ..  721  722  723  724   ..


Hummer H2. Manual - part 723


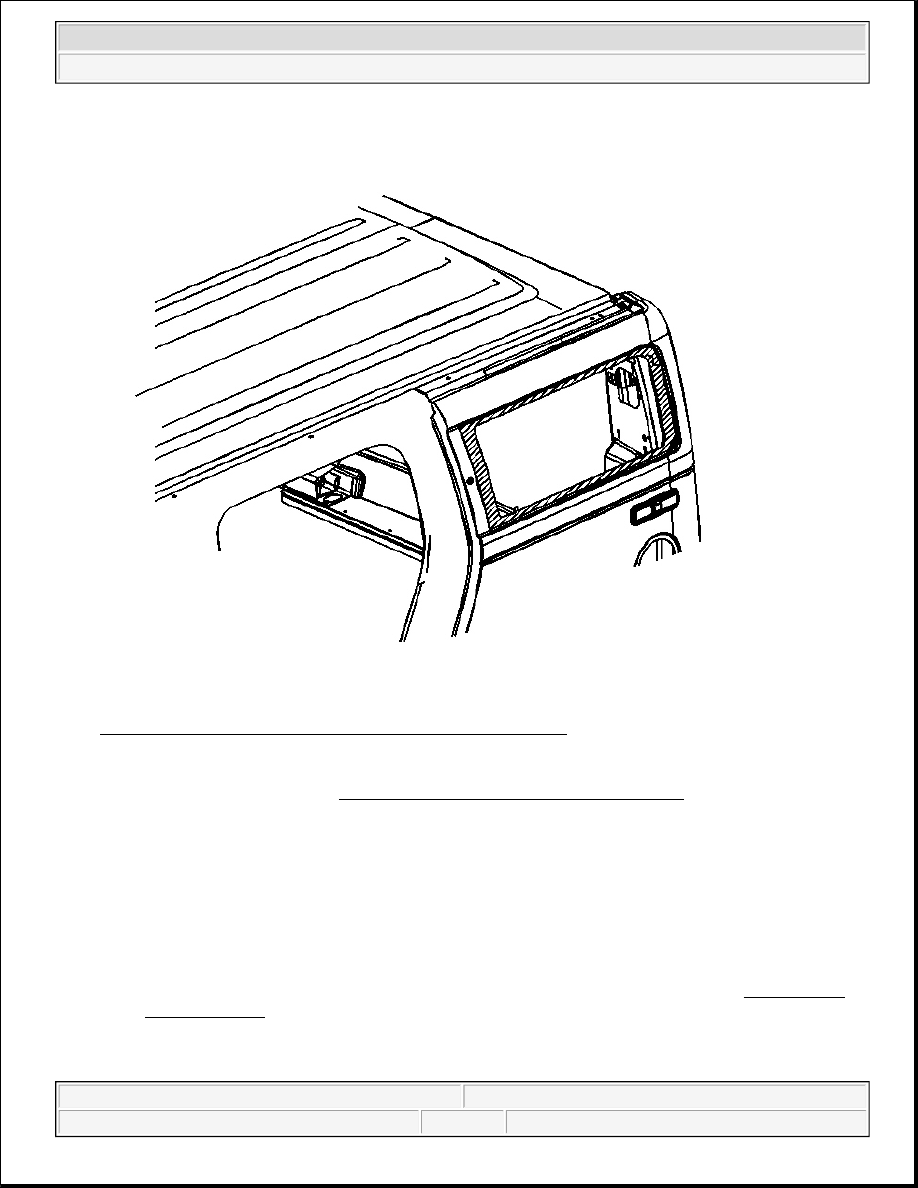
Fig. 24: Quarter Window (SUV Body Side Quarter Window) 
Courtesy of GENERAL MOTORS CORP. 

3. This will allow the urethane adhesive to be separated from the quarter window. 

z

Leave a base of urethane on the pinchweld flange.  

z

The only suitable lubrication is clear water.  

z

UseJ 24402-A , J 39032 or equivalent in order to remove the quarter window. See Special Tools 
and Equipment
 .  

4. If the locator pins were damaged during removal, they must be replaced.  

5. With the aid of an assistant, use the suction cups to remove the window from the opening. 

CAUTION: Refer to Glass and Sheet Metal Handling Caution in Cautions and 

Notices.

IMPORTANT: Keep the cutting edge of the tool against the quarter window.


2004 Hummer H2 

2004 ACCESSORIES & EQUIPMENT Stationary Windows - Hummer H2


Installation Procedure 

1. Install the quarter window into the opening. Refer to Urethane Adhesive Installation of Stationary 

Windows . 

Fig. 25: Quarter Window (SUV Body Side Quarter Window) 
Courtesy of GENERAL MOTORS CORP. 

2. Insure the pinchweld is primed properly. 


2004 Hummer H2 

2004 ACCESSORIES & EQUIPMENT Stationary Windows - Hummer H2


3. Remove the double layer of masking tape around the perimeter of the painted surfaces and the interior 

trim.  

URETHANE ADHESIVE INSTALLATION OF STATIONARY WINDOWS 

1. Remove all mounds or loose pieces of urethane adhesive from the pinch-weld area.  

2. If the original window is being reused, remove all but a thin film of the existing urethane adhesive from 

the window surface by using a clean utility knife or razor blade scraper.  

3. Inspect the following components for the causes of a broken window: 

z

The flange of the window opening  

z

The window reveal molding  

4. Inspect for any of the following problems in order to help prevent future breakage of the window: 

z

High weld  

z

Solder spots  

z

Hardened sealer  

z

Any other obstruction or irregularity in the pinch-weld flange  

5. After repairing the opening as indicated, perform the following steps: 

1. Remove all traces of broken glass from the outer cowl panel, seats, floor and defroster ducts.  

2. Clean around the edge of the inside surface of the window with a 50/50 mixture of isopropyl 

alcohol and water by volume on a dampened lint free cloth.  

CAUTION: Refer to Glass and Sheet Metal Handling Caution in Cautions and 

Notices.

IMPORTANT: Remove all but approximately 2 mm (3/64 in) of the existing bead of 

urethane adhesive from the pinch-weld flange.

IMPORTANT: If corrosion of the pinch-weld flange is present or if sheet metal repairs or 

replacements are required, the pinch-weld flange must be refinished in 
order to restore the bonding area strength. If paint repairs are required, 
mask the flange bonding area prior to applying the color coat in order to 
provide a clean primer only surface. Materials such as BASF DE15(R), 
DuPont 2610(R), Sherwin-Williams PSE 4600 and NP70(R) and Martin-
Semour 5120 and 5130(R) PPG DP90LF SPIES/ HECKER 3688/8590 - 
3688/5150 - 4070/5090 STANDOX 11158/13320 - 14653/14980 products are 
approved for this application.

CAUTION: Refer to Window Retention Caution in Cautions and Notices.


2004 Hummer H2 

2004 ACCESSORIES & EQUIPMENT Stationary Windows - Hummer H2


6. Verify all primers and urethane adhesive are within expiration dates. 

Fig. 26: Applying Pinch-Weld Primer Black #3 To Surface Of Pinch-Weld Flange 
Courtesy of GENERAL MOTORS CORP. 

7. Shake the pinch-weld primer black #3 for at least 1 minute. 

CAUTION: Failure to prep the area prior to the application of primer may cause 

insufficient bonding of urethane adhesive. Insufficient bonding of 
urethane adhesive may allow unrestrained occupants to be ejected 
from the vehicle resulting in personal injury.

IMPORTANT: Do not apply the black #3 primer to the existing bead of the urethane 

adhesive on the pinch-weld flange. Apply the primer only to nicks, 
scratches or the primed surfaces.


2004 Hummer H2 

2004 ACCESSORIES & EQUIPMENT Stationary Windows - Hummer H2


Content   ..  721  722  723  724   ..