Hummer H2. Manual - part 2622


  Index      Hummer     Hummer H2 - service repair manual 2004 year


Search            


Content   ..  2620  2621  2622  2623   ..


Hummer H2. Manual - part 2622


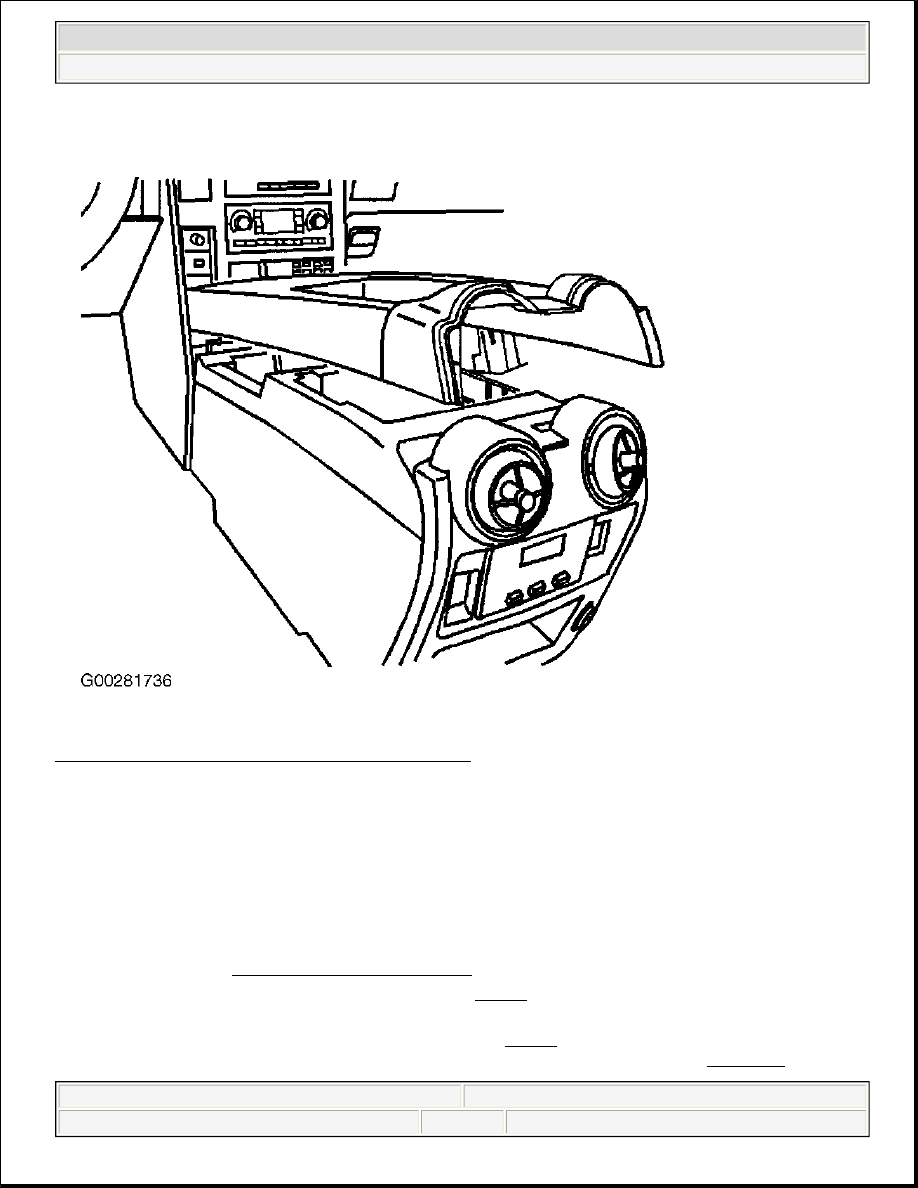
Fig. 27: Identifying Upper Center Console Trim Panel 
Courtesy of GENERAL MOTORS CORP. 

Installation 

1. Align center console to center console bracket and route the electrical wiring through console. Connect 

the console electrical connector.  

2. Install the center console to center console bracket. Install the center console bolts. Tighten the bolts to 

specification. See TORQUE SPECIFICATIONS .  

3. Align the upper trim panel with center console. See Fig. 27 . Push towards the console to engage the trim 

panel clips.  

4. Connect electrical connectors to console end panel. See Fig. 26 . Install the center console end panel. 

Install the center console end panel screws. Tighten the screws to specification. See TORQUE 

NOTE:

Make sure HVAC duct is aligned with center console. 


2004 Hummer H2 

2003-04 AUTOMATIC TRANSMISSIONS Servicing - H2


SPECIFICATIONS .  

5. Connect the lamps to the cup holder. Align the cup holder to the center console. Push the cup holder 

firmly into place to engage the clips.  

6. Install shift handle to shifter and fasten in place. Tighten the set screw to specification. See TORQUE 

SPECIFICATIONS .  

7. Install the center console storage bin. Install the storage bin screws. Tighten the screws to specification. 

See TORQUE SPECIFICATIONS .  

CONTROL & SHIFT SOLENOIDS 

Removal 

1. Remove the transmission oil pan and filter. See DRAINING & REFILLING under LUBRICATION. 

2. Remove the 1-2 accumulator if necessary. See ACCUMULATOR ASSEMBLY .  

3. Disconnect the internal wiring harness electrical connectors from the following components: 

z

Transmission fluid pressure switch. See Fig. 28 .  

z

1-2 shift control solenoid.  

z

2-3 shift control solenoid.  

z

Pressure control solenoid.  

z

Torque Converter Clutch Pulse Width Modulation (TCC PWM) solenoid.  

z

3-2 shift control solenoid.  

4. Remove the pressure control solenoid retainer. Remove the pressure control solenoid. See Fig. 29 .  

5. Remove the 1-2 and 2-3 shift control solenoid retainers. Remove the 1-2 and 2-3 shift control solenoids. 

See Fig. 30 .  

6. Remove the 3-2 control solenoid retainer. Remove the 3-2 control solenoid. See Fig. 31 . 

NOTE:

Valve body removal is not necessary for the following procedure. 

NOTE:

DO NOT remove the valve body for the following procedures. Removal of 
the 1-2 accumulator is necessary only if servicing the pressure control 
solenoid. 


2004 Hummer H2 

2003-04 AUTOMATIC TRANSMISSIONS Servicing - H2


Fig. 28: View Of Control & Shift Control Solenoid Locations 
Courtesy of GENERAL MOTORS CORP.


2004 Hummer H2 

2003-04 AUTOMATIC TRANSMISSIONS Servicing - H2


Fig. 29: Disassembled View Of Pressure Control Solenoid 
Courtesy of GENERAL MOTORS CORP.


2004 Hummer H2 

2003-04 AUTOMATIC TRANSMISSIONS Servicing - H2


Content   ..  2620  2621  2622  2623   ..