Hummer H2. Manual - part 2620


  Index      Hummer     Hummer H2 - service repair manual 2004 year


Search            


Content   ..  2618  2619  2620  2621   ..


Hummer H2. Manual - part 2620


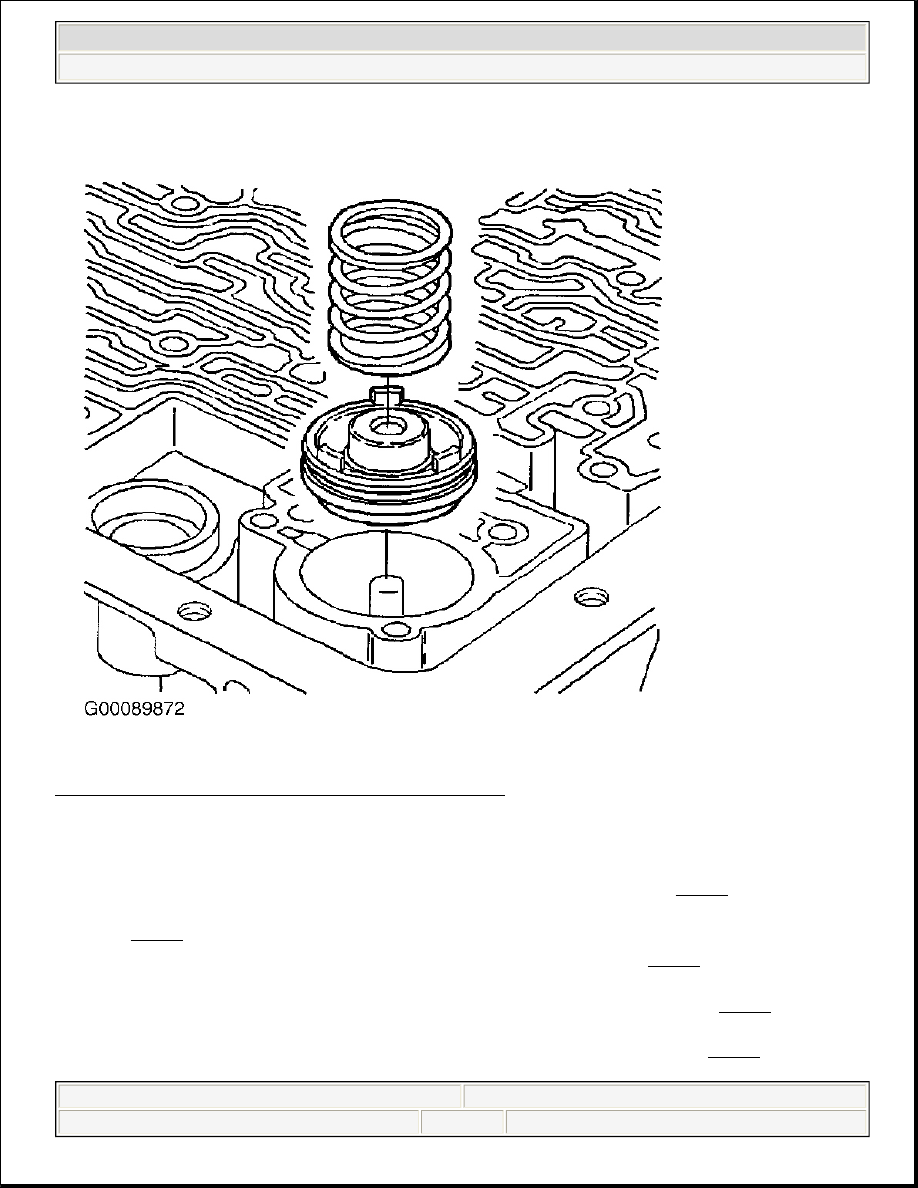
Fig. 21: Removing & Installing 3-4 Accumulator Assembly 
Courtesy of GENERAL MOTORS CORP. 

Installation 

1. Install a new 3-4 accumulator piston seal (1) to the 3-4 accumulator piston. See Fig. 17 .  

2. Install the 3-4 accumulator pin (1) into the transmission case and retain the pin with Transjel(R) lubricant. 

See Fig. 22 .  

3. Install the 3-4 accumulator piston onto the pin in the transmission case. See Fig. 21 . Ensure that the 3-4 

accumulator piston legs face away from the transmission case.  

4. Install the pump and valve body alignment pin set (2, 3) to the transmission case. See Fig. 22 .  

5. Install the spacer plate to transmission case gasket and the spacer plate to valve body gasket to the spacer 

plate; use Transjel(R) lubricant in order to retain the gaskets to the spacer plate. See Fig. 23 . 

z

The case gasket is identified by a "C". Be sure to place the case gasket on the transmission case 


2004 Hummer H2 

2003-04 AUTOMATIC TRANSMISSIONS Servicing - H2


side of the spacer plate.  

z

The valve body gasket is identified by a "V". Be sure to place the valve body gasket on the valve 
body side of the spacer plate.  

6. Ensure that the solenoid screens (1 and 2) are in place on the spacer plate.  

7. Place the checkball (3) on the spacer plate in the location shown.  

8. Place the 3-4 accumulator spring (4) on the spacer plate.  

9. Install the spacer plate and related components to the transmission.  

10. Install the spacer plate support and the spacer plate support bolts. See Fig. 19 . Tighten the bolts to 

specification. See TORQUE SPECIFICATIONS .  

11. After installing the spacer plate support (2), look through the hole in the spacer plate to ensure that the 

checkball (1) has remained in the proper location. See Fig. 24 .  

12. Install a new 1-2 accumulator piston seal (1) to the 1-2 accumulator piston. See Fig. 17 .  

13. Install the 1-2 accumulator inner and outer springs to the 1-2 accumulator cover. See Fig. 25 .  

14. Install the 1-2 accumulator piston onto the pin in the 1-2 accumulator cover. Ensure that the piston legs 

face the accumulator cover.  

15. Install the 1-2 accumulator cover and the accumulator cover bolts. See Fig. 15 . Tighten the bolts to 

specification. See TORQUE SPECIFICATIONS .  

16. Remove the pump and valve body alignment pin set from the transmission case.  

17. Install the valve body. See VALVE BODY & PRESSURE SWITCH .  

18. Install the transmission filter.  


2004 Hummer H2 

2003-04 AUTOMATIC TRANSMISSIONS Servicing - H2


Fig. 22: Installing 3-4 Accumulator Pin 
Courtesy of GENERAL MOTORS CORP.


2004 Hummer H2 

2003-04 AUTOMATIC TRANSMISSIONS Servicing - H2


Fig. 23: Installing Spacer Plate 
Courtesy of GENERAL MOTORS CORP.


2004 Hummer H2 

2003-04 AUTOMATIC TRANSMISSIONS Servicing - H2


Content   ..  2618  2619  2620  2621   ..