Hummer H2. Manual - part 1354


  Index      Hummer     Hummer H2 - service repair manual 2004 year


Search            


Content   ..  1352  1353  1354  1355   ..


Hummer H2. Manual - part 1354


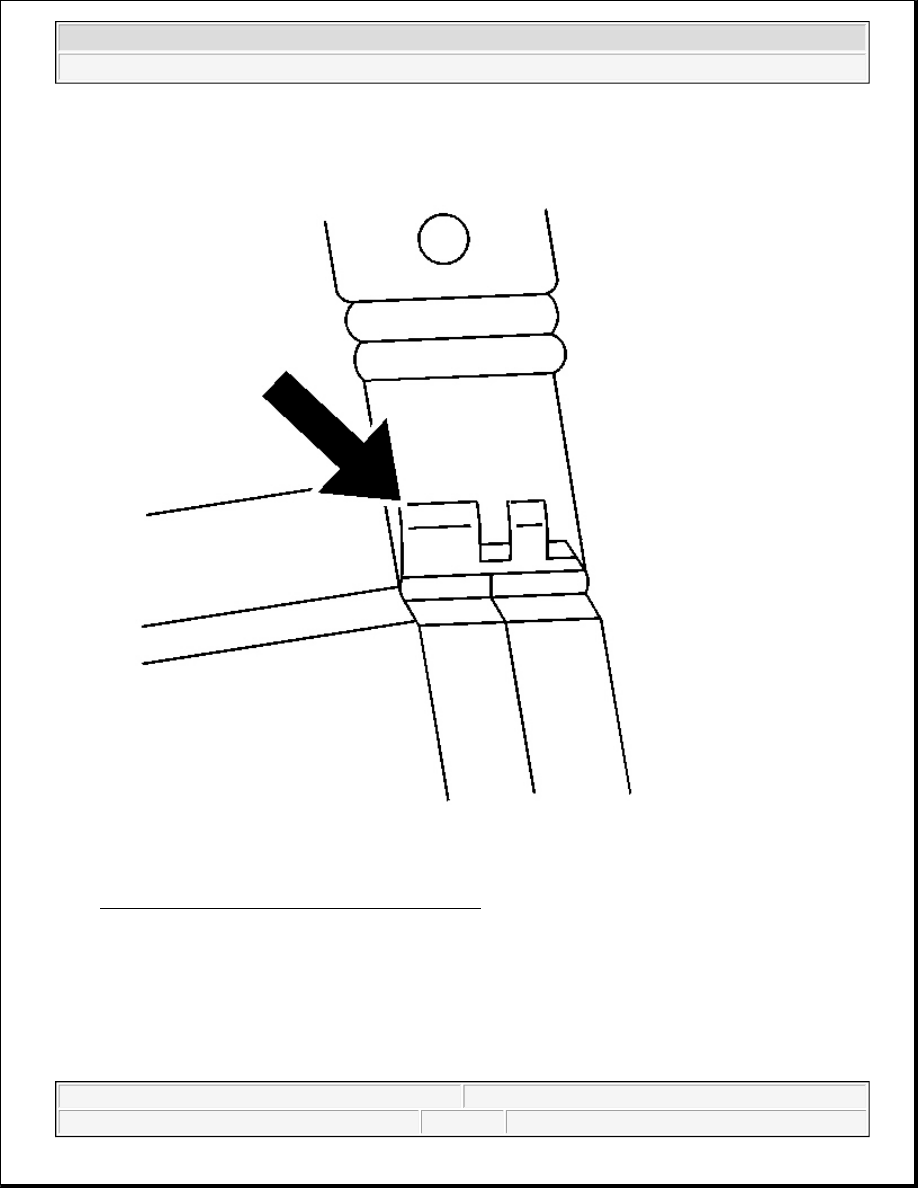
Fig. 36: Inserting Terminal Into Terminal Holder 
Courtesy of GENERAL MOTORS CORP. 

4. Insert terminal into the appropriate terminal holder until it hits bottom and stops. The correct terminal 

holder is determined by the wire size. Also ensure that the terminals wings are pointing towards the 
former on the tool and the release locator.  

5. Insert the stripped cable into the terminal. Insulation should be visible on both sides of the terminal 

insulation wings.  

6. Compress the handles until the ratchet automatically releases. 


2004 Hummer H2 

2004 ACCESSORIES & EQUIPMENT Wiring Systems - Hummer H2


7. Place the terminal into the appropriate cavity and assemble the connector.  

WEATHER PACK CONNECTORS 

The following is the proper procedure for the repair of Weather Pack(R) Connectors. 

Fig. 37: Separating Weather Pack Connector Halves 
Courtesy of GENERAL MOTORS CORP. 

1. Separate the connector halves (1).  

2. Open the secondary lock. A secondary lock aids in terminal retention and is usually molded to the 

connector (1).  

3. Grasp the wire and push the terminal to the forward most position. Hold the wire in this position. 


2004 Hummer H2 

2004 ACCESSORIES & EQUIPMENT Wiring Systems - Hummer H2


Fig. 38: Removing Cable & Terminal From Connector 
Courtesy of GENERAL MOTORS CORP. 

4. Insert the Weather Pack(R) terminal removal tool into the front (mating end) of the connector cavity until 

it rests on the cavity shoulder (1).  

5. Gently pull on the wire to remove the terminal through the back of the connector (2). 

6. Inspect the terminal and connector for damage. Repair as necessary. Refer to Repairing Connector 

Terminals .  

7. Reform the lock tang (2) and reset terminal in connector body.  

8. Close secondary locks and join connector halves. 

IMPORTANT: Never use force to remove a terminal from a connector.


2004 Hummer H2 

2004 ACCESSORIES & EQUIPMENT Wiring Systems - Hummer H2


9. Verify that circuit is complete and working satisfactorily.  

10. Perform system check.  

REPAIRING CONNECTOR TERMINALS 

Tools Required 

J-38125 Terminal Repair Kit. See Special Tools and Equipment . 

Repairing Connector Terminals 

Use the following repair procedures in order to repair the following: 

z

Push to Seat terminals  

z

Pull to Seat terminals  

Some terminals do not require all of the steps shown. Skip the steps that do not apply for your terminal repair. 
The J-38125 contains further information. See Special Tools and Equipment . 

1. Cut off the terminal between the core and the insulation crimp. Minimize any wire loss. 

For cable seal terminals, remove the seal. 

2. Apply the correct cable seal per gauge size of the wire, if used. 

Slide the seal back along the wire in order to enable insulation removal. 

3. Remove the insulation.  

4. For sealed terminals only, align the seal with the end of the cable insulation.  

5. Position the strip in the terminal. 

For sealed terminals, position the strip and seal in the terminal. 

6. Hand crimp the core wings.  

7. Hand crimp the insulation wings. 

For sealed terminals, hand crimp the insulation wings around the seal and the cable. 

8. Solder all of the hand crimp terminals excepting Micro-Pack 100 .64 size. Soldering Micro-Pack 100 

World terminals may damage the terminal.  

SCHEMATIC AND ROUTING DIAGRAMS 

POWER AND GROUNDING SCHEMATIC ICONS 


2004 Hummer H2 

2004 ACCESSORIES & EQUIPMENT Wiring Systems - Hummer H2


Content   ..  1352  1353  1354  1355   ..