Hummer H1 (2006+). Manual - part 326
11-38 Heating/Ventilation/Air Conditioning (HVAC)
______________________
9.
Remove the fastener from the passenger side closeout panel.
10. Lower the panel down to gain access to the floor outlet hose, remove the screw securing the hose and remove the closeout panel.
11. Remove the two screws securing the passenger side of the auxiliary heat/cool unit. Raise the cover up approximately 2" and
support with a block of wood.
12. Remove the passenger side door strap bracket and the seat belt buckle assembly.
13. Remove the front passenger seat and the right front inner and outer kick panels.
NOTE: Panels are removed to prevent damage that would occur during HVAC unit removal.
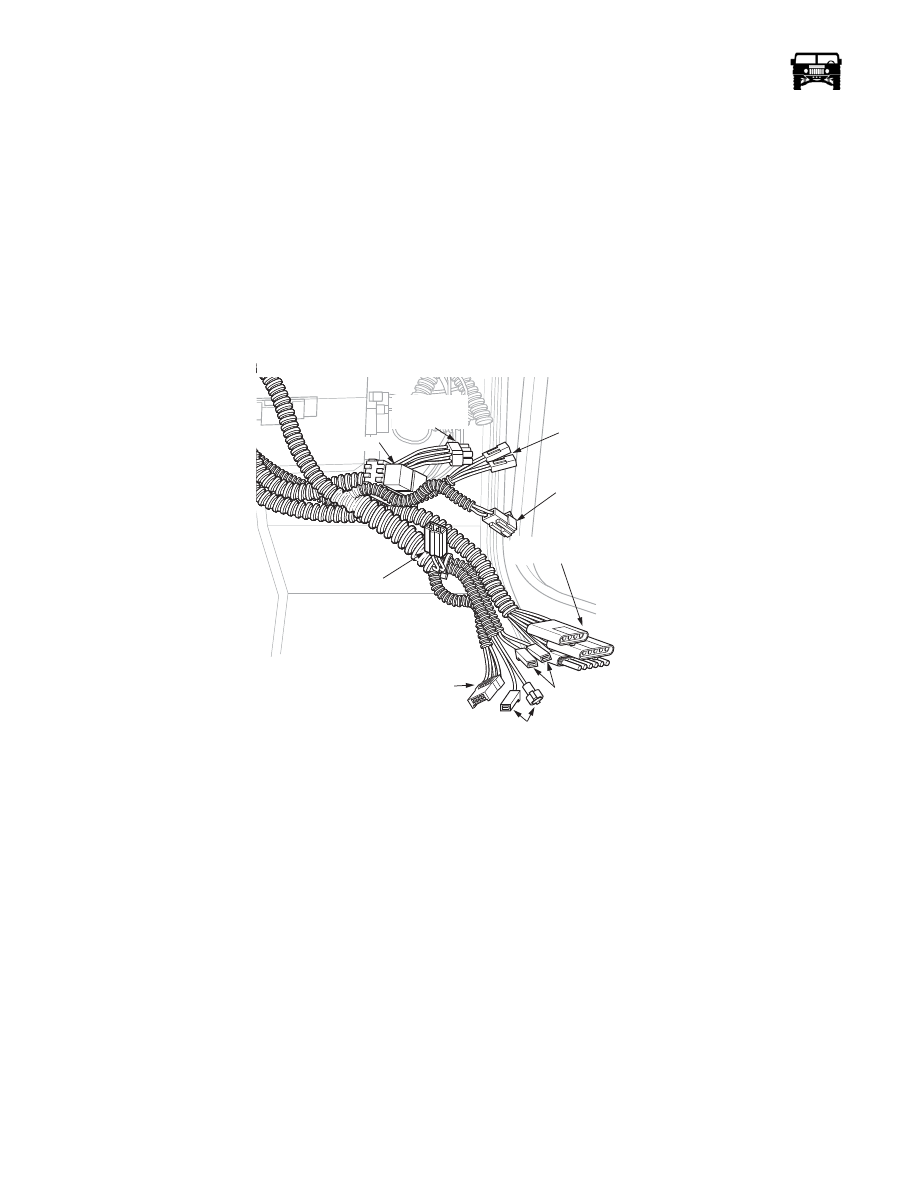
14. Note the HVAC harness positioning prior to removal/disconnect.
15. Disconnect the vacuum motor harness, engine HVAC harness, water valve harness, temperature blend door connector, cycling
switch connections, power mirror harness, resistor harness, power door lock harness, power window harness and the blower
motor connections (Figure 11-29).
Figure 11-29: Harness/Connector Identification
16. Pull the harnesses clear of the HVAC unit and secure.
17. Remove the screw(s) securing the floor duct to the top of the HVAC unit. Disconnect the hose going to the passenger floor
area and remove the hose.
18. Remove the two screws, the Christmas tree fastener and remove the transition assembly.
19. Remove the bolt securing the HVAC manifold block to the expansion valve and discard the sealing gasket. Cap all the
openings.
20. Remove the two interior bolts securing the left and the right side of the HVAC unit to the body. Support the unit prior to
removing the second fastener to prevent the unit from falling down and causing possible damage or injury (Figure 11-30).
21. Removal of the unit can be accomplished by lowering and pulling straight rearward.
Installation
Lift the HVAC unit into the vehicle.
1.
Set the lower bracket on the HVAC unit on top of the lower body bracket. Ensure that the studs on the pass through plate align
with the holes in the body. Harnesses must be positioned to exit to the right side of the HVAC unit.
2.
Pivot the unit upwards until it rests against the defrost and floor ducts. Install the right side fastener, two nuts, washers and
grommets on the passthrough plate. Slowly tighten the front pass through mounts first. This action will pull the unit forward.
Ensure that the defrost and heating ducts align properly with the outlets on the HVAC unit before tightening inside mounts.
POWER MIRROR
ENGINE HVAC
VACUUM
RELAYS
RESISTOR
TEMP BLEND
DOOR MOTOR
BLOWER MOTOR
CYCLING
SWITCH
POWER LOCKS
AND WINDOWS
7-S11-062
CONTROL