Hummer H1 (2006+). Manual - part 296
10-46 Body
______________________________________________________________________
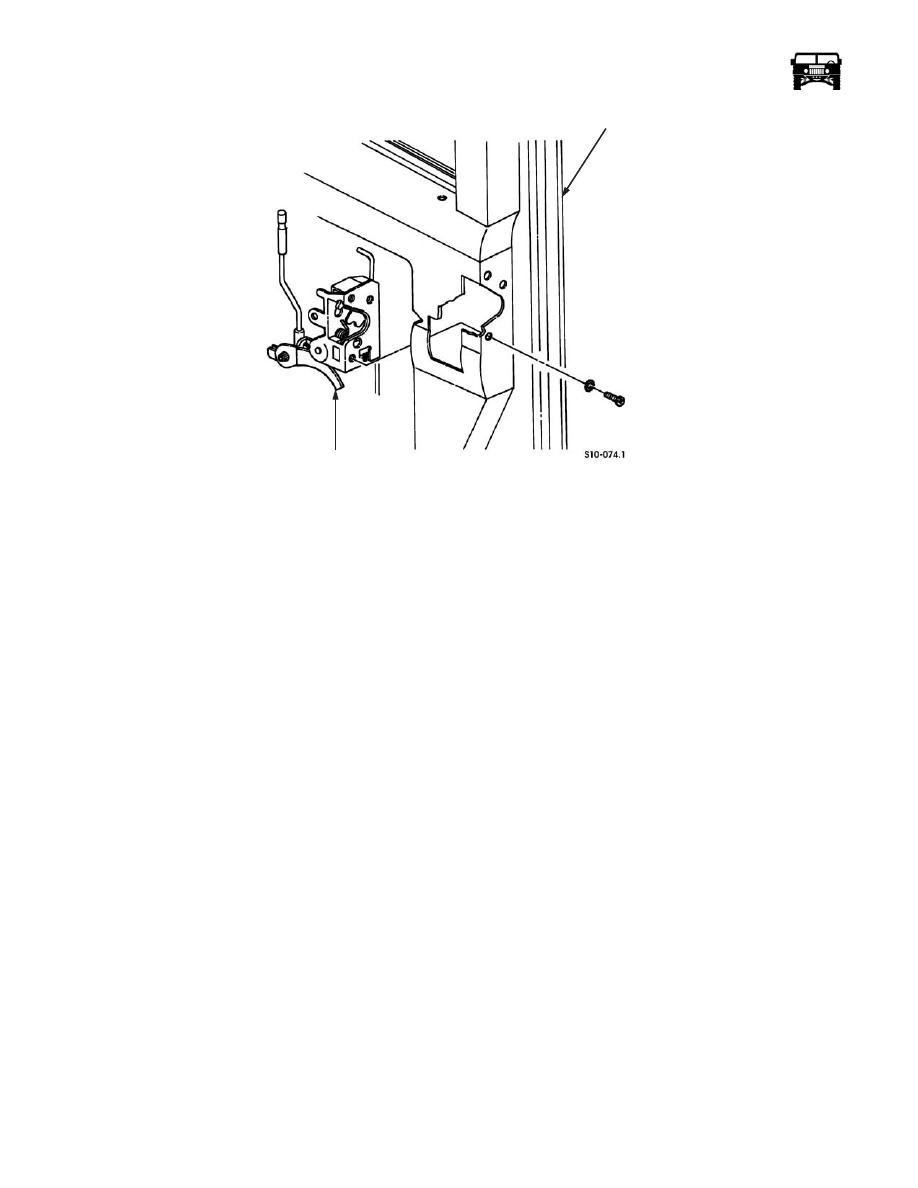
Figure 10-50: Latch Assembly
CAUTION: Firmly support the glass during regulator removal to avoid damage.
Remove the power window regulator (Refer to section 10).
Cleaning and Inspection
NOTE: Clean all the components and examine for wear or damage. Replace if necessary.
Assembly
1.
Install the power windows regulator (Refer to section 10).
2.
Install all the rods on the door latch assembly (Figure 10-50).
WARNING: Screws securing the latch assembly have metric threads. Substituting non-metric threaded screws can
result in door opening during vehicle operation. Do not substitute screws.
3.
Secure the latch assembly to the door with the lock washers and the screws.
4.
Connect the outside operating rod to the outside door handle and secure the gasket and the outside door handle to the door with
the nuts and the lock washers (Figure 10-51).
5.
(Front doors only) Install the lock cylinder in the door and secure the lock operating rod and the lever to the lock cylinder with
the clip.
6.
(Front doors only) Secure the lock cylinder in the door with the lock cylinder clip (Figure 10-49).
7.
Install the inside operating rod on the door latch assembly.
NOTE: The vapor barrier must be completely sealed at all edges to prevent water entry into the interior of the vehicle.
8.
Install the moisture barrier flap and the vapor barrier on the door (Figure 10-48).
9.
Secure the door trim panel to the door with the screws (Figure 10-48).
10. Connect the inside operating rod to the inside door handle and install the inside door handle on the door trim panel with the
screws.
DOOR
LATCH ASSEMBLY