Honda Odyssey (2024 year). Manual in english - page 17
 

  Index      Manuals     Honda Odyssey (2024 year). Manual in english


Search            copyright infringement  


Content      ..     15      16      17      18     ..


Honda Odyssey (2024 year). Manual in english - page 17


547

uu

Honda Sensing

®

u

Traffic Sign Recognition System

Continued

Driving

Traffic Sign Recognition System

Reminds you of road sign information, such as the current speed limit your vehicle 
has just passed through, showing it on the driver information interface.

When the camera located behind the rearview mirror captures traffic signs while 
driving, the system displays the ones that are recognized as designated for your 
vehicle. The sign icon will be displayed until the vehicle reaches a predetermined 
time and distance.
If the system does not detect any traffic signs while you are driving, the sign icon will 
not be displayed

The sign icon also may switch to another one, or disappear when:

The other designated limit is detected.

You make a turn with a turn signal at an intersection.

How the System Works

1

Traffic Sign Recognition System

Not all signs may be displayed, but any signs posted 
on roadsides should not be ignored. The system does 
not work on the designated traffic signs of all the 
countries you travel, nor in all situations.
Do not rely too much on the system. Always drive at 
speeds appropriate for the road conditions.

Never apply a film or attach any objects to the 
windshield that could obstruct the camera’s field of 
vision and cause the system to operate abnormally.
Scratches, nicks, and other damage to the windshield 
within the camera’s field of vision can cause the 
system to operate abnormally. If this occurs, we 
recommend that you replace the windshield with a 
genuine Honda replacement windshield. Making even 
minor repairs within the camera’s field of vision or 
installing an aftermarket replacement windshield may 
also cause the system to operate abnormally. After 
replacing the windshield, have a dealer recalibrate the 
camera. Proper calibration of the camera is necessary 
for the system to operate properly.

To help reduce the likelihood that high interior 
temperatures will cause the camera’s sensing system to 
shut off, when parking, find a shady area or face the front 
of the vehicle away from the sun. If you use a reflective sun 
shade, do not allow it to cover the camera housing.
Covering the camera can concentrate heat on it.

You can read about handling information for the 
camera equipped with this system.

2

Front Sensor Camera

 P. 552

uu

Honda Sensing

®

u

Traffic Sign Recognition System

548

Driving

The traffic sign recognition system may not be able to recognize a traffic sign in the 
following cases.

Vehicle conditions

Headlight lenses are dirty or the headlights are not properly adjusted.

The outside of the windshield is blocked by dirt, mud, leaves, wet snow, etc.

The inside of the windshield is fogged.

There are portions remaining to be wiped.

An abnormal tire or wheel condition (wrong size, varied size or construction, 
improperly inflated, compact spare tire, etc.).

The vehicle is tilted due to a heavy load or suspension modifications.

Environmental conditions

Driving into low sunlight (e.g., at dawn or dusk).

Strong light is reflected onto the roadway.

Sudden changes between light and dark, such as an entrance or exit of a tunnel.

When you drive in the shadows of trees, buildings, etc.

Driving at night, in dark areas such as long tunnels.

Driving in bad weather (rain, fog, snow, etc.).

A vehicle in front of you is kicking up spray or snow.

Traffic Sign Recognition System Conditions and Limitations

1

Traffic Sign Recognition System Conditions and Limitations

When the traffic sign recognition system 
malfunctions, 

 appears on the driver information 

interface. If this message does not disappear, have 
your vehicle checked by a dealer.

549

uu

Honda Sensing

®

u

Traffic Sign Recognition System

Continued

Driving

The position or the condition of the traffic sign

A sign is hard to be found since it is in a complicated area.

A sign is located far away from your vehicle.

A sign is located where the beam of the headlight is hard to reach.

A sign is on a corner or bend in the road.

Faded or bent signs.

Rotated or damaged signs.

A sign is covered with mud, snow, or frost.

A part of the sign is hidden by the trees, or the sign itself is hidden by a vehicle 
and others.

Light (a streetlight) or a shadow is reflected on the surface of the sign.

A sign is too bright or too dark (an electric sign).

A sign of a small size.

Other conditions

When you are driving at a high speed.

550

uu

Honda Sensing

®

u

Traffic Sign Recognition System

Driving

The traffic sign recognition system may not operate correctly, such as displaying a 
sign that does not follow the actual regulation for the roadway or does not exist at 
all in the following cases.

u

A speed limit sign may display at a higher or lower speed than the actual speed 
limit.

There is a supplementary sign with further information such as weather, time, 
vehicle type, school zone, etc.

Figures on the sign are hard to read (electric signs, numbers on the sign are 
blurred, etc.).

A sign is in the vicinity of the lane you are driving in, even though it is not for the 
lane (speed limit sign situated at the junction between the side road and the main 
road, etc.).

There are things that look similar to the color or shape of the recognition object 
(similar sign, electric sign, signboard, structure, etc.).

A truck or another large vehicle with a sticker of the speed limit sign on the back 
is traveling in front of you.

551

uu

Honda Sensing

®

u

Traffic Sign Recognition System

Driving

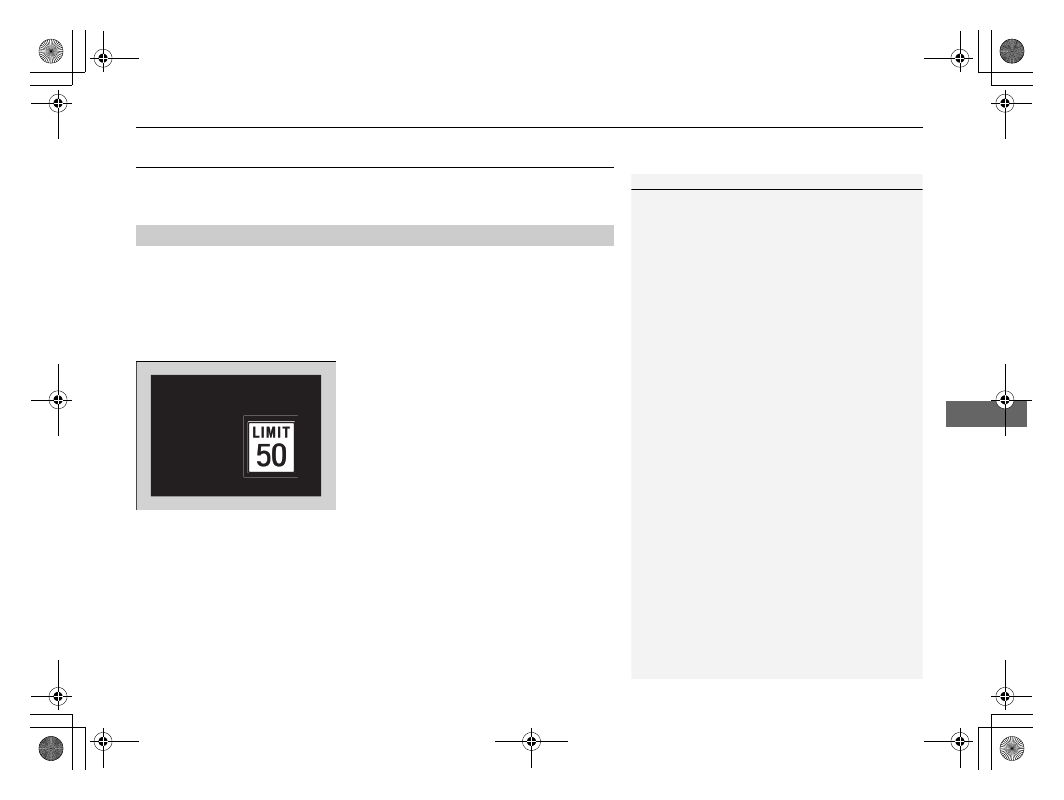
The speed limit sign icon is displayed on the upper right half of the screen.

Speed limit sign on and off

You can switch on and off the speed limit sign on the audio/information screen.

2

Customized Features

 P. 413

Signs Displayed on the Driver information interface

Speed Limit Sign

552

uu

Honda Sensing

®

u

Front Sensor Camera

Driving

Front Sensor Camera

The camera, used in systems such as Collision Mitigation Braking System

TM


(CMBS

TM

), Road Departure Mitigation (RDM), Adaptive Cruise Control (ACC) with 

Low Speed Follow, Lane Keeping Assist System (LKAS), Traffic Sign Recognition 
System, and Auto High-Beam, is designed to detect an object that triggers any of 
the systems to operate its functions.

This camera is located behind the rearview 
mirror.

To help reduce the likelihood that high interior 
temperatures will cause the camera’s sensing 
system to shut off, when parking, find a shady 
area or face the front of the vehicle away from 
the sun. If you use a reflective sun shade, do 
not allow it to cover the camera housing.
Covering the camera can concentrate heat on 
it.

Camera Location and Handling Tips

1

Front Sensor Camera

Never apply a film or attach any objects to the 
windshield, the hood, or the front grille that could 
obstruct the camera’s field of vision and cause the 
system to operate abnormally.
Scratches, nicks, and other damage to the windshield 
within the camera’s field of vision can cause the 
system to operate abnormally. If this occurs, we 
recommend that you replace the windshield with a 
genuine Honda replacement windshield. Making 
even minor repairs within the camera’s field of vision 
or installing an aftermarket replacement windshield 
may also cause the system to operate abnormally.
After replacing the windshield, have a dealer 
recalibrate the camera. Proper calibration of the 
camera is necessary for the system to operate 
properly.

Do not place an object on the top of the instrument 
panel. It may reflect onto the windshield and prevent 
the system from detecting lane lines properly.

Front Sensor 
Camera

553

uu

Honda Sensing

®

u

Front Sensor Camera

Driving

1

Front Sensor Camera

If the 

Some Driver Assist Systems Cannot 

Operate: Camera Temperature Too High

 message 

appears:

Use the climate control system to cool down the 
interior and, if necessary, also use defroster mode 
with the airflow directed towards the camera.

Start driving the vehicle to lower the windshield 
temperature, which cools down the area around 
the camera.

If the 

Some Driver Assist Systems Cannot 

Operate: Clean Front Windshield

 message 

appears:

Park your vehicle in a safe place, and clean the 
windshield. If the message does not disappear after 
you have cleaned the windshield and driven for a 
while, have your vehicle checked by a dealer.

554

uu

Honda Sensing

®

u

Radar Sensor

Driving

Radar Sensor

The radar sensor is in the front grille.

1

Radar Sensor

Avoid strong impacts to the radar sensor cover.

For the CMBS

TM

 to work properly:

Always keep the radar sensor cover clean.

Never use chemical solvents or polishing powder 
for cleaning the sensor cover. Clean it with water 
or a mild detergent.

Do not put a sticker on the radar sensor cover or 
replace the radar sensor cover.

If you need the radar sensor to be repaired, or 
removed, or the radar sensor cover is strongly 
impacted, turn off the system by using the CMBS

TM


OFF button and take your vehicle to a dealer.

2

CMBS

TM

 On and Off

 P. 510

If the vehicle is involved in any of the following 
situations, the radar sensor may not work properly. 
Have your vehicle checked by a dealer:

Your vehicle is involved in a frontal collision.

Your vehicle drives through deep water or is 
submerged in deep water.

Your vehicle strongly strikes a bump, curb, chock, 
or embankment that could jar the radar sensor.

Radar Sensor

555

Continued

Driving

Braking

Brake System

Use the parking brake to keep the vehicle stationary when parked. When the 
parking brake is applied, you can manually or automatically release it.

To apply

The electric parking brake can be applied any 
time the vehicle has battery, no matter which 
position the power mode is in.
Press the electric parking brake switch gently 
and securely.

u

The parking brake and brake system 
indicator (red) comes on.

Parking Brake

1

Brake System

When you depress the brake pedal, you may hear a 
whirling sound from the engine compartment. This is 
because the brake system is in operation, and it is 
normal.

1

Parking Brake

You may hear the electric parking brake system 
motor operating from the rear wheel area when you 
apply or release the parking brake. This is normal.

The brake pedal may slightly move due to the electric 
parking brake system operation when you apply or 
release the parking brake. This is normal.

You cannot apply or release the parking brake if the 
battery goes dead.

2

If the Battery Is Dead

 P. 651

If you press and hold the electric parking brake 
switch while driving, the brakes on all four 
wheels are applied by the VSA

®

 system until the 

vehicle comes to a stop. The electric parking 
brake then applies, and the switch should be 
released.

Electric Parking Brake Switch

uu

Braking

u

Brake System

556

Driving

To release

The power mode must be in ON in order to 
release the electric parking brake.

1.

Depress the brake pedal fully.

2.

Pull the electric parking brake switch up 
gently and securely.

u

The parking brake and brake system 
indicator (red) goes off.

Manually releasing the parking brake using 
the switch helps your vehicle start slowly and 
smoothly when facing down hill on steep hills.

1

Parking Brake

In the following situations, the parking brake 
automatically operates.

When the vehicle stops more than 10 minutes 
while ACC with Low Speed Follow is activated.

When the driver’s seat belt is unfastened while 
your vehicle is stopped automatically by ACC with 
Low Speed Follow.

When the engine is turned off, except by Auto Idle 
Stop system, while ACC with Low Speed Follow is 
activated.

When the vehicle stops with the automatic brake 
hold system activated for more than 10 minutes.

When the driver’s seat belt is unfastened while 
your vehicle is stopped and brake hold is applied.

When the engine is turned off, except by Auto Idle 
Stop system, while brake hold system is applied.

When there is a problem with the brake hold 
system while brake hold is applied.

Electric Parking Brake Switch

Continued

557

uu

Braking

u

Brake System

Driving

To release automatically

Depressing the accelerator pedal releases the parking brake.
Use the accelerator pedal to release the brake when you are starting the vehicle 
facing uphill, or in a traffic jam.

Gently depress the accelerator pedal.
When on a hill, it may require more 
accelerator input to release.

u

The parking brake and brake system 
indicator (red) goes off.

You can release the parking brake automatically when:

You are wearing the driver’s seat belt.

The engine is running.

The transmission is not in 

(

P

 or 

(

N

.

1

Parking Brake

If the parking brake cannot be released 
automatically, release it manually.

When the vehicle is traveling uphill, the accelerator 
pedal may need to be pressed farther to 
automatically release the electric parking brake.

The parking brake cannot be released automatically 
while the following indicators are on:

Malfunction indicator lamp

Transmission system indicator

The parking brake may not be released automatically 
while the following indicators are on:

Parking brake and brake system indicator (amber)

VSA

®

 system indicator

ABS

 indicator

Supplemental restraint system indicator

Accelerator Pedal

uu

Braking

u

Brake System

558

Driving

Your vehicle is equipped with disc brakes at all four wheels. The brake assist system 
increases the stopping force when you depress the brake pedal hard in an 
emergency situation. The anti-lock brake system (ABS) helps you retain steering 
control when braking very hard.

2

Brake Assist System

 P. 562

2

Anti-lock Brake System (ABS)

 P. 561

Foot Brake

1

Foot Brake

Check the brakes after driving through deep water, 
or if there is a buildup of road surface water. If 
necessary, dry the brakes by lightly depressing the 
pedal several times.

If you hear a continuous metallic friction sound when 
applying the brakes, this is caused by the brake wear 
indicator rubbing on the brake rotor and indicates 
that the brake pads need to be replaced. Have the 
vehicle checked by a dealer. If you hear only an 
occasional squeak or squeal when you initially apply 
the brake pedal, this may be normal and caused by 
high frequency vibration of the brake pads against 
the rotating brake disc.

Constantly using the brake pedal while going down a 
long hill builds up heat, which reduces the brake 
effectiveness. Apply engine braking by taking your 
foot off the accelerator pedal and downshifting to a 
lower gear.

Do not rest your foot on the brake pedal while 
driving, as it will lightly apply the brakes and cause 
them to lose effectiveness over time and reduce pad 
life. It will also confuse drivers behind you.

Whenever the brakes are activated by CMBS

TM

 or 

another system that automatically controls braking, 
the brake pedal is depressed and released in 
accordance with braking function.

Continued

559

uu

Braking

u

Brake System

Driving

Keeps the brake applied after releasing the brake pedal until the accelerator pedal is 
pressed. You can use this system while the vehicle is temporarily stopped, like at 
traffic lights and in heavy traffic.

Automatic Brake Hold

1

Automatic Brake Hold

3

WARNING

Activating the automatic brake hold system 
on steep hills or slippery roads may still 
allow the vehicle to move if you remove 
your foot from the brake pedal.

If a vehicle unexpectedly moves, it may 
cause a crash resulting in serious injury or 
death.

Never activate the automatic brake hold 
system or rely on it to keep a vehicle from 
moving when stopped on a steep hill or 
slippery roads.

3

WARNING

Using the automatic brake hold system to 
park the vehicle may result in the vehicle 
unexpectedly moving.

If a vehicle moves unexpectedly, it may 
cause a crash, resulting in serious injury or 
death.

Never leave the vehicle when braking is 
temporarily kept by automatic brake hold 
and always park the vehicle by putting the 
transmission in 

(

P

 and applying the parking 

brake.

Turning on the system

Activating the system

Canceling the system

Automatic Brake Hold 
Button

Comes 
On

On

Comes 
On

Comes 
On

On

U.S.

Canada

Brake Pedal

Accelerator Pedal

Fasten your seat belt 
properly, then start the 
engine. Press the 
automatic brake hold 
button.

The automatic brake 
hold system indicator 
comes on. The system is 
turned on.

Depress the brake pedal 
to come to a complete 
stop. The transmission 
must be in 

(

D

 or 

(

N

.

The automatic brake 
hold indicator comes 
on. Braking is kept for 
up to 10 minutes.

Release the brake 
pedal after the 
automatic brake hold 
indicator comes on.

Depress the accelerator 
pedal while the 
transmission is in 

(

D

.

The system is canceled 
and the vehicle starts to 
move.

The automatic brake 
hold system indicator 
comes on. The system 
continues to be on.

U.S.

Canada

On

Comes 
On

uu

Braking

u

Brake System

560

Driving

The system automatically cancels when:

You engage the parking brake.

You depress the brake pedal and put the transmission into 

(

P

 or 

(

R

.

The system automatically cancels and the parking brake is applied when:

Braking is kept for more than 10 minutes.

The driver’s seat belt is unfastened.

The engine is turned off.

Brake Hold System Problem

 appears on the driver information interface.

There is a problem with automatic brake hold system.

Turning off the automatic brake hold system

While the system is on, press the automatic 
brake hold button again.

u

The automatic brake hold system 
indicator goes off.

If you want to turn off automatic brake hold 
while the system is in operation, press the 
automatic brake hold button with the brake 
pedal depressed.

1

Automatic Brake Hold

While the system is activated, you can turn off the 
engine or park the vehicle through the same 
procedure as you normally do.

2

When Stopped

 P. 563

Whether the system is on, or the system is activated, 
the automatic brake hold turns off once the engine is 
off.

1

Turning off the automatic brake hold system

Make sure to turn off the automatic brake hold 
system before using an automated car wash.

You may hear an operating noise if the vehicle moves 
while the automatic brake hold system is in 
operation.

Automatic Brake Hold 
Button

Goes 
Off

561

uu

Braking

u

Anti-lock Brake System (ABS)

Driving

Anti-lock Brake System (ABS)

Helps prevent the wheels from locking up, and helps you retain steering control by 
pumping the brakes rapidly, much faster than you can.

The electronic brake distribution (EBD) system, which is part of the ABS, also 
balances the front-to-rear braking distribution according to vehicle loading.

You should never pump the brake pedal. Let the ABS work for you by always 
keeping firm, steady pressure on the brake pedal. This is sometimes referred to as 
“stomp and steer.”

ABS operation

The brake pedal may pulsate slightly when the ABS is working. Depress the brake 
pedal and keep holding the pedal firmly down. On dry pavement, you will need to 
press on the brake pedal very hard before the ABS activates. However, you may feel 
the ABS activate immediately if you are trying to stop on snow or ice.

ABS may activate when you depress the brake pedal when driving on:

Wet or snow covered roads.

Roads paved with stone.

Roads with uneven surfaces, such as potholes, cracks, manholes, etc.

When the vehicle speed goes under 6 mph (10 km/h), the ABS stops.

ABS

1

Anti-lock Brake System (ABS)

NOTICE

The ABS may not function correctly if you use a tire of 
the wrong size or type.

If the 

ABS

 indicator comes on while driving, there 

may be a problem with the system. While normal 
braking will not be affected, there is a possibility that 
the ABS will not operating. Have your vehicle 
checked by a dealer immediately.

The ABS is not designed for the purpose of reducing 
the time or distance it takes for a vehicle to stop: It is 
designed to limit brake lockup which can lead to 
skidding and loss of steering control.

In the following cases, your vehicle may need more 
distance to stop than a vehicle without the ABS:

You are driving on rough or uneven road surfaces, 
such as gravel or snow.

The tires are equipped with snow chains.

The following may be observed with the ABS system:

Motor sounds coming from the engine 
compartment when the brakes are applied, or 
when system checks are being performed after the 
engine has been started and while the vehicle 
accelerates.

Brake pedal and/or the vehicle body vibration when 
ABS activates.

These vibrations and sounds are normal to ABS 
systems and are no cause for concern.

562

uu

Braking

u

Brake Assist System

Driving

Brake Assist System

Designed to assist the driver by generating greater braking force when you depress 
the brake pedal hard during emergency braking.

Brake assist system operation

Press the brake pedal firmly for more powerful braking.

When brake assist operates, the pedal may wiggle slightly and an operating noise 
may be heard. This is normal. Keep holding the brake pedal firmly down.

563

Continued

Driving

Parking Your Vehicle

When Stopped

1.

Depress the brake pedal firmly.

2.

With the brake pedal depressed, press the electric parking brake switch slowly, 
but fully.

3.

Change the gear position to 

(

P

.

4.

Turn off the engine.

u

The parking brake and brake system indicator (red) goes off in about 15 
seconds.

1

Parking Your Vehicle

Do not park your vehicle near flammable objects, 
such as dry grass, oil, or timber.
Heat from the exhaust can cause a fire.

1

When Stopped

NOTICE

The following can damage the transmission:

Depressing the accelerator and brake pedals 
simultaneously.

Holding the vehicle in place when facing uphill by 
depressing the accelerator pedal.

Changing into 

(

P

 before the vehicle stops 

completely.

In extremely cold temperatures, the parking brake 
may freeze up if applied. If such temperatures are 
expected, do not apply the parking brake but, if 
parking on a slope, either turn the front wheels so 
they will contact the curb if the vehicle rolls down the 
slope or block the wheels to keep the vehicle from 
moving. If you do not take either precaution, the 
vehicle may roll unexpectedly, leading to a crash.

uu

Parking Your Vehicle

u

When Stopped

564

Driving

Always set the parking brake, especially if you are parked on an incline.

1

When Stopped

3

WARNING

The vehicle can roll away if left unattended 
without confirming that Park is engaged.

A vehicle that rolls away could cause a crash 
resulting in serious injury or death.

Always keep your foot on the brake pedal 
until you have confirmed that 

(

P

 is shown 

on the gear position Indicator.

565

uu

Parking Your Vehicle

u

Parking Sensor System

*

Continued

Driving

Parking Sensor System

*

The corner and center sensors monitor obstacles around your vehicle, and the 
beeper and the driver information interface or audio/information screen let you 
know the approximate distance between your vehicle and the obstacle.

The sensor location and range

1

Parking Sensor System

*

Even when the system is on, always confirm if there is 
no obstacle near your vehicle before parking.

The system may not work properly when:

The sensors are covered with snow, ice, mud, or 
dirt, etc.

The vehicle is on uneven surface, such as grass, 
bumpy road, or a hill.

The vehicle has been out in hot or cold weather.

The system is affected by devices that emit 
ultrasonic waves.

Driving in bad weather.

The system may not sense:

Thin or low objects.

Sonic-absorptive materials, such as snow, cotton, 
or sponge.

Objects directly under the bumper.

Do not put any accessories on or around the sensors.

Within about 24 in (60 cm) or less

Front: Within about 30 in (75 cm) or less
Rear: Within about 43 in (110 cm) or less

Front Corner Sensors

Rear Center Sensors

Rear Corner Sensors

Front Center Sensors

* Not available on all models

uu

Parking Your Vehicle

u

Parking Sensor System

*

566

Driving

Parking sensor system on and off

With the power mode in ON, press the 
parking sensor system button to turn on or off 
the system. The indicator in the button comes 
on when the system is on.

The front corner, rear corner and rear center 
sensors start to detect an obstacle when the 
transmission is in 

(

R

, and the vehicle speed is 

less than 5 mph (8 km/h).

The front corner and front center sensors start 
to detect an obstacle when the transmission is 
not in 

(

P

, and the vehicle speed is less than 5 

mph (8 km/h).

1

Parking sensor system on and off

When you set the power mode to ON, the system will 
be in the previously selected condition.

Continued

567

uu

Parking Your Vehicle

u

Parking Sensor System

*

Driving

Screen Operation

You can switch between split view off and 
split view on by touching the split screen tab.

1

Screen Operation

The split screen tab disappears, and the split view 
returns to the last camera view mode under the 
following conditions:

If the parking sensor system is turned off.

If there is a malfunction in the system.

Split Screen 
Tab

Split View Off

Split View On

568

uu

Parking Your Vehicle

u

Parking Sensor System

*

Driving

When the distance between your vehicle and obstacles behind becomes shorter

*1:At this stage, only the center sensors detect obstacles.

Interval between 

beeps

Distance between the Bumper and Obstacle

Indicator

Audio/information screen/

Driver Information Interface

Corner Sensors

Center Sensors

Moderate

Rear only: 

About 43-30 in 

(110-75 cm)

Blinks in Yellow

*1

Short

About 30-24 in 

(75-60 cm)

Very short

About 24-14 in 

(60-35 cm)

About 24-14 in 

(60-35 cm)

Blinks in Amber

Continuous

About 14 in 

(35 cm) or less

About 14 in 

(35 cm) or less

Blinks in Red

Indicators light up where the 
sensor detects an obstacle

Audio/information screen

Indicators light up where the 
sensor detects an obstacle

Driver information interface

569

uu

Parking Your Vehicle

u

Parking Sensor System

*

Driving

1.

Make sure that the parking sensor system is not activated. Set the power mode to 
VEHICLE OFF.

2.

Press and hold the parking sensor system button, and set the power mode to ON.

3.

Keep pressing the button for 10 seconds. Release the button when the indicator 
in the button blinks.

u

The beeper sounds once.

4.

Press the button again. The indicator in the button goes off.

u

The beeper sounds twice. The rear sensors are now turned off.

To turn the rear sensors on again, follow the above procedure. The beeper sounds 
three times when the rear sensors come back on.

Turning off All Rear Sensors

1

Turning off All Rear Sensors

When you set the gear position to 

(

R

, the indicator 

in the parking sensor system button blinks as a 
reminder that the rear sensors have been turned off.

570

uu

Parking Your Vehicle

u

Cross Traffic Monitor

Driving

Cross Traffic Monitor

Monitors the rear corner areas using the radar sensors when reversing, and alerts 
you if a vehicle approaching from a rear corner is detected.

The system is convenient when you are backing out of a parking space.

1

Cross Traffic Monitor

3

CAUTION

Cross Traffic Monitor cannot detect all 
approaching vehicles and may not 
detect an approaching vehicle at all.

Failure to visually confirm that it is safe 
to back up the vehicle before doing so 
may result in a collision.

Do not solely rely on the system when 
reversing; always also use your mirrors, 
and look behind and to the sides of your 
vehicle before reversing.

Continued

571

uu

Parking Your Vehicle

u

Cross Traffic Monitor

Driving

The system activates when:

The power mode is in ON.

The Cross Traffic Monitor system is turned 
on.

2

Cross Traffic Monitor On and Off

 P. 573

The transmission is in 

(

R

.

Your vehicle is moving at 3 mph (5 km/h) or 
lower.

When a vehicle is detected approaching from a rear corner, Cross Traffic Monitor 
alerts you with a buzzer and a displayed warning.

The system will not detect a vehicle that approaches from directly behind your 
vehicle, nor will it provide alerts about a detected vehicle when it moves directly 
behind your vehicle.

The system does not provide alerts for a vehicle that is moving away from your 
vehicle, and it may alert for pedestrians, bicycles, or stationary objects.

How the System Works

1

Cross Traffic Monitor

Cross Traffic Monitor may not detect or may delay 
alerting an approaching vehicle, or may alert without 
an approaching vehicle under the following 
conditions:

An obstacle, such as another vehicle and a wall, 
near your vehicle’s rear bumper, is blocking the 
radar sensor’s scope.

Your vehicle is moving at the speed of about 3 mph 
(5 km/h) or higher.

A vehicle is approaching at the speed other than 
between about 6 and 16 mph (10 and 25 km/h).

The system picks up external interference such as 
other radar sensors from another vehicle or strong 
radio wave transmitted from a facility nearby.

Either corner of the rear bumper is covered with 
snow, ice, mud or dirt.

When there is bad weather.

Your vehicle is on an incline.

Your vehicle is tilted due to a heavy load in the rear.

Your vehicle is reversing towards a wall, a pole, a 
vehicle, and so on.

The rear bumper or the sensors have been 
improperly repaired or the rear bumper has been 
deformed. Have your vehicle checked by a dealer.

For proper operation, always keep the rear bumper 
corner area clean.
Do not cover the rear bumper corner area with labels 
or stickers of any kind.

Radar sensors:
Underneath the rear bumper 
corners

uu

Parking Your Vehicle

u

Cross Traffic Monitor

572

Driving

An arrow icon appears on the side a vehicle is approaching on the audio/information 
screen.

When the System Detects a Vehicle

1

Cross Traffic Monitor

The parking sensor system’s alerting buzzer overrides 
the Cross Traffic Monitor buzzer when the parking 
sensors are detecting obstacles at the closest range.

1

When the System Detects a Vehicle

If the 

 on the lower right changes to 

 in amber 

when the transmission is in 

(

R

, mud snow or ice may 

have accumulated in the vicinity of the sensor. The 
system is temporarily canceled. Check the bumper 
corners for any obstructions, and thoroughly clean 
the area if necessary.

If the 

 comes on when the transmission is in 

(

R

there may be a problem with the Cross Traffic 
Monitor system. Do not use the system and have your 
vehicle checked by a dealer.

If the display remains the same with the gear position 
is in 

(

R

, there may be a problem with the rear 

camera system and the Cross Traffic Monitor system.
Do not use the system and have your vehicle checked 
by a dealer.

Arrow Icon

Normal View

Top Down View

Wide View

573

uu

Parking Your Vehicle

u

Cross Traffic Monitor

Driving

You can switch on and off the system using the audio/information screen.

1.

Select .

2.

Select 

Settings

.

3.

Select 

Camera

.

4.

Select 

Rear Camera

.

5.

Select 

Cross Traffic Monitor

.

6.

Select 

ON

 or 

OFF

.

The system can also be turned on and off on 
the audio/information screen by pressing the 
Cross Traffic Monitor icon.

Cross Traffic Monitor On and Off

Cross Traffic Monitor Icon

574

Driving

Multi-View Rear Camera

About Your Multi-View Rear Camera

The audio/information screen can display your vehicle’s rear view. The display 
automatically changes to the rear view when the transmission is put into 

(

R

.

Multi-View Rear Camera Display Area

1

About Your Multi-View Rear Camera

The rear camera view is restricted. You cannot see 
the corner ends of the bumper or what is underneath 
the bumper. Its unique lens also makes objects 
appear closer or farther than they actually are.

Visually confirm that it is safe to drive before backing 
up. Certain conditions (such as weather, lighting, and 
high temperatures) may also restrict the rear view. Do 
not rely on the rearview display which does not give 
you all information about conditions at the back of 
your vehicle.

If the camera lens is covered with dirt or moisture, 
use a soft, moist cloth to keep the lens clean and free 
of debris.

You can change the 

Fixed

Dynamic

Both

 and 

OFF


settings.

2

Customized Features

 P. 413

Fixed

: Guidelines appear when you put the 

transmission into 

(

R

.

Dynamic

: Guidelines move according to the steering 

wheel direction.

Both

: Guidelines appear when you put the 

transmission into 

(

R

 and Guidelines move according 

to the steering wheel direction.

OFF

: Guidelines do not appear.

Top Down View Mode

Normal View Mode

Wide View Mode

Guidelines

Bumper

Camera

Approx. 39 inches (1 m)
Approx. 20 inches (50 cm)

575

uu

Multi-View Rear Camera

u

About Your Multi-View Rear Camera

Driving

You can view three different camera modes on the rearview display.
Select the appropriate icon to switch the mode.

: Wide view mode
: Normal view mode
: Top down view mode

If the last used viewing mode was Wide view mode or Normal view mode, the 
same view mode will be activated the next time you put the transmission into 

(

R

.

If Top down view mode was last used before you set the power mode to OFF, 
Wide View mode is selected next time you set the power mode to ON and put the 
transmission into 

(

R

.

If Top down view mode was last used more than 10 seconds after you put the 
transmission out of 

(

R

, Wide View mode is selected the next time you put the 

transmission into 

(

R

.

1

About Your Multi-View Rear Camera

You can change the 

Last Used

Normal View

 and 

Wide View

 settings.

2

Customized Features

 P. 413

576

Driving

Refueling

Fuel Information

Fuel recommendation

Use of a lower octane gasoline can cause a persistent, heavy metallic knocking noise 
that can lead to engine damage.

Top tier detergent gasoline

Because the level of detergency and additives in gasoline vary in the market, Honda 
endorses the use of “TOP TIER Detergent Gasoline” where available to help 
maintain the performance and reliability of your vehicle. TOP TIER Detergent 
Gasoline meets a new gasoline standard jointly established by leading automotive 
manufacturers to meet the needs of today’s advanced engines.

Qualifying gasoline retailers will, in most cases, identify their gasoline as having met 
“TOP TIER Detergent Gasoline” standards at the retail location. This fuel is 
guaranteed to contain the proper level of detergent additives and be free of metallic 
additives. The proper level of detergent additives, and absence of harmful metallic 
additives in gasoline, help avoid build-up of deposits in your engine and emission 
control system. 
For further important fuel-related information for your vehicle, or on information on 
gasoline that does not contain MMT, visit 

www.hondacars.com.

 In Canada, visit 

www.honda.ca

 for additional information on gasoline. For more information on top 

tier gasoline, visit 

www.toptiergas.com

.

Fuel tank capacity: 19.5 US gal (73.8 L)

Unleaded gasoline, pump octane number 87 or higher

1

Fuel Information

NOTICE

We recommend quality gasoline containing 
detergent additives that help prevent fuel system and 
engine deposits. In addition, in order to maintain 
good performance, fuel economy, and emissions 
control, we strongly recommend the use of gasoline 
that does NOT contain harmful manganese-based 
fuel additives such as MMT, if such gasoline is 
available.

Use of gasoline with these additives may adversely 
affect performance, and cause the malfunction 
indicator lamp on your instrument panel to come on. 
If this happens, contact a dealer for service.
Some gasoline today is blended with oxygenates such 
as ethanol. Your vehicle is designed to operate on 
oxygenated gasoline containing up to 15% ethanol 
by volume. Do not use gasoline containing methanol. 
If you notice any undesirable operating symptoms, try 
another service station or switch to another brand of 
gasoline.

577

uu

Refueling

u

How to Refuel

Continued

Driving

How to Refuel

Your fuel tank is not equipped with a fuel filler cap. You can insert the filler nozzle 
directly into the filler neck. The tank seals itself again when you pull out the filler 
nozzle.

1.

Stop your vehicle with the service station 
pump on the left side of the vehicle in the 
rear.

2.

Turn off the engine.

3.

Unlock the driver’s door using the master 
door lock switch.

u

The fuel fill door on the outer side of the 
vehicle will unlock.

2

Locking/Unlocking the Doors from 
the Inside

 P. 156

4.

Press firmly and then release the area 
indicated by the arrow to release the fuel 
filler door.

1

How to Refuel

The fuel filler opening is designed to accept only 
service station filler nozzles for refueling. Use of 
smaller diameter tubes (e.g., those used to siphon 
fuel for other uses) or other non-service station 
devices can damage the area in and around the filler 
opening.

If the filler nozzle keeps turning off when the tank is 
not full, there may be a problem with the pump’s fuel 
vapor recovery system. Try filling at another pump. If 
this does not fix the problem, consult a dealer.

The filler nozzle automatically stops to leave space in 
the fuel tank so that fuel does not overflow as a result 
of changes in air temperature.

Do not continue to add fuel after the filler nozzle has 
automatically stopped. Additional fuel can exceed 
the full tank capacity.

3

WARNING

Gasoline is highly flammable and explosive. 
You can be burned or seriously injured 
when handling fuel.

Stop the engine, and keep heat, sparks, 
and flames away.

Handle fuel only outdoors.

Wipe up spills immediately.

Press

uu

Refueling

u

How to Refuel

578

Driving

5.

Place the end of the filler nozzle on the 
lower part of filler opening, then insert it 
slowly and fully.

u

Make sure that the end of the filler 
nozzle goes down along with the filler 
pipe.

u

Keep the filler nozzle level.

u

When the tank is full, the filler nozzle will 
click off automatically.

u

If you do not fill up the tank to full, 
always add a minimum of 

3.5 US gal 

(13.3 L)

 of fuel.

u

After filling, wait about five seconds 
before removing the filler nozzle.

6.

Shut the fuel fill door by hand.

1

How to Refuel

Use the lock tab or the master door lock switch to 
unlock the fuel fill door.
The vehicle doors and fuel fill door automatically 
relock if the remote unlock function is used. This can 
be deactivated by briefly opening then closing the 
driver’s door.

Using the Walk away auto lock

®

 feature will also lock 

the fuel fill door. Always make sure both the driver’s 
door and fuel fill door are unlocked before 
attempting to open the fuel fill door.

2

Locking the doors and tailgate (Walk away 
auto lock

®

)

 P. 151

If you repeatedly fill the tank with less than the 
specified minimum amount of fuel, the malfunction 
indicator lamp may come on. If this happens, have 
your vehicle checked by a dealer.

If you have to refuel your vehicle from a portable 
container, use the funnel provided with your vehicle.

2

Refueling From a Portable Fuel Container


P. 674


Content      ..     15      16      17      18     ..