Honda Civic Hatchback (2024 year). Manual in english - page 12
 

  Index      Manuals     Honda Civic Hatchback (2024 year). Manual in english


Search            copyright infringement  


Content      ..     10      11      12      13     ..


Honda Civic Hatchback (2024 year). Manual in english - page 12


395

uu

Customized Features

u

Continued

Features

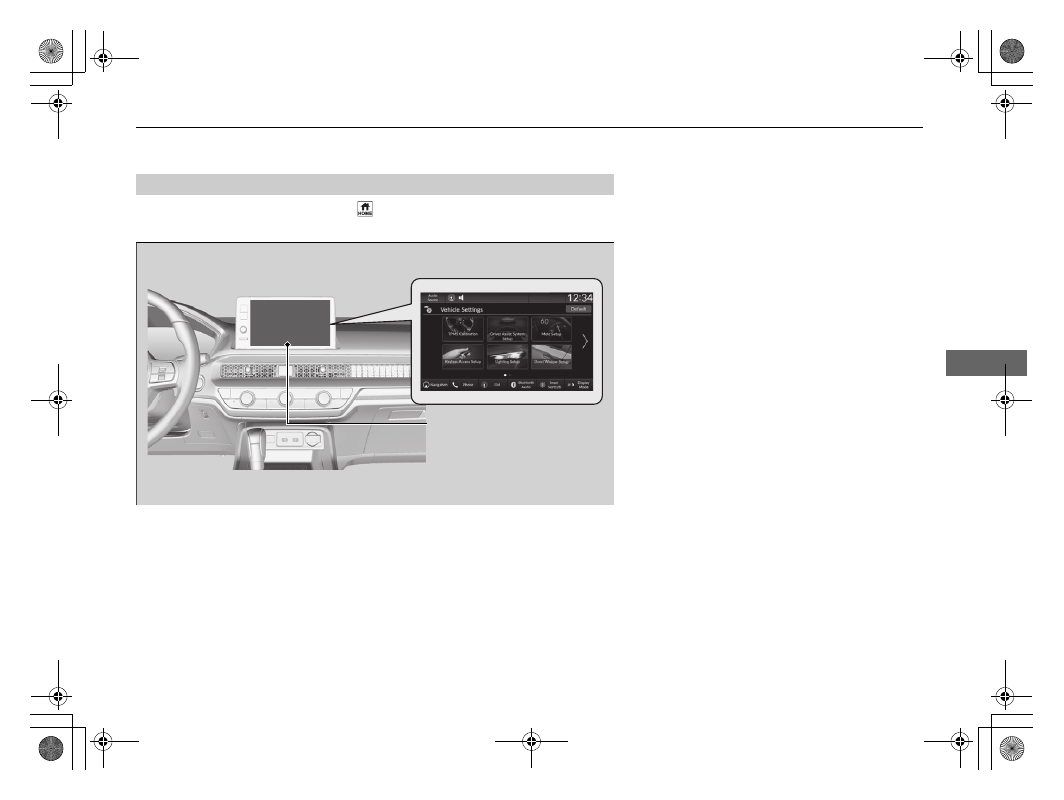
With the power mode in ON, press the 

 button, and then select 

Vehicle Settings


and select a setting item.

How to Customize the Vehicle Settings

Audio/Information Screen

396

uu

Customized Features

u

Features

TPMS Calibration

*

Driver Assist System Setup

*1:Default Setting

Customizable Features

Description

Selectable Settings

TPMS Calibration

Cancels/Calibrates the tire pressure monitoring system (TPMS).

2

Tire Pressure Monitoring System (TPMS)

*

 P. 528

Calibrate

/

Cancel

Customizable Features

Description

Selectable Settings

Forward Collision Warning 
Distance

Changes the distance at which Collision Mitigation Braking 
System

TM

 (CMBS

TM

) alerts.

2

Collision Mitigation Braking System

TM

 (CMBS

TM

)

 P. 543

Long

/

Normal

*1

/

Short

ACC Forward Vehicle Detect 
Beep

Turns On/Off audible notification when vehicle has moved in/out of 
adaptive cruise control with Low Speed Follow

*

 range.

2

Adaptive Cruise Control (ACC) with Low Speed Follow

*

 P. 574

2

Adaptive Cruise Control (ACC)

*

 P. 595

ON

/

OFF

*1

Road Departure Mitigation 
Setting

Selects operating mode of the Road Departure Mitigation system.

2

Road Departure Mitigation System

 P. 566

Narrow

/

Normal

*1

/

Wide

/

Warning Only

Lane Keeping Assist 
Suspend Beep

Switches the LKAS suspend alert beeps on and off.

2

Lane Keeping Assist System (LKAS)

 P. 615

ON

/

OFF

*1

* Not available on all models

397

uu

Customized Features

u

Continued

Features

*1:Default Setting

Customizable Features

Description

Selectable Settings

Blind Spot Info

*

Selects On/Off the blind spot information system audible alert.

2

Blind Spot Information System

*

 P. 535

Audible And Visual Alert

*1

/

Visual Alert

Traffic Sign Recognition 
System Display Setting

Displays the traffic sign recognition system on the instrument panel.

2

Traffic Sign Recognition System

 P. 636

Display

*1

/

None

Traffic Sign Recognition 
System Speed Limit 
Warning

Enables over speed limit warning when speed limit is exceeded.

2

Traffic Sign Recognition System

 P. 636

ON

*1

/

OFF

Speed Limit Warning 
Threshold Setting

Changes the setting speed the traffic sign recognition system over 
speed warning is activated.

2

Traffic Sign Recognition System

 P. 636

Speed Limit

*1

/

Speed Limit


+3mph

/

Speed Limit 

+5mph

/

Speed Limit 

+10mph

(When mph is selected)

Speed Limit

*1

/

Speed Limit 

+5km/h

/

Speed Limit 

+10km/h

/

Speed Limit 

+15km/h

(When km/h is selected)

Driver Attention Monitor

Changes the setting for the driver attention monitor.

2

Driver Attention Monitor

 P. 161

OFF

/

Tactile Alert

/

Tactile 

And Audible Alert

*1

Rev Match System

*

Selects On/Off the rev match system.

2

Rev Match System

*

 P. 498

ON

*1

/

OFF

* Not available on all models

398

uu

Customized Features

u

Features

Meter Setup

Customizable Features

Description

Selectable Settings

Adjust Outside Temp. 
Display

Selects to adjust outside temperature reading by a few degrees.

2

Outside Temperature

 P. 120

-5°F

 ~ 

±0°F

*1

 ~ 

+5°F

 (U.S.)

-3°C

 ~ 

±0°C

*1

 ~ 

+3°C

 (Canada)

Gear Position Display

*

Turns the gear position display feature on and off.

2

Gear Position Indicator

*

 P. 102

ON

*1

/

OFF

“Trip A” Reset Timing

Selects the timing to reset Trip A. 

2

Range/Fuel/Odometer

*

/Trip Meter

 P. 157

2

Speed/Time/Odometer

*

/Trip Meter

 P. 159

When Fully Refueled

/

IGN OFF

/

Manually Reset

*1

“Trip B” Reset Timing

Selects the timing to reset Trip B. 

2

Range/Fuel/Odometer

*

/Trip Meter

 P. 157

2

Speed/Time/Odometer

*

/Trip Meter

 P. 159

When Fully Refueled

/

IGN OFF

/

Manually Reset

*1

Adjust Alarm Volume

Changes volume level of all system warnings, door opening 
warning and indicator.

High

/

Mid

*1

/

Low

Rev Indicator

*

Turns the rev indicators on and off.

2

Rev Indicators

*

 P. 123

ON

*1

/

OFF

Fuel Efficiency Backlight

*

Turns the ambient meter feature on and off.

ON

*1

/

OFF

Turn By Turn Auto Display

Turns on/off the pop-up warning in the turn-by-turn navigation 
in the driver information interface.

2

Turn-by-Turn Directions

 P. 160

ON

*1

/

OFF

Speed/Distance Units

Selects the trip computer units.

2

Speed/Distance Units

 P. 169

km/h · km

/

mph · miles

*1


(U.S.)

km/h · km

*1

/

mph · miles


(Canada)

* Not available on all models

399

uu

Customized Features

u

Continued

Features

*1:Default Setting

Keyless Access Setup

*1:Default Setting

Customizable Features

Description

Selectable Settings

Tachometer

*

Selects whether the tachometer come on the driver information 
interface.

2

Tachometer

 P. 119

ON

*1

/

OFF

Rear Seat Reminder

Turns the Rear Seat Reminder feature on and off.

2

Rear Seat Reminder

 P. 226

ON

*1

/

OFF

Shift Up Alarm

*

Changes whether alarm sounds when the tachometer reading 
approaches the red zone.

2

Tachometer

 P. 119

ON

*1

/

OFF

Customizable Features

Description

Selectable Settings

Door Unlock Mode

Changes which doors unlock when you grab the driver's door 
handle.

Driver Door Only

*1

/

All 

Doors

Smart Entry Light Flash

Causes some exterior lights to flash when you unlock/lock the 
doors.

ON

*1

/

OFF

Smart Entry Beep

Causes the beeper to sound when you unlock/lock the doors.

ON

*1

/

OFF

Remote Start System ON/
OFF

*

Turns the remote engine start feature on and off.

ON

*1

/

OFF

Lockout Protection

Changes the settings for the lockout protection function.

ON

*1

/

OFF

* Not available on all models

400

uu

Customized Features

u

Features

Lighting Setup

*1:Default Setting

Customizable Features

Description

Selectable Settings

Auto High Beam

Turns on/off auto high beam function.

2

Auto High-Beam

 P. 210

ON

*1

/

OFF

Interior Light Dimming Time

Selects the length of time the interior lights stay on after doors are 
closed.

2

Interior Lights

 P. 231

60sec

/

30sec

*1

/

15sec

Headlight Auto OFF Timer

Selects the length of time the exterior lights stay on after you close 
the driver's door.

2

Automatic Lighting Off Feature

 P. 208

60sec

/

30sec

/

15sec

*1

/

0sec

Auto Light Sensitivity

*

Changes the timing for the headlights to come on.

Min

/

Low

/

Mid

*1

/

High

/

Max

Auto Headlight On with 
Wiper On

Selects On/Off headlight function and wiper operation when the 
headlight is in 

AUTO

 setting.

2

Headlight Integration with Wipers

 P. 208

ON

*1

/

OFF

* Not available on all models

401

uu

Customized Features

u

Continued

Features

Door/Window Setup

*1:Default Setting

Customizable Features

Description

Selectable Settings

Auto Door Lock

Changes the setting for the automatic locking feature.

OFF

/

With Vehicle Speed

*1

/

Shift From P

OFF

/

With Vehicle Speed

*1

Auto Door Unlock

Changes the setting for when the doors unlock 
automatically.

OFF

/

All Doors When Driver's Door 

Opens

*1

/

All Doors When Shifted to 

Park

/

All Doors With IGN OFF

OFF

/

All Doors When Driver's Door 

Opens

*1

/

All Doors With IGN OFF

Key And Remote Unlock 
Mode

Sets up either the driver's door or all doors to unlock on 
the first push of the remote key or built-in key.

Driver Door Only

*1

/

All Doors

Walk Away Auto Lock

Changes the settings for the auto lock function when 
you walk away from the vehicle.

ON

/

OFF

*1

Keyless Lock Answer Back

Turns on/off flash of exterior lights when doors are 
locked/unlocked by remote key.

2

Using the Remote Transmitter

 P. 184

ON

*1

/

OFF

Remote Window Control

Turns the remote window control on and off.

ON

*1

/

OFF

Continuously variable transmission models

Manual transmission models

Continuously variable transmission models

Manual transmission models

402

uu

Customized Features

u

Features

INDIVIDUAL Settings

*

*1:Default Setting

Maintenance Info.

Customizable Features

Description

Selectable Settings

Engine

Selects the responsiveness of the engine.

2

Customizing the INDIVIDUAL Settings

 P. 521

COMFORT

/

SPORT

*1

/

+R

Steering

Selects the level of steering effort.

2

Customizing the INDIVIDUAL Settings

 P. 521

COMFORT

/

SPORT

*1

/

+R

Suspension

Selects the firmness of the suspension.

2

Customizing the INDIVIDUAL Settings

 P. 521

COMFORT

/

SPORT

*1

/

+R

Engine Sound

Selects the effect of Engine Sound.

2

Customizing the INDIVIDUAL Settings

 P. 521

COMFORT

/

SPORT

*1

/

+R

Rev Match

Selects the Rev Match responsiveness.

2

Customizing the INDIVIDUAL Settings

 P. 521

COMFORT

/

SPORT

*1

Gauge

Selects the gauges to be displayed in the Driver Information 
Interface.

2

Customizing the INDIVIDUAL Settings

 P. 521

COMFORT

/

SPORT

*1

/

+R

Customizable Features

Description

Selectable Settings

Maintenance Info.

Resets the maintenance information.

2

Maintenance Minder

TM

 P. 686

Select Reset Items

* Not available on all models

403

uu

Customized Features

u

Defaulting All the Settings

Features

Defaulting All the Settings

Reset all the menu and customized settings as the factory defaults.

1.

Press the 

 button.

2.

Select 

General Settings

.

3.

Select 

System

.

4.

Select 

Factory Data Reset

.

u

A confirmation message appears on the 
screen.

5.

Select 

Continue

 to reset the settings.

6.

Select 

Continue

 again to reset the settings.

u

The system will reboot.

1.

Press the 

 button.

2.

Select 

Vehicle Settings

.

3.

Select 

Default

.

4.

Select 

Yes

.

Defaulting General Settings

1

Defaulting All the Settings

When you transfer the vehicle to a third party, reset 
all settings to default and delete all personal data.

If you perform 

Factory Data Reset

, it will reset the 

preinstalled apps to their factory default.

If you perform 

Factory Data Reset

, you cannot use 

the HondaLink

®

 because it becomes off line.

2

HondaLink

®

 P. 337

Defaulting Vehicle Settings

404

Features

Honda LogR

*

About Honda LogR

Monitors driving conditions, and lets you record them. By checking the recorded 
data on the audio/information screen or uploading it to a server, you can compare it 
with other users' data.

Honda LogR has two modes:

Auto Score Mode

Evaluates driving performance in everyday situations.

2

Auto Score Mode

 P. 408

Data Log Mode

Allows you to record and analyze your track driving data.

2

Data Log Mode

 P. 414

Refer to the commentary in the customize menu for more details on each mode.

2

Settings

 P. 426

1

Honda LogR

*

When selling or transferring ownership of a vehicle, 
the customer is responsible for initializing the system. 
If user consent cannot be given, do not use the app.

2

Settings

 P. 426

When the telematics control unit (TCU) is not 
available, use Honda LogR through Wi-Fi.

Some features cannot be used while driving.

Some features cannot interact with the maps 
function.

After starting the engine, logs may not be recorded 
for a certain amount of time.

Depending on driving conditions or connection 
status, some features may not be available.

a

Honda LogR

* Not available on all models

405

uu

Honda LogR

*

u

Initial Settings

Features

Initial Settings

When you use Honda LogR for the first time, you must read and agree to the user 
consent before using this application.

1.

Select 

Honda LogR

 on the home screen.

2.

After confirming the user consent, select 

Agree

.

3.

Check the tutorial screen, then select 

Start

.

u

If you select 

Previous

, the system will 

return to the user consent screen.

406

uu

Honda LogR

*

u

Performance Monitor

Features

Performance Monitor

You can check your vehicle conditions and view individual scores for different areas 
of performance.
There are five screens, and you can switch between them as necessary.

Image

Image Name

Description

Default Display

Displays vehicle behavior in the center of the screen, and vehicle information is 
displayed in real time on the left and right.
The 3D vehicle display in the center can be changed to the G-meter, which 
displays the magnitude and direction of forces acting on the vehicle.
You can set a limit value for some vehicle information. If the limit is passed, the 
corresponding number display will change color.
You can change the limit values, and adjust which items are displayed on-
screen, in the customization menu.

2

Settings

 P. 426

Auto Score Live

Examines performance in areas such as acceleration and deceleration in 
everyday driving situations, and applies a score to each of them in real time.
Refer to the commentary in the customize menu for more details on each item 
displayed here.

2

Settings

 P. 426

407

uu

Honda LogR

*

u

Performance Monitor

Features

Image

Image Name

Description

Tire Friction Circle 
Display

Displays the vehicle behavior in the center of the screen and the forces applied 
to each tire by the tire friction circles.
The 3D vehicle display in the center can be changed to the G-meter, which 
displays the direction and magnitude of forces acting on the vehicle.
Refer to the commentary in the customize menu for more details.

2

Settings

 P. 426

Instrument Panel 
Display

Displays vehicle information in real time.
You can set a limit value for some vehicle information. If the limit is passed, the 
corresponding number display will change color.
You can change the limit values, and adjust which items are displayed on-
screen, in the customize menu.

2

Settings

 P. 426

Measurement Data 
Log

A mode designed for track driving, displays lap time and vehicle information in 
real time.

408

uu

Honda LogR

*

u

Auto Score Mode

Features

Auto Score Mode

This mode is designed for everyday driving situations.
When you turn on Honda LogR, Auto Score mode is selected automatically.
Refer to the commentary in the customize menu for more details.

2

Settings

 P. 426

Select 

Auto Score Log Save

 at the top of the 

performance monitor screen.

Saving will be canceled if you switch to a 
screen other than the performance monitor 
screen before saving is completed.

Saving Auto Score History

1

Auto Score Mode

When you want to Auto Score mode set to OFF, you 
can customize on the 

Settings

 screen.

2

Settings

 P. 426

You can get data for up to 99:59.99 continuously. 
After 99:59.99 elapsed, getting data will be started 
newly.

1

Saving Auto Score History

Auto Score history is stored even if the power mode 
is in VEHICLE OFF.

Continued

409

uu

Honda LogR

*

u

Auto Score Mode

Features

By selecting 

Auto Score

 at the bottom of the performance monitor screen, you can 

check previously recorded Auto Score data. On the Auto Score history screen, a 
graph showing the evaluation transition for each situation, such as acceleration and 
deceleration, is displayed. Also, you can search for scores by date, and data can be 
sorted by date and score.

Select 

Auto Score

 at the bottom of the 

performance monitor screen.

You can search by date.

1.

Select 

Calendar

 at the top of the screen.

2.

Select a date.

You can sort your history.

1.

Select 

Date

.

2.

Select a category to sort the data by.

You can change the data storage location to 

Local

My Server

.

1.

Select 

Local

.

2.

Select a data storage location from 

Local

/

My Sever

.

Checking Auto Score History

1

Checking Auto Score History

The date and the 12/24 hour display format matches 
the main audio display settings.

2

Settings

 P. 426

Refer to the commentary in the customize menu for 
more details on how the scores are generated.

2

Settings

 P. 426

If the date changes while driving, the corresponding 
data will be displayed under the earlier date.

uu

Honda LogR

*

u

Auto Score Mode

410

Features

You can view more details by selecting a 
history item.
You can view separate driving records for 
each performance item that has been scored.
Select the date and time you want to view.

u

Separate scores and routes are displayed 
corresponding to driving performance in 
areas such as acceleration and 
deceleration.

u

You can view more detailed information 
by selecting an area of performance.

You can sort your history.

1.

Select 

Scene

.

2.

Select a category to sort the data by.

Checking Detailed Auto Score History

1

Checking Detailed Auto Score History

Refer to the commentary in the customize menu for 
more details on how the scores are generated.

2

Settings

 P. 426

By selecting the icon on the map, you can switch 
between map view and aerial view.

Continued

411

uu

Honda LogR

*

u

Auto Score Mode

Features

You can view more detailed information by 
selecting a scene for a given performance 
area.

By selecting the play icon, you can also view a 
time progression of the data.

You can enlarge the graph by selecting it. 
After it has been enlarged, you can adjust the 
scale. The vertical axis is adjusted by pinching 
in or out on the screen, and the horizontal axis 
is adjusted by selecting the icons.

Checking the Score Log Details for Auto Score History

1

Checking the Score Log Details for Auto Score History

Refer to the commentary in the customize menu for 
more details on how the scores are generated.

2

Settings

 P. 426

By selecting the icon on the map, you can switch 
between map view and aerial view.

You can enlarge a tire friction circle by selecting it.

By enlarging the tire friction circle display, the vehicle 
displayed in the center of the screen can be changed 
to the G-meter which displays the direction of the 
force applied on the vehicle.

412

uu

Honda LogR

*

u

Auto Score Mode

Features

1.

Select 

Auto Score

 at the bottom of the 

performance monitor screen.

2.

Select 

Log Management

.

3.

Select the data you want to delete, then 
select 

Delete

 at the top of the screen.

Deleting Auto Score History

413

uu

Honda LogR

*

u

Auto Score Mode

Features

You can upload Auto Score history to the server.

1.

Select 

Auto Score

 at the bottom of the 

performance monitor screen.

2.

Select 

Log Management

.

3.

Select the data you want to upload, then 
select 

 at the top of the screen.

Uploading Auto Score History

1

Uploading Auto Score History

If the data storage location is Local, 

 is 

displayed.

414

uu

Honda LogR

*

u

Data Log Mode

Features

Data Log Mode

This mode is designed for track driving. In addition to the features from Auto Score 
mode, you can also record lap time data etc. By uploading data to the server, you 
can compare it with other user’s data.
Refer to the commentary in the customize menu for more details.

2

Settings

 P. 426

1.

Select 

Data Log Start

 at the top of the 

performance monitor screen.

2.

Configure location settings, then select 

Data Log Start

.

2

Set location

 P. 415

2

My location settings

 P. 416

u

By selecting 

Data Log Stop

 at the top of 

the performance monitor screen, you 
can stop the Data Log. After stopping, 
the driving data for this log will be 
displayed.

Starting and Stopping Data Log Mode

1

Data Log Mode

You can get Log data for up to 99:59.99 
continuously. After 99:59.99 elapsed, getting data 
will be started newly.

1

Starting and Stopping Data Log Mode

When Data Log Mode is activated, the Lap Timer 
Settings can be turned Auto and manual.
If the Lap Timer Settings is Auto, lap times cannot be 
recorded manually.

2

Settings

 P. 426

415

uu

Honda LogR

*

u

Data Log Mode

Continued

Features

Set location

You can set a location from a list of previously saved locations.

1.

Select 

Settings

 at the bottom of the 

performance monitor screen.

2.

Select 

Data Log Settings

.

3.

Select 

Location to use

.

u

You can select 

Preset

 or 

My Location

.

4.

Select a location to use.

u

If you want to select a location in a 
different region, select 

Country: All

 at 

the top right corner of the 

Location List


screen, then change the location.

5.

Confirm a Lap line on the map, then select 

OK

.

u

If you select 

Cancel

, the system will 

return to the 

Location List

 screen.

u

If you pass in the direction of the arrow 
on the Lap line, the Lap time will be 
measured.

uu

Honda LogR

*

u

Data Log Mode

416

Features

My location settings

You can save a new set location.

1.

Select 

Settings

 at the bottom of the 

performance monitor screen.

2.

Select 

Data Log Settings

.

3.

Select 

My Location

.

4.

Select 

Register new location

.

u

If you select a registered location, the 

Location Edit

 screen is displayed, and 

then location names can be changed.
If you select 

Delete

, you can delete 

saved locations.

5.

Select 

Edit

.

u

If you select 

Cancel

, the system will 

return to the 

My Location

 screen 

without saving.

1

My location settings

The maximum for a location name is 19 characters.

A maximum of 100 locations can be saved.

By selecting the icon on the map, you can switch 
between map view and aerial view.

Automatic lap measurement uses a pre-set point start 
and end line. Please use the map to set your own 
points for the start and end lines.

Only while data storage location is set to Local, the 
next Lap time will start to be measured when you 
cross a set finish line.

You can delete unnecessary Lap times.

2

Uploading/Deleting Data Log History


P. 421

417

uu

Honda LogR

*

u

Data Log Mode

Continued

Features

6.

Search for the point which you want to 
register on the map, then select 

Next

.

7.

Set the start and end lines for Automatic 
LAP Measurement.

u

If you want to set the end line to a 
different point from the start line, select 

Next

, then set a point for the end line.

u

If you pass in the direction of the arrow 
on the Lap line, the Lap time will be 
measured.

8.

Select 

Done

.

9.

Select 

Save

.

u

If you select 

Cancel

, the system will 

return to the 

My Location

 screen 

without saving.

uu

Honda LogR

*

u

Data Log Mode

418

Features

You can check previously saved data logs by selecting 

Data Log

 at the bottom of 

the performance monitor screen. On the Data Log history screen, a graph showing 
the transition for a Lap time is displayed. Also, you can search for Log data by place 
and date, and you can sort it by date and best lap time.

Select 

Data Log

 at the bottom of the 

performance monitor screen.

You can search by location.

1.

Select 

Location Select

.

2.

Select the location you want to be 
displayed.

You can search by date.

1.

Select 

Calendar

 at the top of the screen.

2.

Select a date.

You can sort the history.

1.

Select 

Date

.

2.

Select a category to sort the data by.

u

If a location has not been selected, you 
cannot sort by best lap time.

Changing data storage location.

1.

Select 

Local

.

2.

Select a data storage location from 

Local

/

My Server

/

Other Server

.

Checking Data Log History

1

Checking Data Log History

Refer to the commentary in the customize menu for 
more details on how the scores are generated.

2

Settings

 P. 426

LAP measurement setting (

Auto

/

Manual

), location 

name, and best lap time are displayed.

If the date changes while driving, the corresponding 
data will be displayed under the earlier date.

Continued

419

uu

Honda LogR

*

u

Data Log Mode

Features

When you select the history item you want to 
view, previous LAPs are displayed in a list.

In the LAP list, each lap has its time, the 

Auto

/

Manual

 setting, and best lap times’ heat map 

displayed. Additionally, you can leave 
comments and enter weather information for 
the selected day in your history. User 
information comments can be viewed in other 
user's history.
You can switch between sorting the list by 
LAP time or LAP number.

Sorting the list.

1.

Select 

Lap Time

.

2.

Select a category to sort the data by.

Checking Detailed Data Log History

1

Checking Detailed Data Log History

Refer to the commentary in the customize menu for 
more details on how the scores are generated.

2

Settings

 P. 426

The heat map displays in different colors 
corresponding to both the degree of acceleration and 
brake pressure.

At points where both the accelerator and brake are 
pressed at the same time, only the brake information 
is displayed.

By selecting the icon on the map, you can switch 
between map view and aerial view.

The maximum for a condition memo is 45 characters.

uu

Honda LogR

*

u

Data Log Mode

420

Features

By selecting an individual lap, you can view 
detailed driving data for that lap. By selecting 
the play icon, you can also view a time 
progression of the data.

You can enlarge a tire friction circle by 
selecting it.

You can enlarge the graph by selecting it. 
After it has been enlarged, you can adjust the 
scale of the horizontal and vertical axes. Also, 
you can change which items are displayed.

Changing items on the graph display.

1.

Select

Select Items

.

2.

Select the items you want to be displayed.

u

You can select up to six categories.

Additionally, by selecting 

Score

, you can view 

the score of the Lap data and the rank 
corresponding to it.

Checking Detailed Lap Data in Data Log History

1

Checking Detailed Lap Data in Data Log History

Refer to the commentary in the customize menu for 
more details on how the scores are generated.

2

Settings

 P. 426

The heat map displays in different colors 
corresponding to both the degree of acceleration and 
brake pressure.

At points where both the accelerator and brake are 
pressed at the same time, only the brake information 
is displayed.

By selecting the icon on the map, you can switch 
between map view and aerial view.

Continued

421

uu

Honda LogR

*

u

Data Log Mode

Features

1.

Select 

Log Management

.

2.

Select the data you want to upload to the 
server.

3.

Select  

or 

Delete

.

u

By selecting 

, the selected LAP 

will be uploaded to the cloud. After the 
upload is finished, you can choose 
whether to delete the selected data from 
Local.

u

If 

My Server

 is selected as the data 

storage location, 

 is replaced by 

 and 

, allowing you to 

adjust privacy settings for the selected 
data.
If you select 

, the selected data 

will be made public to other users. If you 
select 

, the selected data will 

not be made public to other users.

u

If you select 

Delete

, the selected data is 

deleted from either the server or the 
vehicle's storage, depending on your 
data storage location.

Uploading/Deleting Data Log History

1

Uploading/Deleting Data Log History

By uploading data to the server, you can share it with 
others. (limited to automatic lap measurements and 
pre-set locations.)

If you switch to another screen (by pressing the home 
button, etc.) in the middle of uploading, the upload 
will be canceled. Afterwards, when you return to the 
in-vehicle app a pop-up notification will display 
informing you that the operation has been canceled.

All driving data is uploaded to the server not only 
while measuring Lap data, but also while Data Log 
mode is activated.

uu

Honda LogR

*

u

Data Log Mode

422

Features

1.

Select 

Log Management

.

2.

Select the LAP you want to delete.

3.

Select 

Delete

.

u

By selecting 

Delete

, the selected LAP can 

be deleted from the Log. Also, you can 
select whether to save as new Log data, 
or to overwrite the data with the LAP 
removed.

Deleting Lap Data from the Data Log History

1

Deleting Lap Data from the Data Log History

The heat map displays in different colors 
corresponding to both the degree of acceleration and 
brake pressure.

At points where both the accelerator and brake are 
pressed at the same time, only the brake information 
is displayed.

If the data is saved to 

My Server

 or 

Other Server

Log Management

 will not be displayed.

Continued

423

uu

Honda LogR

*

u

Data Log Mode

Features

This feature allows you to compare your driving history against separate lap data or 
another user’s driving data.

1.

Go to the detailed Lap Data in the data log 
history screen.

2.

Select 

VS Mode

 at the top of the screen.

3.

Select the history item you want to 
compare.

u

By selecting 

Local

, you can select where 

to save the data to from 

Local

/

My 

Server

/

Other Server

.

u

By selecting 

Date

, you can rearrange the 

data.

VS Mode

1

VS Mode

Only data recorded with a pre-set location using 
automatic lap measurements can be used for 
comparison against other users’ data.

If 

Other Server

 is selected as the data storage 

destination:

Displayed items are changed to 

Date

/

Lap Time

/

User ID

/

Favorite

.

You can search by users saved to your favorites.

You can search by User ID. User IDs will only appear 
on a search if they are an exact match.

uu

Honda LogR

*

u

Data Log Mode

424

Features

4.

Select the data you want to compare 
against.

VS Mode Comparison Screen

By swiping or touching the screen, you can 
choose various situations for comparison.
By selecting the play icon, you can also view a 
time progression of the data.
You can select whether to compare by time 
elapsed or by mileage.

When using the graph display, you can 
change which items are displayed.
Changing items on the graph display.

1.

Select

Select Items

.

2.

Select the items you want to be displayed.

u

You can select up to four categories.

1

VS Mode Comparison Screen

Refer to the commentary in the customize menu for 
more details on how the scores are generated.

2

Settings

 P. 426

By selecting the icon on the map, you can switch 
between map view and aerial view.

You can view a user’s profile by selecting their 
nickname. (Not applicable to areas where the server 
is inaccessible.)

425

uu

Honda LogR

*

u

Customize

Continued

Features

Customize

By selecting 

Settings

 at the bottom of the performance monitor, you can change 

the settings for various features.

426

uu

Honda LogR

*

u

Customize

Features

*1:Default setting

Settings

Setting Item

Overview

Options

Data Log 
Settings

Lap Timer Settings

You can set how the data logs’ lap 
measurements are performed.

Auto

*1

/

Manual

Location to use

You can select saved locations.
Refer to the page below for more details.

2

Set location

 P. 415

My Location

Register new 
location

You can enter and save a location name.
You can save by the LAPs start and end line on 
the map.
Refer to the page below for more details.

2

My location settings

 P. 416

Registered 
location

Auto Score Settings

You can set the Auto Score on or off.

ON

*1

/

OFF

User information

Displays your User ID, nickname, and 
comment.

Smartphone App Login Information

Displays User ID and PIN for use with the 
smartphone app.


Content      ..     10      11      12      13     ..