Honda Accord (2024 year). Manual in english - page 3
 

  Index      Manuals     Honda Accord (2024 year). Manual in english (Хонда Аккорд - руководство на английском, 2024 год)


Search            copyright infringement  


Content      ..     1      2      3      4      ..


Honda Accord (2024 year). Manual in english - page 3


99

uu

Indicators

u

Continued

In

strum

ent Pa

nel

Indicator

Name

On/Blinking

Explanation

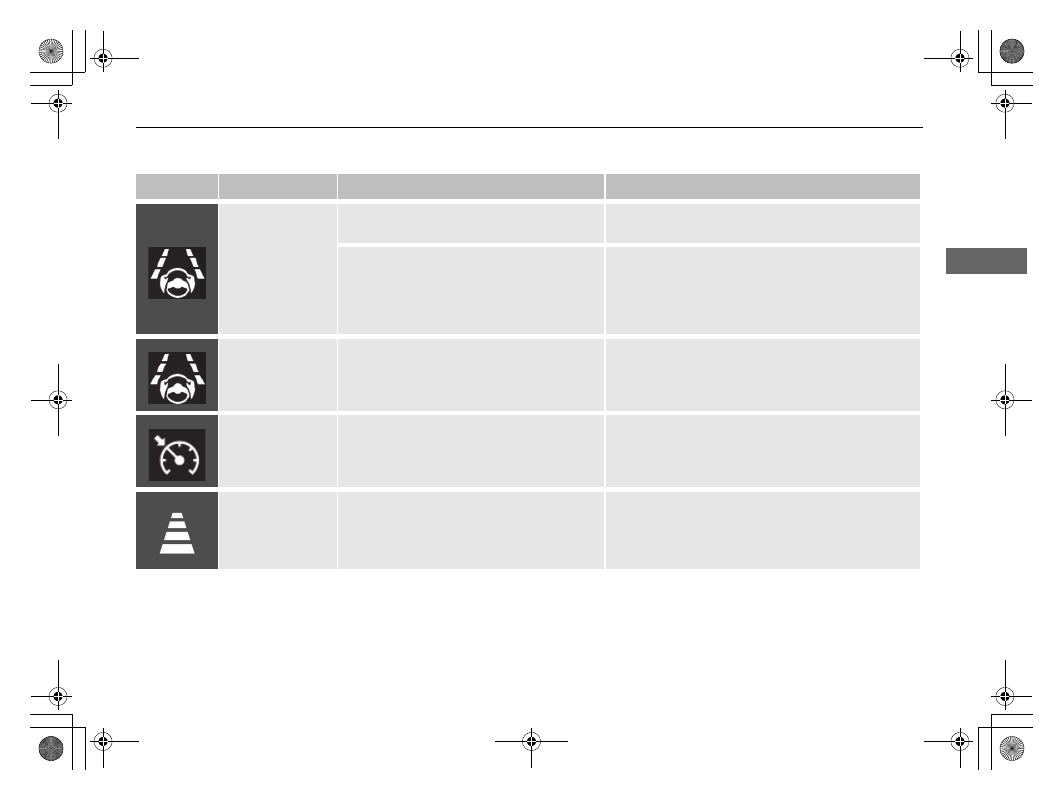
Lane Keeping 
Assist System 
(LKAS) Indicator 
(Amber)

Comes on if there is a problem with the 
LKAS.

Stays on constantly 

- Have your vehicle checked 

by a dealer.

Indicator may come on temporarily when 
the Maximum Load Limit is exceeded.

Make sure the total load is within the Maximum 
Load Limit.

2

Maximum Load Limit

 P. 293

Stays on constantly

 - Have your vehicle checked 

by a dealer.

Lane Keeping 
Assist System 
(LKAS) Indicator 
(White/Green)

Lights up in white when you press the LKAS 
button.

Lights up in green when the LKAS is in 
operation.

2

Lane Keeping Assist System (LKAS)

 P. 370

2

Traffic Jam Assist

 P. 381

Cruise Mode 
Indicator 
(White/Green)

Lights up in white when you change to 
cruise mode.

Lights up in green when you have set a 
speed for cruise control.

2

To Switch ACC with Low Speed Follow to 
Cruise Control

 P. 368

Adaptive Cruise 
Control (ACC) with 
Low Speed Follow 
Interval Indicator

Comes on when Adaptive Cruise Control 
(ACC) with Low Speed Follow indicator 
comes on.

2

To Set or Change Following-interval

 P. 363

100

uu

Indicators

u

In

strum

ent Pa

nel

Indicator

Name

On/Blinking

Explanation

Safety Support 
Indicator (Amber)

Comes on if there is a problem with the 
Road Departure Mitigation system, 
CMBS

TM

, or blind spot information system

*

.

Stays on constantly

 - Have your vehicle checked 

by a dealer.

Indicator may come on temporarily when 
the Maximum Load Limit is exceeded.

Make sure the total load is within the Maximum 
Load Limit.

2

Maximum Load Limit

 P. 293

Stays on constantly

 - Have your vehicle checked 

by a dealer.

Comes on if the Road Departure Mitigation 
system and CMBS

TM

 are deactivated 

temporarily after the battery has been 
disconnected and then reconnected.

Drive a short distance at more than 12 mph (20 
km/h). The indicator should go off. If it does not, 
have your vehicle checked by a dealer.

* Not available on all models

101

uu

Indicators

u

Continued

In

strum

ent Pa

nel

Indicator

Name

On/Blinking

Explanation

Safety Support 
Indicator (Amber)

Comes on when the Road Departure 
Mitigation system and/or CMBS

TM

 shuts 

itself off.

Indicator may come on temporarily if the radar 
sensor cannot detect any objects when passing 
through an enclosed space such as a tunnel, or 
driving on an open road without any structures 
nearby.

The area around the radar sensor is blocked by dirt, 
mud, etc. Stop your vehicle in a safe place and wipe 
the debris off with a soft cloth. Indicator may take 
some time to go off after the radar sensor is 
cleaned.

Have your vehicle checked by a dealer if the 
indicator does not go off even after you have 
cleaned the radar sensor.

2

Radar Sensor

 P. 398

Stays on

 - The temperature inside the camera is 

too high.
Use the climate control system to cool down the 
camera.
The system activates when the temperature inside 
the camera cools down.

2

Front Sensor Camera

 P. 396

102

uu

Indicators

u

In

strum

ent Pa

nel

Indicator

Name

On/Blinking

Explanation

Safety Support 
Indicator (Amber)

Comes on when the Road Departure 
Mitigation system and/or CMBS

TM

 shuts 

itself off.

Stays on

 - The area around the camera is blocked 

by dirt, mud, etc. Stop your vehicle in a safe place 
and wipe the debris off with a soft cloth.

Have your vehicle checked by a dealer if the 
indicator and message are still displayed even after 
you have cleaned the area around the camera.

2

Front Sensor Camera

 P. 396

It may come on when the ambient conditions are 
dark, such as when driving in a tunnel, or at night, 
dawn, or dusk.

Comes on when mud, snow, or ice 
accumulates in the vicinity of the blind spot 
information system sensor.

Comes on when the temperature of the 
blind spot information system sensor is 
high.

Comes on while driving

 - Something may be 

interfering with the blind spot information system 
sensor. Check the vicinity of the blind spot 
information system sensor and remove any 
obstacles.

The system will return to normal when the 
temperature cools down.

2

Blind Spot Information System

*

 P. 323

Models with blind spot information system

* Not available on all models

103

uu

Indicators

u

In

strum

ent Pa

nel

Indicator

Name

On/Blinking

Explanation

Safety Support 
Indicator (Green/
Gray)

Lights up in green when the Road 
Departure Mitigation system, CMBS

TM

, and 

blind spot information system

*

 are on.

Lights up in green and gray when one or 
more of the systems above are off.

Lights up in gray when all systems above 
are off.

2

Road Departure Mitigation System

 P. 342

2

Blind Spot Information System

*

 P. 323

2

Collision Mitigation Braking System

TM


(CMBS

TM

)

 P. 330

* Not available on all models

104

In

strum

ent Pa

nel

Gauges and Driver Information Interface

Gauges

Gauges include the speedometer, fuel gauge, and other related indicators.
They are displayed when the power mode is in ON.

Displays your driving speed in mph or km/h.

Speedometer

1

Speedometer

You can change the speed/distance units.

2

Speed/distance units

 P. 123

2

Vehicle Settings

 P. 126

If you change the unit from miles and mph to km and 
km/h, the current vehicle speed in mph appears next 
to the digital speedometer.

U.S. models

Vehicle Speed in mph

Continued

105

uu

Gauges and Driver Information Interface

u

Gauges

In

strum

ent Pa

nel

Shows the number of engine revolutions per minute.

Displays the amount of fuel left in the fuel tank.

Displays the temperature of the engine coolant.

Shows the total number of miles or kilometers that your vehicle has accumulated.

Tachometer

Fuel Gauge

Temperature Gauge

Odometer

1

Fuel Gauge

NOTICE

You should refuel when the reading approaches 

.

Running out of fuel can cause the engine to misfire, 
damaging the catalytic converter.

The actual amount of remaining fuel may differ from 
the fuel gauge reading.

E

1

Temperature Gauge

NOTICE

Driving with the temperature gauge reading near the 

 can cause serious engine damage. Pull safely to 

the side of the road and allow engine temperature to 
return to normal.

2

Overheating

 P. 489

H

uu

Gauges and Driver Information Interface

u

Gauges

106

In

strum

ent Pa

nel

Shows the outside temperature in Fahrenheit (U.S.) or Celsius (Canada).

Adjusting the outside temperature display

Adjust the temperature reading by up to ±5°F or ±3°C if the temperature reading 
seems incorrect.

Shows certain detected traffic signs while driving.
If speed limit warning is activated, the sign icon blinks when the maximum speed of 
the traffic sign detected is exceeded by a threshold, when compared with the vehicle 
speed.

2

Traffic Sign Recognition System

 P. 390

Outside Temperature

Traffic Sign Recognition System

1

Outside Temperature

The temperature sensor is in the front bumper.
Road heat and exhaust from another vehicle can 
affect the temperature reading when your vehicle 
speed is less than 19 mph (30 km/h).

It may take several minutes for the display to be 
updated after the temperature reading has stabilized.

1

Adjusting the outside temperature display

You can adjust the temperature reading.

2

Vehicle Settings

 P. 126

1

Traffic Sign Recognition System

The default speed limit warning threshold is the 
maximum speed of the traffic sign detected.

You can adjust the threshold for speed limit warning.

2

Vehicle Settings

 P. 126

107

uu

Gauges and Driver Information Interface

u

Gauges

In

strum

ent Pa

nel

Shows the current mode for ACC with Low Speed Follow, LKAS, and Traffic Jam 
Assist.

2

Adaptive Cruise Control (ACC) with Low Speed Follow

 P. 350

2

Lane Keeping Assist System (LKAS)

 P. 370

2

Traffic Jam Assist

 P. 381

Current Mode for ACC with Low Speed Follow, the LKAS, 

and Traffic Jam Assist

1

Current Mode for ACC with Low Speed Follow, the LKAS, and 
Traffic Jam Assist

When you set speed for ACC with Low Speed Follow 
or cruise control, a set speed mark will be displayed 
on the speedometer.

Set 

Speed

108

uu

Gauges and Driver Information Interface

u

Driver Information Interface (Left Side Area)

In

strum

ent Pa

nel

Driver Information Interface (Left Side Area)

Shows the current mode for audio and phone information, etc.

2

Audio Remote Controls

 P. 209

2

Bluetooth

®

 HandsFreeLink

®

 P. 265

Shows the clock.

Clock

1

Clock

You can adjust the time manually and change the 
clock display to show the 12 hour clock or 24 hour 
clock.

2

Clock

 P. 136

You can choose whether the clock is displayed on the 
driver information interface.

2

Customize Display

 P. 109

Continued

109

uu

Gauges and Driver Information Interface

u

Driver Information Interface (Left Side Area)

In

strum

ent Pa

nel

Arrange audio source on the left side area

You can choose which sources to display on the audio source screen.

1.

Roll the left selector wheel until 

Customize 

display

 is selected, then press the left 

selector wheel.

2.

Roll the left selector wheel to scroll to select 

Hide/show

, then press the left selector 

wheel.

3.

Roll the left selector wheel to scroll 
between audio sources, then press the left 
selector wheel to check or uncheck them.

Customize Display

1

Arrange audio source on the left side area

When you customize settings, shift to 

(

P

.

110

uu

Gauges and Driver Information Interface

u

Driver Information Interface (Left Side Area)

In

strum

ent Pa

nel

Turn the displaying on the left side area on and off

You can select whether the current audio information and clock appear on the left 
side area.

1.

Roll the left selector wheel until 

Customize 

display

 is selected, then press the left 

selector wheel.

2.

Roll the left selector wheel to scroll to select 

Display content

, then press the left 

selector wheel.

3.

Roll the left selector wheel to scroll to select 
your desired settings, then press the left 
selector wheel.

111

uu

Gauges and Driver Information Interface

u

Driver Information Interface (Right Side Area)

Continued

In

strum

ent Pa

nel

Driver Information Interface (Right Side Area)

The driver information interface shows information such as the estimated travelable 
distance and fuel economy of the vehicle. It also displays messages such as warnings 
and other helpful information.
When a warning message displays, please check the message and contact a dealer 
to have the vehicle inspected if necessary. Please refer to the pages below if the 

Engine oil pressure low

 or 

Engine temperature too hot

 message is displayed.

2

If the Engine oil pressure low Warning Appears

 P. 491

2

Overheating

 P. 489

112

uu

Gauges and Driver Information Interface

u

Driver Information Interface (Right Side Area)

In

strum

ent Pa

nel

Roll the right selector wheel to view different types of content.

Switching the Display

1

Switching the Display

You can add or remove content from the driver 
information interface.

2

Gauge Display Settings

 P. 123

Right Selector 

Wheel

No Content

Maintenance

 P. 120

Safety Support

 P. 121

Vehicle Settings

 P. 126

Vehicle Stability 

Assist Mode

 P. 122

Brightness 

Setting

 P. 122

Warning Messages

 P. 125

Range/Fuel/

Trip Meter

 P. 113

Driver Attention 

Monitor

 P. 117

Speed/Time/

Trip Meter

 P. 115

Gauge Display 

Settings

 P. 123

Seat Belts

 P. 120

113

uu

Gauges and Driver Information Interface

u

Driver Information Interface (Right Side Area)

Continued

In

strum

ent Pa

nel

Press the right selector wheel to switch between trip meter A and trip meter B.

Trip meter

Shows the total number of miles or kilometers driven since the last reset. Meters A 
and B can be used to measure two separate trips.

Resetting a trip meter

To reset the trip meter, display it, press and hold the right selector wheel, and then 
select 

Reset

.

u

The trip meter is reset to 0.0.

Range/Fuel/Trip Meter

Trip Meter A

Range

Average Fuel Economy

Instant Fuel 

Economy

Trip Meter B

uu

Gauges and Driver Information Interface

u

Driver Information Interface (Right Side Area)

114

In

strum

ent Pa

nel

Average fuel economy

Shows the estimated average fuel economy of each trip meter in mpg or l/100 km. 
The display is updated at set intervals. When a trip meter is reset, the average fuel 
economy is also reset.

Instant fuel economy

Shows the instant fuel economy as a bar graph in mpg or l/100 km.

Range

Shows the estimated distance you can travel on the remaining fuel. This estimated 
distance is based on the vehicle’s current fuel economy.

1

Average fuel economy

You can change when to reset the average fuel 
economy.

2

Vehicle Settings

 P. 126

1

Range

The driving range displayed is only an estimate and 
may differ from the actual distance the vehicle can 
travel.

115

uu

Gauges and Driver Information Interface

u

Driver Information Interface (Right Side Area)

Continued

In

strum

ent Pa

nel

Press the right selector wheel to switch between trip meter A and trip meter B.

Speed/Time/Trip Meter

Trip Meter A

Elapsed Time

Trip Meter B

Average Speed

uu

Gauges and Driver Information Interface

u

Driver Information Interface (Right Side Area)

116

In

strum

ent Pa

nel

Trip meter

2

Trip meter

 P. 113

Elapsed time

Shows the time elapsed since Trip A or Trip B was reset.

Average speed

Shows the average speed in mph or km/h since Trip A or Trip B was reset.

1

Elapsed time

You can change when to reset the elapsed time.

2

Vehicle Settings

 P. 126

1

Average speed

You can change when to reset the average speed.

2

Vehicle Settings

 P. 126

Continued

117

uu

Gauges and Driver Information Interface

u

Driver Information Interface (Right Side Area)

In

strum

ent Pa

nel

The Driver Attention Monitor analyzes steering inputs to determine if the vehicle is 
being driven in a manner consistent with drowsy or inattentive driving. If it 
determines that the vehicle is being driven in such a manner, it will display the 
degree of the driver’s attention on the driver information interface.

When you select Driver Attention Monitor on 
the driver information interface, bars on it 
light up in white to indicate the degree of the 
driver’s attention.

2

Switching the Display

 P. 112

Driver Attention Monitor

1

Driver Attention Monitor

The Driver Attention Monitor cannot always detect if 
the driver is tired or inattentive.
Regardless of the system’s feedback, if you are 
feeling tired, stop in a safe location and rest for as 
long as needed. 

Driver Information Interface

Right Selector 

Wheel

Level

118

uu

Gauges and Driver Information Interface

u

Driver Information Interface (Right Side Area)

In

strum

ent Pa

nel

If two bars light up, the 

Driver attention 

level low

 message will appear.

If one bar lights up, the 

Driver attention 

level low. Time for a break.

 message will 

appear, a beep will sound, and the steering 
wheel will vibrate.
If this message appears, stop in a safe location 
and rest for as long as needed.
The message will disappear when the right 
selector wheel is rolled or when the system 
has determined that the driver is driving 
normally.
If the driver does not take a break and the 
monitor continues to detect that the driver is 
very tired, the message will appear again after 
approximately 15 minutes, accompanied by a 
beep and steering wheel vibrations.
The message does not appear when the 
traveling time is 30 minutes or less.

Continued

119

uu

Gauges and Driver Information Interface

u

Driver Information Interface (Right Side Area)

In

strum

ent Pa

nel

The Driver Attention Monitor resets when:

The engine is turned off.

The driver unfastens the seat belt and opens the door while the vehicle is stopped.

For the Driver Attention Monitor to function:

The vehicle must be traveling above 25 mph (40 km/h).

The electric power steering (EPS) system indicator must be off.

Depending on driving conditions or other factors, the Driver Attention 
Monitor may not function in the following circumstances:

The steering assist function of the Lane Keeping Assist System (LKAS) is active.

2

Lane Keeping Assist System (LKAS)

 P. 370

The condition of the road is poor; e.g., the surface is unpaved or bumpy.

It is windy.

The driver is frequently operating the vehicle in an assertive manner, such as 
changing lanes or accelerating.

Customizing

You can change the Driver Attention Monitor settings. Select 

Tactile and audible 

alert

Tactile alert

, or 

OFF

.

2

Vehicle Settings

 P. 126

1

For the Driver Attention Monitor to function:

The bars on the driver information interface remain 
grayed-out unless the Driver Attention Monitor is 
functioning.

120

uu

Gauges and Driver Information Interface

u

Driver Information Interface (Right Side Area)

In

strum

ent Pa

nel

Occurs, under specified conditions, when seat belts are latched or unlatched.

2

Seat Belt Reminder

 P. 42

Shows the remaining oil life and Maintenance Minder

TM

.

2

Maintenance Minder

TM

 P. 427

Seat Belts

Maintenance

Continued

121

uu

Gauges and Driver Information Interface

u

Driver Information Interface (Right Side Area)

In

strum

ent Pa

nel

Indicates the status of the Road Departure Mitigation system, CMBS

TM

, and blind 

spot information system

*

, such as On, Off, or Failure, by color and letters.

The following colors indicate the status of any of the above-mentioned systems:

Green: The system is on.

Gray: The system is off.

Amber: There is a problem with the system.

Safety Support

1

Safety Support

If a system is indicated by the color amber, have your 
vehicle checked by a dealer immediately.

To turn each system on or off, first press the right 
selector wheel to switch displays. From the next 
display, you can select which system to turn on or off. 

2

Road Departure Mitigation System

 P. 342

2

Blind Spot Information System

*

 P. 323

2

Collision Mitigation Braking System

TM


(CMBS

TM

)

 P. 330

You can also confirm the status of each function by 
the color of the safety support indicator.

2

Safety Support Indicator (Amber)

 P. 100

2

Safety Support Indicator (Green/Gray)


P. 103

Area Info for CMBS

TM

Area Info for Blind 

Spot Information 

System

*

Area Info for Road 

Departure 

Mitigation System

Road Departure 

Mitigation 

System Icon and 

Status Info

CMBS

TM

 Icon and 

Status Info

Blind Spot 

Information 

System Icon and 

Status Info

*

* Not available on all models

uu

Gauges and Driver Information Interface

u

Driver Information Interface (Right Side Area)

122

In

strum

ent Pa

nel

Press the right selector wheel when the 

Brightness setting

 screen is displayed.

When the power mode is in ON, you can use the right selector wheel to adjust 
instrument panel brightness.

Brighten: 

Roll the right selector wheel up.

Dim: 

Roll the right selector wheel down.

Press the right selector wheel to exit.

You can turn the VSA

®

 on or off.

Roll the right selector wheel to scroll to select 

Reduce traction control

, then press the right 

selector wheel to check or uncheck it.

2

Vehicle Stability Assist

TM

 (VSA

®

), aka 

Electronic Stability Control (ESC), System


P. 313

Brightness Setting

Vehicle Stability Assist Mode

1

Brightness Setting

The brightness of the gauge is automatically adjusted 
depending on the ambient brightness.

The brightness dims when the ambient light is 
dark.

The brightness brightens when the ambient light is 
bright.

You can change the setting even when the ambient 
lighting is bright, but the brightness of the gauge 
won’t change.

123

uu

Gauges and Driver Information Interface

u

Driver Information Interface (Right Side Area)

Continued

In

strum

ent Pa

nel

Speed/distance units

Enables you to set the displayed measurements to read in either miles and mph or 
km and km/h.

1.

Press the right selector wheel when you 
select the 

Gauge display settings

 on the 

driver information interface.

2.

Roll the right selector wheel to scroll to 
select 

Speed/distance units

, then press 

the right selector wheel.

3.

Roll the right selector wheel to scroll to 
select your desired settings, then press the 
right selector wheel.

Gauge Display Settings

uu

Gauges and Driver Information Interface

u

Driver Information Interface (Right Side Area)

124

In

strum

ent Pa

nel

Arrange content on the right side area

You can choose which contents to display on the right side area.

1.

Press the right selector wheel when you 
select the 

Gauge display settings

 on the 

driver information interface.

2.

Roll the right selector wheel to scroll to 
select 

Hide/show

, then press the right 

selector wheel.

3.

Roll the right selector wheel to scroll 
between contents, then press the right 
selector wheel to check or uncheck them.

1

Arrange content on the right side area

Contents that are gray cannot be removed from the 
right side area.

When you customize settings, shift to 

(

P

.

Continued

125

uu

Gauges and Driver Information Interface

u

Driver Information Interface (Right Side Area)

In

strum

ent Pa

nel

Change gauge design

You can change the gauge design.

1.

Press the right selector wheel when you 
select the 

Gauge display settings

 on the 

driver information interface.

2.

Roll the right selector wheel to scroll to 
select 

Gauge design

, then press the right 

selector wheel.

3.

Roll the right selector wheel to scroll to 
select your desired settings, then press the 
right selector wheel.

You can check if there are any active warning messages.

1

Change gauge design

When using the 

Round minimal

 or 

Bar minimal


gauge design, a simplified display is used when ACC 
with Low Speed Follow is in operation.

Warnings

1

Warnings

If there are multiple warnings, you can roll the right 
selector wheel to see other warnings.

uu

Gauges and Driver Information Interface

u

Driver Information Interface (Right Side Area)

126

In

strum

ent Pa

nel

Use the driver information interface to customize certain features.

How to customize

Roll the right selector wheel to scroll to select 

 screen while the power mode is in 

ON, the vehicle is at a complete stop, and the shift position is in 

(

P

. Then, press the 

right selector wheel.

Vehicle Settings

1

Vehicle Settings

To customize other features, roll the right selector 
wheel.

2

List of customizable options

 P. 127

2

Example of customization settings

 P. 133

When you customize settings, shift to 

(

P

.

Driver 

Information 

Interface

Right Selector Wheel

127

uu

Gauges and Driver Information Interface

u

Driver Information Interface (Right Side Area)

Continued

In

strum

ent Pa

nel

List of customizable options

*1:Default Setting

Setup Group

Customizable Features

Description

Selectable Settings

TPMS 
calibration

*

Calibrates the TPMS.

Cancel

/

Calibrate

Driver assist 
system setup

Forward collision 
warning distance

Changes the distance at which CMBS

TM

 alerts.

Long

/

Normal

*1

/

Short

ACC forward vehicle 
detect beep

Causes the system to beep when a vehicle is detected or 
when the vehicle is out of ACC with Low Speed Follow 
range.

ON

/

OFF

*1

Road departure 
mitigation setting

Changes the setting for the Road Departure Mitigation 
system.

Narrow

/

Normal

*1

/

Wide

/

Warning only

Lane keeping assist 
suspend beep

Causes the system to beep when the LKAS is suspended.

ON

/

OFF

*1

Blind spot 
information

*

Changes the setting for the blind spot information.

Audible and visual 
alert

*1

/

Visual alert

* Not available on all models

128

uu

Gauges and Driver Information Interface

u

Driver Information Interface (Right Side Area)

In

strum

ent Pa

nel

*1:Default Setting

Setup Group

Customizable Features

Description

Selectable Settings

Driver assist 
system setup

Traffic sign 
recognition system 
display setting

Turns the traffic sign recognition system on and off.

ON

*1

/

OFF

Traffic sign 
recognition system 
speed limit warning

Turns the traffic sign recognition system over speed 
warning on and off.

ON

/

OFF

*1

Speed limit warning 
threshold setting

Changes the setting speed at which the traffic sign 
recognition system over speed warning is activated.

Speed limit

*1

/

Speed limit+3mph

/

Speed limit+5mph

/

Speed limit+10mph

(When mph is selected)

Speed limit

*1

/

Speed limit+5km/h

/

Speed limit+10km/h

/

Speed limit+15km/h

(When km/h is selected)

Driver attention 
monitor

Changes the setting for the driver attention monitor.

Tactile and audible 
alert

*1

Tactile alert

/

OFF

129

uu

Gauges and Driver Information Interface

u

Driver Information Interface (Right Side Area)

Continued

In

strum

ent Pa

nel

*1:Default Setting

Setup Group

Customizable Features

Description

Selectable Settings

Meter setup

Language selection

Changes the displayed language.

English

*1

/

Français

/

Español

Adjust outside temp. 
display

Adjusts the temperature reading by a few degrees.

-5°F

 ~ 

±0°F

*1

 ~ 

+5°F


(U.S.)

-3°C

 ~ 

±0°C

*1

 ~ 

+3°C


(Canada)

“Trip A” reset timing

Changes the setting of how to reset trip meter A, 
average fuel economy A, average speed A, and elapsed 
time A.

When fully refueled

/

IGN OFF

/

Manually reset

*1

“Trip B” reset timing

Changes the setting of how to reset trip meter B, 
average fuel economy B, average speed B, and elapsed 
time B.

When fully refueled

/

IGN OFF

/

Manually reset

*1

Adjust alarm volume

Changes the alarm volume, such as buzzers, warnings, 
turn signal sound, and so on.

High

/

Mid

*1

/

Low

Fuel efficiency backlight

Turns the ambient meter feature on and off.

ON

*1

/

OFF

Rear seat reminder

Turns the Rear Seat Reminder feature on and off.

ON

*1

/

OFF

Speed/distance units

Selects the speed/distance units.

km/h∙km

/

mph∙miles

*1


(U.S.)

km/h∙km

*1

/

mph∙miles


(Canada)

130

uu

Gauges and Driver Information Interface

u

Driver Information Interface (Right Side Area)

In

strum

ent Pa

nel

*1:Default Setting

Setup Group

Customizable Features

Description

Selectable Settings

Keyless access 
setup

Door unlock mode

Changes which doors unlock when you grab the driver’s 
door handle.

Driver door only

*1

/

All 

doors

Keyless access light 
flash

Causes some exterior lights to flash when you unlock/
lock the doors.

ON

*1

/

OFF

Keyless access beep

Causes the beeper to sound when you unlock/lock the 
doors.

ON

*1

/

OFF

Remote start system 
ON/OFF

Turns the remote engine start feature on and off.

ON

*1

/

OFF

Lighting setup

Auto high-beam

Turns the auto high-beam on and off.

ON

*1

/

OFF

Interior light dimming 
time

Changes the length of time the interior lights stay on 
after you close the doors.

60sec

/

30sec

*1

/

15sec

Headlight auto off 
timer

Changes the length of time the exterior lights stay on 
after you close the driver’s door.

60sec

/

30sec

/

15sec

*1

/

0sec

Auto light sensitivity

*

Changes the timing for the headlights to come on.

Max

/

High

/

Mid

*1

/

Low

/

Min

Auto headlight ON 
with wiper ON

Changes the settings for the wiper operation when the 
headlights automatically come on while the headlight 
switch is in the 

AUTO

 position.

ON

*1

/

OFF

* Not available on all models


Content      ..     1      2      3      4      ..