Honda Accord Hybrid (2022 year). Manual in english - page 10
 

  Index      Manuals     Honda Accord Hybrid (2022 year). Manual in english


Search            copyright infringement  


Content      ..     8      9      10      11     ..


Honda Accord Hybrid (2022 year). Manual in english - page 10


158

uu

Gauges and Displays

u

Driver Information Interface

In

strum

ent Pa

nel

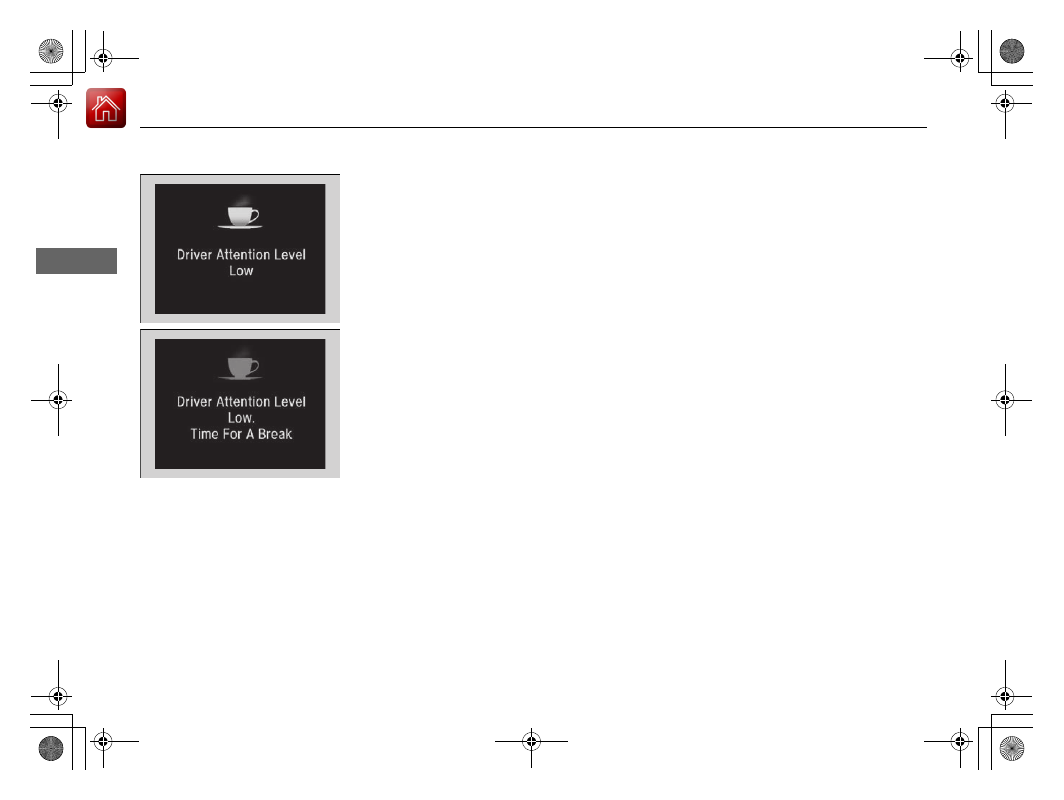
If two bars light up, the 

Driver Attention 

Level Low

 message will appear.

If one bar lights up, the 

Driver Attention 

Level Low. Time For A Break

 message will 

appear, a beep will sound, and the steering 
wheel will vibrate.
If this message appears, stop in a safe location 
and rest for as long as needed.
The message will disappear when the left 
selector wheel is pressed or when the system 
has determined that the driver is driving 
normally.
If the driver does not take a break and the 
monitor continues to detect that the driver is 
very tired, the message will appear again after 
approximately 15 minutes, accompanied by a 
beep and steering wheel vibrations.
The message does not appear when the 
traveling time is 30 minutes or less.

Continued

159

uu

Gauges and Displays

u

Driver Information Interface

In

strum

ent Pa

nel

The Driver Attention Monitor resets when:

The power system is turned off.

The driver unfastens the seat belt and opens the door while the vehicle is stopped.

For the Driver Attention Monitor to function:

The vehicle must be traveling above 25 mph (40 km/h).

The electric power steering (EPS) system indicator must be off.

Depending on driving conditions or other factors, the Driver Attention 
Monitor may not function in the following circumstances:

The steering assist function of the Lane Keeping Assist System (LKAS) is active.

2

Lane Keeping Assist System (LKAS)

 P. 480

The condition of the road is poor, e.g. the surface is unpaved or bumpy.

It is windy.

The driver is frequently operating the vehicle in an assertive manner such as 
changing lanes or accelerating.

Customizing

You can change the Driver Attention Monitor settings. Select 

Tactile And Audible 

Alert

Tactile Alert

, or 

OFF

.

2

Customized Features

 P. 357

1

For the Driver Attention Monitor to function:

The bars on the driver information interface remain 
grayed out unless the Driver Attention Monitor is 
functioning.

uu

Gauges and Displays

u

Driver Information Interface

160

In

strum

ent Pa

nel

Shows the distance between your vehicle and 
the vehicle detected ahead.
Informs you whether ACC with Low Speed 
Follow and/or LKAS is activated or not. If ACC 
with Low Speed Follow is activated, the set 
following interval is displayed. If LKAS is 
activated, the displayed lane marks change to 
indicate that LKAS is activated.

2

Adaptive Cruise Control (ACC) with Low 
Speed Follow

 P. 464

2

Lane Keeping Assist System (LKAS)

 P. 480

Driving Support Information

1

Driving Support Information

In case ACC with Low Speed Follow is not activated, 
when the distance between your vehicle and the 
vehicle ahead becomes too small, the section behind 
the vehicle icon turns amber and alerts you.

Amber gradation

Icon of vehicle ahead

Distance to vehicle ahead

When ACC with Low Speed Follow and 

LKAS are On

Set Vehicle Interval

ACC with Low Speed Follow on: 

The section behind the vehicle icon 

turns green.
LKAS on: The lane outlines appear 

on the display.
LKAS starts: The lane lines change 

to solid ones.
LKAS suspend: The lane lines 

change to dotted ones.

Continued

161

uu

Gauges and Displays

u

Driver Information Interface

In

strum

ent Pa

nel

Indicates the status of RDM, Low Speed Braking Control

*

, CMBS

TM

, and blind spot 

information system

*

, such as On, Off, or Failure, by color and letters.

The following colors indicate the status of any of the above mentioned systems:

Green: The system is on.

Gray: The system is off.

Amber: There is a problem with the system.

Safety Support

1

Safety Support

If a system is indicated by the color amber, have your 
vehicle checked by a dealer immediately.

To turn on or off each system, first rotate the left 
selector wheel to switch displays. From the next 
display you can select which system to turn on or off.

2

RDM On and Off

 P. 491

2

CMBS

TM

 On and Off

 P. 453

2

Blind spot information system on and off


P. 445

2

System On and Off

 P. 461

You can also confirm the status of each function by 
the color of the safety support indicator.

2

Safety Support Indicator (Amber)

 P. 111

2

Safety Support Indicator (Green/Gray)


P. 114

Even when the Low Speed Braking Control icon is 
green, if the parking sensor is turned off for the rear 
only, the brake assist will not operate when reversing.

2

Turning off All Rear Sensors

 P. 518

Models with Low Speed Braking Control

Area Info for 

CMBS

TM

CMBS

TM

 Icon 

and Status Info

Area Info for 

blind spot 

information 

system

*

RDM Icon and 

Status Info

Area Info for 

RDM

Blind spot 

information 

system Icon 

and Status 

Info

*

Low Speed 

Braking Control 

Icon and Status 

Info

*

Area Info for the Low 

Speed Braking Control

*

* Not available on all models

162

uu

Gauges and Displays

u

Driver Information Interface

In

strum

ent Pa

nel

Shows the average fuel economy for the last 
three driving cycles (1-3), and the current 
driving cycle (0) in mpg or l/100 km.

Each time you set the power mode to ON, the 
display is updated, and the oldest record is 
deleted.

Average Fuel Economy Records

Continued

163

uu

Gauges and Displays

u

Driver Information Interface

In

strum

ent Pa

nel

Eco Drive Display

The vehicle icon on the display moves forward or backward while driving.
The more aggressive the acceleration is, the further the icon moves forward.
The more aggressive the deceleration is, the further the icon moves backward.
Keep the icon near the center of the circle for better fuel economy while driving.

Eco Drive Display/Drive Cycle Score/Lifetime Points

1

Eco Drive Display

Switch between the average fuel economy A and 
average fuel economy B by rolling the left selector 
wheel.

Aggressive 

Deceleration

Vehicle Icon

Aggressive 

Acceleration

Moderate 

Deceleration

Slow 

Acceleration/ 

Deceleration

Moderate 

Acceleration

Average Fuel 

Economy

164

uu

Gauges and Displays

u

Driver Information Interface

In

strum

ent Pa

nel

Drive Cycle Score/Lifetime Points

Appear for a few seconds when you set the power mode to VEHICLE OFF. Each has 
three stages. Depending on your driving style, the leaf icon(s) and the gauge 
increase or decrease to indicate that you have reached a different stage of fuel 
economy.

Resetting the Drive Cycle Score

1.

Make sure the shift position is in 

(

P

. Turn the power mode to ON.

2.

If ECON mode is on, press the 

ECON

 button to turn it off.

3.

Turn the power mode to VEHICLE OFF.

4.

Turn the power mode to ON again.

u

Make sure to complete steps from 4 through 6 within 30 seconds.

5.

Depress the brake pedal twice.

6.

Press the 

ECON

 button twice.

u

The color of the ambient meter will turn to monochrome.

7.

Turn the power mode to VEHICLE OFF.

Drive Cycle Score

Lifetime Points

Advancing 

to 2nd 

Stage

Receding 

to 1st 

Stage

Advancing 

to 3rd 

Stage

Receding 

to 2nd 

Stage

165

uu

Gauges and Displays

u

Driver Information Interface

In

strum

ent Pa

nel

Displays the power flow of the motor and engine, indicating the vehicle’s power 
source and whether the battery is being charged.

Power Flow Monitor

1

Power Flow Monitor

While the vehicle is stationary with the engine 
running, the following may appear on the driver 
information interface.

Power is supplied 

by the motor and 

the engine.

Hybrid (HV)

The engine is running 

and the motor is 

charging the High 

Voltage battery.

Power is being 

supplied by the 

engine only.

Engine ON

Engine OFF

Power is supplied 

by the motor.

Electric Vehicle (EV)

The engine is running 

and the motor is 

charging the High 

Voltage battery.

Engine (Direct Drive)

Power Flow

Engine

The motor is 

charging the High 

Voltage battery.

Regeneration

166

uu

Gauges and Displays

u

Head-Up Display

*

In

strum

ent Pa

nel

Head-Up Display

*

Shows the current mode for ACC with Low Speed Follow and the LKAS, POWER/
CHARGE gauge, traffic sign recognition system, shift position and deceleration 
paddle selector indicator, compass or turn-by-turn directions along with the vehicle 
speed. You can choose which item to be displayed using the   (

HUD

) button on the 

steering wheel. They are displayed when the power mode is in ON.

To turn the head-up display on and off 

: Press the 

HUD

 button on the driver 

side control panel.
The display can be moved up and down to become level with your eyes.

To raise or lower the head-up display 

: Press the 

 or 

 button until the 

desired position is reached.

1

Head-Up Display

*

When you unlock and open the driver’s door with a 
remote transmitter or keyless access system, the 
head-up display adjusts automatically to one of the 
two preset positions.

3

4

/

 Button

3 4

HUD

 Button

Head-Up Display

Press the   button to raise 

the display.

3

Press the 

 button to 

lower the display.

4

* Not available on all models

167

uu

Gauges and Displays

u

Head-Up Display

*

Continued

In

strum

ent Pa

nel

The display also shows the following 
warnings.

Lane Departure Warning: 

When your 

vehicle is too close to the traffic lane lines, 
the lane departure warning appears.

2

Lane Keeping Assist System (LKAS)


P. 480

Head-up Warning Lights: 

Flash when the 

BRAKE

 message appears on the driver 

information interface.

2

Collision Mitigation Braking System

TM


(CMBS

TM

)

 P. 450

2

Adaptive Cruise Control (ACC) with 
Low Speed Follow

 P. 464

2

Low Speed Braking Control

*

 P. 459

Lane Departure Warning

* Not available on all models

168

uu

Gauges and Displays

u

Head-Up Display

*

In

strum

ent Pa

nel

Each time you press the   (

HUD

) button on the steering wheel, the head-up display 

content will change.

To Change Head-Up Display Content

Head-Up Display

Current Mode for ACC 

with Low Speed Follow 

and the LKAS, Vehicle 

Speed, Traffic Sign 

Recognition System

Vehicle Speed, Traffic 

Sign Recognition 

System

POWER/CHARGE Gauge, Shift 

Position Indicator, Deceleration 

Paddle Selector Indicator, 

Vehicle Speed, Traffic Sign 

Recognition System

Traffic Sign Recognition 

System, Vehicle Speed

Turn-by-Turn 

Directions, Vehicle 

Speed, Traffic Sign 

Recognition System

Compass, Vehicle 

Speed, Traffic Sign 

Recognition System

 (

HUD

) Button

Continued

169

uu

Gauges and Displays

u

Head-Up Display

*

In

strum

ent Pa

nel

Shows your driving speed in mph or km/h.

Shows the degree for POWER/CHARGE as a bar graph.

Shows the current shift position.

2

Shift Position Indicator

 P. 97

Shows the current deceleration stage for the deceleration paddle selector.

2

Deceleration Paddle Selector Indicator

 P. 97

2

Shifting

 P. 423

Shows the current mode for ACC with Low Speed Follow and the LKAS.

2

Adaptive Cruise Control (ACC) with Low Speed Follow

 P. 464

2

Lane Keeping Assist System (LKAS)

 P. 480

Vehicle Speed

POWER/CHARGE Gauge

Shift Position Indicator

Deceleration Paddle Selector Indicator

Current Mode for ACC with Low Speed Follow and the LKAS

1

Vehicle Speed

Switch between mph and km/h by using the driver 
information interface or customized features on the 
audio/information screen.

2

Speed/Distance Units

 P. 154

2

Customized Features

 P. 357

uu

Gauges and Displays

u

Head-Up Display

*

170

In

strum

ent Pa

nel

Compass

Shows the compass screen.

Turn-by-Turn Directions

When driving guidance is provided by the navigation system, Android Auto or Apple 
CarPlay, turn-by-turn directions to your destination appear.

2

Refer to the Navigation System Manual

2

Android Auto

 P. 326

2

Apple CarPlay

 P. 320

Shows the traffic sign recognition system.

2

Traffic Sign Recognition System

 P. 493

Navigation

Traffic Sign Recognition System

1

Navigation

You can select whether to have the turn-by-turn 
display come on or not during the route guidance.

2

Customized Features

 P. 357

Turn-by-turn directions may not be available for all 
apps.

171

Controls

This chapter explains how to operate the various controls necessary for driving.

Clock

.................................................. 172

Locking and Unlocking the Doors

Key .................................................. 174
Low Keyless Remote Signal Strength.... 175
Locking/Unlocking the Doors from the 

Outside .......................................... 176

Locking/Unlocking the Doors from the 

Inside ............................................. 183

Childproof Door Locks ..................... 185
Auto Door Locking/Unlocking .......... 186

Opening and Closing the Trunk

....... 187

Security System

Immobilizer System .......................... 190

Security System Alarm...................... 190

Windows

........................................... 193

Moonroof

*

........................................ 196

Operating the Switches Around the 

Steering Wheel

POWER Button................................. 197
Turn Signals ..................................... 200
Light Switches.................................. 201
Fog Lights

*

...................................... 203

Daytime Running Lights ................... 204
Auto High-Beam .............................. 205
Wipers and Washers ........................ 208

Rear Defogger/Heated Door Mirror Button ..210
Heated Windshield Button

*

 ............. 210

Brightness Control ........................... 211
Driving Position Memory System

*

.... 213

Adjusting the Steering Wheel .......... 215

Mirrors

Interior Rearview Mirror ................... 216
Power Door Mirrors ......................... 217

Seats

.................................................. 218

Interior Convenience Items

.............. 228

Climate Control System

Using Automatic Climate Control .... 244
Automatic Climate Control Sensors......248

* Not available on all models

172

Co
ntrols

Clock

Adjusting the Clock

You can adjust the time manually in the audio/information screen, with the power 
mode in ON.

1

Clock

The clock is automatically updated through the 
navigation system, so the time does not need to be 
adjusted.

Models with navigation system

173

uu

Clock

u

Adjusting the Clock

Co
ntrols

1.

Press the 

 (Home) button, then select 

Settings

.

2.

Select 

System

.

3.

Select 

Day & Time

.

4.

Select 

Set Date & Time

.

5.

Select 

Automatic Date & Time

, then 

select 

OFF

.

To adjust time:
6.

Select 

Set Time

.

7.

Selecting /

.

8.

Select 

Save

 to set the time.

To adjust date:
6.

Select 

Set Date

.

7.

Selecting /

.

8.

Select 

Save

 to set the date.

Adjusting the Time

1

Clock

You can also adjust the clock by touching the clock 
displayed on the upper right corner of the display or 
the 

Clock

 icon on the home screen.

1. Touch the clock on the display.

The clock screen of the select face-type appears.

2. Select 

Settings

.

3. Select 

Day & Time

.

4. Select 

Set Date & Time

.

5. Select 

Automatic Date & Time

, then select 

OFF

.

6. Select 

Set Date

 or 

Set Time

.

7. Adjusting the dates, hours and minutes by 

selecting /

.

8. Select 

Save

 to set the time.

You can customize the clock display to show the 12 
hour clock or 24 hour clock.

2

Customized Features

 P. 357

You can customize the date display to 

MM/DD/

YYYY

DD/MM/YYYY

 or 

YYYY/MM/DD

.

2

Customized Features

 P. 357

3 4

3 4

3 4


Content      ..     8      9      10      11     ..