Honda Odyssey (2023 year). Manual in english - page 42
 

  Index      Manuals     Honda Odyssey (2023 year). Manual in english


Search            copyright infringement  


Content      ..     40      41      42      43     ..


Honda Odyssey (2023 year). Manual in english - page 42


673

uu

Fuses

u

Fuse Locations

Continued

Han

d

lin
g the U

n

expected

Fuse box C

Fuse Label

Circuit protected and fuse rating

Circuit Protected

Amps

a

Meter

(10 A)

b

VSA

(10 A)

c

ACG

(10 A)

d

Body Control Module

(10 A)

e

f

Back Up

(10 A)

g

ACC

(10 A)

674

uu

Fuses

u

Fuse Locations

Han

d

lin
g the U

n

expected

Located on the left side of cargo area. Take 
off the cover to open.

Fuse locations are shown on the fuse box 
cover.
Locate the fuse in question by the fuse 
number and box cover number.

Rear Side Interior Fuse Box

Circuit protected and fuse rating

Circuit Protected

Amps

1

Rear Driver’s Side Door 

Lock

10 A

2

Passenger’s Side Power 

Sliding Door Closer

(20 A)

3

Power Tailgate Closer 

Motor

*

(20 A)

4

Cargo Area’s Accessory 

Power Socket

20 A

5

Fuel Fill Door

10 A

6

USB

*

(5 A)

7

Driver’s Side Power Sliding 

Door Closer

(20 A)

8

9

10

11

12

13

14

Passenger’s Side Power 

Sliding Door Motor

(30 A)

15

16

Power Tailgate Motor

*

(40 A)

17

18

19

Driver’s Side Power Sliding 

Door Motor

(30 A)

* Not available on all models

675

uu

Fuses

u

Inspecting and Changing Fuses

Han

d

lin
g the U

n

expected

Inspecting and Changing Fuses

1.

Set the power mode to VEHICLE OFF. Turn 
headlights and all accessories off.

2.

Check the fuses on the battery in the 
engine compartment.

u

If the fuse is blown, have it replaced by a 
dealer.

3.

Remove the fuse box cover.

4.

Inspect the small fuses in the engine 
compartment and the vehicle interior.

u

If there is a blown fuse, remove it with 
the fuse puller and replace it with a new 
one.

5.

Check the large fuse in the vehicle interior.

u

If the fuse is blown, use a Phillips-head 
screwdriver to remove the screw and 
replace it with a new one.

1

Inspecting and Changing Fuses

NOTICE

Replacing a fuse with one that has a higher rating 
greatly increases the chances of damaging the 
electrical system.

Use the charts to locate the fuse in question and 
confirm the specified amperage on the fuse label.

2

Fuse Locations

 P. 669

Replace a fuse with a spare fuse of the same specified 
amperage.

There is a fuse puller on the back of the engine 
compartment fuse box cover.

Blown

Fuse Box on the Battery

Fuse Puller

Combined Fuse

Blown Fuse

676

Han

d

lin
g the U

n

expected

Emergency Towing

Call a professional towing service if you need to tow your vehicle.

Flatbed equipment

The operator loads your vehicle on the back of a truck.

This is the only way you can safely transport your vehicle.

Any other towing method will damage the vehicle’s drive system.

1

Emergency Towing

NOTICE

Trying to lift or tow your vehicle by the bumpers will 
cause serious damage. The bumpers are not designed 
to support the vehicle’s weight.

NOTICE

Improper towing such as towing behind a 
motorhome or other motor vehicle can damage the 
transmission.

Never tow your vehicle with just a rope or chain.
It is very dangerous since ropes or chains may shift 
from side to side or break.

677

Han

d

lin
g the U

n

expected

If You Cannot Unlock the Fuel Fill Door

If you cannot unlock the fuel fill door, use the following procedure.

1.

Open the tailgate and remove the cover on 
the left side of cargo area.

2.

Pull the yellow release cord (as shown).

u

The release cord opens the fuel fill door 
when it is pulled.

What to Do If Unable to Unlock the Fuel Fill Door

1

What to Do If Unable to Unlock the Fuel Fill Door

After taking these steps, contact a dealer to have the 
vehicle checked.

Cover

Release Cord

678

Han

d

lin
g the U

n

expected

If You Cannot Open the Tailgate

If you cannot open the tailgate or power tailgate, use the following procedure.

1.

Use a flat-tip screwdriver and remove the 
cover on the back of the tailgate.

u

Wrap the flat-tip screwdriver with a cloth 
to prevent scratches.

2.

To open the tailgate, push the tailgate 
while pushing the lever to the right.

What to Do If Unable to Open the Tailgate

1

What to Do If Unable to Open the Tailgate

Following up:
After taking these steps, contact a dealer to have the 
vehicle checked.

When you open the tailgate from inside, make sure 
there is enough space around the tailgate, and it 
does not hit anyone or any object.

Cover

Lever

Models with power tailgate

679

uu

If You Cannot Open the Tailgate

u

Han

d

lin
g the U

n

expected

2.

To open the tailgate, push the tailgate 
while pushing the lever to the right with the 
flat-tip screwdriver.

Lever

Models without power tailgate

680

Han

d

lin
g the U

n

expected

When You Cannot Close the Power Sliding Doors

If either power sliding door does not latch when closed, use the following 
procedure.

1.

Set the sliding door main switch in the OFF 
position.

2

Switching between manual and 
automatic operations

 P. 175

2.

Push front edge of the cover on hand 
pocket of the power sliding door to pop it 
out, and remove it as shown in the image.

3.

Pull the rear latch reset cable (yellow) 
towards the front of the vehicle until it 
bottoms out (about 9/16 inch [15 mm]).

4.

Manually close the door and confirm 
latches engage.

What to Do When Unable to Close the Power Sliding Doors

1

When You Cannot Close the Power Sliding Doors

After taking these steps, contact a dealer to have 
your vehicle checked.

Cover

Rear Latch 
Reset Cable

681

Continued

Han

d

lin
g the U

n

expected

Refueling

Refueling From a Portable Fuel Container

If you have run out of fuel and need to refuel your vehicle from a portable fuel 
container, use the funnel provided with your vehicle.

1.

Turn off the engine.

2.

Press on the edge of the fuel fill door to 
make it pop up slightly.

u

The fuel fill door opens.

3.

Remove the cover on the right side panel of 
the cargo area.

4.

Pick up the funnel from the cover (as 
shown).

2

Types of Tools

 P. 646

5.

Place the end of the funnel on the lower 
part of filler opening, then insert it slowly 
and fully.

u

Make sure that the end of the funnel 
goes down along with the filler pipe.

1

Refueling From a Portable Fuel Container

3

WARNING

Fuel is highly flammable and explosive.
You can be burned or seriously injured 
when handling fuel.

Stop the engine, and keep heat, sparks, 
and flames away.

Handle fuel only outdoors.

Wipe up spills immediately.

Cover

Funnel

uu

Refueling

u

Refueling From a Portable Fuel Container

682

Han

d

lin
g the U

n

expected

6.

Fill the tank with fuel from the portable fuel 
container.

u

Pour fuel carefully so you do not spill any.

7.

Remove the funnel from the filler neck.

u

Wipe up any fuel from the funnel before 
storing it.

8.

Shut the fuel fill door by hand.

1

Refueling From a Portable Fuel Container

NOTICE

Do not insert the nozzle of a portable fuel container 
or any funnel other than the one provided with your 
vehicle. Doing so can damage the fuel system.
Do not try to pry open or push open the sealed fuel 
tank with foreign objects. This can damage the fuel 
system and its seal.

Make sure the fuel in the portable fuel container is 
gasoline before you refuel.

684

Info

rm

ation

Specifications

Vehicle Specifications

Air Conditioning

Model

Odyssey

No. of Passengers:
Front

2

Rear

2nd Row

3

3rd Row

3

Total

8

Weights:
Gross Vehicle Weight 
Rating 

See the certification label on the driver’s 
doorjamb

Gross Axle Weight 
Rating (Front)

See the certification label on the driver’s 
doorjamb

Gross Axle Weight 
Rating (Rear)

See the certification label on the driver’s 
doorjamb

Gross Combined Weight 
Rating

U.S.: 8,565 lbs (3,885 kg)
Canada: 3,885 kg

Refrigerant Type

HFO-1234yf (R-1234yf)

Charge Quantity

20.3 - 22.0 oz (575 - 625 g)

Lubricant Type

ND-OIL14 (POE)

Quantity

7.3 - 8.2 cu-in (120 - 135 cm

3

)

Engine Specifications

Fuel

Washer Fluid

Displacement

212 cu-in (3,471 cm

3

)

Spark Plugs

NGK

DILZKR7B11G

Fuel: 
Type

Unleaded gasoline, Pump octane number 
of 87 or higher

Fuel Tank Capacity

19.5 US gal (73.8 L)

Tank Capacity

U.S.: 2.6 US qt (2.5 L)
Canada: 4.8 US qt (4.5 L)

Light Bulbs

Headlights (Low Beam)

LED

Headlights (High Beam)

LED

Fog Lights

LED

Front Turn Signal Lights

28/8W (Amber)

Front Side Marker Lights

3CP

Parking/Daytime Running Lights

LED

Side Turn Signal Lights 
(on Door Mirrors)

LED

Brake Lights

21W

Rear Side Marker/Taillights

LED

Rear Turn Signal Lights

21W

Back-Up Lights

21W

Taillights

LED

High-Mount Brake Light

LED

Rear License Plate Light

LED

Interior Lights

Front Map Lights

5W

Rear Map Lights

5W

Ambient Light

LED

Cargo Area Light

8W

Vanity Mirror Lights

1.4W

Door Courtesy Lights 3.8W (2CP)
Glove Box Light

1.4W

Foot Lights

*

LED

Console Compartment 
Light

1.4W

Door Inner Handle 
Lights

*

LED

Door Tray Ambient 
Lights

*

LED

Pass Through Light

*

LED

* Not available on all models

685

uu

Specifications

u

Info

rm

ation

Brake Fluid

Automatic Transmission Fluid

Specified

Honda Heavy Duty Brake Fluid DOT 3

Specified

Honda ATF-Type 2

Engine Oil

Engine Coolant

Recommended

·Genuine Honda Motor Oil 0W-20
·API Premium-grade 0W-20 detergent oil

Capacity

Change

5.4 US qt (5.1 L)

Change 
including 
filter

5.7 US qt (5.4 L)

Specified

Honda Long-Life Antifreeze/Coolant Type2

Ratio

50/50 with distilled water

Capacity

1.69 US gal (6.38 L) 
(change including the remaining 0.19 US gal 
(0.73 L) in the reserve tank)

Tire

*1: Original tire size is mentioned on the tire information label on 

the driver’s doorjamb.

*2: Models with 235/60R18 tires
*3: Models with 235/55R19 tires

Regular

Size

*1

235/60R18 103H
235/55R19 101H

Pressure 
psi (kPa [kgf/cm

2

])

35 (240 [2.4])

*2

36 (250 [2.5])

*3

Compact 
Spare

Size

T135/80D17 103M

Pressure 
psi (kPa [kgf/cm

2

])

60 (420 [4.2])

Wheel Size

Regular

18 x 7 1/2J

*2

19 x 7 1/2J

*3

Compact Spare

17 x 4T

686

Info

rm

ation

Identification Numbers

Vehicle Identification Number (VIN), Engine Number, 
and Transmission Number

Your vehicle has a 17-digit vehicle identification number (VIN) used to register your 
vehicle for warranty purposes, and for licensing and insuring your vehicle.
The locations of your vehicle’s VIN, engine number, and transmission number are 
shown as follows:

1

Vehicle Identification Number (VIN), Engine Number, and 
Transmission Number

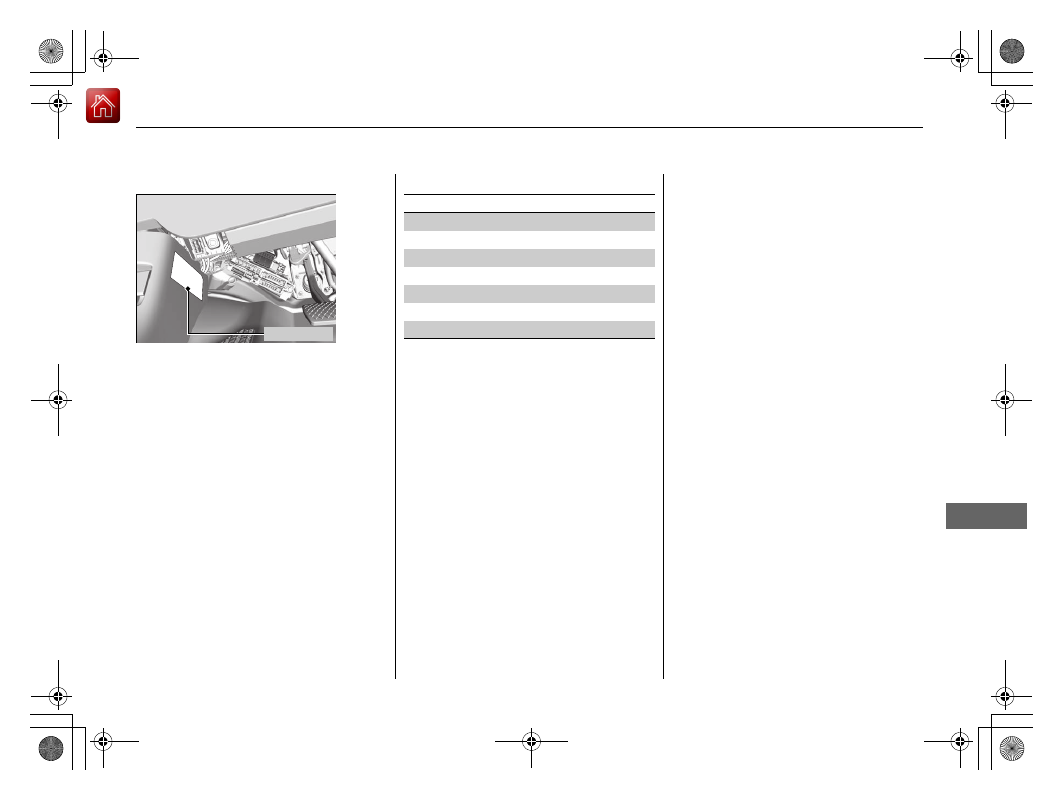
The interior vehicle identification number (VIN) is 
located under the cover.

Vehicle Identification 
Number

Certification Label/
Vehicle Identification 
Number

Engine Number

Transmission Number

687

Info

rm

ation

Devices that Emit Radio Waves

Each radio frequency device installed in the vehicle conforms to the requirements 
and standards of the regulation listed below:

As required by the FCC:
This device complies with Part 15 of the FCC rules. Operation is 
subject to the following two conditions: (1) This device may not 
cause harmful interference, and (2) this device must accept any 
interference received, including interference that may cause 
undesired operation.

Changes or modifications not expressly approved by the party 
responsible for compliance could void the user’s authority to 
operate the equipment.

This device complies with Industry Canada licence-exempt RSS standard(s). 
Operation is subject to the following two conditions: (1) this device may not cause 
interference, and (2) this device must accept any interference, including interference 
that may cause undesired operation of the device.

688

Info

rm

ation

Reporting Safety Defects

In the U.S.
If you believe that your vehicle has a defect which could cause a crash or could cause injury or death, you 
should immediately inform the National Highway Traffic Safety Administration (NHTSA) in addition to 
notifying American Honda Motor Co., Inc.

If NHTSA receives similar complaints, it may open an investigation, and if it finds that a safety defect exists 
in a group of vehicles, it may order a recall and remedy campaign. However, NHTSA cannot become involved 
in individual problems between you, your dealer, or American Honda Motor Co., Inc.

To contact NHTSA, you may call the Vehicle Safety Hotline toll-free at 1-888-327-4236 (TTY: 1-800-424-
9153); go to 

http://www.safercar.gov

; or write to: Administrator, NHTSA, 1200 New Jersey Avenue, SE., 

Washington, DC 20590. You can also obtain other information about motor vehicle safety from 

http://

www.safercar.gov

.

In Canada
If you believe that your vehicle has a defect which could cause a crash or could cause injury or death, you 
should immediately inform Honda Canada Inc. and you may also inform Transport Canada.

If Transport Canada receives similar complaints, it may open an investigation, and if it finds that a safety 
defect exists in a group of vehicles, it may lead to a recall and remedy campaign. However, Transport Canada 
cannot become involved in individual problems between you, your dealer, or Honda Canada Inc.

To contact Transport Canada’s Defect Investigations and Recalls Division, you may call 1-800-333-0510. For 
more information on reporting safety defects or about motor vehicle safety, go to 

http://www.tc.gc.ca/

roadsafety

.


Content      ..     40      41      42      43     ..