Honda HR-V eHEV (2022 year). Manual in english - page 5
 

  Index      Manuals     Honda HR-V eHEV (2022 year). Manual in english


Search            copyright infringement  


Content      ..     3      4      5      6     ..


Honda HR-V eHEV (2022 year). Manual in english - page 5


uu

Child Safety

u

Safety of Infants and Small Children

78

Safe Driving

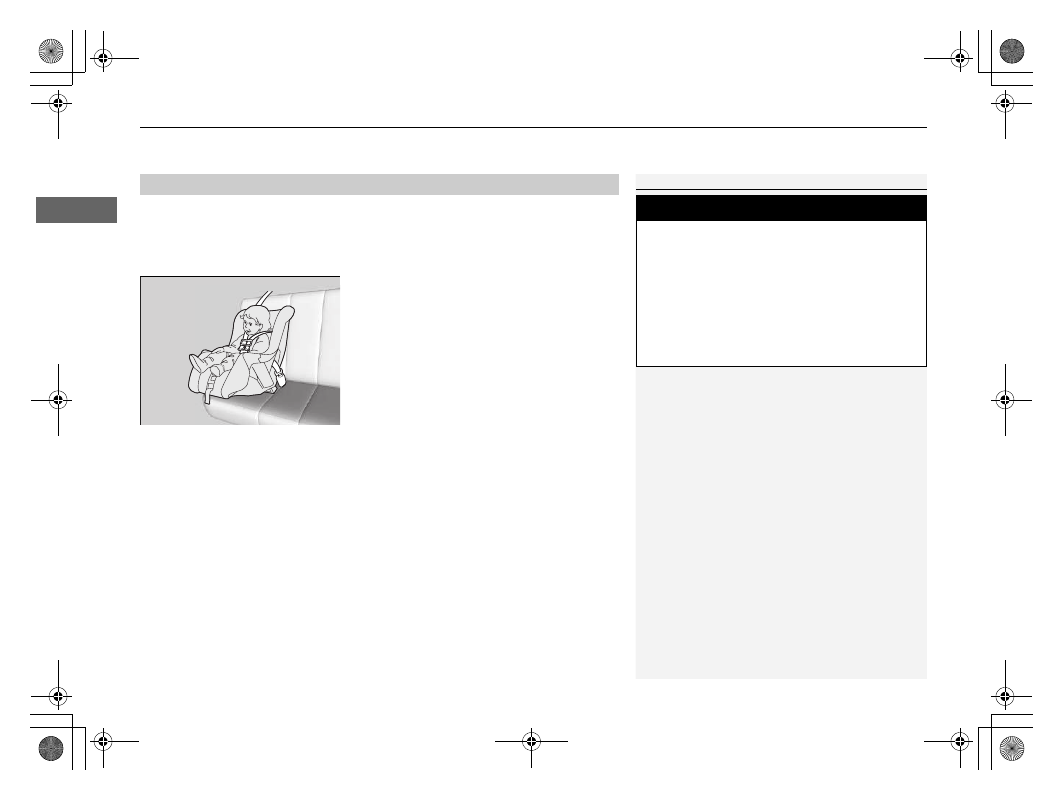
If a child has exceeded the weight and height limitations of a rear-facing child 
restraint system, the child should be properly restrained in a firmly secured front-
facing child restraint system until they exceed the weight and height limitations for 
the front-facing child restraint system.

Front-facing child restraint system 
placement

We strongly recommend placing a front-
facing child restraint system in a rear seating 
position.

Placing a front-facing child restraint system in the front seat can be hazardous. A 
rear seat is the safest place for a child.

Protecting Smaller Children

1

Protecting Smaller Children

Educate yourself about the laws and regulations 
regarding child restraint system use where you are 
driving, and follow the child restraint system 
manufacturer’s instructions.

3

WARNING

Placing a front-facing child restraint system 
in the front seat can result in serious injury 
or death if the front airbag inflates.

If you must place a front-facing child 
restraint system in front, move the vehicle 
seat as far back as possible, and properly 
restrain the child.

Continued

79

uu

Child Safety

u

Safety of Infants and Small Children

Safe Driving

Some child restraint systems are lower anchorage compatible. Some have a rigid-
type connector while others have a flexible-type connector. Both are equally easy to 
use. Some existing and previously owned child restraint systems can only be installed 
using the seat belt. Whichever type you choose, follow the child restraint system 
manufacturer’s use and care instructions including recommended expiration dates 
as well as the instructions in this manual. Proper installation is key to maximising 
your child’s safety. 

The flexible type may not be available in your country.

In seating positions and vehicles not equipped with lower anchorages, install a child 
restraint system using the seat belt and a top tether for added security. This is 
because all child restraint systems must be secured with the seat belt when the 
lower anchorage system is not in use. In addition, the child restraint system 
manufacturer may advise that a seat belt be used to attach an ISOFIX restraint 
system once a child reaches a specified weight. Please read the child restraint system 
owner’s manual for proper installation instructions. 

Important consideration when selecting a child restraint system

Make sure the child restraint system meets the following three requirements:

The child restraint system is the correct type and size for the child.

The child restraint system is the correct type for the seating position.

The child restraint system is compliant with safety standards. We recommend a 
child restraint system compliant with UN Regulation No. 44 or No. 129, or the 
regulations of the subject countries. Look for the approval mark on the system 
and the manufacturer’s statement of compliance on the box.

Selecting a Child Restraint System

1

Selecting a Child Restraint System

Installation of a lower anchorage-compatible child 
restraint system is simple.

Lower anchorage-compatible child restraint systems 
have been developed to simplify the installation 
process and reduce the likelihood of injuries caused 
by incorrect installation.

uu

Child Safety

u

Safety of Infants and Small Children

80

Safe Driving

Child Restraint Systems Standards

If a child restraint system (whether an i-Size/ISOFIX type or one that is fitted with a 
seat belt) meets the relevant UN Regulation, it will be affixed with an approval label 
as shown in the adjacent table. Before purchasing or using any child restraint 
system, make sure to check the approval label and ensure that it is compatible with 
your vehicle and the child, and that it complies with the relevant UN Regulation.

1

Selecting a Child Restraint System

Example of UN Regulation No. 44 approval label

a

“Mass group”

b

Regulation number

c

Category

d

Approval number

e

Country code

Continued

81

uu

Child Safety

u

Safety of Infants and Small Children

Safe Driving

1

Selecting a Child Restraint System

Example of UN Regulation No. 129 approval label

a

Category

b

Size and weight indication

c

Approval number

d

Regulation number

e

Country code

82

uu

Child Safety

u

Safety of Infants and Small Children

Safe Driving

Locations for Child Restraint System Installation

Passenger Airbag ON or without 
Passenger Airbag ON/OFF SW

Passenger Airbag OFF

*1 : Forward facing only.
*2 : • Adjust the seat slide to the rearmost position. 

• If the child restraint system interferes with the head restraint and cannot 
be installed stably, raise the head restraint to the highest position. If this 
interference is unavoidable even after raising, remove the head restraint. 
Please note that the removed head restraint should be stored in the luggage 
compartment so that it will not fly during sudden braking or collision.
Also, if you remove the child restraint system, attach the head restraint to 
the original seat and make sure it is locked.

*3 : For installing the universal belted type, adjust the seat back to the most 

front lock position.

*4 : If the child restraint system interferes with the head restraint and cannot 

be installed stably, raise it to the top.

*5 : If you attach a child restraint system to the rear centre seat, the seat belt 

on one side cannot be used.

*6 : If you attach a child restraint system to the rear left seat, the centre seat 

belt cannot be used.

*7 : Attaching a child restraint system to the rear right seat may make the 

centre seat belt unusable.

*8 : If attaching an ISOFIX child restraint system to the rear left seat, the centre 

seat belt cannot be used.

Suitable for universal restraint systems installed with 
vehicle safety belts.

Suitable for forward facing universal restraint systems 
installed with vehicle safety belts.

Suitable for i-Size and ISOFIX child restraints systems.

Suitable for forward facing restraint systems only.

Never use a rearward facing child restraint system.

Seat position equipped with Top Tether anchorages.

Child restraint systems with support legs can be installed on non i-Size 
seating positions. However, the centre seat is excluded.

Left-hand drive type

83

uu

Child Safety

u

Safety of Infants and Small Children

Continued

Safe Driving

Passenger Airbag ON or without 
Passenger Airbag ON/OFF SW

Passenger Airbag OFF

*1 : Forward facing only.
*2 : • Adjust the seat slide to the rearmost position. 

• If the child restraint system interferes with the head restraint and cannot 
be installed stably, raise the head restraint to the highest position. If this 
interference is unavoidable even after raising, remove the head restraint. 
Please note that the removed head restraint should be stored in the 
luggage compartment so that it will not fly during sudden braking or 
collision.
Also, if you remove the child restraint system, attach the head restraint to 
the original seat and make sure it is locked.

*3 : For installing the universal belted type, adjust the seat back to the most 

front lock position.

*4 : If the child restraint system interferes with the head restraint and cannot 

be installed stably, raise it to the top.

*5 : If you attach a child restraint system to the rear centre seat, the seat belt 

on one side cannot be used.

*6 : If you attach a child restraint system to the rear left seat, the centre seat 

belt cannot be used.

*7 : Attaching a child restraint system to the rear right seat may make the 

centre seat belt unusable.

*8 : If attaching an ISOFIX child restraint system to the rear left seat, the centre 

seat belt cannot be used.

Suitable for universal restraint systems installed with 
vehicle safety belts.

Suitable for forward facing universal restraint systems 
installed with vehicle safety belts.

Suitable for i-Size and ISOFIX child restraints systems.

Suitable for forward facing restraint systems only.

Never use a rearward facing child restraint system.

Seat position equipped with Top Tether anchorages.

Child restraint systems with support legs can be installed on non i-Size 
seating positions. However, the centre seat is excluded.

Right-hand drive type

uu

Child Safety

u

Safety of Infants and Small Children

84

Safe Driving

Detail information for CRS installation

Seating position and Seat position number

Size groups

Weight
Stature

a

b

c

d

Front passenger

*2

2nd row

*4

Front passenger 

airbag ON/OFF 

switch position

Left

*6*8

Centre

*5

Right

*7

ON

*1

OFF

Seating position suitable for 
universal belted (yes/no)

Group 0

Up to 10kg

No

Yes

*3

Yes

Yes

Yes

Group 0+

Up to 13kg

Group I

9-18kg

Yes

*3

Yes

Yes

Yes

Group II

15-25kg

Group III

22-36kg

i-Size seating position (yes/no)

≤ 150cm

No

No

Yes

No

Yes

Seating position suitable for 
recommended genuine CRS

*9

Refer to genuine CRS list

Yes

Yes

Yes

Yes

Yes

Seating position suitable for 
lateral fixture (L1/L2)

No

No

No

No

No

Largest suitable rearward 
facing fixture (R1/R2X/R2/R3)

Group 0

Up to 10kg

No

No

R3

No

R3

Group 0+

Up to 13kg

Group I

9-18kg

Largest suitable forward 
facing fixture (F2X/F2/F3)

Group I

9-18kg

No

No

F3

No

F3

Largest suitable booster 
fixture (B2/B3)

≤ 150cm

B3

*3

B3

*3

B3

B3

B3

1

Locations for Child Restraint System Installation

When purchasing a child restraint systems, make sure 
to check the ISOFIX size class or the fixture to ensure 
that the seat is compatible with your vehicle.

Fixture 

(CRF)

Description

ISO/L1

Left lateral-facing (carrycot) 
infant seat

ISO/L2

Right lateral-facing (carrycot) 
infant seat

ISO/R1 Rearward-facing infant seat

ISO/R2X

Reduced-size rearward-facing 
child restraint systems

ISO/R2

Reduced-size rearward-facing 
child restraint systems

ISO/R3

Full-size rearward-facing child 
restraint systems

ISO/F2X

Reduced-height forward-facing 
child restraint systems

ISO/F2

Reduced-height forward-facing 
child restraint systems

ISO/F3

Full-height, forward-facing child 
restraint systems

ISO/B2

Reduced width forward-facing 
booster seat

ISO/B3

Full width forward-facing 
booster seat

All models

85

uu

Child Safety

u

Safety of Infants and Small Children

Continued

Safe Driving

*1:Forward facing only.
*2:• Adjust the seat slide to the rearmost position. 

• If the child restraint system interferes with the head restraint and cannot be 
installed stably, raise the head restraint to the highest position. If this interference 
is unavoidable even after raising, remove the head restraint. Please note that the 
removed head restraint should be stored in the luggage compartment so that it 
will not fly during sudden braking or collision.
Also, if you remove the child restraint system, attach the head restraint to the 
original seat and make sure it is locked.

*3:For installing the universal belted type, adjust the seat back to the most front lock 

position.

*4:If the child restraint system interferes with the head restraint and cannot be 

installed stably, raise it to the top.

*5:If you attach a child restraint system to the rear centre seat, the left seat belt 

cannot be used.

*6:If you attach a child restraint system to the rear left seat, the centre seat belt 

cannot be used.

*7:Attaching a child restraint system to the rear right seat may make the centre seat 

belt unusable.

*8:If attaching an ISOFIX child restraint system to the rear left seat, the centre seat 

belt cannot be used.

*9:The named Child Restraint Systems (CRS) reflect Honda’s recommendations at 

the date of publication. You should speak to an authorised dealer for up to date 
details relating to our recommended CRSs.
Other CRS may also be suitable - please consult CRS manufacturers for 
recommended vehicle lists.

Child restraint systems with support legs can be installed on non i-Size seating 
positions. However, the centre seat is excluded.

86

uu

Child Safety

u

Safety of Infants and Small Children

Safe Driving

R44

R129

Europe Genuine CRS List

Mass Group

Child Restraint System

Category

Group 0
up to 10kg

Group 0+
up to 13kg

Group I
9 to 18kg

Group II, III
15 to 36kg

Honda KIDFIX XP

Universal
Semi-universal

Range of application

Child Restraint System

Category

40 to 83cm
up to 13kg
(Birth - 15 months)

Honda baby safe

Infant carrier module

Honda baby safe ISOFIX

Base for i-Size

76 to 105cm
8 to 22kg
(15 months - 4 years)

Honda ISOFIX

i-Size Universal ISOFIX

Continued

87

uu

Child Safety

u

Safety of Infants and Small Children

Safe Driving

A lower anchorage-compatible child restraint system can be installed in either of the 
two outer rear seats. A child restraint system is attached to the lower anchorages 
with either the rigid or flexible type of connectors (see illustrations).

1.

Locate the lower anchorages under the 
marks.

2.

Place the child restraint system on the 
vehicle seat, then attach the child restraint 
system to the lower anchorages according 
to the instructions that came with the 
child restraint system.

u

When installing the child restraint 
system, make sure that the lower 
anchorages are not obstructed by the 
seat belt or any other object.

Installing a Lower Anchorage-Compatible Child Restraint 

System

1

Installing a Lower Anchorage-Compatible Child Restraint System

Some child restraint systems come with optional 
guide-cups, which avoid possible damage to the seat 
surface. Follow the manufacturer’s instructions when 
using the guide-cups, and attach them to the lower 
anchorages as shown in the image.

3

WARNING

Never attach two child restraint systems to 
the same anchorage. In a collision, one 
anchorage may not be strong enough to 
hold two child restraint system attachments 
and may break, causing serious injury or 
death.

a

Lower Anchorage

b

Guide-cup

a

Marks

a

Rigid Type

b

Lower Anchorages

uu

Child Safety

u

Safety of Infants and Small Children

88

Safe Driving

1

Installing a Lower Anchorage-Compatible Child Restraint System

WARNING: 

Never use a hook that does not come 

with a Top Tether Anchorage Symbol when securing 
an installed child restraint system.

For your child’s safety, when using a child restraint 
system installed using the lower anchorage system, 
make sure that the child restraint system is properly 
secured to the vehicle.
A child restraint system that is not properly secured 
will not adequately protect a child in a crash and may 
cause injury to the child or other vehicle occupants.

The flexible type may not be available in your country.

a

Flexible Type

b

Lower Anchorages

a

Top Tether Anchorage Symbol

89

uu

Child Safety

u

Safety of Infants and Small Children

Continued

Safe Driving

3.

Raise the head restraint to its highest 
position.

u

Remove the luggage area cover.

2

Luggage Area Cover

 P. 227

4.

Route the tether strap between the head 
restraint legs.

5.

Secure the tether strap hook to the 
anchorage.

6.

Tighten the tether strap as instructed by 
the child restraint system manufacturer.

7.

Make sure the child restraint system is firmly 
secured by rocking it forward and back, and 
side to side; little movement should be felt.

8.

Make sure any unused seat belt that a 
child can reach is buckled.

a

Ahead of the Vehicle

b

Tether Strap Hook

c

Anchorage

Straight top tether type

Child restraint system with tether strap

a

Ahead of the Vehicle

b

Tether Strap Hook

c

Anchorage

Other top tether type

90

uu

Child Safety

u

Safety of Infants and Small Children

Safe Driving

3.

Extend the support leg until it touches the 
floor as instructed by the child restraint 
system manufacturer.

u

Confirm that the section of the floor on 
which the support leg rests is level. If the 
section is not level, the support leg will 
not provide adequate support.

u

Make sure that there is no contact 
between the child restraint system and 
the seat in front of it.

a

Support Leg

Child restraint system with support leg

Continued

91

uu

Child Safety

u

Safety of Infants and Small Children

Safe Driving

1.

Place the child restraint system on the 
vehicle seat.

2.

Route the seat belt through the child 
restraint system according to the child 
restraint system manufacturer’s 
instructions, and insert the latch plate into 
the buckle.

u

Insert the latch plate fully until it clicks.

3.

Push down the tab. Route the shoulder 
part of the belt into the slit at the side of 
the restraint. 

4.

Grab the shoulder part of the belt near the 
buckle, and pull up to remove any slack 
from the lap part of the belt. 

u

When doing this, place your weight on 
the child restraint system and push it 
into the vehicle seat.

5.

Position the belt properly and push up the 
tab. Make sure the belt is not twisted. 

u

When pushing up the tab, pull up the 
upper shoulder part of the belt to 
remove any slack from the belt.

Installing a Child Restraint System with a Lap/Shoulder Seat 

Belt

1

Installing a Child Restraint System with a Lap/Shoulder Seat Belt

A child restraint system that is not properly secured 
will not adequately protect a child in a crash and may 
cause injury to the child or other vehicle occupants.

a

Tab

92

uu

Child Safety

u

Safety of Infants and Small Children

Safe Driving

6.

Make sure the child restraint system is 
firmly secured by rocking it forward and 
back, and side to side; little movement 
should be felt.

7.

Make sure any unused seat belt that a 
child can reach is buckled.

If your child restraint system does not come 
with a mechanism that secures the belt, install 
a locking clip on the seat belt.

After going through the step 1 and 2, pull up 
the shoulder part of the belt and make sure 
there is no slack in the lap portion.

3.

Tightly grasp the belt near the latch plate. 
Pinch both parts of the belt together so 
they do not slip through the latch plate. 
Unbuckle the seat belt.

4.

Install the locking clip as shown in the 
image. Position the clip as close as possible 
to the latch plate.

5.

Insert the latch plate into the buckle. Go 
to step 6 and 7.

a

Locking Clip

Except European models

Continued

93

uu

Child Safety

u

Safety of Infants and Small Children

Safe Driving

A tether anchorage point is provided behind 
each rear outer seating position.
If you have a child restraint system that comes 
with a tether but can be installed with a seat 
belt, the tether may be used for additional 
security.

1.

Raise the head restraint to its highest 
position.

u

Remove the luggage area cover.

2

Luggage Area Cover

 P. 227

2.

Route the tether strap between the head 
restraint legs.

3.

Secure the tether strap hook to the 
anchorage.

4.

Tighten the tether strap as instructed by 
the child restraint system manufacturer.

5.

Make sure the child restraint system is 
firmly secured by rocking it forward and 
back, and side to side; little movement 
should be felt.

6.

Make sure any unused seat belt that a 
child can reach is buckled.

Adding Security with a Tether

1

Adding Security with a Tether

WARNING: 

Child restraint anchorages are designed 

to withstand only those loads imposed by correctly 
fitted child restraints. Under no circumstances are 
they to be used for adult seat belts, harnesses or for 
attaching other items or equipment to the vehicle.

Always use a tether for front-facing child restraint 
system whether using the seat belt or lower 
anchorages.

a

Tether Anchorage Points

a

Ahead of the Vehicle

b

Tether Strap Hook

c

Anchorage

Straight top tether type


Content      ..     3      4      5      6     ..