Honda CR-V Hybrid (2022 year). Manual in english - page 13
 

  Index      Manuals     Honda CR-V Hybrid (2022 year). Manual in english


Search            copyright infringement  


Content      ..     11      12      13      14     ..


Honda CR-V Hybrid (2022 year). Manual in english - page 13


uu

Operating the Switches Around the Steering Wheel

u

Driving Position Memory System

*

204

Co
ntrols

1.

Set the power mode to ON. Adjust the 
driver’s seat to the desired position.

2.

Press the 

SET

 button.

u

You will hear a beep, and the memory 
button indicator light will blink.

3.

Press and hold memory button 

(

1

 or 

(

2


within five seconds of pressing the 

SET


button.

u

Once the seat position has been 
memorized, the indicator light on the 
button you pressed stays on.

1.

Put the transmission into 

(

P

.

2.

Apply the parking brake.

3.

Press a memory button (

(

1

 or 

(

2

).

u

You will hear a beep, and the indicator 
light will blink.

The seat will automatically move to the 
memorized position. When it has finished 
moving, you will hear a beep, and the 
indicator light stays on.

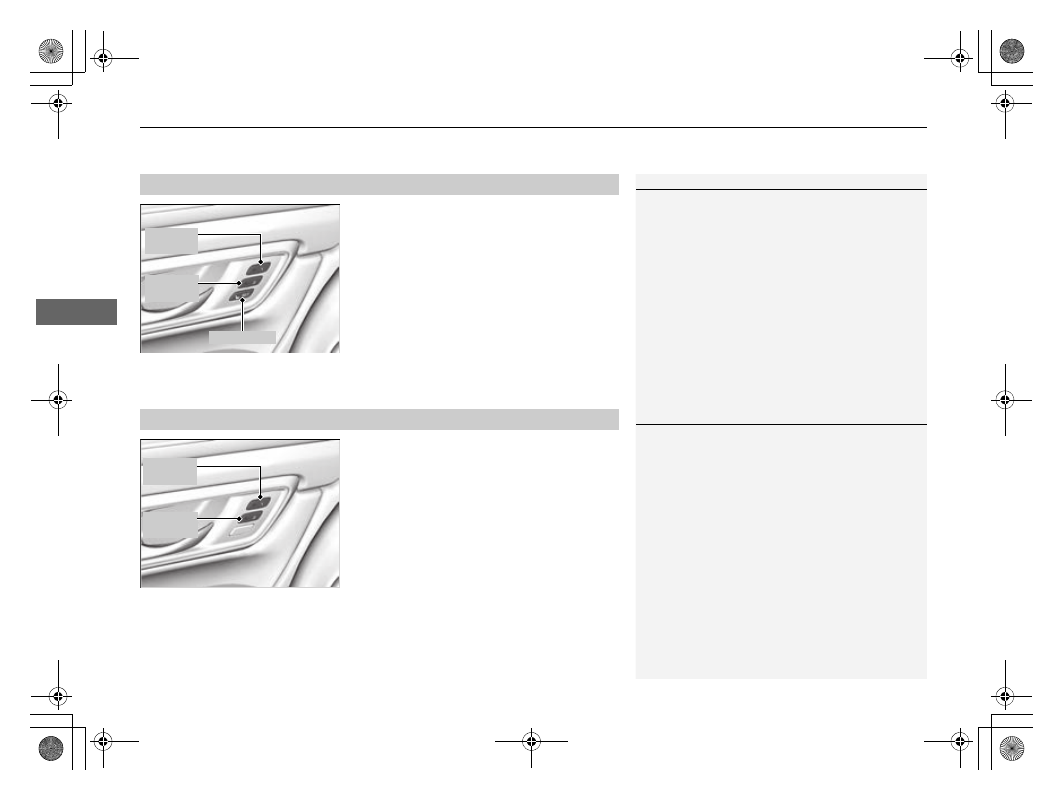
Storing a Position in Memory

1

Storing a Position in Memory

After you press the 

SET

 button, the storing operation 

will be canceled when: 

You do not press the memory button within five 
seconds.

You readjust the seat position before the double-
beep.

You set the power mode to any position except 
ON.

Memory 

Button 

1

Memory 

Button 

2

SET

 Button

Recalling the Stored Position

1

Recalling the Stored Position

The seat will stop moving if you: 

Press the 

SET

 button, or a memory button (

(

1

 or 

(

2

).

Adjust the seat position.

Put the transmission into a position other than 

(

P

.

Memory 

Button 

1

Memory 

Button 

2

205

uu

Operating the Switches Around the Steering Wheel

u

Adjusting the Steering Wheel

Co
ntrols

Adjusting the Steering Wheel

The steering wheel height and distance from your body can be adjusted so that you 
can comfortably grip the steering wheel in an appropriate driving posture.

1.

While the vehicle is stopped, pull the 
steering wheel adjustment lever up.

u

The steering wheel adjustment lever is 
under the steering column.

2.

Move the steering wheel up or down, and 
in or out.

u

Make sure you can see the instrument 
panel gauges and indicators.

3.

Push the steering wheel adjustment lever 
down to lock the steering wheel in position.

u

After adjusting the position, make sure 
you have securely locked the steering 
wheel in place by trying to move it up, 
down, in, and out.

1

Adjusting the Steering Wheel

3

WARNING

Adjusting the steering wheel position while 
driving may cause you to lose control of the 
vehicle and be seriously injured in a crash.

Adjust the steering wheel only when the 
vehicle is stopped.

To lock

Lever

To adjust

206

Co
ntrols

Mirrors

Interior Rearview Mirror

Adjust the angle of the rearview mirror when you are sitting in the correct driving 
position.

Flip the tab to switch the position.
The night position will help to reduce the glare 
from headlights behind you when driving 
after dark.

When you are driving after dark, the 
automatic dimming rearview mirror reduces 
the glare from headlights behind you. This 
feature is always active.

Rearview Mirror with Day and Night Positions

*

1

Mirrors

Keep the inside and outside mirrors clean and 
adjusted for best visibility.

Adjust the mirrors before you start driving.

2

Front Seats

 P. 208

Tab

Daytime 

Position

Night 

Position

Automatic Dimming Rearview Mirror

*

Sensor

1

Automatic Dimming Rearview Mirror

*

The auto dimming function cancels when the 
transmission is in 

(

R

.

* Not available on all models

207

uu

Mirrors

u

Power Door Mirrors

Co
ntrols

Power Door Mirrors

You can adjust the door mirrors when the 
power mode is in ON.

Mirror position adjustment

L/R selector switch:

 Select the left or right 

mirror. After adjusting the mirror, return the 
switch to the center position.

Mirror position adjustment switch:

 Press 

the switch left, right, up, or down to move the 
mirror.

Selector 

Switch

Adjustment 

Switch

208

Co
ntrols

Seats

Front Seats

Adjust the driver’s seat as far back as possible 
while allowing you to maintain full control of 
the vehicle. You should be able to sit upright, 
well back in the seat and be able to 
adequately press the pedals without leaning 
forward, and grip the steering wheel 
comfortably. The passenger’s seat should be 
adjusted in a similar manner, so that it is as far 
back from the front airbag in the dashboard 
as possible.

Adjusting the front power seat

*

1

Seats

Always make seat adjustments before driving.

1

Front Seats

The National Highway Traffic Safety Administration 
recommends that driver’s allow at least 10 inches (25 
cm) between the center of the steering wheel and 
the chest.

3

WARNING

Sitting too close to a front airbag can result 
in serious injury or death if the front 
airbags inflate.

Always sit as far back from the front 
airbags as possible while maintaining 
control of the vehicle.

Move back.

Allow sufficient 

space.

Adjusting the Seat Positions

Horizontal Position 

Adjustment

Height Adjustment 

(Driver’s seat only)

Seat-back 

Angle 

Adjustment

* Not available on all models

209

uu

Seats

u

Front Seats

Continued

Co
ntrols

Lumbar Support Adjustment Switch

*


(Driver’s seat only)

Press the top: 

To move the lumbar support 

up.

Press the bottom: 

To move the lumbar 

support down.

Press the front: 

To increase the entire 

lumbar support.

Press the rear: 

To decrease the entire lumbar 

support.

Lumbar 

Support 

Adjustment 

Switch

* Not available on all models

uu

Seats

u

Front Seats

210

Co
ntrols

Adjusting the front manual seat(s)

*

1

Adjusting the front manual seat(s)

*

Once a seat is adjusted correctly, rock it back and 
forth to make sure it is locked in position.

Horizontal Position 

Adjustment

Pull up on the bar to move 
the seat, then release the 
bar.

Height Adjustment

(Driver’s seat only)
Pull up or push down 
the lever to raise or 
lower the seat.

Seat-back Angle 

Adjustment

Pull up the lever to 
change the angle.

* Not available on all models

211

uu

Seats

u

Front Seats

Co
ntrols

Adjust the driver’s seat-back to a comfortable, 
upright position, leaving ample space 
between your chest and the airbag cover in 
the center of the steering wheel.

The front seat passenger should also adjust 
their seat-back to a comfortable, upright 
position.

Reclining a seat-back so that the shoulder part of the belt no longer rests against the 
occupant’s chest reduces the protective capability of the belt. It also increases the 
chance of sliding under the belt in a crash and being seriously injured. The farther a 
seat-back is reclined, the greater the risk of injury.

Adjusting the Seat-Backs

1

Adjusting the Seat-Backs

Do not put a cushion, or other object, between the 
seat-back and your back.

Doing so may interfere with proper seat belt or airbag 
operation.

If you cannot get far enough away from the steering 
wheel and still reach the controls, we recommend 
that you investigate whether some type of adaptive 
equipment may help.

3

WARNING

Reclining the seat-back too far can result in 
serious injury or death in a crash.

Adjust the seat-back to an upright position, 
and sit well back in the seat.

212

uu

Seats

u

Rear Seats

Co
ntrols

Rear Seats

Adjusting the Seat Positions

1

Rear Seats

Once a seat is adjusted correctly, rock it back and 
forth to make sure it is locked in position.

Lever

Seat-back Angle Adjustment

Pull up the lever to change the angle.

213

uu

Seats

u

Rear Seats

Co
ntrols

1.

Store the center seat belt first. Insert the 
latch plate into the slot on the side of the 
anchor buckle.

2.

Retract the seat belt into the holder on the 
ceiling.

2

Seat Belt with Detachable Anchor

 P. 53

3.

Lower the rear seat head restraint to its 
lowest position. Put the armrest back into 
the seat-back.

4.

Pull the release lever and fold down the 
seat.

4.

Pull the release lever and fold down the 
seat.

Folding Down the Rear Seats

Latch plate

Anchor buckle

1

Folding Down the Rear Seats

The rear seat-backs can be folded down to 
accommodate bulkier items in the cargo area.

Remove any items from the rear seat cushion and 
floor before you fold down the rear seat.

When returning the seat-back to its original position, 
push it firmly back. Also, make sure all rear shoulder 
belts are positioned in front of the seat-back.

Make sure all items in the cargo area or items 
extending through the opening into the rear 
seats are properly secured. Loose items can fly 
forward if you have to brake hard.

Make sure that the folded seat-back does not press 
against the front passenger seat, as this can cause the 
weight sensors in the front passenger seat to work 
improperly.

2

Passenger Airbag Off Indicator

 P. 69

Make sure the seat-back, head restraints and seat 
cushion are securely latched back into place before 
driving.

Release 

Lever

From the rear seat side

Release Lever

From the cargo area side

214

uu

Seats

u

Maintain a Proper Sitting Position

Co
ntrols

Maintain a Proper Sitting Position

After all occupants have adjusted their seats and head restraints, and put on their 
seat belts, it is very important that they continue to sit upright, well back in their 
seats, with their feet on the floor, until the vehicle is safely parked and the power 
system is off.

Sitting improperly can increase the chance of injury during a crash. For example, if 
an occupant slouches, lies down, turns sideways, sits forward, leans forward or 
sideways, or puts one or both feet up, the chance of injury during a crash is greatly 
increased.

In addition, an occupant who is out of position in the front seat can be seriously or 
fatally injured in a crash by striking interior parts of the vehicle or being struck by an 
inflating front airbag.

1

Maintain a Proper Sitting Position

3

WARNING

Sitting improperly or out of position can 
result in serious injury or death in a crash.

Always sit upright, well back in the seat, 
with your feet on the floor.

215

uu

Seats

u

Head Restraints

Continued

Co
ntrols

Head Restraints

Your vehicle is equipped with head restraints in all seating positions.

Head restraints are most effective for 
protection against whiplash and other rear-
impact crash injuries when the center of the 
back of the occupant’s head rests against the 
center of the restraint. The tops of the 
occupant’s ears should be level with the 
center height of the restraint.

To raise the head restraint:

 Pull it upward.

To lower the head restraint:

 Push it down 

while pressing the release button.

Adjusting the Front Head Restraints

1

Adjusting the Front Head Restraints

In order for the head restraint system to work 
properly:

Do not hang any items on the head restraints, or 
from the restraint legs.

Do not place any objects between an occupant and 
the seat-back.

Install each restraint in its proper location.

3

WARNING

Improperly positioning head restraints 
reduces their effectiveness and increases 
the likelihood of serious injury in a crash.

Make sure head restraints are in place and 
positioned properly before driving.

Position head in the center 

of the head restraint.

uu

Seats

u

Head Restraints

216

Co
ntrols

A passenger sitting in the rear seat should 
adjust the height of their head restraint to an 
appropriate position before the vehicle begins 
moving.

To raise the head restraint:

Pull it upward.

To lower the head restraint:

Push it down while pressing the release 
button.

Head restraints can be removed for cleaning or repair.

To remove a head restraint:

Pull the restraint up as far as it will go. Then, push the release button and pull the 
restraint up and out.

To reinstall a head restraint:

Insert the legs back in place, then adjust the head restraint to an appropriate height 
while pressing the release button. Pull up on the restraint to make sure it is locked 
in position.

Changing the Rear Seat Head Restraint Position

Removing and Reinstalling the Head Restraints

1

Removing and Reinstalling the Head Restraints

3

WARNING

Failure to reinstall, or correctly reinstall, the 
head restraints can result in severe injury 
during a crash.

Always replace the head restraints before 
driving.

217

uu

Seats

u

Armrest

Co
ntrols

Armrest

The console lid can be used as an armrest.

To adjust:

Slide the armrest to a desired position.

Pull down the armrest in the center seat-back.

Using the Front Seat Armrest

Using the Rear Seat Armrest

218

Co
ntrols

Interior Convenience Items

Interior Lights

ON

The interior lights come on regardless of 
whether the doors are open or closed.

Door activated

The interior lights come on in the following 
situations:

When any doors are opened.

You unlock the driver’s door.

When the power mode is set to VEHICLE 
OFF.

OFF

The interior lights remain off regardless of 
whether the doors are open or closed.

Interior Light Switches

1

Interior Light Switches

In the door activated position, the interior lights fade 
out and go off about 30 seconds after the doors are 
closed.

The lights go off after about 30 seconds in the 
following situations:

When you unlock the driver’s door but do not open 
it.

When you set the power mode to VEHICLE OFF but 
do not open a door.

You can change the interior lights dimming time.

2

Customized Features

 P. 140

2

Customized Features

 P. 369

The interior lights go off immediately in the following 
situations:

When you lock the driver’s door.

When you close the driver’s door in ACCESSORY 
mode.

When you set the power mode to ON.

To avoid draining the 12-volt battery, do not leave 
the interior light on for an extended length of time 
when the power system is off. 

If you leave any of the doors open in VEHICLE OFF 
mode, the interior lights go off after about 15 
minutes.

Models with color audio system

Models with Display Audio

All models

Models with moonroof

Front

Models without moonroof

Door Activated Position

Front

Rear

Door Activated Position

Off

On

Door Activated Position

Off

On

Off

219

uu

Interior Convenience Items

u

Interior Lights

Co
ntrols

The map lights can be turned on and off by 
pressing the lenses.

The cargo area lights comes on when you 
open the tailgate.

Map Light Switches

1

Map Light Switches

When the interior light switch is in the door activated 
position and any door is open, the map light will not 
go off when you press the lenses.

Cargo Area Lights

1

Cargo Area Lights

The cargo area lights do not have an on/off switch. In 
case the tailgate is left open for an extended period 
of time, they automatically go out in 30 minutes.


Content      ..     11      12      13      14     ..