Honda Ridgeline. Manual - part 377
05
06
07
SJC8A00J18573958301KBAT20
20-146
Tailgate
Right Tailgate Upper Latch Replacement
B
A
8 x 1.25 mm
22 N·m
(2.2 kgf·m, 16 lbf·ft)
A
B
Fastener Locations
: Bolt, 2
B
B
A
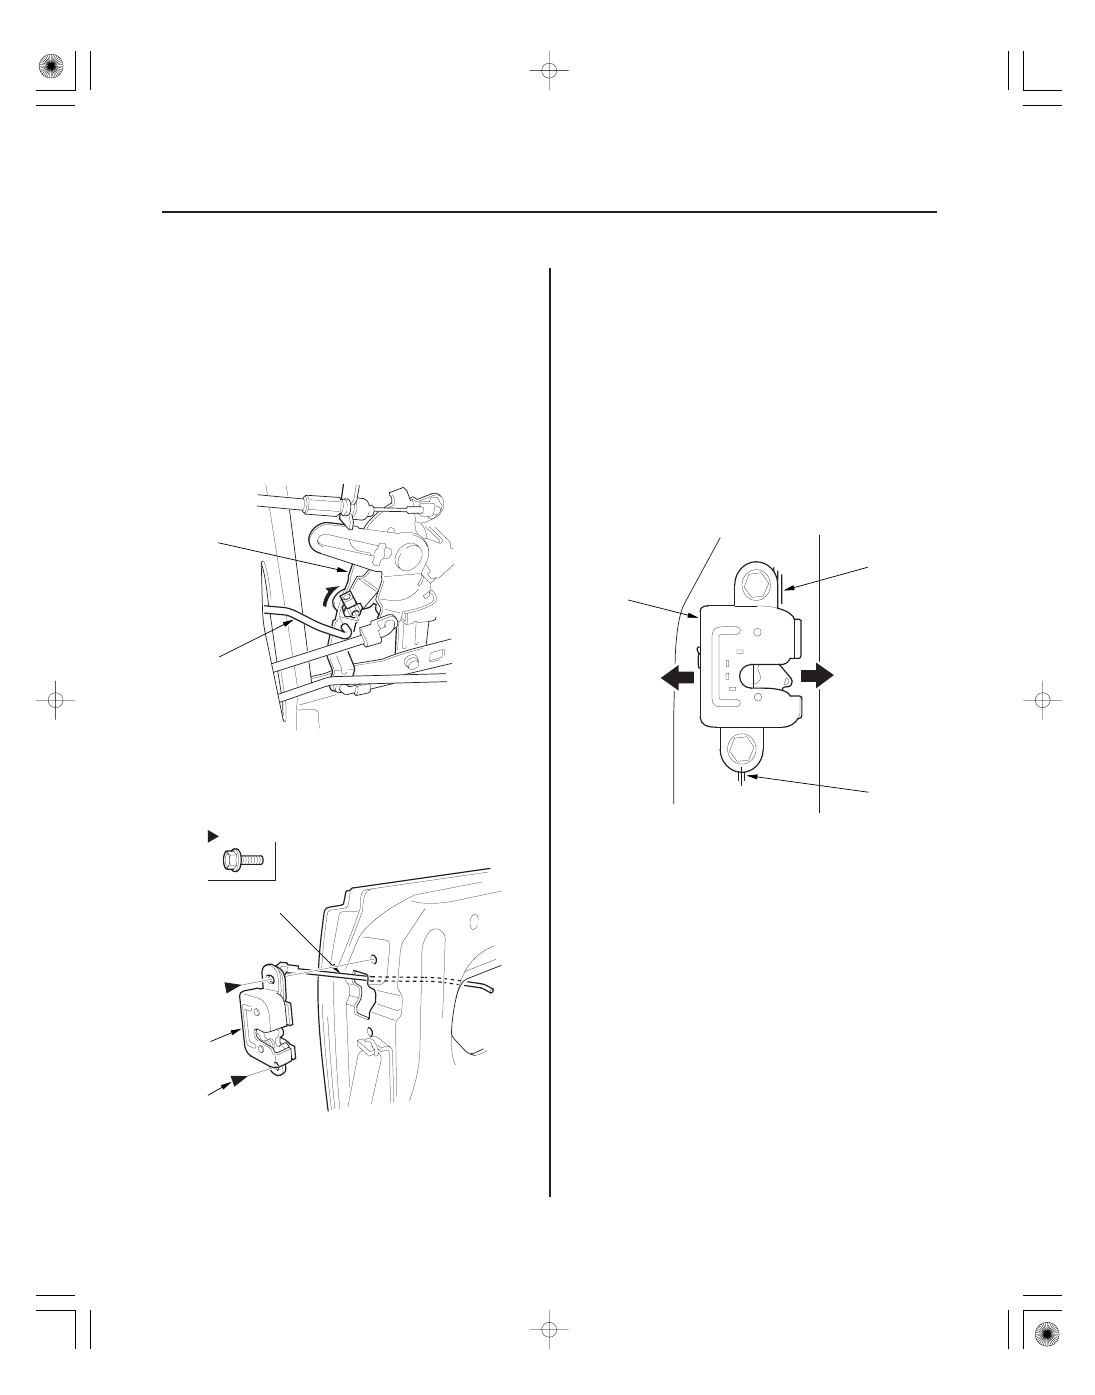
NOTE: Put on gloves to protect your hands.
1. Open the tailgate.
NOTE: Opening the tailgate in either swing mode or
drop-down mode will allow you to remove the right
upper latch.
2. Remove the tailgate trim panel (see page 20-140).
3. Disconnect the right upper lock rod (A) from the
latch synchronizer (B).
4. Remove the bolts, and then remove the right
tailgate upper latch (A) with the right upper lock rod
(B).
5. Install the latch in the reverse order of removal, and
note these items:
• Make sure the rod is connected securely.
• The right tailgate upper latch (A) must be
synchronized to lock with right tailgate lower
latch (in swing mode) or left tailgate upper latch
(in drop-down mode). If not, adjust the latch
forward or rearward as necessary, using
alignment lines (B) on the tailgate as guides.
• Make sure the tailgate that is closed should open
in drop-down mode by pulling on the upper
handle.
• Make sure the tailgate that is closed should open
in swing mode by pulling on the lower handle.