Ford Ranger (2024 year). Manual in english - page 7
 

  Index      Manuals     Ford Ranger (2024 year). Manual in english


Search            copyright infringement  


Content      ..     5      6      7      8     ..


Ford Ranger (2024 year). Manual in english - page 7


BRAKES –
TROUBLESHOOTING

BRAKES – WARNING LAMPS

WARNING: 

Driving your vehicle

with the warning lamp on is dangerous.
A significant decrease in braking
performance may occur. It may take you
longer to stop your vehicle. Have your
vehicle checked as soon as possible.
Driving extended distances with the
parking brake engaged can cause brake
failure and the risk of personal injury.

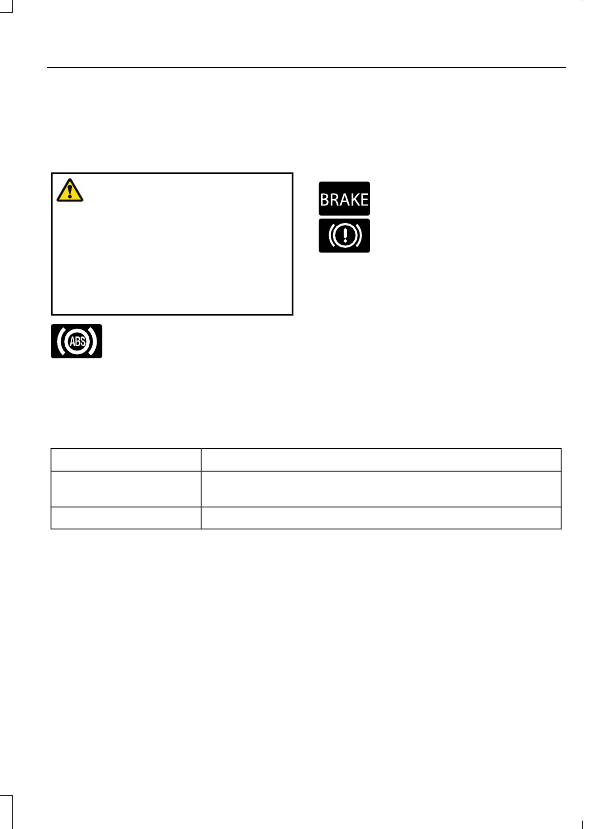
E67020

If the ABS indicator illuminates
when you are driving, this
indicates a malfunction. Your

vehicle continues to have normal braking
without the anti-lock braking system
function. See an authorized dealer.

It also momentarily illuminates when you
switch the ignition on to confirm the lamp
is functional. If it does not illuminate when
you switch the ignition on, or begins to
flash at any time, have the system checked
by an authorized dealer.

E270480

E67024

The brake indicator momentarily
illuminates when you switch the
ignition on to confirm the lamp

is functional.  It may also illuminate when
you apply the parking brake and the
ignition is on.  If it illuminates when your
vehicle is moving, make sure the parking
brake is disengaged.  If the parking brake
is disengaged, this indicates low brake fluid
level or a brake system fault.  See an
authorized dealer.

BRAKES – INFORMATION MESSAGES

Details

Message

The brake fluid level is low, check the brake system immedi-

ately.  See 

Checking the Brake Fluid

 (page 216).

Brake Fluid Level Low

Have the system checked as soon as possible.

Check Brake System

217

Brakes

BRAKES – FREQUENTLY ASKED
QUESTIONS

Is it normal for my brakes to make
noise?

Occasional brake noise is normal. If a
metal-to-metal, continuous grinding, or
squeal sound is present, the brake lining
could be worn. Have the system checked.

There is an electrical motor sound
when I press on the brake pedal or
activate the park brake switch. Is
this normal?

Yes, those sounds are the electronic brake
booster or the electronic park brake
operating.

Note:

 Brake dust could accumulate on the

wheels, even under normal driving
conditions.  Some dust is normal as the
brakes wear and does not contribute to
brake noise. See 

Cleaning Wheels

 (page

426).

218

Brakes

WHAT IS THE ELECTRIC
PARKING BRAKE

The electric parking brake is used to hold
your vehicle on slopes and flat roads.

APPLYING THE ELECTRIC
PARKING BRAKE

WARNING: 

Apply the parking brake

and make sure your vehicle is in park (P).
Power the vehicle off and remove the
keys or remote control whenever you
leave your vehicle. Failure to follow this
instruction could result in personal injury
or death.

WARNING: 

If you drive extended

distances with the parking brake applied,
you could cause damage to the brake
system.

WARNING: 

The electric parking

brake does not operate if the vehicle
battery has run out of charge.

WARNING: 

If the parking brake is

fully released, but the brake warning
lamp remains illuminated, the brakes
may not be working properly. Have your
vehicle checked as soon as possible.

E267156

The electric parking brake switch
is on the center console.

1.

Pull the switch up.

The red warning lamp flashes during
operation and illuminates when the parking
brake is applied.

Note:

You can apply the electric parking

brake when the ignition is off.

Note:

The electric parking brake could

apply when you shift into park (P). See 

Park

(P)

 (page 189).

APPLYING THE ELECTRIC
PARKING BRAKE IN AN
EMERGENCY

You can use the electric parking brake to
slow or stop your vehicle in an emergency.

Pull the switch up and hold it.

The red warning lamp illuminates, a tone
sounds and the stoplamps turn on when
you use the electric parking brake in an
emergency.

The electric parking brake continues to
slow your vehicle down unless you release
the switch.

Note:

Do not apply the electric parking

brake when your vehicle is moving, except
in an emergency. If you repeatedly use the
electric parking brake to slow or stop your
vehicle, you could cause damage to the
brake system.

MANUALLY RELEASING THE
ELECTRIC PARKING BRAKE

1.

Switch the ignition on.

2. Press and hold the brake pedal.

3. Push the switch down.

The red warning lamp turns off.

Pulling Away on a Hill When Towing a
Trailer

1.

Press and hold the brake pedal.

2. Pull the switch upward and hold it.

3. Shift into gear.

219

Electric Parking Brake

4. Press the accelerator pedal until engine

has developed sufficient torque to
prevent your vehicle from rolling down
the hill.

5. Release the switch and pull away in a

normal manner.

AUTOMATICALLY RELEASING
THE ELECTRIC PARKING
BRAKE

1.

Close the driver door.

2. Shift into gear.

3. Press the accelerator pedal and pull

away in a normal manner.

ELECTRIC PARKING BRAKE
AUDIBLE WARNING

Sounds when the parking brake is on and
your vehicle is moving. If the warning tone
continues after you have released the
parking brake, this indicates a malfunction.
Have your vehicle checked as soon as
possible.

RELEASING THE ELECTRIC
PARKING BRAKE IF THE
VEHICLE BATTERY HAS RUN
OUT OF CHARGE

WARNING: 

The electric parking

brake does not operate if the vehicle
battery has run out of charge.

Connect a booster battery to the vehicle
battery to release the electric parking brake
if the vehicle battery has run out of charge.
See 

Jump Starting the Vehicle

 (page

378).

ELECTRIC PARKING BRAKE –
TROUBLESHOOTING

ELECTRIC PARKING BRAKE –
WARNING LAMPS

Brake System

E270480

E67024

It illuminates red when you apply
the parking brake and your
vehicle is on.  If the lamp flashes
when the parking brake has been
released, this indicates the
parking brake system requires

service.   Have your vehicle checked as
soon as possible.

Note:

Lamps may vary depending on region.

Electric Parking Brake

E67024

E146190

When the lamp illuminates
yellow, it indicates a malfunction
in the electric parking brake.

Have your vehicle checked as soon as
possible.

Note:

Lamps may vary depending on region.

220

Electric Parking Brake

ELECTRIC PARKING BRAKE – INFORMATION MESSAGES

Parking Brake

Details

Message

The electric parking brake is fully applied.

Park Brake On

The electric parking brake is fully released.

Park Brake Off

The electric parking brake system has detected a condition

where components may have been subject to overheating.

Contact an authorized dealer.

Park Brake System

Overheated

The electric parking brake is set and you attempted a manual

release without pressing the brake.

To Release: Press Brake

and Switch

With the electric parking brake set, you attempted an auto-

matic release with no success. Perform a manual release.

Park Brake Use Switch

to Release

The electric parking brake is set and your vehicle speed

exceeds 3 mph (5 km/h). Release the parking brake before

continued driving.

Release Park Brake

The electric parking brake is not fully applied.

Park Brake Not Applied

The electric parking brake is not fully released.

Park Brake Not Released

The electric parking brake system has been put into a special

mode to allow rear brake service. Contact an authorized

dealer.

Park Brake Maintenance

Mode

The electric parking brake system has detected a condition

that requires service. Some functionality may still be available.

Contact an authorized dealer.

Park Brake Limited

Function Service

Required

The electric parking brake system has detected a condition

that requires service. Contact an authorized dealer.

Park Brake Malfunction

Service Now

ELECTRIC PARKING BRAKE –
FREQUENTLY ASKED QUESTIONS

Pulling Away on a Hill When
Towing a Trailer

Press and hold the brake pedal.

E267156

Pull the switch upward and hold
it.

Shift into gear.

Press the accelerator pedal until engine
has developed sufficient torque to prevent
your vehicle from rolling down the hill.

E267156

Release the switch and pull
away in a normal manner.

221

Electric Parking Brake

WHAT IS REVERSE BRAKE
ASSIST

Reverse brake assist is designed to reduce
impact damage or assist in avoiding a
collision while in reverse (R). Using sensors
on the rear of the vehicle, it can detect a
possible collision and apply the brakes. If
full braking occurs, the system attempts
to stop the vehicle a safe distance from
the obstacle.

HOW DOES REVERSE BRAKE
ASSIST WORK

Reverse brake assist functions when in
reverse (R) and traveling at a speed of
1–7 mph (2–12 km/h).

If the system detects an obstacle behind
your vehicle, it provides a warning through
the rear parking aid or cross traffic alert
system.

REVERSE BRAKE ASSIST
PRECAUTIONS

WARNING: 

You are responsible for

controlling your vehicle at all times. The
system is designed to be an aid and does
not relieve you of your responsibility to
drive with due care and attention. Failure
to follow this instruction could result in
the loss of control of your vehicle,
personal injury or death.

WARNING: 

To help avoid personal

injury, always use caution when in
reverse (R) and when using the sensing
system.

WARNING: 

The system may not

operate properly during severe weather
conditions, for example snow, ice, heavy
rain and spray. Always drive with due
care and attention. Failure to take care
may result in a crash.

WARNING: 

Traffic control systems,

fluorescent lamps, inclement weather,
air brakes, external motors and fans may
affect the correct operation of the
sensing system. This may cause reduced
performance or false alerts.

WARNING: 

Some situations and

objects prevent hazard detection. For
example low or direct sunlight, inclement
weather, unconventional vehicle types,
and pedestrians. Apply the brakes when
necessary. Failure to follow this
instruction could result in the loss of
control of your vehicle, personal injury or
death.

WARNING: 

Do not use the system

with accessories that extend beyond the
front or rear of your vehicle, for example
a trailer hitch or bike rack. The system is
not able to make corrections for the
additional length of the accessories.

The system only applies the brakes for a
short period of time when an event occurs.
Act as soon as you notice the brakes apply
to remain in control of the vehicle. If you
do not intervene the vehicle may start to
move again.

Note:

Certain add-on devices around the

bumper or fascia may create false alerts.
For example, large trailer hitches, bicycle or
surfboard racks, license plate brackets,
bumper covers or any other device that may
block the normal detection zone of the
system. Remove the add-on device to
prevent false alerts.

222

Reverse Brake Assist

 (If Equipped)

Note:

The system does not react to small

or moving objects, particularly those close
to the ground.

Note:

The system does not operate during

hard acceleration or steering.

Note:

If your vehicle sustains damage to

the bumper or fascia leaving it misaligned
or bent, it could alter the sensing zone
causing inaccurate measurement of
obstacles or false alerts.

Note:

Vehicle loading and suspension

changes can impact the angle of the sensors
and may change the normal detection zone
of the system resulting in inaccurate
measurement of obstacles or false alerts.

Note:

When you connect a trailer, the

system may detect the trailer and provide
an alert, or the system turns off. If the
system does not turn off, manually switch
the system off after you connect the trailer.

Note:

You may experience reduced system

performance on road surfaces that limit
deceleration. For example, roads with ice,
loose gravel, mud or sand.

SWITCHING REVERSE BRAKE
ASSIST ON AND OFF

1.

E386797

 Press the button on the

touchscreen.

2. Press 

Driver Assistance

.

3. Switch 

Reverse Brake Assist

 on or off.

Note:

The system is unavailable when the

rear parking aid or cross traffic alert is off.

Note:

If your vehicle is not equipped with

cross traffic alert the reverse brake assist
relies on input from the rear parking aid and
rear view camera sensors.

OVERRIDING REVERSE BRAKE
ASSIST

There could be instances when
unexpected or unwanted braking occurs.
Firmly pressing the accelerator pedal or
switching the feature off overrides the
system.

REVERSE BRAKE ASSIST
INDICATORS

If the system determines that a collision
with an obstacle may occur, full braking
may apply.

E293490

A message and warning
indicator appear when the
system applies the brakes.

223

Reverse Brake Assist

 (If Equipped)

REVERSE BRAKE ASSIST – TROUBLESHOOTING

REVERSE BRAKE ASSIST – INFORMATION MESSAGES

Description

Message

Displays when the system applies the

brakes and remains on for a few seconds.

Reverse Brake Assist

Displays when a related subsystem or

feature error has occurred. Make sure the

rear view camera and side cameras are

clean and not obstructed. Drive the vehicle

on a straight road for a short period. If the

message remains on, have the system

checked as soon as possible.

Reverse Brake Assist Not Available See

Manual

Displays when a system error has occurred.

Have your vehicle checked as soon as

possible.

Reverse Brake Assist Fault

Displays when reverse brake assist is off.

Reverse Brake Assist Off

224

Reverse Brake Assist

 (If Equipped)

REVERSE BRAKE ASSIST –
FREQUENTLY ASKED QUESTIONS

Why is reverse brake assist
unavailable?

Make sure the reverse brake assist is
on.  See 

Switching Reverse Brake

Assist On and Off

 (page 223).

Make sure that all doors, liftgate or
tailgate and hood are closed. Drive the
vehicle on a straight road for a short
period. If the message remains, have
the system checked.

If your vehicle has the cross traffic alert
system, make sure it is on. See

Switching Cross Traffic Alert On
and Off

 (page 308).

Make sure the rear parking aid system
is on.  See 

Parking Aids

 (page 243).

Your vehicle may have sustained a rear
end impact. Have the sensors checked
for proper coverage and operation.

Make sure the rear view camera and
side cameras are not dirty or
obstructed. If dirty, clean the cameras.
If the message remains after cleaning
the cameras, wait a short time for the
message to clear. If the message does
not clear, drive the vehicle on a straight
road for a short period. If the message
still appears, have your system
checked.

Make sure the cross traffic alert, rear
parking aid and side parking aid sensors
are not blocked or faulty. See 

Locating

the Cross Traffic Alert Sensors

(page 308).  See 

Locating the Rear

Parking Aid Sensors

 (page 244).  See

Locating the Side Parking Aid
Sensors

 (page 246).

You recently had your vehicle serviced,
or the battery disconnected. Drive your
vehicle a short distance to resume
system operation.

Reverse brake assist does not function
when you connect a trailer. Operation
resumes when you disconnect the
trailer.

Note:

If the answers to why the system is

unavailable do not assist in returning reverse
brake assist to available, have the system
checked as soon as possible.

225

Reverse Brake Assist

 (If Equipped)

WHAT IS HILL START ASSIST

Hill Start Assist makes it easier for you to
pull away when your vehicle is on a slope
without using the parking brake.

HOW DOES HILL START
ASSIST WORK

When the system activates, your vehicle
remains stationary for a few seconds after
you release the brake pedal.  This gives you
time to move your foot from the brake
pedal to the accelerator pedal.  The brakes
release when you apply the accelerator
pedal and the vehicle begins to move
forward, or the vehicle is stationary beyond
the Hill Start Assist hold time.

The system activates when your vehicle is
in any forward gear and facing uphill, or
when your vehicle is in reverse (R) and
facing downhill.

HILL START ASSIST
PRECAUTIONS

WARNING: 

The system does not

replace the parking brake. When you
leave your vehicle, always apply the
parking brake.

WARNING: 

You must remain in

your vehicle when the system turns on.
At all times you are responsible for
controlling your vehicle, supervising the
system, and intervening if required.
Failure to follow this instruction could
result in the loss of control of your
vehicle, personal injury or death.

WARNING: 

The system turns off if

there is a malfunction.

SWITCHING HILL START
ASSIST ON AND OFF

Hill start assist is active when you switch
the ignition on. You cannot switch the
system on or off.

HILL START ASSIST –
TROUBLESHOOTING

HILL START ASSIST –
INFORMATION MESSAGES

Details

Message

Displays when

system is not avail-

able.  Have your

vehicle checked as

soon as possible.

Hill Start Assist Not

Available

226

Hill Start Assist

HOW DOES AUTO HOLD WORK

Auto hold applies the brakes to hold your
vehicle after you bring the vehicle to a stop.
This can help when waiting on a hill or in
traffic.

SWITCHING AUTO HOLD ON
AND OFF

WARNING: 

The system does not

replace the parking brake. When you
leave your vehicle, always apply the
parking brake.

WARNING: 

You must remain in

your vehicle when the system turns on.
At all times, you are responsible for
controlling your vehicle, supervising the
system and intervening, if required.
Failure to take care may result in the loss
of control of your vehicle, serious
personal injury or death.

You can switch the system on or off by
accessing the menu on the touchscreen.

1.

Press 

Settings

 on the touchscreen.

2. Press 

Driver Assistance

.

Note:

You can only switch the system on

after you close the driver door and fasten
your seatbelt.

Note:

The system remembers the last

setting when you start your vehicle.

Note:

When using an automatic car wash,

make sure to switch auto hold off, or shift
to neutral (N) with the brake pedal applied
to ensure auto hold is not active.

USING AUTO HOLD

1.

Bring your vehicle to a complete stop.
The auto hold active indicator
illuminates in the information display.

2. Release the brake pedal. The system

holds your vehicle at a standstill. The
auto hold active indicator remains
illuminated in the information display.

3. Apply the accelerator and drive off in

a normal manner. The system releases
the brakes and the auto hold active
indicator switches off.

Note:

The system only activates if you

apply enough brake pressure on the brake
pedal to bring the vehicle to a standstill.

Note:

Under certain conditions, the system

could apply the electric parking brake. The
brake system warning lamp illuminates. The
electric parking brake releases when you
press the accelerator pedal.  See

Automatically Releasing the Electric
Parking Brake

 (page 220).

Note:

The system switches off if you shift

into reverse (R) or neutral (N) while pressing
the brake pedal.

There could be actions that can cause the
auto hold system not to work when the
following occur:

When you use active park assist.

Your vehicle is in stay in neutral mode.

The driver door is open.

You shift into reverse (R) or neutral (N)
before the system is active.

AUTO HOLD INDICATORS

E323448

Illuminates when the system is
active.

227

Auto Hold

E323449

Illuminates when the system is
on but cannot hold your vehicle
at a standstill at this particular

time.

228

Auto Hold

WHAT IS TRACTION CONTROL

The traction control system helps to avoid
drive wheel spin and loss of traction.

HOW DOES TRACTION
CONTROL WORK

If your wheels begin to spin, the loss of
traction can compromise steering control
and stability of the vehicle. The traction
control system applies the brakes to
individual wheels and when needed,
reduces engine power at the same time to
increase traction.

SWITCHING TRACTION
CONTROL ON AND OFF

WARNING: 

Operating your vehicle

with the traction control disabled could
lead to an increased risk of loss of vehicle
control, vehicle rollover, personal injury
and death.

The system turns on each time you switch
the ignition on.

If your vehicle is stuck in mud or snow,
switching traction control off may be
beneficial as this allows the wheels to spin.

Switching the System Off

E348750

The switch for the stability and
traction control system is on the
center console.

When you switch the system off, a
message and an illuminated icon appear
on the instrument cluster.

Use the switch again to return the traction
control system to normal operation.

Note:

When you switch traction control off,

stability control remains fully active.

Note:

When you place your vehicle into

four-wheel drive low (4L), the traction
control disables. Traction control resumes
when you put your vehicle back into
two-wheel drive or four-wheel drive high
(4H).

Note:

For additional information on the

traction and stability control systems.  See

Stability Control

 (page 231).

TRACTION CONTROL
INDICATOR

Stability and Traction Control
Indicator

E138639

If the indicator does not
illuminate when you switch the
ignition on, or remains on when

the engine is running, this indicates a
malfunction. Have your vehicle checked
by an authorized dealer as soon as
possible.

E130458

The traction control off indicator
illuminates when you switch the
traction control system off, or

when an alternative stability control mode
is selected that requires the traction
control off depending on the drive mode
selected.

229

Traction Control

TRACTION CONTROL –
TROUBLESHOOTING

TRACTION CONTROL – WARNING
LAMPS

System Messages

E138639

The traction control light
temporarily illuminates on

start-up and flashes when activated by a
driving condition.

The traction control off light temporarily
illuminates on start-up and stays on:

When you switch the traction control
system off.

When you select an alternative stability
control mode.

If a problem occurs in the system.

TRACTION CONTROL – INFORMATION MESSAGES

Action

Message

The status of the traction control system after you switched

it off.

Traction Control Off

The status of the traction control system after you switched

it on.

Traction Control On

230

Traction Control

HOW DOES STABILITY
CONTROL WORK

WARNING: 

Vehicle modifications

involving braking system, aftermarket
roof racks, suspension, steering system,
tire construction and wheel and tire size
may change the handling characteristics
of your vehicle and may adversely affect
the performance of the electronic
stability control system. In addition,
installing any stereo loudspeakers may
interfere with and adversely affect the
electronic stability control system. Install
any aftermarket stereo loudspeaker as
far as possible from the front center
console, the tunnel, and the front seats
in order to minimize the risk of interfering
with the electronic stability control
sensors. Reducing the effectiveness of
the electronic stability control system
could lead to an increased risk of loss of
vehicle control, vehicle rollover, personal
injury and death.

WARNING: 

Remember that even

advanced technology cannot defy the
laws of physics. It's always possible to
lose control of a vehicle due to
inappropriate driver input for the
conditions. Aggressive driving on any
road condition can cause you to lose
control of your vehicle increasing the risk
of personal injury or property damage.
Activation of the electronic stability
control system is an indication that at
least some of the tires have exceeded
their ability to grip the road; this could
reduce the operator's ability to control
the vehicle potentially resulting in a loss
of vehicle control, vehicle rollover,
personal injury and death. If your
electronic stability control system
activates, SLOW DOWN.

If a driving condition activates either the
stability control or the traction control
system you may experience the following
conditions:

The stability and traction control light
flashes.

Your vehicle slows down.

Reduced engine power.

The stability control system has several
features built into it to help you maintain
control of your vehicle:

Electronic Stability Control

Electronic stability control enhances your
vehicle’s ability to prevent skids or lateral
slides by applying brakes to one or more
of the wheels individually and, if necessary,
reducing engine power.

Roll Stability Control

Roll stability control enhances your
vehicle’s ability to prevent rollovers by
detecting your vehicle’s roll motion and
the rate at which it changes by applying
the brakes to one or more wheels
individually.

Curve Control

Curve control enhances your vehicle’s
ability to follow the road when cornering
severely or avoiding objects in the roadway.
Curve control operates by reducing engine
power and, if necessary, applying brakes
to one or more of the wheels individually.

Traction Control

Traction control enhances your vehicle’s
ability to maintain traction of the wheels
by detecting and controlling wheel spin.
See 

How Does Traction Control Work

(page 229).

231

Stability Control

E72903

Vehicle without stability control
skidding off its intended route.

A

B

Vehicle with stability control
maintaining control on a slippery
surface.

SWITCHING STABILITY
CONTROL ON AND OFF

Stability Control turns on each time you
switch the ignition on.

You can switch the stability control off by
pressing and holding the stability and
traction control button off for 5-15
seconds, or you can press the button again
to switch the system on.

Shifting the transmission into reverse (R)
will disable the system.

You can switch the traction control system
off or on independently. See 

Switching

Traction Control On and Off

 (page 229).

232

Stability Control

Stability Control and Traction Control with Roll Stability Control

Traction Control

System

3

Electronic

Stability

Control

3

Roll Stability

Control

3

Stability Control

OFF Light

Enabled

Enabled

3

Enabled

Illuminated
during bulb

check

Default at start-

up

Disabled

1

Enabled

3

Enabled

Illuminated

Button pressed

momentarily

Disabled

1

Disabled

2

Enabled

Illuminated

Button pressed
and held for 5 -

15 seconds

Disabled

1

Disabled

Disabled

Illuminated

Button not

pressed and

transfer case is

switched to 4x4

Low or put into

Rock Crawl

Mode

The Traction Control system can still be enabled but with tighter or looser thresholds.

When you press and hold the button, a progress bar will display to show the button hold

time progress.

Functions can vary depending on what selectable drive mode the vehicle is currently in.

STABILITY CONTROL
INDICATOR

E138639

The system turns on each time
you switch the ignition on. You
can switch off the traction

control portion of the system
independently. See 

How Does Traction

Control Work

 (page 229).

233

Stability Control

STABILITY CONTROL –
TROUBLESHOOTING

STABILITY CONTROL –
INFORMATION MESSAGES

Displayed when the

system has

detected a condi-

tion that requires

service. Contact

your authorized

dealer as soon as

possible.

Service Advan-

ceTrac

The traction control

has been disabled

or enabled by the

driver

AdvanceTrac Off

On

234

Stability Control

WHAT IS TRAIL CONTROL

WARNING: 

The system does not

control speed in low traction conditions
or extremely steep slopes. The system
is designed to be an aid and does not
relieve you of your responsibility to drive
with due care and attention. Failure to
follow this instruction could result in
personal injury.

WARNING: 

The system does not

replace the parking brake. When you
leave your vehicle, always apply the
parking brake.

Trail control lets you focus on steering
during low-speed and off-road use by
controlling your vehicle's acceleration and
braking to maintain the speed that you set.

You may hear a noise from the anti-lock
brake system pump motor when you use
the system.  This is normal.

TRAIL CONTROL LIMITATIONS

Trail control is unavailable when any of the
following occur:

Your vehicle speed is greater than
20 mph (32 km/h) in two-wheel drive
high (2H), four-wheel drive auto (4A)
or four-wheel drive high (4H) modes.

Your vehicle speed is greater than
9 mph (15 km/h) in four-wheel drive
low (4L) mode.

Your vehicle speed is greater than
5 mph (8 km/h) in reverse (R).

The transmission is in park (P).

The driver side door is open.

Cruise control is on.

The parking brake is applied.

SWITCHING TRAIL CONTROL
ON AND OFF

E272858

Press the Trail Control on the
touchscreen.  See 

Using the

Off-Road Screen

 (page 372).

The system switches off if you press the
button again or exceed 42 mph (68 km/h).

SETTING THE TRAIL CONTROL
SPEED

Note:

The buttons are located on the

steering wheel.

Drive to your preferred speed.

E246884

Press the toggle button up to
increase the set current speed.

E246885

Press the toggle button down to
decrease the set current speed.

Note:

The indicator changes color.

You can adjust the set speed in small or
large increments. Press the toggle button
up or down once to adjust the set speed
in small increments. Press and hold the
toggle button up or down to adjust the set
speed in large increments.

You can also decrease the set speed by
braking.

Note:

If a set speed is set, the trail control

is active and the vehicle is stopped by the
brake, releasing the brake allows the vehicle
to accelerate to the set speed. Pressing the
brake pedal does not switch off the system.

CANCELING THE SET SPEED

E350925

Press the button.

235

Trail Control - Raptor

TRAIL CONTROL INDICATORS

E272858

236

Trail Control - Raptor

TRAIL CONTROL – TROUBLESHOOTING

TRAIL CONTROL – INFORMATION MESSAGES

Details

Message

Displays when you must reduce your vehicle speed to

use trail control.

Reduce Speed To Enter Trail

Control

Displays when you must release the park brake to use

trail control.

Trail Control Not Available with

Park Brake Applied

Displays when you must switch off the trailer backup

assist to use trail control.

Trail Control Not Available

While Pro Trailer Backup

Assist™ Active

Displays when you successfully enabled trail control

and can set a speed with the Set+ or Set- control.

Trail Control Enabled Use SET

Button to Set Speed

Displays when a system fault has occurred when trail

control was active and the driver must resume control.

Trail Control Off Driver Resume

Control

Displays when the system has turned off.

Trail Control Off

Displays when a system fault is present. See the trail

control section in your Owner's Manual. See your

authorized dealer for diagnosis.

Trail Control Fault See Manual

Displays when you must be in drive (D), neutral (N) or

reverse (R) to use trail control.

Trail Control To Activate Select

Gear

Displays when you must switch the cruise control off

to use trail control.

Trail Control Not Available with

Cruise Control Active

Displays when you must close the driver door to use

trail control.

Trail Control Not Available with

Driver Door Open

Displays when the system detects you may be stuck

in sand and recommends using trail control on to the

lowest set speed. Doing this could slowly pull sand

under the tires to free the vehicle.

Set Trail Control to 1 MPH to Aid

in Getting Unstuck in Sand

Set Trail Control to 2 km/h to

Aid in Getting Unstuck in Sand

Due to some driver action, Trail Control propulsion was
turned off but the vehicle will still brake if descending
a hill. The driver must press the Trail Control switch to

turn the feature OFF, they can then turn it back on.

Hill Descent Control Now Active

Press Trail Control Switch To

Exit

Displays when you must have the seatbelt on to use

trail control.

Trail Control Not Available with

Seatbelt Off

237

Trail Control - Raptor

WHAT IS TRAIL TURN ASSIST

Trail turn assist can reduce the turning
radius of your vehicle by applying the
brakes to the inside rear wheel in
low-speed, high steering-angle maneuvers.

TRAIL TURN ASSIST
PRECAUTIONS

Note:

Do not use trail turn assist on dry,

hard surfaced roads. Doing so can produce
excessive noise, increase tire wear and may
damage drive line, or braking components.
Trail turn assist is only intended for slippery,
or loose surfaces.

You may hear noise from the anti-lock
brake system while trail turn assist is
active. This is normal operation.

TRAIL TURN ASSIST
LIMITATIONS

Trail turn assist can only be used when the
vehicle’s four-wheel drive system is in the
four-wheel drive high (4H), or four-wheel
drive low (4L) modes.

Trail Turn Assist cannot be used when the
vehicle’s rear differential is locked. If the
rear differential has recently been locked
prior to Trail Turn Assist being turned on,
Trail Turn Assist may not activate until it
can confirm that the rear differential is
unlocked.

SWITCHING TRAIL TURN
ASSIST ON AND OFF

You can switch trail turn assist on or off
from the touchscreen.

Once trail turn assist activates:

Vehicle speed is less than 12 mph
(19 km/h).

Vehicle is in four-wheel drive high (4H)
or four-wheel drive low (4L).

Steering wheel is almost fully turned
to the left or right.

You can cease trail turn assist by
performing any of the following:

Select two-wheel drive high (2H) or
four-wheel drive auto (4A).

Switch on the rear locking differential.

Reduce the steering wheel input.

Trail turn assist remains available, even if
not active, until you switch it off in the
touchscreen.

TRAIL TURN ASSIST
INDICATORS

E338899

E338900

When trail turn assist is on, one
of these two indicators will be
displayed, depending on the
direction of the vehicle’s last
turn. When the feature is
available but not in use, the

indicator will be gray. When the feature is
active the indicator will be green.

238

Trail Turn Assist

TRAIL TURN ASSIST –
TROUBLESHOOTING

TRAIL TURN ASSIST –
INFORMATION MESSAGES

Details

Message

Switch to four-wheel

drive low (4L) or four-

wheel drive high (4H) to

activate trail turn assist.

See 

Selecting a Four-

Wheel Drive Mode

(page 203).

Trail Turn

Assist Avail-
able in 4L or

4H

Trail turn assist system

malfunction could be

present. If this condition

persists, have your

vehicle serviced.

Trail Turn

Assist Not

Available See

Manual

You have activated trail

turn assist.

Trail Turn

Assist ON

You have switched trail

turn assist off.

Trail Turn

Assist OFF

TRAIL TURN ASSIST –
FREQUENTLY ASKED QUESTIONS

Why does Trail Turn Assist not activate
after unlocking the rear differential?

The rear differential may not be fully
disengaged. When possible, turn off
the rear axle locker while driving
immediately before using trail turn
assist. If you are already in a tight turn
when you encounter this situation,
driving the vehicle for a short distance
in reverse could allow the differential
to fully disengage.

239

Trail Turn Assist

ELECTRIC POWER STEERING

HOW DOES ELECTRIC POWER
STEERING WORK

The electric power steering system assists
the brake system to help operate
advanced stability control and accident
avoidance systems.

If your vehicle loses electrical power or
detects a concern when you are driving,
the system switches to reduced steering
assist or manual steering. Additionally,
whenever disconnecting the battery or
installing a new one, you must drive your
vehicle a short distance before the system
relearns the strategy and reactivates all
systems.

ELECTRIC POWER STEERING
PRECAUTIONS

WARNING: 

The electric power

steering system has diagnostic checks
that continuously monitor the system. If
a fault is detected, a message displays
in the information display. Stop your
vehicle as soon as it is safe to do so.
Switch the vehicle off. After at least 10
seconds, switch the vehicle on and
watch the information display for a
steering system warning message. If a
steering system warning message
returns, have the system checked as
soon as possible.

WARNING: 

If the system detects

an error, you may not feel a difference in
the steering, however a serious condition
may exist. Have your vehicle checked as
soon as possible. Failure to do so may
result in loss of steering control.

Adapt your speed and driving behavior
according to reduced steering assist.

Extreme continuous steering may increase
the effort to steer. This occurs to prevent
internal overheating and damage to the
steering system. If this occurs, you will not
lose the ability to steer your vehicle
manually nor will it cause damage to the
system. Normal steering and driving allows
the system to cool down and steering
assist returns to normal.

Note:

There is no fluid reservoir to check or

fill.

STEERING –
TROUBLESHOOTING

STEERING – WARNING
INDICATORS

E223375

The electric power steering
system indicator illuminates if
the system detects a fault during

the continuous diagnostic checks.

Note:

If a red warning message displays,

stop your vehicle as soon as it is safe to do
so.

240

Steering

STEERING – INFORMATION MESSAGES

Action

Message

The power steering system has detected a

condition that requires service.  Have your

vehicle checked as soon as possible.

Steering Fault Service Now

The power steering system is not working.
Stop your vehicle in a safe place.  Have your

vehicle checked as soon as possible.

Steering Loss Stop Safely

The power steering system has detected a

condition that requires service.  Have your

vehicle checked as soon as possible.

Steering Assist Fault Service Required

The steering system has detected a condi-

tion that could prevent you from starting

your vehicle.  Have your vehicle checked as

soon as possible.

Steering Lock Malfunction Service Now

241

Steering

STEERING – FREQUENTLY ASKED
QUESTIONS

Why does it seem that the steering
is wandering or pulling?

Check your vehicle for an improperly
inflated or uneven tire, loose or worn
suspension or steering components, or
improper vehicle alignment.

The system is functioning properly
and the components have been
checked, why is the steering
system continuing to pull or
wander?

A high crown in the road or crosswinds
could make the steering system feel
like it is wandering or pulling.

242

Steering

PARKING AID PRECAUTIONS

WARNING: 

To help avoid personal

injury, always use caution when in
reverse (R) and when using the sensing
system.

WARNING: 

The system may not

detect objects with surfaces that absorb
reflection. Always drive with due care
and attention. Failure to take care may
result in a crash.

WARNING: 

Traffic control systems,

fluorescent lamps, inclement weather,
air brakes, external motors and fans may
affect the correct operation of the
sensing system. This may cause reduced
performance or false alerts.

WARNING: 

The system may not

detect small or moving objects,
particularly those close to the ground.

WARNING: 

The parking aid system

can only assist you to detect objects
when your vehicle is moving at parking
speeds. To help avoid personal injury you
must take care when using the parking
aid system.

WARNING: 

The system may not

function if the sensor is blocked.

WARNING: 

In cold and severe

weather conditions the system may not
function. Rain, snow and spray can all
limit sensor performance.

WARNING: 

If damage occurs in the

immediate area surrounding the sensor,
have your vehicle checked as soon as
possible.

Note:

If your vehicle sustains damage

leaving the sensors misaligned, this will
cause inaccurate measurements or false
alerts.

When you connect a trailer to your vehicle,
the rear parking aid detects the trailer and
provides an alert. Disable the parking aid
when you connect a trailer to prevent the
alert.

Note:

The system might detect a connected

trailer, if so, it turns parking aid off.

Note:

Certain add-on devices installed

around the bumper or fascia may create
false alerts. For example, large trailer
hitches, bike or surfboard racks, license plate
brackets, bumper covers or any other device
could block the normal detection zone of
the parking aid system. Aftermarket spare
tires or spare tire covers mounted to the rear
tailgate could cause false alerts from the
park aid system. Remove the add-on device
to prevent false alerts.

Note:

 Keep the sensors free of debris.

Accumulation of dirt, snow or ice over the
sensors can affect the accuracy of the
system.

Do not clean the sensors with sharp
objects.

Note:

 When using a programmed MyKey,

you cannot switch the parking aids off.

SWITCHING PARKING AID ON
AND OFF

Using the Parking Aid Button

 (If

Equipped)

E326188

P

Press the parking aid button and
use the menu to switch the
system on and off.

243

Parking Aids

 (If Equipped)

Using the Touchscreen

1.

Open the driver assistance menu.  See

Center Display

 (page 507).

2. Switch Park Aid System on or off.

REAR PARKING AID

WHAT IS THE REAR PARKING AID

Rear parking sensors detect objects behind
your vehicle when in reverse (R).

REAR PARKING AID LIMITATIONS

There is a decreased coverage area at the
outer corners.

When using a programmed MyKey, you
cannot switch the rear parking aid off.

The rear parking aid sensors are active
when your vehicle is in reverse (R) and the
vehicle speed is less than 5 mph (8 km/h).

The sensor coverage area is up to 71 in
(180 cm) from the rear bumper.

The rear parking aid detects large objects
when you shift into reverse (R) and any of
the following occur:

Your vehicle is moving backward at a
low speed.

Your vehicle is stationary but an object
is approaching the rear of your vehicle
at a low speed.

Your vehicle is moving backward at a
low speed and an object is moving
towards your vehicle, for example
another vehicle at a low speed.

The system shall provide no audible
warning for the object behind the vehicle
when in neutral (N) gear.

LOCATING THE REAR PARKING
AID SENSORS

E231381

The rear parking aid sensors are in the rear
bumper.

REAR PARKING AID AUDIBLE
WARNINGS

A warning tone sounds when your vehicle
approaches an object.  As your vehicle
moves closer to an object, the rate of the
tone increases.  The warning tone
continuously sounds when an object is 12 in
(30 cm) or less from the rear bumper.

If your vehicle remains stationary for a few
seconds, the audible warning turns off. If
your vehicle moves backward the tone
sounds again.

Note:

When the parking aid system sounds

a tone, the audio system could reduce the
set volume.

FRONT PARKING AID

WHAT IS THE FRONT PARKING
AID

Front parking sensors detect objects in
front of your vehicle.

244

Parking Aids

 (If Equipped)

FRONT PARKING AID
LIMITATIONS

The front parking aid sensors are active
when your vehicle is in any position other
than park (P) and the vehicle speed is less
than 5 mph (8 km/h).

The sensor coverage area is up to 28 in
(70 cm) from the front bumper.

If your vehicle is in reverse (R), the front
parking aid detects objects and provides
an audible warning when your vehicle is
moving at a low speed, or when an object
is moving toward your vehicle, for example,
another vehicle at a low sped. If your
vehicle remains stationary for a few
seconds, the audible warning turns off.
Visual indication is always active in reverse
(R).

If your vehicle is in any forward gear, the
front parking aid provides audible warnings
and a visual indication when your vehicle
is moving at a speed of 5 mph (8 km/h) or
below and the system detects an object
within the detection zone. If your vehicle
remains stationary for a few seconds, the
visual indication and audible warning turns
off.

If your vehicle is in neutral (N), the front
and rear sensors provide a visual indication
only when your vehicle is moving below a
speed of 5 mph (8 km/h) and the system
detects obstacles inside the detection
areas. Once your vehicle stops, the visual
indication and audible warning stops after
a few seconds.

LOCATING THE FRONT PARKING
AID SENSORS

E310332

The front parking aid sensors are in the
front bumper.

FRONT PARKING AID AUDIBLE
WARNINGS

A warning tone sounds when there is an
object within 28 in (70 cm) from the front
bumper. As your vehicle moves closer to
an object, the rate of the tone increases.

The warning tone continuously sounds
when an object is 12 in (30 cm) or less from
the front bumper.

Note:

If the detected object is 12 in (30 cm)

or less from your vehicle, visual indication
remains on.

SIDE PARKING AID

WHAT IS THE SIDE PARKING AID

The front and rear outermost parking aid
sensors map objects that are near to the
sides of your vehicle.

SIDE PARKING AID LIMITATIONS

The sensor coverage is up to 24 in (60 cm)
from the sides of your vehicle.

245

Parking Aids

 (If Equipped)

The side parking aid may not function if:

Your vehicle remains stationary for over
two minutes.

The anti-lock brake system activates.

The traction control system activates.

Your vehicle is in park (P).

The steering wheel angle information
is not available. To reset the steering
wheel angle information, drive straight
for at least 492 ft (150 m) above
19 mph (30 km/h).

Note:

If you switch traction control off, the

side sensing system also turns off.

To reinitialize the system, drive the length
of your vehicle.

The side parking aid does not detect an
object that is moving toward the side of
your vehicle, for example another vehicle
moving at a low speed, if it does not pass
a front or rear parking aid sensor.

If the transmission is in reverse (R), the side
sensing system provides audible warnings.
When your vehicle is moving slowly, the
system detects obstacles within 24 in
(60 cm) and are inside the driving path of
your vehicle. If your vehicle remains
stationary for a few seconds, the audible
warning turns off. Visual indication is
always present in reverse (R).

If your vehicle is in neutral (N), the side
sensing system provides visual indication
only when your vehicle is moving slowly
and there is a front or rear parking aid
obstacle detected, and the side obstacle
is within 24 in (60 cm) from the side of
your vehicle. If your vehicle remains
stationary for a few seconds, the visual
indication turns off.

If the transmission is in drive (D) or any
other forward gear, the side sensing system
provides audible and visual warnings.
When your vehicle is moving slowly, the
system detects obstacles within 24 in
(60 cm) and are inside the driving path of
your vehicle. If your vehicle remains
stationary for a few seconds, the visual
indication and audible warning turns off.

LOCATING THE SIDE PARKING AID
SENSORS

E372932

The side parking sensors are located in the
sides of the front and rear bumpers.

SIDE PARKING AID AUDIBLE
WARNINGS

When the side parking aid detects an
object within the coverage area and the
driving path of your vehicle, an audible
warning sounds. As your vehicle moves
closer to the object, the rate of the tone
increases.

246

Parking Aids

 (If Equipped)

PARKING AID INDICATORS

E388639

The system provides object distance
indication through the center display.

As the distance to the object
decreases, the indicator blocks
illuminate and move toward the vehicle
icon.

If there is no object detected, the
distance indicator blocks are grey.

Visual indication remains on when the
transmission is in reverse (R). When you
stop your vehicle, visual indication turns
off after four seconds.

If the parking aids are not available, the
distance indicator blocks do not display.

PARKING AIDS –
TROUBLESHOOTING

PARKING AIDS – INFORMATION
MESSAGES

If a fault is present in the parking aids, a
warning message appears in the
instrument cluster or the touchscreen.

Note:

When the front or rear park aid

presents a fault message, the side parking
aid also disables.

Action

Message

The system detects a condition that

requires service.  Have your vehicle checked

as soon as possible.

Check Front Park Aid

The system detects a condition that

requires service.  Have your vehicle checked

as soon as possible.

Check Rear Park Aid

Displays the park aid status.

Front Park Aid On Off

Displays the park aid status.

Rear Park Aid On Off

247

Parking Aids

 (If Equipped)

WHAT IS THE REAR VIEW
CAMERA - VEHICLES WITH:
DIGITAL REAR VIEW CAMERA

The rear view camera provides a video
image of the area behind your vehicle when
the transmission is in reverse (R).

E332186

You can access the rear view
camera by pressing the button
on the touchscreen.

WHAT IS THE REAR VIEW
CAMERA - VEHICLES WITH:
ANALOG REAR VIEW CAMERA

The rear view camera provides a video
image of the area behind your vehicle when
the transmission is in reverse (R).

REAR VIEW CAMERA
PRECAUTIONS

WARNING: 

The rear view camera

system is a reverse aid supplement
device that still requires the driver to use
it in conjunction with the interior and
exterior mirrors for maximum coverage.

WARNING: 

Objects that are close

to either corner of the bumper or under
the bumper, might not be seen on the
screen due to the limited coverage of the
camera system.

WARNING: 

Reverse your vehicle

slowly. Failure to follow this instruction
could result in the loss of control of your
vehicle, personal injury or death.

WARNING: 

Use caution when the

tailgate is ajar. If the tailgate is ajar, the
camera is out of position and the video
image could be incorrect.

WARNING: 

Use caution when

turning camera features on or off when
the transmission is not in park (P). Make
sure your vehicle is not moving.

Note:

 When towing, the camera only sees

what you are towing.  This might not provide
adequate coverage and you might not see
some objects.  In some vehicles, the guide
lines may disappear when you connect the
trailer tow connector.

LOCATING THE REAR VIEW
CAMERA

The rear view camera is on the tailgate. It
provides a video image of the area behind
your vehicle.

248

Rear View Camera


Content      ..     5      6      7      8     ..