Ford F-650 / 750 (2023 year). Manual in english - page 11
 

  Index      Manuals     Ford F-650 / 750 (2023 year). Manual in english


Search            copyright infringement  


Content      ..     9      10      11      12     ..


Ford F-650 / 750 (2023 year). Manual in english - page 11


Note:

A high crown in the road or high

crosswinds may also make the steering
seem to wander or pull.

PRE-COLLISION ASSIST -
VEHICLES WITH: AIR BRAKES

(IF EQUIPPED)

WARNING: 

You are responsible for

controlling your vehicle at all times. The
system is designed to be an aid and does
not relieve you of your responsibility to
drive with due care and attention. Failure
to follow this instruction could result in
the loss of control of your vehicle,
personal injury or death.

WARNING: 

The system does not

detect vehicles that are driving in a
different direction, pedestrians, cyclists
or animals. Apply the brakes when
necessary. Failure to follow this
instruction could result in the loss of
control of your vehicle, personal injury or
death.

WARNING: 

The system is not

designed to detect non-metallic objects
and does not reliably detect some
objects with limited metallic surfaces.
For example, recreational vehicles,
motorcycles and guard rails. Apply the
brakes when necessary. Failure to follow
this instruction could result in the loss of
control of your vehicle, personal injury or
death.

WARNING: 

The system does not

operate during hard acceleration or
steering. Failure to take care may lead
to a crash or personal injury.

WARNING: 

Some situations and

objects prevent hazard detection. For
example low or direct sunlight, inclement
weather, unconventional vehicle types,
and pedestrians. Apply the brakes when
necessary. Failure to follow this
instruction could result in the loss of
control of your vehicle, personal injury or
death.

WARNING: 

The system may fail or

operate with reduced function during
cold and severe weather conditions.
Snow, ice, rain, spray and fog can
adversely affect the system. Keep the
front camera and radar free of snow and
ice. Failure to take care may result in the
loss of control of your vehicle, serious
personal injury or death.

WARNING: 

The system cannot

help prevent all crashes. Do not rely on
this system to replace driver judgment
and the need to maintain a safe distance
and speed.

WARNING: 

Take additional care if

your vehicle is heavily loaded or you are
towing a trailer. These conditions could
result in reduced performance of this
system. Failure to follow this instruction
could result in the loss of control of your
vehicle, personal injury or death.

Using the Pre-Collision Assist
System

If your vehicle is approaching a stationary
vehicle in your lane of travel, the system
provides an Alert. Stationary vehicle
detection is active at speeds above
approximately 10 mph (16 km/h).

E156130

168

Driving Aids

If your vehicle is rapidly approaching
another vehicle traveling in the same
direction as yours, the system provides two
levels of functionality:

1.

Alert.

2. Active Braking.

E255268

E255268

Alert

: When active, a flashing visual

warning appears and an audible warning
tone sounds.

Active Braking

: Active Braking is active

at speeds above approximately 15 mph
(24 km/h). Active braking may activate if
the system determines that a collision is
imminent. The system may help the driver
reduce impact damage or avoid the crash
completely.

Pre-Collision Assist Settings

Active braking turns on every time you
switch the ignition on. You cannot adjust
the Pre-Collision Assist settings.

Note:

We recommend that you switch the

system off if you install a snow plow or
similar object in such a way that it may
block the radar sensor. Your vehicle
remembers the system status across key
cycles.

Blocked Sensors

E312316

E312316

Radar sensor.

1

The information display shows a blocked
sensor message to indicate a sensor
obstruction. The radar sensor is located
behind the bumper and mounted to the
frame below the center of the grille. If you
install a snow plow or similar object, you
may block the radar sensor. With a blocked
sensor, the Pre-Collision Assist system
may not function, or performance may
reduce. The following table lists possible
causes and actions for when this message
displays.

169

Driving Aids

Radar Troubleshooting

Action

Cause

Clean the grille surface in front of the radar

or remove the object causing the obstruc-

tion.

The surface of the radar in the grille is dirty

or obstructed in some way.

Wait a short time. It may take several

minutes for the radar to detect that there

is no obstruction.

The surface of the radar in the grille is clean

but the message remains in the display

screen.

The Pre-Collision Assist system is tempor-
arily disabled. Pre-Collision Assist automat-

ically reactivates a short time after the

weather conditions improve.

Heavy rain, spray, snow or fog is interfering

with the radar signals.

The Pre-Collision Assist system is tempor-
arily disabled. Pre-Collision Assist automat-

ically reactivates a short time after the

weather conditions improve.

Swirling water or snow or ice on the surface

of the road may interfere with the radar

signals.

Contact an authorized dealer to have the

radar checked for proper coverage and

operation.

Radar is out of alignment due to a front end

impact.

Note:

If something hits the front end of your

vehicle or damage occurs and your vehicle
has a radar sensor, the radar sensing zone
may change. This could cause missed or
false vehicle detections. Contact an
authorized dealer to have the radar checked
for proper coverage and operation.

PRE-COLLISION ASSIST -
VEHICLES WITH: HYDRAULIC
BRAKES

 (IF EQUIPPED)

WARNING: 

You are responsible for

controlling your vehicle at all times. The
system is designed to be an aid and does
not relieve you of your responsibility to
drive with due care and attention. Failure
to follow this instruction could result in
the loss of control of your vehicle,
personal injury or death.

170

Driving Aids

WARNING: 

The system does not

detect vehicles that are driving in a
different direction, pedestrians, cyclists
or animals. Apply the brakes when
necessary. Failure to follow this
instruction could result in the loss of
control of your vehicle, personal injury or
death.

WARNING: 

The system does not

operate during hard acceleration or
steering. Failure to take care may lead
to a crash or personal injury.

WARNING: 

The system may fail or

operate with reduced function during
cold and severe weather conditions.
Snow, ice, rain, spray and fog can
adversely affect the system. Keep the
front camera and radar free of snow and
ice. Failure to take care may result in the
loss of control of your vehicle, serious
personal injury or death.

WARNING: 

Some situations and

objects prevent hazard detection. For
example low or direct sunlight, inclement
weather, unconventional vehicle types,
and pedestrians. Apply the brakes when
necessary. Failure to follow this
instruction could result in the loss of
control of your vehicle, personal injury or
death.

WARNING: 

The system cannot

help prevent all crashes. Do not rely on
this system to replace driver judgment
and the need to maintain a safe distance
and speed.

WARNING: 

Take additional care if

your vehicle is heavily loaded or you are
towing a trailer. These conditions could
result in reduced performance of this
system. Failure to follow this instruction
could result in the loss of control of your
vehicle, personal injury or death.

Using the Pre-Collision Assist
System

The Pre-Collision Assist system is active
at speeds above approximately 3 mph
(5 km/h).

E156130

If your vehicle is rapidly approaching
another stationary vehicle or a vehicle
traveling in the same direction the system
provides three levels of functionality:

1.

Alert

2. Brake Support

3. Active Braking

55 68

E255268

Alert

: When active, a flashing visual

warning appears and an audible warning
tone sounds.

171

Driving Aids

Brake Support

: The system is designed

to help reduce the impact speed by
preparing the brakes for rapid braking. The
system does not automatically apply the
brakes. If you press the brake pedal, the
system could apply additional braking up
to maximum braking force, even if you
lightly press the brake pedal.

Active Braking

: Active braking may

activate if the system determines that a
collision is imminent. The system may help
the driver reduce impact damage or avoid
the crash completely.

Note:

If you perceive Pre-Collision Assist

alerts as being too frequent or disturbing,
then you can reduce the alert sensitivity,
though the manufacturer recommends
using the highest sensitivity setting where
possible. Setting lower sensitivity would
lead to fewer and later system warnings.

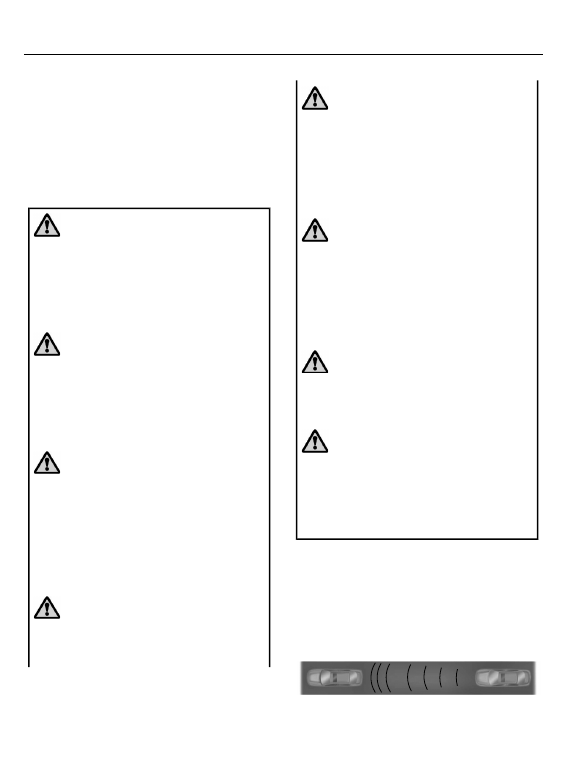
Distance Indication and Alert

Distance Indication and Alert is a function
that provides the driver with a graphical
indication of the time gap to other
preceding vehicles traveling in the same
direction. The Distance Indication and Alert
screen in the display screen shows one of
the graphics that follow.

E254791

E254791

If the time gap to a preceding vehicle is
small, a red visual indication displays.

Note:

Distance Indication and Alert

deactivates and the graphics do not display
when Adaptive Cruise Control is active.

Adjusting the Pre-Collision Assist
Settings

You can adjust the following settings by
using the information display controls. See

General Information

 (page 70).

You can change Alert and Distance
Alert sensitivity to one of three possible
settings.

You can switch Distance Indication and
Alert on or off.

If required, you can switch Active
Braking on or off.

If required, you can switch the entire
Pre-Collision Assist feature on or off.

Note:

Active braking automatically turns

on every time you switch the ignition on.

172

Driving Aids

Note:

We recommend that you switch the

system off if you install a snow plow or
similar object in such a way that it may
block the radar sensor. Your vehicle
remembers the selected setting across key
cycles.

Blocked Sensors

E31

E311873

1873

Camera

1

Radar sensor

2

If a message regarding a blocked sensor
or camera appears in the information
display, the radar signals or camera images
are obstructed. With a blocked sensor or
camera, the Pre-Collision Assist system
may not function, or performance may
reduce. The following table lists possible
causes and actions for when this message
displays.

Camera Troubleshooting

Action

Cause

Clean the outside of the windshield in front

of the camera.

The windshield in front of the camera is

dirty or obstructed in some way.

Wait a short time. It may take several

minutes for the camera to detect that there

is no obstruction.

The windshield in front of the camera is

clean but the message remains in the

display screen.

173

Driving Aids

Radar Troubleshooting

Action

Cause

Clean the grille surface in front of the radar

or remove the object causing the obstruc-

tion.

The surface of the radar in the grille is dirty

or obstructed in some way.

Wait a short time. It may take several

minutes for the radar to detect that there

is no obstruction.

The surface of the radar in the grille is clean

but the message remains in the display

screen.

The Pre-Collision Assist system is tempor-
arily disabled. Pre-Collision Assist automat-

ically reactivates a short time after the

weather conditions improve.

Heavy rain, spray, snow or fog is interfering

with the radar signals.

The Pre-Collision Assist system is tempor-
arily disabled. Pre-Collision Assist automat-

ically reactivates a short time after the

weather conditions improve.

Swirling water or snow or ice on the surface

of the road may interfere with the radar

signals.

Contact an authorized dealer to have the

radar checked for proper coverage and

operation.

Radar is out of alignment due to a front end

impact.

Note:

Proper system operation requires a

clear view of the road by the camera. Have
any windshield damage in the area of the
camera's field of view repaired.

Note:

If something hits the front end of your

vehicle or damage occurs and your vehicle
has a radar sensor, the radar sensing zone
may change. This could cause missed or
false vehicle detections. Contact an
authorized dealer to have the radar checked
for proper coverage and operation.

Note:

If your vehicle detects excessive heat

at the camera or a potential misalignment
condition, a message may display in the
information display indicating temporary
sensor unavailability. When operational
conditions are correct, the message
deactivates. For example, when the ambient
temperature around the sensor decreases
or the sensor automatically recalibrates
successfully.

174

Driving Aids

LOAD LIMIT

WARNING: 

Do not exceed

the GVWR or the GAWR
specified on the Safety
Compliance Certification Label.

WARNING: 

Do not use

replacement tires with lower
load carrying capacities than the
original tires because they may
lower the vehicle's GVWR and
GAWR limitations. Replacement
tires with a higher limit than the
originals do not increase the
GVWR and GAWR limitations.

WARNING: 

Exceeding any

vehicle weight rating limitation
could result in serious damage
to the vehicle and/or personal
injury.

Every vehicle manufactured by
Ford Motor Company is supplied
with information on the Safety
Compliance Certification Label,
located on either the B-pillar or
the driver’s door edge, listing the
maximum loading for the vehicle
(GVWR), and its axle systems
(GAWR) at the tire to ground
interface.

Example only:

E210937

Under no circumstances should
your vehicle be loaded in excess
of the GVWR or GAWR. It is the
operator’s responsibility to ensure
that neither the axle capacities,
spring capacities, tire capacities
nor the vehicle rated GVWR is
exceeded.

Unloaded or Lightly Loaded
Vehicles

WARNING: 

When

operating empty or lightly
loaded, sudden or hard braking
may induce wheel lockup with
loss of vehicle control and the
possibility of accident and
serious injury, especially on wet
or slippery road surfaces.

The braking system has been
designed to safely stop your
vehicle when fully loaded to its
GVWR.

175

Load Carrying

AIR SUSPENSION

Note:

Do not operate your vehicle without

air in the suspension springs. Operating your
vehicle without air in the suspension springs
damages the suspension, degrades ride
performance and may cause property
damage.

The air suspension system automatically
adjusts to different loads to maintain a
constant frame height, allows for ease of
vehicle loading, provides improved vehicle
ride, and increased driver comfort.

Air Suspension Dump Button

E213409

Note:

The suspension dumps air when the

ignition is in the accessory or on position,
but fills only when the ignition is in the on
position.

A button located on the instrument panel
controls the system. It operates only when
the ignition is in the accessory or on
position and the air tanks have sufficient
pressure to fill the air springs. When you
turn off the ignition, the suspension
remains in whatever state it was last set.

Pressing and holding the button for two
seconds exhausts air from the air springs,
lowering the frame for loading. Pressing
and holding the button for two seconds
fills the air springs so your vehicle remains
at normal ride height.

System Indicator Light

The air suspension indicator light
illuminates when using the button to
release air pressure in the rear air springs.
Never drive your vehicle when the warning
lamp is illuminated and there is low (or no)
air pressure in the springs.

Connecting and Disconnecting a
Trailer with Air Suspension and Air
Suspension Dump Button

When connecting to a trailer:

Press and hold the button for two
seconds to exhaust air from the air
suspension system.

Press and hold the button for two
seconds, and then raise the landing
gear after making the connection to
the trailer.

When disconnecting the trailer:

Lower the landing gear, and then press
and hold the button for two seconds.

Disconnect the brake hoses, trailer-side
and rear light connectors, then pull the
release lever on the fifth wheel.

You must fill the air springs before
operating with a trailer or operating in the
bobtail mode.

Suspension Conversions

WARNING: 

When operating a

loaded vehicle, the driver must keep all
adjustable axles on the ground at all
times, supporting their share of the
vehicle’s load. Failure to do so can
overload other axles, tires, wheels,
springs, steering components, brakes
and frames, resulting in early component
failure, loss of vehicle control, possible
property damage and personal injury.

176

Load Carrying

We do not recommend performing, or
approve of, suspension conversions.
However, we understand that, on occasion,
others install aftermarket add-on
suspensions on the truck chassis that allow
operator control for weight transfer from
other axles (such as air lift axles).

177

Load Carrying

TOWING A TRAILER

WARNING: 

Do not exceed

the GVWR or the GAWR
specified on the certification
label.

WARNING: 

Towing trailers

beyond the maximum
recommended gross trailer
weight exceeds the limit of the
vehicle and could result in engine
damage, transmission damage,
structural damage, loss of
vehicle control, vehicle rollover
and personal injury.

Your vehicle may have electrical
items, such as fuses or relays,
related to towing.  See 

Fuses

(page 200).

Your vehicle's load capacity
designation is by weight, not by
volume, so you cannot necessarily
use all available space when
loading a vehicle.

Towing a trailer places an extra
load on your vehicle's engine,
transmission, axle, brakes, tires
and suspension. Inspect these
components periodically during,
and after, any towing operation.

Load Placement

To help minimize how trailer
movement affects your vehicle
when driving:

Load the heaviest items closest
to the trailer floor.

Load the heaviest items
centered between the left and
right side trailer tires.

Load the heaviest items above
the trailer axles or just slightly
forward toward the trailer
tongue. Do not allow the final
trailer tongue weight to go
above or below 10-15% of the
loaded trailer weight.

When driving with a trailer or
payload, a slight takeoff vibration
or shudder may be present due to
the increased payload weight.
Additional information regarding
proper trailer loading and setting
your vehicle up for towing is
located in another chapter of this
manual.  See 

Load Limit

 (page

175).

You can also find information in
the 

RV & Trailer Towing Guide

available at your authorized
dealer, or online.

RV & Trailer Towing Guide Online

http://www.fleet.ford.com/towing-guides/

Website

178

Towing

RECOMMENDED TOWING WEIGHTS

Website

Market

https://www.fleet.ford.com/

towing-guides/

United States of America

https://www.fleet.ford.ca/towing-

guides/

Canada

179

Towing

ESSENTIAL TOWING CHECKS

See 

Load limits

 in the Load Carrying

chapter for load specification terms found
on the tire label and Safety Compliance
label and instructions on calculating your
vehicle's load.

Remember to account for the trailer
tongue weight as part of your vehicle load
when calculating the total vehicle weight.

Hitches

Do not use a hitch that either clamps onto
the bumper or attaches to the axle. You
must distribute the load in your trailer so
that 10-15% of the total weight of the
trailer is on the tongue.

Safety Chains

Note:

Do not attach safety chains to the

bumper.

Always connect the safety chains to the
frame or hook retainers of your vehicle
hitch.

To connect the safety chains, cross the
chains under the trailer tongue and allow
enough slack for turning tight corners. Do
not allow the chains to drag on the ground.

Trailer Brakes

WARNING: 

Do not connect a

trailer's hydraulic brake system directly
to your vehicle's brake system. Your
vehicle may not have enough braking
power and your chances of having a
collision greatly increase.

Electric brakes and manual, automatic or
surge-type trailer brakes are safe if you
install them properly and adjust them to
the manufacturer's specifications. The
trailer brakes must meet local and federal
regulations.

The rating for the tow vehicle's braking
system operation is at the gross vehicle
weight rating, not the gross combined
weight rating.

Trailer Lamps

WARNING: 

Never connect any

trailer lamp wiring to the vehicle's tail
lamp wiring; this may damage the
electrical system resulting in fire. Contact
your authorized dealer as soon as
possible for assistance in proper trailer
tow wiring installation. Additional
electrical equipment may be required.

Trailer lamps are required on most towed
vehicles. Make sure all running lights, brake
lights, turn signals and hazard lights are
working.

Before Towing a Trailer

Practice turning, stopping and backing up
to get the feel of your vehicle-trailer
combination before starting on a trip.
When turning, make wider turns so the
trailer wheels clear curbs and other
obstacles.

When Towing a Trailer

Check your hitch, electrical connections
and trailer wheel lug nuts thoroughly
after you have traveled 50 mph
(80 km/h).

When stopped in congested or heavy
traffic during hot weather, place the
transmission in park (P) or neutral (N)
to aid engine and transmission cooling
and to help air conditioning
performance.

Turn off the speed control with heavy
loads or in hilly terrain. The speed
control may turn off automatically
when you are towing on long, steep
grades.

180

Towing

Shift to a lower gear when driving down
a long or steep hill. Do not apply the
brakes continuously, as they may
overheat and become less effective.

If your transmission is equipped with
the Tow/Haul feature, use this feature
when towing. This provides engine
braking and helps eliminate excessive
transmission shifting for optimum fuel
economy and transmission cooling.

Allow more distance for stopping with
a trailer attached. Anticipate stops and
brake gradually.

FIFTH WHEEL OPERATION

WARNING: 

Failure to follow the

fifth wheel manufacturer’s instructions
for hooking and unhooking as well as
sliding the fifth wheel could result in an
accident, personal injury or death.

WARNING: 

When the tractor and

trailer are parked unattended, the trailer
brake hand control should never be used
to apply the brake, since air may leak
from the system, allowing vehicle
movement, resulting in possible property
damage, personal injury or death.

Before hook-up, make sure:

The fifth wheel jaws are fully open.

The fifth wheel is fully tilted back to
prevent body damage when the tractor
is backed under a trailer.

You block the trailer wheels and adjust
and apply the trailer spring brakes.
Never chase a trailer.

The brake hoses and light cords are
clear of the fifth wheel.

Hook-up

1.

Back the tractor squarely under the
trailer, engaging the fifth-wheel jaws
on the kingpin. Always back up slowly;
make sure the trailer is neither too high
nor too low. Avoid backing under the
trailer from an angle.

2. Connect the service and emergency

brake hoses and trailer light connector.

3. Inspect the jaws of the fifth wheel to

be sure they have fully closed on the
trailer kingpin and the trailer plate is
resting securely on the fifth wheel.

4. Make sure the coupler release lever is

in the locked position.

5. Charge the trailer brake system. Set

the trailer brakes, with either the hand
valve or tractor protection valve. Pull
against the trailer for an extra check of
proper hook-up. Do not pull hard
enough to damage or strain the
equipment.

6. Set the tractor parking brakes and fully

raise the trailer landing gear.

7.

Check the operation of all trailer lights
and correct any lights that may be
faulty.

Un-hook

1.

Try to keep the tractor and trailer in a
straight line.

2. Apply the parking brakes.

3. Lower the trailer landing gear, making

sure it is on solid, level ground. The
weight of the trailer is to be on the
landing gear.

4. Block the trailer wheels.

5. Disconnect the brake hoses and light

cords. Be sure hoses and cords are
clear.

6. Pull coupler release lever to disengage

the fifth wheel jaws.

181

Towing

7.

Release the tractor parking brakes.

8. Pull out from the trailer slowly, allowing

the landing gear to take the load
gradually.

182

Towing

GENERAL DRIVING POINTS

General Information

Accelerate smoothly and evenly. Rapid
acceleration increases fuel
consumption without increasing engine
performance.

When approaching a hill, press the
accelerator smoothly to start the
incline at full power, and then shift
down as needed to maintain vehicle
speed.

When going down a hill, or long steep
grades, prevent overspeeding of the
engine. Normally, choose the same
gear to descend the hill that you use to
ascend the hill. The engine governor
has no control over engine speed when
it is being pushed by a loaded vehicle.

Do not operate in a gear that permits
an engine speed more than the
maximum governed speed or high-idle
RPM (no load).

Always shift to a lower gear at high
altitudes to prevent engine smoking.

Backing Up

WARNING: 

All vehicles have blind

spots. To reduce the risk of severe injury
or property damage, never move your
vehicle to the side or rear or change lanes
without being sure your way is clear on
both sides and to your rear.

WARNING: 

To reduce the risk of

the possibility of personal injury while
backing up the vehicle, always be sure
your vehicle’s path is clear.

Before backing up your vehicle, be sure you
can do so safely. If anything behind the cab
limits your view, do not rely on mirrors
alone to make sure that your intended path
is clear. If other people are in the vicinity,
have someone standing well behind your
vehicle and outside of your intended path
(visible through an exterior mirror) guide
you as you back up.

Although OSHA or some governmental
regulations may require the use of an
electrical or mechanical back up alarm to
warn bystanders, such an alarm does not
guarantee that the intended path is clear.
When in doubt, get out of your vehicle and
visually check the intended path is clear.
Back up slowly as to allow others time to
move, if necessary.

If you install an electrical back up alarm,
connect it to the backup lamp circuit.

Parking

WARNING: 

When parking your

vehicle, do not leave the transmission in
gear; if the key is in the on position and
the vehicle rolls, the engine could start.
Failure to follow these instructions could
result in an unattended vehicle moving,
possibly causing personal injury or
property damage.

Always use the parking brake. When
parking on a grade, block the wheels and
turn the front wheels to one side so that if
your vehicle rolls, the front tires act against
the curb to stop your vehicle. The front
wheels are more effective at stopping a
rolling vehicle than the rear wheels.

183

Driving Hints


Content      ..     9      10      11      12     ..