Ford Bronco (2022 year). Manual in english - page 13
 

  Index      Manuals     Ford Bronco (2022 year). Manual in english


Search            copyright infringement  


Content      ..     11      12      13      14     ..


Ford Bronco (2022 year). Manual in english - page 13


WHAT IS TRAIL TURN ASSIST

Trail turn assist can reduce the turning
radius of your vehicle by applying the
brakes to the inside rear wheel in
low-speed, high steering-angle maneuvers.

TRAIL TURN ASSIST
PRECAUTIONS

Note:

Do not use trail turn assist on dry,

hard surfaced roads. Doing so can produce
excessive noise, increase tire wear and may
damage drive line, or braking components.
Trail turn assist is only intended for slippery,
or loose surfaces.

You may hear noise from the anti-lock
brake system while trail turn assist is
active. This is normal operation.

TRAIL TURN ASSIST
LIMITATIONS

You can only use trail turn assist when the
system is in four-wheel drive high (4H), or
four-wheel drive low (4L) mode.

You cannot use trail turn assist with the
rear differential engaged. If the system
detects that the rear differential has
recently been engaged, it may not activate
trail turn assist until it can confirm that the
rear differential is disengaged.

If the vehicle’s rear differential is engaged
when pressing the trail turn assist button,
the rear differential will attempt to
disengage to allow for trail turn assist
operation.

SWITCHING TRAIL TURN
ASSIST ON AND OFF

While in four-wheel drive high (4H) or
four-wheel drive low (4L), press the trail
turn assist button to turn the feature on.
trail turn assist will be on at this time but
will not activate until:

Vehicle speed is less than 12 mph
(19.3 km/h).

Rear differential is fully unlocked.

Steering wheel is almost fully turned
to the left or right.

You can turn off trail turn assist by doing
any of the following:

Pressing the trail turn assist button
again.

Selecting a two-wheel drive high (2H),
or four-wheel drive auto (4A).

Turning on the rear locking differential.

TRAIL TURN ASSIST
INDICATORS

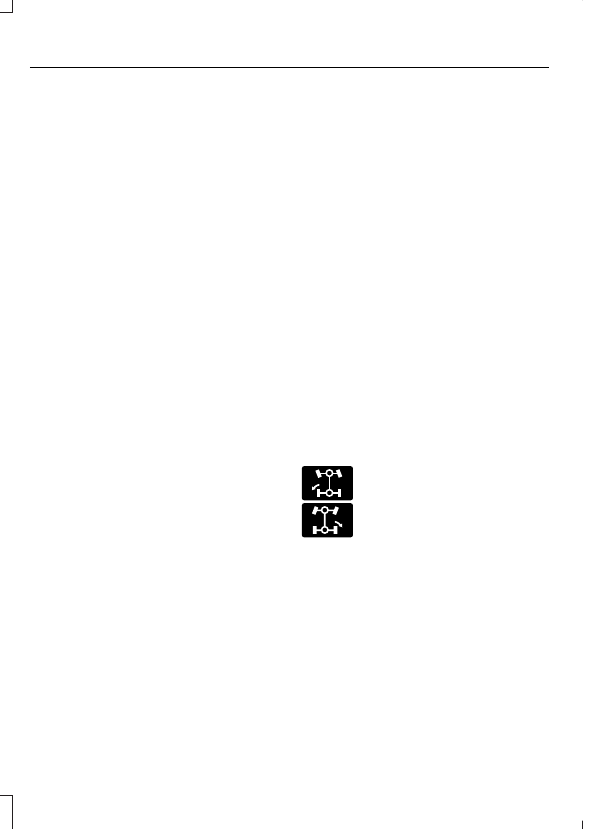
E338899

E338900

When trail turn assist is on, one
of these two indicators will be
displayed, depending on the
direction of the vehicle’s last
turn. When the feature is on but
not in use, the indicator light will

be gray. When the feature is active the
indicator light will be green.

212

Trail Turn Assist

 (If Equipped)

TRAIL TURN ASSIST –
TROUBLESHOOTING

TRAIL TURN ASSIST –
INFORMATION MESSAGES

Details

Message

Switch to four-wheel

drive low (4L) or four-

wheel drive high (4H) to

activate trail turn assist.

See 

Selecting a Four-

Wheel Drive Mode

(page 184).

Trail Turn

Assist Avail-
able in 4L or

4H

Trail turn assist system

malfunction could be

present. if this condition

persists, have your

vehicle serviced.

Trail Turn

Assist Not

Available See

Manual

You have activated trail

turn assist.

Trail Turn

Assist ON

You have switched trail

turn assist off.

Trail Turn

Assist OFF

TRAIL TURN ASSIST –
FREQUENTLY ASKED QUESTIONS

Why does Trail Turn Assist not activate
after unlocking the rear differential?

The rear differential may not be fully
disengaged. When possible, turn off
the rear axle locker while driving
straight before using trail turn assist.
If you are already in a tight turn when
you encounter this situation, driving
the vehicle for a short distance in
reverse could allow the differential to
fully disengage.

213

Trail Turn Assist

 (If Equipped)

WHAT IS THE STABILIZER BAR
DISCONNECT

Stabilizer bar disconnect is a feature that
allows the front stabilizer bar to be
disconnected for off-road use. This allows
for increased front wheel articulation to
improve capability and comfort on off-road
terrain.

STABILIZER BAR DISCONNECT
PRECAUTIONS

WARNING: 

If the stabilizer bar

disconnect warning lamp illuminates red,
a fault could be detected and the
stabilizer bar could not be connected.
Do not drive your vehicle above 20 mph
(32 km/h) and have the system checked
as soon as possible. Driving your vehicle
above 20 mph (32 km/h) could reduce
vehicle stability.

WARNING: 

Do not get under a

vehicle that is switched on as the
stabilizer bar disconnect could activate
and the vehicle could unexpectedly drop.
Failure to follow this instruction could
result in personal injury or death.

If an amber warning message appears in
the cluster indicating that the system
requires service, the stabilizer bar
disconnect will not be available. Have your
vehicle checked by an authorized dealer
as soon as possible.

SWITCHING THE STABILIZER
BAR DISCONNECT ON AND
OFF

Switching the Stabilizer Bar
Disconnect On

E358560

Stabilizer bar disconnect switch.

A

E329476

Switch the system on by
pressing the button on the
instrument panel. The stabilizer

bar disconnects when the vehicle speed is
below 20 mph (32 km/h). An amber
indicator illuminates to show that the
stabilizer bar disconnected.

When the vehicle speed exceeds 20 mph
(32 km/h), the stabilizer bar reconnects
and a gray indicator illuminates, indicating
the system is in standby mode. The
stabilizer bar disconnects again once the
vehicle speed is below 20 mph (32 km/h).

If the vehicle speed is above 20 mph
(32 km/h) and the system is on, the
request is stored and a gray indicator
illuminates to indicate the system is in
standby mode. When the vehicle speed
falls below 20 mph (32 km/h), the
stabilizer bar disconnects and the amber
indicator illuminates, indicating the
stabilizer bar has disconnected.

214

Stabilizer Bar Disconnect

 (If Equipped)

Note:

The gray indicator stays on until

either the vehicle speed reduces and the
stabilizer bar disconnects, or the system
turns off.

The stabilizer bar system also turns on and
disconnects when you select the Rock
Crawl drive mode.  See 

Selecting a

G.O.A.T. Mode

 (page 242).

Note:

The stabilizer bar disconnect is not

available in certain drive modes. See

Selecting a G.O.A.T. Mode

 (page 242).

Note:

The stabilizer bar disconnect could

be delayed during wheel slippage, dynamic
maneuvers, dynamic cornering or when
there is an anti-lock brake system or
electronic stability control event in progress.

Switching the Stabilizer Bar
Disconnect Off

Switch the system off by pressing the
stabilizer bar disconnect button, which
reconnects the stabilizer bar if currently
disconnected.

The stabilizer bar disconnect system also
turns off when any of the following occur:

The engine is switched off.

You switch out of four-wheel drive low
(4L) or four-wheel drive high (4H).

You select a drive mode that does not
allow the stabilizer bar to disconnect.

Note:

The stabilizer bar can be reconnected

at any time. It is not necessary for the
vehicle to be on a level surface as the
stabilizer bar self-aligns.

STABILIZER BAR DISCONNECT
INDICATORS

E329476

An indicator illuminates when
you switch the stabilizer bar
disconnect system on. The color

of the indicator changes to indicate the
system status.

Amber indicates that the stabilizer bar is
disconnected.

Grey indicates that the stabilizer bar is
connected and in standby.

Red indicates that there is a fault with the
system, have the system checked as soon
as possible.

STABILIZER BAR DISCONNECT
– TROUBLESHOOTING

STABILIZER BAR DISCONNECT –
INFORMATION MESSAGES

Action

Message

The selected drive

mode does not

allow you to turn on

the stabilizer bar

disconnect feature.

See 

G.O.A.T.

Mode Control

(page 242).

Sta-Bar Disconnect

Not Available In

Selected Drive

Mode

The stabilizer bar
has been discon-

nected.

Sta-Bar Discon-

nected Sta-Bar

Reconnects over 20

MPH

Sta-Bar Discon-

nected Sta-Bar

Reconnects over 32

km/h

The stabilizer bar

disconnect is avail-
able below 20 mph

(32 km/h).

Sta-Bar Disconnect
Available Below 20

MPH

Sta-Bar Disconnect

Available Below 32

km/h

215

Stabilizer Bar Disconnect

 (If Equipped)

Action

Message

The selected 4WD

mode does not

allow you to turn on

the stabilizer bar

disconnect feature.

Sta-Bar Disconnect

Available in 4L or

4H

Stabilizer bar

disconnect is not

available.  See

Stabilizer Bar

Disconnect –

Frequently Asked

Questions

 (page

216).

Sta-Bar Disconnect

Not Available See

Manual

Stabilizer bar

disconnect fault

detected, drive

below 20 mph

(32 km/h). Have

your vehicle

checked by an

authorized dealer

as soon as possible.

Sta-Bar Disconnect

Drive Below 32

km/h Service Now

Sta-Bar Disconnect

Drive Below 20

MPH Service Now

STABILIZER BAR DISCONNECT –
FREQUENTLY ASKED QUESTIONS

Why is the stabilizer bar disconnect not
disconnecting?

The engine is turned off and needs to
be turned on.

Why is the stabilizer bar disconnect not
disconnecting?

The vehicle is not in four-wheel drive
low (4L) or four-wheel drive high (4H),
and needs to be switched to either
mode.

Why is the stabilizer bar disconnect not
disconnecting?

Vehicle speed is above 20 mph
(32 km/h) and needs to be reduced in
order for the stabilizer bar to
disconnect.

Why is the stabilizer bar disconnect not
disconnecting?

The vehicle is on a very significant
lateral incline, and needs to be moved
to more level ground.

Why is the stabilizer bar disconnect not
disconnecting?

The vehicle's battery charge is low and
needs to be changed or charged.

Why is the stabilizer bar disconnect not
disconnecting?

There is a fault active in another
system on the vehicle, have the system
checked as soon as possible.

Why is the stabilizer bar disconnect not
disconnecting?

The vehicle is in a drive mode that
does not allow the stabilizer bar to
disconnect and needs to be switched
to a different drive mode.

216

Stabilizer Bar Disconnect

 (If Equipped)

WHAT IS HILL DESCENT
CONTROL

Hill descent control allows the driver to set
and maintain vehicle speed while
descending steep slopes in various surface
conditions.

HOW DOES HILL DESCENT
CONTROL WORK

Hill descent control can maintain vehicle
speeds on downhill slopes between
2–20 mph (3–32 km/h). Above 20 mph
(32 km/h), the system remains on but the
descent speed cannot be set or
maintained.

Note:

The system does not function below

2 mph (3 km/h).

The system requires a cool down interval
after a period of sustained use. Hill descent
control provides a warning in the message
center and a tone sounds when the system
is about to disengage for cooling. At this
time, manually apply the brakes as needed
to maintain descent speed.

Note:

The amount of time that the system

can remain active before cooling varies with
conditions.

HILL DESCENT CONTROL
PRECAUTIONS

WARNING: 

The system does not

control speed in low traction conditions
or extremely steep slopes. The system
is designed to be an aid and does not
relieve you of your responsibility to drive
with due care and attention. Failure to
follow this instruction could result in
personal injury.

WARNING: 

The system does not

replace the parking brake. When you
leave your vehicle, always apply the
parking brake.

SWITCHING HILL DESCENT
CONTROL ON AND OFF

E328593

Press the button on the center
console. A light in the instrument
cluster illuminates when the

system is active.

SETTING THE HILL DESCENT
SPEED

To increase or decrease the descent speed,
press the accelerator or brake pedal, or use
the SET 

+

 and SET 

-

 buttons on the

steering wheel. Once you reach the
preferred speed remove your feet from the
pedals.

HILL DESCENT CONTROL
INDICATOR

E328593

Illuminates when you switch hill
descent control on.

217

Hill Descent Control - Manual Transmission

HILL DESCENT CONTROL – TROUBLESHOOTING

HILL DESCENT CONTROL – INFORMATION MESSAGES

Details

Message

Displays when you deactivate hill descent

control mode.

Hill Descent Control OFF

Displays when the speed exceeds 20 mph

(32 km/h) and hill descent control is

unavailable.

For Hill Descent Reduce Speed

Displays when Cruise Control is Active and

driver attempts to turn on hill descent

control.

Hill Descent Control Not Available With

Cruise Control Active

Displays when the hill descent control

mode requires you to resume control.

Hill Descent Driver Resume Control

Displays when a hill descent system fault

is present.

Hill Descent Control Fault

Displays when the hill descent control turns

off to cool the brake system.

Hill Descent Control Off System Cooling

Displays when you activate the hill descent

control mode.

Hill Descent Control Ready

218

Hill Descent Control - Manual Transmission

ELECTRIC POWER STEERING

HOW DOES ELECTRIC POWER
STEERING WORK

The electric power steering system assists
the brake system to help operate
advanced stability control and accident
avoidance systems.

If your vehicle loses electrical power or
detects a concern when you are driving the
system switches off and you retain normal
steering function. Additionally, whenever
the battery is disconnected or a new
battery is installed, you must drive your
vehicle a short distance before the system
relearns the strategy and reactivates all
systems.

ELECTRIC POWER STEERING
PRECAUTIONS

WARNING: 

The electric power

steering system has diagnostic checks
that continuously monitor the system. If
a fault is detected, a message displays
in the information display. Stop your
vehicle as soon as it is safe to do so.

Switch the vehicle off. After at least 10
seconds, switch the vehicle on and
watch the information display for a
steering system warning message. If a
steering system warning message
returns, have the system checked as
soon as possible.

WARNING: 

If the system detects

an error, you may not feel a difference in
the steering, however a serious condition
may exist. Have your vehicle checked as
soon as possible. Failure to do so may
result in loss of steering control.

Adapt your speed and driving behavior
according to reduced steering assist.

Extreme continuous steering may increase
the effort to steer. This occurs to prevent
internal overheating and damage to the
steering system. If this occurs, you will not
lose the ability to steer your vehicle
manually nor will it cause damage to the
system. Normal steering and driving allows
the system to cool down and steering
assist returns to normal.

Note:

There is no fluid reservoir to check or

fill.

219

Steering

STEERING – TROUBLESHOOTING

STEERING – INFORMATION MESSAGES

Action

Message

The power steering system has detected a

condition that requires service.  Have your

vehicle checked as soon as possible.

Steering Fault Service Now

The power steering system is not working.
Stop your vehicle in a safe place.  Have your

vehicle checked as soon as possible.

Steering Loss Stop Safely

The power steering system has detected a

condition that requires service.  Have your

vehicle checked as soon as possible.

Steering Assist Fault Service Required

The steering system has detected a condi-
tion that requires service.  Have your vehicle

checked as soon as possible.

Steering Lock Malfunction Service Now

220

Steering

STEERING – FREQUENTLY ASKED
QUESTIONS

Why does it seem that the steering is
wandering or pulling?

Check your vehicle for an improperly
inflated or uneven tire, loose or worn
suspension or steering components,
or improper vehicle alignment.

The system is functioning properly and
the components have been checked,
why is the steering system continuing
to pull or wander?

A high crown in the road or crosswinds
could make the steering system feel
like it is wandering or pulling.

221

Steering

PARKING AID PRECAUTIONS

WARNING: 

To help avoid personal

injury, always use caution when in
reverse (R) and when using the sensing
system.

WARNING: 

The system may not

detect objects with surfaces that absorb
reflection. Always drive with due care
and attention. Failure to take care may
result in a crash.

WARNING: 

Traffic control systems,

fluorescent lamps, inclement weather,
air brakes, external motors and fans may
affect the correct operation of the
sensing system. This may cause reduced
performance or false alerts.

WARNING: 

The system may not

detect small or moving objects,
particularly those close to the ground.

WARNING: 

The parking aid system

can only assist you to detect objects
when your vehicle is moving at parking
speeds. To help avoid personal injury you
must take care when using the parking
aid system.

WARNING: 

The system may not

function if the sensor is blocked.

WARNING: 

In cold and severe

weather conditions the system may not
function. Rain, snow and spray can all
limit sensor performance.

WARNING: 

If damage occurs in the

immediate area surrounding the sensor,
have your vehicle checked as soon as
possible.

Note:

If your vehicle sustains damage

leaving the sensors misaligned, this will
cause inaccurate measurements or false
alerts.

When you connect a trailer to your vehicle,
the rear parking aid detects the trailer and
provides an alert. Disable the parking aid
when you connect a trailer to prevent the
alert.

Note:

Connected trailers might be detected

by the vehicle and parking aid turns off
automatically in those instances.

Note:

Certain add-on devices installed

around the bumper or fascia may create
false alerts, for example, large trailer
hitches, bike or surfboard racks, license plate
brackets, bumper covers or any other device
that could block the normal detection zone
of the parking aid system. Aftermarket spare
tires or spare tire covers mounted to the rear
tailgate could cause false alerts from the
park aid system. Remove the add-on device
to prevent false alerts.

Note:

 Keep the sensors free from snow, ice

and large accumulations of dirt.  If the
sensors are covered, the system's accuracy
can be affected.

Do not clean the sensors with sharp
objects.

Note:

 When using a programmed MyKey,

you cannot switch the parking aids off.  See

MyKey™

 (page 74).

SWITCHING PARKING AID ON
AND OFF

E139213

Press the parking aid button and
use the menu to switch the
system on and off.

You can also switch the system off using
the pop-up message that appears when
you are in reverse (R).

222

Parking Aids

 (If Equipped)

REAR PARKING AID

WHAT IS THE REAR PARKING AID

Rear parking sensors detect objects behind
your vehicle when in reverse (R).

REAR PARKING AID LIMITATIONS

There is a decreased coverage area at the
outer corners.

When using a programmed MyKey, you
cannot switch the rear parking aid off.

The rear parking aid sensors are active
when your vehicle is in reverse (R) and the
vehicle speed is less than 5 mph (8 km/h).

The sensor coverage area is up to 71 in
(180 cm) from the rear bumper.

The rear parking aid detects large objects
when you shift into reverse (R) and any of
the following occur:

Your vehicle is moving backward at a
low speed.

Your vehicle is stationary but an object
is approaching the rear of your vehicle
at a low speed.

Your vehicle is moving backward at a
low speed and an object is moving
towards your vehicle, for example
another vehicle at a low speed.

The system shall provide no audible
warning for the object behind the vehicle
when in neutral (N) gear.

LOCATING THE REAR PARKING
AID SENSORS

E130178

The rear parking aid sensors are in the rear
bumper.

REAR PARKING AID AUDIBLE

WARNINGS

A warning tone sounds when your vehicle
approaches an object.  As your vehicle
moves closer to an object, the rate of the
tone increases.  The warning tone
continuously sounds when an object is 12 in
(30 cm) or less from the rear bumper.

If your vehicle remains stationary for a few
seconds, the audible warning turns off. If
your vehicle moves backward the tone
sounds again.

Note:

When the parking aid system sounds

a tone, the audio system could reduce the
set volume.

FRONT PARKING AID

WHAT IS THE FRONT PARKING
AID

Front parking sensors detect objects in
front of your vehicle.

223

Parking Aids

 (If Equipped)

FRONT PARKING AID
LIMITATIONS

The front parking aid sensors are active
when your vehicle is in any position other
than park (P) and the vehicle speed is less
than 5 mph (8 km/h).

The sensor coverage area is up to 28 in
(70 cm) from the bumper.

If your vehicle is in reverse (R), the front
parking aid detects objects when your
vehicle is moving at a low speed or an
object is moving toward your vehicle and
provides an audible warning, for example
another vehicle at a low speed. If your
vehicle remains stationary for a few
seconds, the audible warning turns off.
Visual indication is always active in reverse
(R).

If your vehicle is in any forward gear, the
front parking aid provides audible warnings
and visual indication when your vehicle is
moving at a speed of 5 mph (8 km/h) or
below and the system detects an object
within the detection zone. If your vehicle
remains stationary for a few seconds, the
visual indication and audible warning turns
off.

If your vehicle is in neutral (N), the front
and rear sensors provide visual indication
only when your vehicle is moving below a
speed of 5 mph (8 km/h) and obstacles
are detected inside the detection areas.
Once your vehicle stops, the visual
indication and audible warning stops after
a few seconds.

LOCATING THE FRONT PARKING
AID SENSORS

E187330

The front parking aid sensors are in the
front bumper.

FRONT PARKING AID AUDIBLE
WARNINGS

A warning tone sounds when there is an
object within 28 in (70 cm) from the front
bumper. As your vehicle moves closer to
an object, the rate of the tone increases.

The warning tone continuously sounds
when an object is 12 in (30 cm) or less from
the front bumper.

Note:

If the detected object is 12 in (30 cm)

or less from your vehicle, visual indication
remains on.

224

Parking Aids

 (If Equipped)

PARKING AID INDICATORS

E190459

The system provides object distance
indication through the information display.

As the distance to the object
decreases, the indicator blocks
illuminate and move toward the vehicle
icon.

If there is no object detected, the
distance indicator blocks are gray.

Visual indication remains on when the
transmission is in reverse (R). When you
stop your vehicle, visual indication turns
off after four seconds.

If the system is not available, the side
distance indicator blocks do not display.

PARKING AIDS –
TROUBLESHOOTING

PARKING AIDS – INFORMATION
MESSAGES

If a fault is present in the parking aids, a
warning message appears in the
instrument cluster or the touchscreen.

Note:

When the front or rear park aid

presents a fault message, the side parking
aid also disables.

Action

Message

The system detects a condition that

requires service.  Have your vehicle checked

as soon as possible.

Check Front Park Aid

The system detects a condition that

requires service.  Have your vehicle checked

as soon as possible.

Check Rear Park Aid

Displays the park aid status.

Front Park Aid On Off

Displays the park aid status.

Rear Park Aid On Off

225

Parking Aids

 (If Equipped)

WHAT IS THE REAR VIEW
CAMERA

The rear view camera provides a video
image of the area behind your vehicle when
the transmission is in reverse (R).

REAR VIEW CAMERA
PRECAUTIONS

WARNING: 

The rear view camera

system is a reverse aid supplement
device that still requires the driver to use
it in conjunction with the interior and
exterior mirrors for maximum coverage.

WARNING: 

Objects that are close

to either corner of the bumper or under
the bumper, might not be seen on the
screen due to the limited coverage of the
camera system.

WARNING: 

Reverse your vehicle

slowly. Failure to follow this instruction
could result in the loss of control of your
vehicle, personal injury or death.

WARNING: 

Use caution when the

rear cargo door is ajar. If the rear cargo
door is ajar, the camera will be out of
position and the video image could be
incorrect. All guide lines disappear when
the rear cargo door is ajar. Failure to
follow this instruction could result in
personal injury.

WARNING: 

Use caution when

turning camera features on or off when
the transmission is not in park (P). Make
sure your vehicle is not moving.

Note:

 When towing, the camera only sees

what you are towing.  This might not provide
adequate coverage and you might not see
some objects.  In some vehicles, the guide
lines may disappear when you connect the
trailer tow connector.

LOCATING THE REAR VIEW
CAMERA

The rear view camera is in the spare tire
carrier.

REAR VIEW CAMERA GUIDE
LINES

Note:

Active guide lines and fixed guide

lines are only available when the
transmission is in reverse (R).

Note:

The centerline is only available if the

active or fixed guide lines are on.

226

Rear View Camera

E306774

A. Active guide lines.
B. Centerline.
C. Fixed guide line: Green zone.
D. Fixed guide line: Yellow zone.
E. Fixed guide line: Red zone.
F. Rear bumper.

Active guide lines only show with fixed
guide lines. To use active guide lines, turn
the steering wheel to point the guide lines
toward an intended path. If the steering
wheel position changes while reversing,
your vehicle might deviate from the
intended path.

The fixed and active guide lines fade in and
out depending on the steering wheel
position. The active guide lines do not
display when the steering wheel position
is straight.

Use caution while reversing. Objects in the
red zone are closest to your vehicle and
objects in the green zone are farther away.
Objects get closer to your vehicle as they
move from the green zone to the yellow or
red zones. Use the side view mirrors and
rear view mirror to get better coverage on
both sides and rear of your vehicle.

REAR VIEW CAMERA OBJECT
DISTANCE INDICATORS

The system provides an image of your
vehicle and the sensor zones. The zones
highlight green, yellow, and red when the
parking aid sensors detect an object in the
coverage area.

REAR VIEW CAMERA
SETTINGS

ZOOMING THE REAR VIEW
CAMERA IN AND OUT

WARNING: 

When manual zoom is

on, the full area behind your vehicle may
not show. Be aware of your surroundings
when using the manual zoom feature.

Selectable settings for this feature are
zoom in (+) and zoom out (-). Press the
symbol on the camera screen to change
the view. The default setting is zoom off.

This allows you to get a closer view of an
object behind your vehicle.  The zoomed
image keeps the bumper in the image to
provide a reference.  The zoom is only
active while the transmission is in reverse
(R).

Note:

Manual zoom is only available when

the transmission is in reverse (R).

Note:

Only the centerline shows when you

enable manual zoom.

227

Rear View Camera


Content      ..     11      12      13      14     ..