Ford Police Interceptor Utility (2022 year). Manual in english - page 10
 

  Index      Manuals     Ford Police Interceptor Utility (2022 year). Manual in english


Search            copyright infringement  


Content      ..     8      9      10      11     ..


Ford Police Interceptor Utility (2022 year). Manual in english - page 10


spun as a generator to create electrical
current. This recharges the battery and
slows the vehicle. In effect, once the
accelerator pedal is released, the motor
changes from an energy user to an energy
producer.

When you release the accelerator pedal or
press the brake pedal, the brake controller
automatically detects the amount of
deceleration requested and optimizes how
much of the deceleration will be produced
by regenerative braking. The remaining
portion is generated by standard friction
braking. When the battery is almost fully
charged, the amount of regenerative
braking is limited to avoid overcharging,
and the requested deceleration is
produced by standard friction braking
alone.

Regenerative braking does not take the
place of the standard friction brakes; it only
assists them. Regenerative braking has
also been designed to interact with the
anti-lock brake system. Regenerative
braking is disabled when the anti-lock
brake system is activated or the battery is
fully charged.

HINTS ON DRIVING WITH
ANTI-LOCK BRAKES

The anti-lock brake system does not
eliminate the risks when:

You drive too closely to the vehicle in
front of you.

Your vehicle is hydroplaning.

You take corners too fast.

The road surface is poor.

Note:

 If the system activates, the brake

pedal could pulse and may travel further.
Maintain pressure on the brake pedal.  You
may also hear a noise from the system.  This
is normal.

ELECTRIC PARKING BRAKE

WARNING: 

Always fully apply the

parking brake and make sure you shift
into park (P). Failure to follow this
instruction could result in personal injury
or death.

WARNING: 

If you drive extended

distances with the parking brake applied,
you could cause damage to the brake
system.

WARNING: 

The electric parking

brake does not operate if the vehicle
battery is running out of charge.

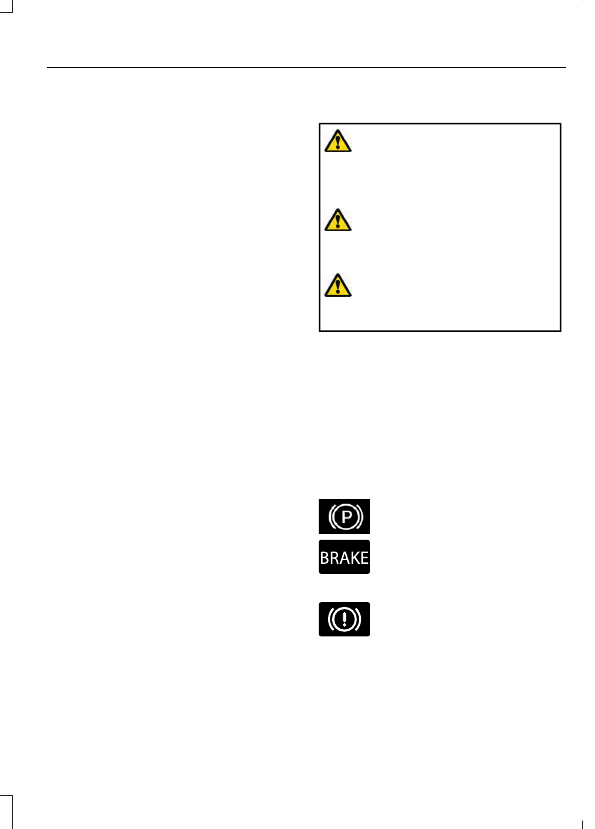
Your vehicle has an electric parking brake.
You operate it with a switch instead of a
lever. The switch is on the center console
or to the left-hand side of the steering
wheel, on the lower part of the instrument
panel.

Note:

The electric parking brake makes

noises during operation. This is normal.

Applying the Electric Parking
Brake

E267156

Pull the switch upward.

E270480

The red warning lamp flashes
during operation and illuminates
when the parking brake is

applied.

Note:

It remains illuminated for a short

period of time after you switch the ignition
off.

151

Brakes

If it continues to flash or does not
illuminate, the system has malfunctioned.
Have your vehicle checked as soon as
possible.

Note:

You can apply the electric parking

brake when the ignition is off.

Note:

The electric parking brake could

automatically apply when you shift into park
(P).  See 

Transmission

 (page 141).

Applying the Electric Parking Brake in
an Emergency

Note:

Do not apply the electric parking

brake when your vehicle is moving, except
in an emergency. If you repeatedly use the
electric parking brake to slow or stop your
vehicle, you could cause damage to the
brake system.

You can use the electric parking brake to
slow or stop your vehicle in an emergency.

E267156

Pull the switch upward and hold
it.

E270480

The red warning lamp
illuminates, a tone sounds and
the stoplamps turn on.

The electric parking brake continues to
slow your vehicle down unless you release
the switch.

Manually Releasing the Electric
Parking Brake

Switch the ignition on.

Press and hold the brake pedal.

E267156

Push the switch downward.

E270480

The red warning lamp turns off.

If it remains illuminated or flashes, the
system has malfunctioned.  Have your
vehicle checked as soon as possible.

Pulling Away on a Hill When Towing a
Trailer

Press and hold the brake pedal.

E267156

Pull the switch upward and hold
it.

Shift into gear.

Press the accelerator pedal until engine
has developed sufficient torque to prevent
your vehicle from rolling down the hill.

E267156

Release the switch and pull
away in a normal manner.

Automatically Releasing the
Electric Parking Brake

Close the driver door.

Shift into gear.

Press the accelerator pedal and pull away
in a normal manner.

E270480

The red warning lamp turns off.

If it remains illuminated or flashes, the
electric parking brake has not released.
Manually release the parking brake.

152

Brakes

Releasing the Electric Parking
Brake if the Vehicle Battery is
Running Out of Charge

Connect a booster battery to the vehicle
battery to release the electric parking brake
if the vehicle battery is running out of
charge.  See 

Jump Starting the Vehicle

(page 194).

HILL START ASSIST

WARNING: 

The system does not

replace the parking brake. When you
leave your vehicle, always apply the
parking brake.

WARNING: 

You must remain in

your vehicle when the system turns on.
At all times, you are responsible for
controlling your vehicle, supervising the
system and intervening, if required.
Failure to take care may result in the loss
of control of your vehicle, serious
personal injury or death.

WARNING: 

The system will turn

off if a malfunction is apparent or if you
rev the engine excessively. Failure to take
care may result in the loss of control of
your vehicle, serious personal injury or
death.

The system makes it easier to pull away
when your vehicle is on a slope without the
need to use the parking brake.

When the system is active, your vehicle
remains stationary on the slope for two to
three seconds after you release the brake
pedal.  This allows time to move your foot
from the brake to the accelerator pedal.
The system releases the brakes
automatically once the engine has

developed sufficient torque to prevent your
vehicle from rolling down the slope.  This
is an advantage when pulling away on a
slope, for example from a car park ramp,
traffic lights or when reversing uphill into
a parking space.

The system activates on any slope that
causes your vehicle to roll.

Note:

There is no warning light to indicate

the system is either on or off.

Using Hill Start Assist

1.

Press the brake pedal to bring your
vehicle to a complete standstill. Keep
the brake pedal pressed and shift into
first gear when facing uphill or reverse
(R) when facing downhill.

2. If the sensors detect that your vehicle

is on a slope, the system activates
automatically.

3. When you remove your foot from the

brake pedal, your vehicle remains on
the slope without rolling away for
about two to three seconds. This hold
time automatically extends if you are
in the process of driving off.

4. Drive off in the normal manner. The

system releases the brakes
automatically.

Note:

When you remove your foot from the

brake pedal and press the pedal again when
the system is active, you will experience
significantly reduced brake pedal travel. This
is normal.

Switching the System On and Off

Vehicles with Manual Transmission

You can switch this feature on or off in the
information display.  The system
remembers the last setting when you start
your vehicle.

153

Brakes

Vehicles with Automatic Transmission

You cannot turn the system on or off.
When you switch the ignition on, the
system automatically turns on.

154

Brakes

PRINCIPLE OF OPERATION

The traction control system helps avoid
drive wheel spin and loss of traction.

If your vehicle begins to slide, the system
applies the brakes to individual wheels
and, when needed, reduces engine power
at the same time. If the wheels spin when
accelerating on slippery or loose surfaces,
the system reduces engine power in order
to increase traction.

USING TRACTION CONTROL

WARNING: 

Operating your vehicle

with the traction control disabled could
lead to an increased risk of loss of vehicle
control, vehicle rollover, personal injury
and death.

The system automatically turns on each
time you switch the ignition on.

If your vehicle is stuck in mud or snow,
switching traction control off may be
beneficial as this allows the wheels to spin.

Note:

When you switch traction control off,

stability control remains fully active.

Switching the System Off

When you switch the system off or on, a
message appears in the information
display showing system status.

You can switch the system off by either
using the information display controls or
the switch.

Using the Information Display
Controls

You can switch this feature off or on in the
information display. See 

General

Information

 (page 84).

Using a Switch

 (If Equipped)

Use the traction control switch on the
instrument panel to switch the system off
or on.

System Indicator Lights and
Messages

E138639

The stability and traction control
light:

Temporarily illuminates on engine
start-up.

Flashes when a driving condition
activates either of the systems.

Illuminates if a problem occurs in either
of the systems.

E130458

The stability and traction control
off light temporarily illuminates
on engine start-up and stays on

when you switch the traction control
system off.

155

Traction Control

PRINCIPLE OF OPERATION

WARNING: 

Vehicle modifications

involving braking system, aftermarket
roof racks, suspension, steering system,
tire construction and wheel and tire size
may change the handling characteristics
of your vehicle and may adversely affect
the performance of the electronic
stability control system. In addition,
installing any stereo loudspeakers may
interfere with and adversely affect the
electronic stability control system. Install
any aftermarket stereo loudspeaker as
far as possible from the front center
console, the tunnel, and the front seats
in order to minimize the risk of interfering
with the electronic stability control
sensors. Reducing the effectiveness of
the electronic stability control system
could lead to an increased risk of loss of
vehicle control, vehicle rollover, personal
injury and death.

WARNING: 

Remember that even

advanced technology cannot defy the
laws of physics. It’s always possible to
lose control of a vehicle due to
inappropriate driver input for the
conditions. Aggressive driving on any
road condition can cause you to lose
control of your vehicle increasing the risk
of personal injury or property damage.
Activation of the electronic stability
control system is an indication that at
least some of the tires have exceeded
their ability to grip the road; this could
reduce the operator’s ability to control
the vehicle potentially resulting in a loss
of vehicle control, vehicle rollover,
personal injury and death. If your
electronic stability control system
activates, SLOW DOWN.

The system automatically turns on each
time you switch the ignition on.

If a fault occurs in either the stability
control or the traction control system, you
may experience the following conditions:

The stability and traction control light
illuminates steadily.

The stability control and traction
control systems do not enhance your
vehicle's ability to maintain traction of
the wheels.

If a driving condition activates either the
stability control or the traction control
system you may experience the following
conditions:

The stability and traction control light
flashes.

Your vehicle slows down.

Reduced engine power.

A vibration in the brake pedal.

The brake pedal is stiffer than usual.

If the driving condition is severe and
your foot is not on the brake, the brake
pedal may move as the system applies
higher brake force.

The stability control system has several
features built into it to help you maintain
control of your vehicle:

Electronic Stability Control

The system enhances your vehicle’s ability
to prevent skids or lateral slides by
applying brakes to one or more of the
wheels individually and, if necessary,
reducing engine power.

Roll Stability Control

The system enhances your vehicle’s ability
to prevent rollovers by detecting your
vehicle’s roll motion and the rate at which
it changes by applying the brakes to one
or more wheels individually.

156

Stability Control

Traction Control

The system enhances your vehicle’s ability
to maintain traction of the wheels by
detecting and controlling wheel spin. See

Using Traction Control

 (page 155).

E72903

Vehicle without stability control
skidding off its intended route.

A

Vehicle with stability control
maintaining control on a slippery
surface.

B

USING STABILITY CONTROL

The system automatically turns on each
time you switch the ignition on.

You cannot switch the stability control and
roll stability control systems off, but when
you shift into reverse (R), the systems turn
off.

You can switch the traction control system
off or on.  See 

Using Traction Control

(page 155).

157

Stability Control

PRINCIPLE OF OPERATION

WARNING: 

To help avoid personal

injury, always use caution when in
reverse (R) and when using the sensing
system.

WARNING: 

The system may not

detect objects with surfaces that absorb
reflection. Always drive with due care
and attention. Failure to take care may
result in a crash.

WARNING: 

Traffic control systems,

inclement weather, air brakes, external
motors and fans may affect the correct
operation of the sensing system. This
may cause reduced performance or false
alerts.

WARNING: 

The system may not

detect small or moving objects,
particularly those close to the ground.

Note:

If your vehicle has MyKey™, the

sensing system cannot be switched off
when a MyKey™ is present.

Note:

Keep the sensors on the bumper or

fascia free from snow, ice and large
accumulations of dirt. If the sensors are
covered, the system’s accuracy can be
affected. Do not clean the sensors with
sharp objects.

Note:

If your vehicle sustains damage to

the bumper or fascia, leaving it misaligned
or bent, the sensing zone may be altered
causing inaccurate measurement of
obstacles or false alerts.

Note:

Certain add-on devices installed

around the bumper or fascia may create
false alerts. For example, large trailer
hitches, bike or surfboard racks, license plate
brackets, bumper covers or any other device
that may block the normal detection zone
of the system. Remove the add-on device
to prevent false alerts.

Note:

When you connect a trailer to your

vehicle, the rear parking aid may detect the
trailer and therefore provide an alert. Disable
the rear parking aid when you connect a
trailer to prevent the alert.

The sensing system warns the driver of
obstacles within a certain range of your
vehicle. The system turns on automatically
whenever you switch the ignition on.

You can switch the system off through the
touchscreen, information display or from
the pop-up message that appears once
you shift the transmission into reverse (R).
If your vehicle has a parking aid button, you
can switch the system off by pressing the
button.

If a fault is present in the system, a warning
message appears in the information
display.  See 

Information Messages

(page 87).

REAR PARKING AID

WARNING: 

The system may not

detect objects with surfaces that absorb
reflection. Always drive with due care
and attention. Failure to take care may
result in a crash.

WARNING: 

The system may not

detect small or moving objects,
particularly those close to the ground.

158

Parking Aids

WARNING: 

To help avoid personal

injury, always use caution when in
reverse (R) and when using the sensing
system.

WARNING: 

The parking aid system

can only assist you to detect objects
when your vehicle is moving at parking
speeds. To help avoid personal injury you
must take care when using the parking
aid system.

Note:

Keep the sensors free from snow, ice

and large accumulations of dirt.

Note:

Do not cover up the sensors.

Note:

Do not clean the sensors with sharp

objects.

Note:

If your vehicle sustains damage

leaving the sensors misaligned, this may
cause inaccurate measurements or false
alerts.

Note:

Some accessories, for example large

trailer hitches or bike or surfboard racks, can
cause reduced performance or false alerts.

The sensors are on the rear bumper.

The sensors are active when the
transmission is in reverse (R) and the
vehicle speed is less than 5 mph (8 km/h).
When the parking aid system sounds a
tone, the audio system may reduce the set
volume.

A warning tone sounds when your vehicle
approaches an object.  As your vehicle
moves closer to an object, the rate of the
tone increases.  The warning tone
continuously sounds when an object is 12 in
(30 cm) or less from the center of the rear
bumper.

Note:

There is a decreased coverage area

at the outer corners.

E130178

The sensor coverage area is up to 70 in
(180 cm) from the rear bumper.

If the system detects a fault, a warning
message appears in the information
display.

The system detects large objects when
you shift into reverse (R) and any of the
following occur:

Your vehicle is moving backward at low
speed.

Your vehicle is stationary, but an object
is approaching the rear of your vehicle
at low speed.

Your vehicle is moving backward at low
speed and an object is moving toward
your vehicle, for example another
vehicle, at low speed.

If your vehicle remains stationary for two
seconds, the audible warning turns off. If
your vehicle moves backward, the tone
sounds again.

Note:

If the detected object is 12 in (30 cm)

or less from the rear bumper, the audible
warning does not turn off.

159

Parking Aids

Object Distance Indicator

 (If Equipped)

E190459

The system provides object distance
indication through the information display.

As the distance to the object
decreases, the indicator blocks
illuminate and move toward the vehicle
icon.

If the system does not detect an object,
the distance indicator blocks are gray.

When you shift into reverse (R), the system
provides audible warnings and visual
indication when your vehicle is moving, and
the detected object is moving toward your
vehicle. When you stop your vehicle, the
audible warnings stop after two seconds.
Visual indication remains on when the
transmission is in reverse (R).

REAR VIEW CAMERA

WARNING: 

The rear view camera

system is a reverse aid supplement
device that still requires the driver to use
it in conjunction with the interior and
exterior mirrors for maximum coverage.

WARNING: 

Objects that are close

to either corner of the bumper or under
the bumper, might not be seen on the
screen due to the limited coverage of the
camera system.

WARNING: 

Reverse your vehicle

slowly. Failure to follow this instruction
could result in the loss of control of your
vehicle, personal injury or death.

WARNING: 

Use caution when the

rear cargo door is ajar. If the rear cargo
door is ajar, the camera will be out of
position and the video image could be
incorrect. All guide lines disappear when
the rear cargo door is ajar. Failure to
follow this instruction could result in
personal injury.

WARNING: 

Use caution when

turning camera features on or off when
the transmission is not in park (P). Make
sure your vehicle is not moving.

The rear view camera provides a video
image of the area behind your vehicle.

During operation, lines appear in the
display representing the proximity to
objects behind your vehicle.

160

Parking Aids

E253742

The camera is on the luggage
compartment door.

Using the Rear View Camera
System

The rear view camera system displays
what is behind your vehicle when you place
the transmission in reverse (R).

Note:

The reverse sensing system is not

effective at speeds above 3 mph (5 km/h)
and may not detect certain angular or
moving objects.

The system uses three types of guides to
help you see what is behind your vehicle:

Active guide lines: If your vehicle comes
with these, they show the intended
path of your vehicle when reversing.

Fixed guide lines: Show the actual path
your vehicle is moving in when reversing
in a straight line. This can be helpful
when backing into a parking space or
aligning your vehicle with another
object behind you.

Centerline: Helps align the center of
your vehicle with an object, for
example, a trailer.

Note:

If the transmission is in reverse (R)

and the luggage compartment door or
liftgate is open, no rear view camera
features display.

Note:

 When towing, the camera only sees

what you are towing.  This might not provide
adequate coverage as it usually provides in
normal operation, and some objects might
not be visible.  In some vehicles, the guide
lines could disappear when you connect the
trailer tow connector.

The rear view camera may not operate
correctly under the following conditions:

Nighttime or dark areas if one or both
reverse lamps are not operating.

Mud, water or debris obstructs the
camera's view.  Clean the lens with a
soft, lint-free cloth and non-abrasive
cleaner.  You can also use the rear
washer to clean the camera.  See 

Rear

Window Wiper and Washers

 (page

67).

The rear of your vehicle is hit or
damaged, causing the camera to
become misaligned.

Camera System Settings

Access the rear view camera settings
through the display screen. See 

General

Information

 (page 84).

161

Parking Aids

Camera Guide Lines

A

B C

D

F

E

E142436

Active guide lines.

A

Centerline.

B

Fixed guideline: Green zone.

C

Fixed guideline: Yellow zone.

D

Fixed guideline: Red zone.

E

Rear bumper.

F

Active guide lines are only shown with fixed
guide lines. To use active guide lines, turn
the steering wheel to point the guide lines
toward an intended path. If you change the
steering wheel position when reversing,
your vehicle could deviate from the original
intended path.

The fixed and active guide lines fade in and
out depending on the steering wheel
position. The active guide lines do not
display when the steering wheel position
is straight.

Use caution when reversing. Objects in the
red zone are closest to your vehicle and
objects in the green zone are farther away.
Objects are getting closer to your vehicle
as they move from the green zone to the
yellow or red zones. Use the side view
mirrors and rear view mirror to get better
coverage on both sides and rear of the
vehicle.

Note:

Guide lines are not available on some

vehicles.

Note:

Active guide lines are only available

when the transmission is in reverse (R).

Obstacle Distance Indicator

 (If

Equipped)

E190459

The system provides an image of your
vehicle and the sensor zones. The zones
highlight green, yellow and red when the
parking aid sensors detect an object in the
coverage area.

162

Parking Aids

Rear Camera On Demand

 (If Equipped)

E327108

Press the camera button on the
overhead console to bring up the
rear camera view in the display

screen. The guide lines appear as white
and you are able to use the manual zoom
feature by pressing the zoom button.

Manual Zoom

WARNING: 

When manual zoom is

on, the full area behind your vehicle may
not show. Be aware of your surroundings
when using the manual zoom feature.

Note:

Manual zoom is only available when

the transmission is in reverse (R).

Note:

When you enable manual zoom, only

the centerline is shown.

Selectable settings for this feature are
zoom in, +, and zoom out, -. Press the
symbol in the camera screen to change the
view. The default setting is zoom off.

Manual zoom allows you to get a closer
view of an object behind your vehicle.  The
zoomed image keeps the bumper in the
image to provide a reference.  The zoom is
only active when the transmission is in
reverse (R).

Rear Camera Delay

Selectable settings for this feature are on
and off.

The default setting for the rear camera
delay is off.

When shifting the transmission out of
reverse (R) and into any gear other than
park (P), the camera image remains in the
display until:

Your vehicle speed reaches
approximately 5 mph (8 km/h).

You shift your vehicle into park (P).

163

Parking Aids

WHAT IS CRUISE CONTROL

Cruise control lets you maintain a set
speed without keeping your foot on the
accelerator pedal.

Requirements

Use cruise control when the vehicle speed
is greater than 20 mph (30 km/h).

SWITCHING CRUISE CONTROL
ON AND OFF

WARNING: 

Do not use cruise

control on winding roads, in heavy traffic
or when the road surface is slippery. This
could result in loss of vehicle control,
serious injury or death.

The cruise controls are on the steering
wheel.

Switching Cruise Control On

E71340

Press the button to put the
system in standby mode.

Switching Cruise Control Off

E71340

Press the button when in
standby mode or switch the
ignition off.

Note:

When you switch cruise control off

the set speed clears.

SETTING THE CRUISE
CONTROL SPEED

WARNING: 

When you are going

downhill, your vehicle speed could
increase above the set speed. The
system does not apply the brakes.

Drive to the speed you prefer.

Press the toggle button upward
or downward to set the current
speed.

Take your foot off the accelerator pedal.

Note:

The indicator changes color in the

information display.

Changing the Set Speed

Press and release the toggle
button upward to increase the
set speed in small increments.

Press and hold the toggle button upward
to accelerate. Release the button when
you have reached your preferred speed.

Press and release the toggle
button downward to decrease
the set speed in small

increments.

Press and hold the toggle button
downward to decelerate. Release the
button when you have reached your
preferred speed.

Note:

 If you accelerate by pressing the

accelerator pedal, the set speed does not
change.  When you release the accelerator
pedal, your vehicle returns to the speed that
you previously set.

164

Cruise Control

CANCELING THE SET SPEED

E280804

Press the button, or tap the
brake pedal to cancel the set
speed.

Note:

The system remembers the set

speed.

Note:

The system cancels if the vehicle

speed drops below 10 mph (16 km/h) under
the set speed when driving uphill.

RESUMING THE SET SPEED

Press the button.

CRUISE CONTROL
INDICATORS

E71340

Illuminates when you switch the
system on.

165

Cruise Control

BLIND SPOT INFORMATION
SYSTEM

 (IF EQUIPPED)

WARNING: 

Do not use the blind

spot information system as a
replacement for using the interior and
exterior mirrors or looking over your
shoulder before changing lanes. The
blind spot information system is not a
replacement for careful driving.

WARNING: 

The system may not

operate properly during severe weather
conditions, for example snow, ice, heavy
rain and spray. Always drive with due
care and attention. Failure to take care
may result in a crash.

E255695

The design of the system is to detect
vehicles that could have entered the blind
spot zone. The detection area is on both
sides of your vehicle, extending rearward
from the exterior mirrors to approximately
13 ft (4 m) beyond the rear bumper. The
detection area extends to approximately
59 ft (18 m) beyond the rear bumper when
the vehicle speed is greater than 30 mph
(48 km/h) to alert you of faster
approaching vehicles.

Note:

The system does not prevent contact

with other vehicles. It does not detect
parked vehicles, pedestrians, animals or
other infrastructures.

Using the Blind Spot Information
System

Vehicles with Automatic Transmission

The system turns on when all of the
following occur:

You start your vehicle.

You shift into drive (D).

The vehicle speed is greater than
6 mph (10 km/h).

Note:

The system does not operate in park

(P) or reverse (R).

System Lights and Messages

E142442

When the system detects a vehicle, an
alert indicator illuminates in the exterior
mirror on the side the approaching vehicle
is coming from. If you turn the direction
indicator on for that side of your vehicle,
the alert indicator flashes.

Note:

The system may not alert you if a

vehicle quickly passes through the detection
zone.

166

Driving Aids


Content      ..     8      9      10      11     ..