Mercury Villager (2002 year). Manual - part 8


  Index      Mercury     Mercury Villager (2002 year) - manual in english


Search            copyright infringement  


Content      ..     6      7      8      9     ..


Mercury Villager (2002 year). Manual - part 8


Arming the system

When unauthorized entry occurs, the system will flash headlamp lamps,
tail lamps and the security indicator lamp, chirp the horn and disable the
starting system.

The system is ready to arm whenever the key is removed from the
ignition. Any of the following actions will prearm the alarm system:
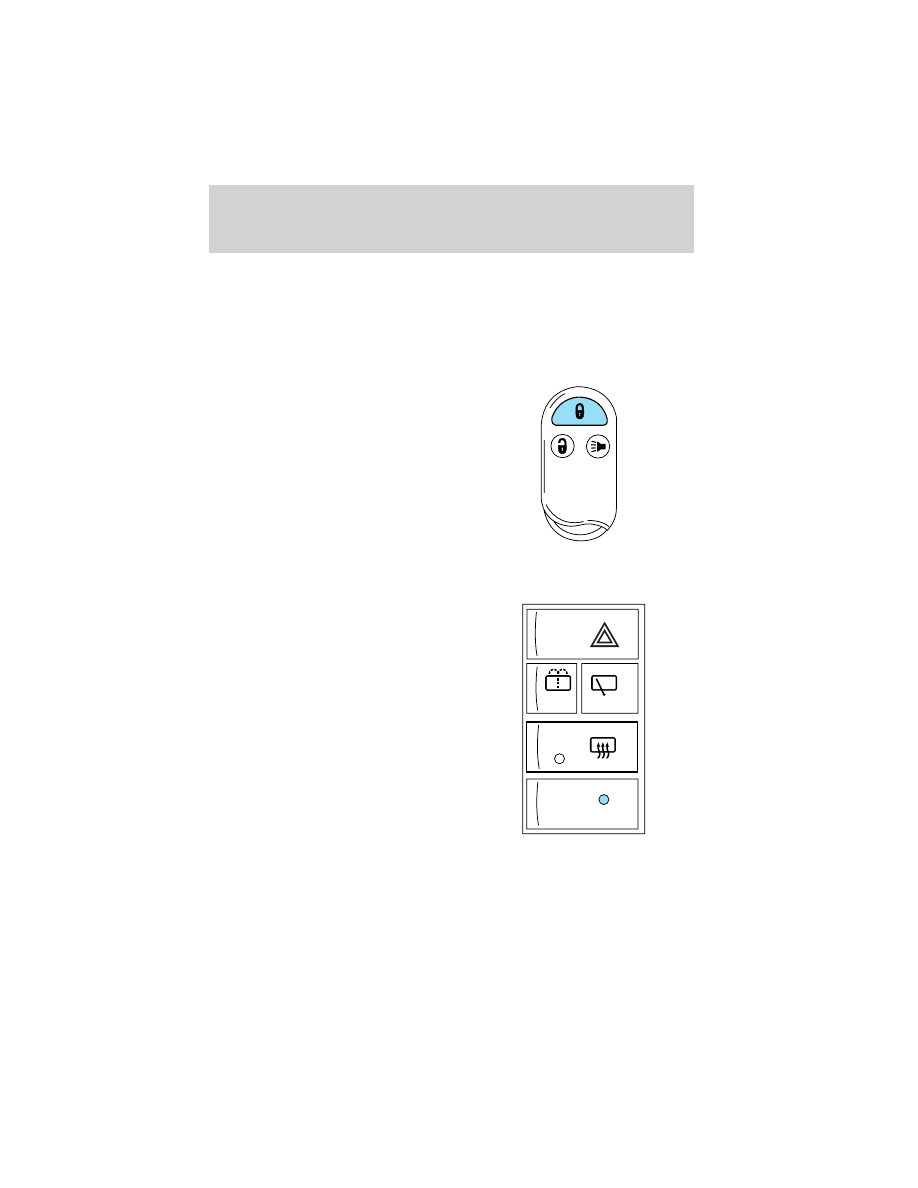
• Lock the doors with the remote

transmitter (doors opened or
closed). The horn will chirp (if all
doors are closed) to confirm that
the control was pressed. The
horn chirp feature can be turned
on/off by holding the LOCK and
UNLOCK controls on the
transmitter simultaneously for
two seconds. The hazard lights
will flash three times each time
the system is toggled between active and non-active modes.

• Open a door and press the power door lock control to lock the doors.
If a door is open, the system is
prearmed and is waiting for the door
to close. Once all the doors are
closed, the security indicator lamp
on the instrument panel will
illuminate continuously when the
system is prearmed.

The system will arm in 30 seconds
and the security indicator lamp will
begin to flash.

SECURITY

HAZARD

RR DEFOG

RR WIPER

RR WASH

Locks and Security

113

-------------------------------------------------------------------------------------------------------------------------------------------------------------

Disarming the anti-theft system

Disarming an untriggered anti-theft system

You can disarm the system by any of the following actions:
• Unlock the doors by using your

remote entry transmitter.

• Unlock the doors with a key. Turn

the key full travel (toward the
rear of the vehicle) to make sure
the alarm disarms.

• Turn ignition to ACC or ON.

Triggering the anti-theft system

The armed system will be triggered if:
• Any door or liftgate is opened without using the door key or the

remote entry transmitter. (if the vehicle is armed while in side the
vehicle, inserting the key into the ignition will also trigger system.)

Disarming a triggered anti-theft system

You can disarm the system by any of
the following actions:
• Press the unlock control using

your remote entry transmitter.

• Unlock the doors with a key.

Locks and Security

114

-------------------------------------------------------------------------------------------------------------------------------------------------------------

SEATING

Adjustable head restraints (if equipped)

Your vehicle’s seats may be equipped with head restraints which are
vertically adjustable. The purpose of these head restraints is to help limit
head motion in the event of a rear collision. To properly adjust your head
restraints, lift the head restraint so that it is located directly behind your
head or as close to that position as possible. Refer to the following to
raise and lower the head restraints.

The head restraints can be moved
up and down.

Push side control and push down on
head restraint to lower it.

Adjusting the front manual seat

Never adjust the driver’s seat or seatback when the vehicle is
moving.

Do not pile cargo higher than the seatbacks to reduce the risk of
injuring people in a collision or sudden stop.

Seating and Safety Restraints

115

-------------------------------------------------------------------------------------------------------------------------------------------------------------

Always drive and ride with your seatback upright and the lap
belt snug and low across the hips.

Reclining the seatback can cause an occupant to slide under the
seat’s safety belt, resulting in severe personal injuries in the

event of a collision.

Lift handle to move seat forward or
backward.

Pull lever up to adjust seatback.

Seating and Safety Restraints

116

-------------------------------------------------------------------------------------------------------------------------------------------------------------

Using the manual lumbar support (if equipped)

The lumbar control is located on the
inboard side of the driver’s seat.

Move the control up or down to
adjust lumbar support.

Adjusting the power seats (if equipped)

The power seat controls are located on the outboard side of the seat.

Never adjust the driver’s seat or seatback when the vehicle is
moving.

Always drive and ride with your seatback upright and the lap
belt snug and low across the hips.

Reclining the seatback can cause an occupant to slide under the
seat’s safety belt, resulting in severe personal injuries in the

event of a collision.

Move the control up or down to move the seat up and down.
• 6 way (driver seat)

Slide the control forward or backward to move the seat forward or
backward.

Seating and Safety Restraints

117

-------------------------------------------------------------------------------------------------------------------------------------------------------------

• 6 way (driver seat)

• 4 way (passenger seat)

Rotate the vertical control to adjust
the seatback.

Memory seats and mirrors (if equipped)

Some vehicles may only have the
memory feature available for the
seats.

The memory seat control is located
on the driver’s door panel. The
control operates with the ignition in
the OFF position or the ignition is in
the ON position and the vehicle is in
P (Park) or N (Neutral).

The two buttons provide three
memory positions, one individual position for each button and a third
position obtained by pressing buttons 1 and 2 simultaneously.

Position three (pressing 1 and 2 simultaneously) is always full rearward
and downward for exit mode, but is not programmable.

To record the memory positions:

1. Move the seat and mirror to the desired position using the manual
controls.

2

1

MEMORY

SEAT

Seating and Safety Restraints

118

-------------------------------------------------------------------------------------------------------------------------------------------------------------

2. Press button 1 or 2 and hold for at least two seconds. The indicator
light will stay on until the position is programmed. When the position has
been programmed, the indicator light will flash three times. Repeat
procedure for second position.

To record a remote entry transmitter:

1. Program a desired position to a memory switch as indicated above.

2. Press and hold the desired memory position button. Within ten
seconds, press the unlock button on the transmitter while the memory
button is pressed.

3. When the transmitter has been programmed, the indicator will flash
five times. The indicator light will remain illuminated until the memory
button is pressed again or ten seconds lapse.

To remove a programmed seat position:

1. Press and hold both memory seat buttons 1 and 2 and then press the
unlock button on the remote entry transmitter.

REAR SEATS

Removable floor mats

Whenever the floor mats are removed to adjust or move any of the rear
seats, always reinstall the mats before passengers ride in the vehicle. The
floor mats are specifically designed to keep objects out of the seat
tracks.
• 7 passenger vehicle
A. Cargo mat (if equipped)

B. Narrow mats

C. Sliding door mats, LH/RH

A

C

B

Seating and Safety Restraints

119

-------------------------------------------------------------------------------------------------------------------------------------------------------------

• 4 passenger vehicle (with third row seat in storage position)
A. Cargo mat (if equipped)

B. Narrow mats

C. Sliding door mats, LH/RH

• 5 passenger vehicle (second row seats removed)
A. Cargo mat (if equipped)

B. Narrow mats

C. Sliding door mats, LH/RH

• 5 passenger vehicle (second row seats removed and third row bench

seat moved forward to limousine seating position)

A. Cargo mat (if equipped)

A

B

C

B

B

A

B

C

Seating and Safety Restraints

120

-------------------------------------------------------------------------------------------------------------------------------------------------------------

B. Narrow mats

• Two passenger vehicle (second row seats removed and third row seat

stored in full forward position — if equipped with Rear Seat
Entertainment System, the third row seat cannot be put into this
position.)

A. Cargo mat (if equipped)

B. Narrow mats

A

B

A

B

Seating and Safety Restraints

121

-------------------------------------------------------------------------------------------------------------------------------------------------------------

Stowed cupholders

The vehicle is equipped with cupholders that pull out from the 2nd row
seat:
• Bench seat - below center of the seat cushion
• Bucket seat (driver’s side only) -

inboard side of seat base

Use only soft cups in the cupholder. Hard objects can injure you
in a collision.

Adjusting 2nd row bench

Pull control up to flip seatback to
forward flat position.

Seating and Safety Restraints

122

-------------------------------------------------------------------------------------------------------------------------------------------------------------

2nd row bucket seats (if equipped)
• Adjusting the left side bucket seat
Pull control up to recline the
seatback or fold the seatback flat.

• Adjusting the right side (E-Z Entry Tip Slide) bucket seat
The E-Z Entry Tip Slide seat allows for easier entry and exit to and from
the 3rd row seat. The E-Z Entry system will slide the seat and tip the
seatback forward (the seatback must be in the upright position).

To enter the 3rd row seat, pull up
on the seatback recline handle.

Seating and Safety Restraints

123

-------------------------------------------------------------------------------------------------------------------------------------------------------------

To exit the third row seat, pull up
on the 3rd row access control.

To return the seat to a seating position, move the seat rearward until the
seat track locks. Then readjust the seatback.

Lift handle to move the seat forward
or backward.

Seating and Safety Restraints

124

-------------------------------------------------------------------------------------------------------------------------------------------------------------

Pull control up to flip seatback to a
forward flat position.

Adjusting 3rd row bench

Pull control up to adjust seatback
position.

This control will also allow the
seatback to be put in the forward
flat position.

Seating and Safety Restraints

125

-------------------------------------------------------------------------------------------------------------------------------------------------------------

The entire seat can be moved to four seating positions and two storage
positions.

Before rearranging the seats, remove any floor mats that might be in the
way, see Removable floor mats in this chapter for instructions on
placement of floor mats.

For vehicles equipped with a second row bench seat: If the three
passenger bench seat is moved up to the second row position, the
outside passenger (opposite the driver) should fasten the
standard lap/shoulder belt. The secondary seat belt tongue is not
fastened to the outside bottom of the seat (as does the two
passenger bench seat). This is not required with the three
passenger bench seat since the seat is much wider.

The seat tracks may have grease on them that could stain your clothing
or vehicle fabric surfaces if care is not taken when handling the seats.

A. Three rearward seating positions

B. Limousine seating position (3rd row seat with 2nd row seat removed)

C. Two storage positions (If equipped with a Rear Seat Entertainment
System, the second row seat cannot be locked in the forward most
position.)

A

C

B

Seating and Safety Restraints

126

-------------------------------------------------------------------------------------------------------------------------------------------------------------

To move the seat to another seating or storage position:

1. Lift control (A) to release the
seat cushion and flip the cushion
up. The seat cushion must be
moved to the storage position before
the seat can be moved along the
track.

2. Pull control (B) to move the seat
forward or backward until it locks
into position. The seat cushion
cannot be lowered if the seat is in a
storage position.

A

B

Seating and Safety Restraints

127

-------------------------------------------------------------------------------------------------------------------------------------------------------------

After sliding the seat, check to ensure that both sides of the seat are
locked in position. This must be done before the vehicle is put into
motion in order to prevent unintended movement of the seat.

Every time you adjust any seat, check to be sure that it is
properly latched in the lock position of both seat tracks. If the

seat is not properly latched, it could come loose and increase the risk
of severe injury or death in an accident.

The 3rd row bench seat is not removable.

To remove the 2nd row seat(s):

Use the following instructions for
both bench and bucket seats.

The seat tracks may have grease on
them that could stain your clothing
or vehicle fabric surfaces if care is
not taken when handling the seats.

Fold the seatback flat before
removing each seat. Refer to the
Adjusting 2nd row seats portion of
this section.

1. (Bench seats only) Disengage the lap/shoulder belt from the seat belt
detach anchor by pushing the release control and lifting upward.

2. From behind the seat, pull up on
the release straps located on each
side of the seat, releasing the rear
floor latches.

3. Lift up the back of the seat to clear the floor latches and then pull the
seat rearward until the front hooks have come out of the floor anchors.

4. Remove the seat. Two people should lift and rotate the seat and
remove it from vehicle.

Seating and Safety Restraints

128

-------------------------------------------------------------------------------------------------------------------------------------------------------------


Content      ..     6      7      8      9     ..