Mercury Villager (2002 year). Manual - part 4


  Index      Mercury     Mercury Villager (2002 year) - manual in english


Search            copyright infringement  


Content      ..     2      3      4      5     ..


Mercury Villager (2002 year). Manual - part 4


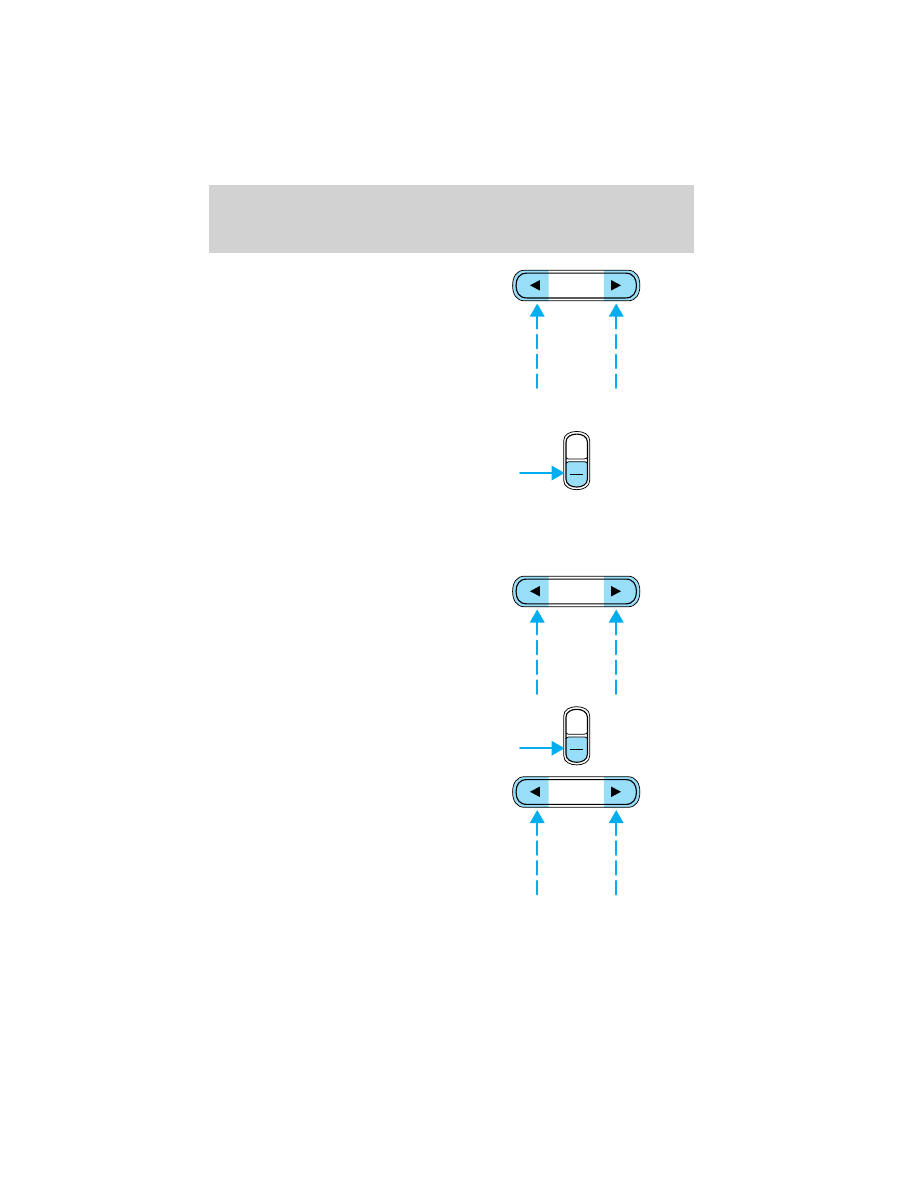
Press the RDS control. Use the SEL
control to select ON or OFF to
enable or disable the feature.

RDS traffic announcement

When set ON, this traffic feature will
interrupt tape or CD play to play a
traffic report broadcast from a FM
RDS station.

To activate the traffic feature:
• Press the RDS control until TRAFFIC is displayed.
To see if any stations in your area are capable of broadcasting an RDS
traffic alert, press SCAN or SEEK while TRAFFIC ON is displayed. The
radio will then SCAN or SEEK only
to traffic capable stations.

RDS select program type
• Press the RDS control until FIND

program type is displayed.

• Use the SEL control to select the

desired program type. With the
feature ON (FIND program type),
press the SEEK, AUTOSET, or
SCAN control to find only
stations of the selected type from
the following selections:

• Classic
• Country
• Info
• Jazz/R&B
• Religious

SEL

AUTO

RDS
CLK

SEL

AUTO

RDS
CLK

SEL

Entertainment Systems

49

-------------------------------------------------------------------------------------------------------------------------------------------------------------

• Rock
• Soft
• Top 40

RDS show

RDS sends information with the FM
broadcast, including: station name,
station type, and/or radio text. To
view this information:
• With the RDS menu enabled,

press the RDS control until SHOW is displayed.

• Use the SEL control to select

TYPE, NAME, TEXT or NONE.
When your radio is turned to a
RDS station, RDS station TYPE,
station NAME, or TEXT message
will be displayed along with the
frequency. Press SEL in order to
scroll through the text messages.

Rear audio controls (if equipped)

Your vehicle may be equipped with rear audio controls for the rear seat
passengers. Refer to Rear Seat Controls in this Chapter for more
information.

REAR SEAT CONTROLS (IF EQUIPPED)

The Rear Seat Controls (RSC) allow
the rear seat passengers to operate
the radio, tape, CD or CD changer
(if equipped).

Simultaneously press the memory
preset controls 3 and 5 to engage
the RSC.

will appear in the

radio display. Press 3 and 5 again to
disengage the RSC.

AUTO

RDS
CLK

SEL

VOLUME

MEDIA

MEM

SEEK

REW

1

FF

2

SIDE 1-2

3

4

COMP

5

SHUFFLE

6

Entertainment Systems

50

-------------------------------------------------------------------------------------------------------------------------------------------------------------

ADJUSTING THE VOLUME

Press the + control to increase
volume.

Press the — control to decrease
volume.

From the RSC, the speaker volume
can not be set higher than the
current volume radio setting. Once in headphone mode, the RSC volume
controls will only change the headphone volume level (muting the
speakers will not mute the headphones).

USING HEADPHONES

Plug a 3.6 mm headphone (not
included) into either one of the

two

jacks. Press

/

to

operate the headphones.

The speakers will cut out once the speaker on/off control is pressed.

Press

/

again to deactivate headphones.

PERSONAL AUDIO SYSTEM (IF EQUIPPED)

If your vehicle is equipped with the Premium AM/FM cassette or the
Super Sound AM/FM Stereo/Cassette/Single CD Player, your vehicle is
equipped with the Personal Audio System.

The Personal Audio System allows the rear seat passengers to listen to
one media source (radio, tape, CD, or CD changer if equipped) while the
front seat passengers listen to another. However, front and rear seat
passengers can not listen to two different radio stations simultaneously.

The rear speakers will cut out once
the speaker on/off control is
pressed. DUAL PLAY will appear in
the audio display, signaling that your
Personal Audio System has been
activated. A soft audible sound may be heard from the rear speakers.
The front speaker will remain playing for the front passengers. Press
the

/

control again to deactivate the headphones (Personal Audio

System). SINGLE PLAY will appear in the digital display of the audio
system, signaling that your Personal Audio System has been deactivated.

VOLUME

MEDIA

MEM

SEEK

VOLUME

MEDIA

MEM

SEEK

VOLUME

MEDIA

MEM

SEEK

Entertainment Systems

51

-------------------------------------------------------------------------------------------------------------------------------------------------------------

MEDIA SELECT

Push the MEDIA control to toggle
between AM, FM1, FM2, tape, or CD
changer (if equipped).

MEMORY PRESET CONTROL

Push the MEM control successively
to allow rear sear passengers to
scroll through the six memory
presets in AM, FM1, or FM2.

Push the MEM control in CD
changer mode (if equipped) to
advance to the next disc.

SEEK FUNCTION
• Press

to find the next

listenable station down the
frequency band.

• Press

to find the next

listenable station up the
frequency band.

In CD changer mode (if equipped), use the SEEK function to access the
next

or previous

selection.

In tape mode, use the SEEK function to access the next

or

previous

selection.

VOLUME

MEDIA

MEM

SEEK

VOLUME

MEDIA

MEM

SEEK

VOLUME

MEDIA

MEM

SEEK

Entertainment Systems

52

-------------------------------------------------------------------------------------------------------------------------------------------------------------

CD CHANGER (IF EQUIPPED)

The CD changer is located in the center console of your vehicle.

1. Slide the door to access the CD
changer magazine.

2. Press EJECT to eject the
magazine.

3. Turn the magazine (A) over.

4. Using the disc holder release
knob (C), pull the disc holder (B)
out of the magazine.

A

B

C

Entertainment Systems

53

-------------------------------------------------------------------------------------------------------------------------------------------------------------

If you pull too hard on the disc holder, the disc holder may come
completely out of the magazine. If this happens, reinsert the disc holder
back into the magazine while pressing on the lever (A).

5. Line up the CD with the groove
of the disc holder. Ensure that the
label on the CD faces downwards.

6. Press in on the disc holder until it
locks securely into the magazine. If
the disc holders are not fully locked
into the magazine, the unit will not
operate.

Ensure that the disc holder is
evenly inserted and at the same
level as the magazine (A). The unit
will not operate if the disc holder is
not inserted at the same level (B).

Radio power must be turned on to play the CDs in the changer. The
magazine may be stored in the glove box when not being used.

A

A

B

Entertainment Systems

54

-------------------------------------------------------------------------------------------------------------------------------------------------------------

The CD magazine may be inserted or ejected with the radio power on or
off.

ONLY use the magazine type supplied with the CD changer, other types
will damage the unit.

Keep the CD changer door closed. Coins and foreign objects will damage
the CD player and void your audio system warranty.

Do not insert any promotional (odd shaped or sized) discs, or
discs with removable labels into the CD player as jamming may
occur.

TROUBLESHOOTING THE CD CHANGER (IF EQUIPPED)

The laser beam used in the compact disc player is harmful to the
eyes. Do not attempt to disassemble the case.

If sound skips:
• You may be traveling on a rough road, playing badly scratched discs or

the disc may be dirty. Skipping will not scratch the discs or damage
the player.

If your changer does not work, it may be that:
• A disc is already loaded where you want to insert a disc.
• The disc is inserted with the label surface downward.
• The disc is dusty or defective.
• The player’s internal temperature is above 60°C (140°F). Allow the

player to cool down before operating.

• A disc with format and dimensions not within industry standards is

inserted.

CLEANING COMPACT DISCS

Inspect all discs for contamination before playing. If necessary, clean
discs only with an approved CD cleaner and wipe from the center out to
the edge. Do not use circular motion.

CD AND CD CHANGER CARE
• Handle discs by their edges only. Never touch the playing surface.
• Do not expose discs to direct sunlight or heat sources for extended

periods of time.

• Do not insert more than one disc into each slot of the CD changer

magazine.

Entertainment Systems

55

-------------------------------------------------------------------------------------------------------------------------------------------------------------

CD units are designed to play commercially pressed 12 cm (4.75
in) audio compact discs only. Due to technical incompatibility,
certain recordable and re-recordable compact discs may not
function correctly when used in Ford CD players. Irregular
shaped CDs, CDs with a scratch protection film attached, and CDs
with homemade paper (adhesive) labels should not be inserted
into the CD player. The label may peel and cause the CD to
become jammed. It is recommended that homemade CDs be
identified with permanent felt tip marker rather than adhesive
labels. Ball point pens may damage CDs. Please contact your
dealer for further information.

CLEANING CASSETTE PLAYER

Clean the tape player head with a cassette cleaning cartridge after 10 to
12 hours of play in order to maintain the best sound and operation.

CASSETTE AND CASSETTE PLAYER CARE
• Use only cassettes that are 90 minutes long or less.
• Do not expose tapes to direct sunlight, high humidity, extreme heat or

extreme cold. Allow tapes that may have been exposed to extreme
temperatures to reach a moderate temperature before playing.

• Tighten very loose tapes by inserting a finger or pencil into the hole

and turning the hub.

• Remove loose labels before inserting tapes.
• Do not leave tapes in the cassette player for a long time when not

being played.

RADIO FREQUENCY INFORMATION

The Federal Communications Commission (FCC) and the Canadian Radio
and Telecommunications Commission(CRTC) establish the frequencies
AM and FM stations may use for their broadcasts. Allowable frequencies
are:

AM 530, 540–1600, 1610 kHz

FM 87.7, 87.9–107.7, 107.9 MHz

Not all frequencies are used in a given area.

Entertainment Systems

56

-------------------------------------------------------------------------------------------------------------------------------------------------------------

RADIO RECEPTION FACTORS

Three factors can affect radio reception:
• Distance/strength. The further an FM signal travels, the weaker it is.

The listenable range of the average FM station is approximately 40 km
(24 miles). This range can be affected by “signal modulation.” Signal
modulation is a process radio stations use to increase their
strength/volume relative to other stations.

• Terrain. Hills, mountains and tall buildings between your vehicle’s

antenna and the radio station signal can cause FM reception problems.
Static can be caused on AM stations by power lines, electric fences,
traffic lights and thunderstorms. Moving away from an interfering
structure (out of its “shadow”) returns your reception to normal.

• Station overload. Weak signals are sometimes captured by stronger

signals when you pass a broadcast tower. A stronger signal may
temporarily overtake a weaker signal and play while the weak station
frequency is displayed.

The audio system automatically switches to single channel reception if it
will improve the reception of a station normally received in stereo.

AUDIO SYSTEM WARRANTIES AND SERVICE

Refer to the Warranty Guide for audio system warranty information.

If service is necessary, see your dealer or a qualified technician.

Entertainment Systems

57

-------------------------------------------------------------------------------------------------------------------------------------------------------------

MANUAL HEATING AND AIR CONDITIONING SYSTEM

Fan speed control

Controls the volume of air circulated
in the vehicle.

Temperature control knob

Controls the temperature of the
airflow inside the vehicle.

Mode Selector Control

Controls the direction of the airflow
to the inside of the vehicle.

A/C Control

A/C

This control is used to manually enable or disable the operation of the
air conditioning in all modes. In all modes, the air conditioning will only
function if the outside temperature is about 4°C (40°F) or higher.
When

A/C

is selected (ON) the indicator will be lit. When

A/C

is selected

again (OFF) the indicator will not be lit.

1

MAX

A/C

A/C

OFF

2

3

4

CLIMATE CONTROL SYSTEM

1

2

3

4

MAX

A/C

OFF

Climate Controls

58

-------------------------------------------------------------------------------------------------------------------------------------------------------------

The air condition operates in MAX A/C and when the A/C control is
depressed. However, the air conditioning will only function if the outside
temperature is about 4°C (40°F) or higher.

Since the air conditioner removes considerable moisture from the air
during operation, it is normal if clear water drips on the ground under
the air conditioner drain while the system is working and even after you
have stopped the vehicle.
• MAX A/C – Uses recirculated air to cool the vehicle. MAX A/C is

noisier than A/C modes but more economical and will cool the inside
of the vehicle faster. In this mode, the air conditioning will
automatically engage if the outside temperature is about 4°C (40°F) or
higher and the

A/C

indicator will automatically light. Airflow will be

from the instrument panel registers. This mode can also be used to
prevent undesirable odors from entering the vehicle.

(Panel) – Distributes outside air through the instrument panel

registers. Heating and air conditioning capabilities are provided in this
mode. Push

A/C

to cool the vehicle below the outside temperature.

• OFF – Outside air is shut out and the fan will not operate. For short

periods of time only, use this mode to reduce undesirable odors from
entering the vehicle.

(Panel and floor) – Distributes outside air through the

instrument panel registers and the front and rear floor ducts. Heating
and air conditioning capabilities are provided in this mode. Push

A/C

in order to cool the vehicle below the outside temperature. For added
customer comfort, when the temperature control knob is anywhere in
between the full hot and full cold positions, the air distributed through
the front and rear floor ducts will be slightly warmer than the air sent
to the instrument panel registers.

(Floor) – Distributes outside air through the front and rear floor

ducts. Heating and air conditioning capabilities are provided in this
mode. Push

A/C

in order to cool the vehicle below the outside

temperature.

Operating tips
• In humid weather conditions, place the climate control system in

Defrost mode before driving. This will reduce fogging on your
windshield. Once the windshield has been cleared, operate the climate
control system as desired.

• To reduce humidity buildup inside the vehicle in cold weather

conditions, don’t drive with the climate control system in the OFF or
MAX A/C position.

Climate Controls

59

-------------------------------------------------------------------------------------------------------------------------------------------------------------

• To reduce humidity buildup inside the vehicle in warm weather

conditions, don’t drive with the climate control system in the OFF
position.

• Under normal weather conditions, your vehicle’s climate control

system should be left in any position other than the MAX A/C or OFF
when the vehicle is parked. This allows the vehicle to “breathe”
through the outside air inlet duct.

• Under snowy or dirty weather conditions, your vehicle’s climate

control system should be left in the OFF position when the vehicle is
parked. This allows the climate control system to be free from
contamination of outside pollutants.

• If your vehicle has been parked with the windows closed during warm

weather conditions, the air conditioner will perform more efficiently in
cooling the vehicle if driven for two or three minutes with the
windows open. This will force most of the hot, stale air out of the
vehicle. Once the vehicle has been “aired out”, operate the climate
control system as desired.

• Do not put objects under the front seat which may interfere with the

airflow to the rear seats (if equipped).

• Remove any snow, ice or leaves from the air intake area (at the

bottom of the windshield and underneath the hood).

• Do not place objects over the defroster outlets. These objects can

block airflow and reduce visibility through your windshield. Avoid
placing small objects on top of the instrument panel. These objects
may fall down into the defroster outlets and block airflow, in addition
to, damaging the climate control system.

To aid in side window defogging/demisting in cold weather conditions:

1. Select the position that distributes air through the Panel and Floor.

2. Set the temperature control to full heat.

3. Set the fan speed to full fan.

4. Direct the outer panel vents towards the side windows.

5. To increase airflow to the outer panel vents, close the central panel
vents.

Do not place objects on top of the instrument panel as these
objects may become projectiles in a collision or sudden stop.

Climate Controls

60

-------------------------------------------------------------------------------------------------------------------------------------------------------------

REAR PASSENGER AIR CONDITIONING SYSTEM (IF EQUIPPED)

This system allows the rear seat occupants to adjust their air
conditioning comfort level.

The rear A/C fan speed control allows the rear passengers to control the
volume of air that is distributed from the rear registers.

The rear seat A/C system is controlled from the main climate control
system on the instrument panel. Ensure that the control is set to REAR
A/C to engage the rear passenger compartment air conditioning system.

0

1

2

3

4

REAR

A/C

OFF  REAR A/C   1     2     3     4

1

MAX

A/C

OFF

2

3

4

A/C

Climate Controls

61

-------------------------------------------------------------------------------------------------------------------------------------------------------------

Turning the Rear A/C on

1. Set the main climate control rear fan control to Rear A/C; set the
mode selector to any position (other than OFF), and depress the A/C
control.

2. Set the fan speed on the Rear A/C fan control to a number between
1–4 to regulate the airflow to the rear seat section.

The Rear A/C fan speed may be adjusted by the front seat passengers.
For example, if the Rear A/C fan speed is set at 4, the Rear A/C control
on the main climate control system may be adjusted to a lower setting
and will override that of the rear seat setting.

Turning the Rear A/C off:

There are two ways to turn the rear air conditioning system off. The first
way is to set the Rear Fan Control on the main climate control system to
OFF.

OFF  REAR A/C   1     2     3     4

1

MAX

A/C

OFF

2

3

4

A/C

1

0

2

3

4

REAR

A/C

OFF  REAR A/C   1     2     3     4

A/C

Climate Controls

62

-------------------------------------------------------------------------------------------------------------------------------------------------------------

You can also set the Rear Fan Control on the main climate control
system to Rear A/C and turn the Rear A/C Fan Control to 0.

For maximum cooling for the front seat passengers, set the rear fan
switch to the OFF (0) position.

Please note that the rear passenger air conditioning system is
designed for air conditioning purposes only, and does not heat the
rear compartment. Rear compartment heating is provided by the
underseat floor ducts. Refer to Rear Seat Heating.

ELECTRONIC AUTOMATIC TEMPERATURE CONTROL (EATC)
SYSTEM (IF EQUIPPED)

The EATC system will maintain a selected temperature and automatically
control airflow. You can override automatic operation with any of the
override controls or the fan speed control.

0

1

2

3

4

REAR

A/C

TEMP

AUTOMATIC

OFF  REAR   1      2      3      4

OFF

A/C

A/C

MAX

HI

LO

Climate Controls

63

-------------------------------------------------------------------------------------------------------------------------------------------------------------

Turning the EATC system on

Press AUTOMATIC, any of the override controls or the fan speed control.
The EATC system will only operate when the vehicle is running.

Turning the EATC system off

Press OFF.

Automatic operation

Press AUTOMATIC and select the desired temperature. The selected
temperature and the word AUTO will appear in the display window. The
EATC system will either heat or cool to achieve the selected
temperature. The system will automatically determine fan speed, airflow
location and if outside air or recirculated air is required. Fan speed
remains automatic unless the fan speed thumbwheel is turned or the
steering wheel fan speed control (if equipped) is pressed.

When in AUTOMATIC and weather conditions require heat, air will be
sent to the floor. However, if the engine is not warm enough to provide
heat, the fan will be at a low speed and the air will be directed to the
windshield. In approximately 3

1

2

minutes or less, the fan speed will start

to increase and the airflow location will change to the floor area.

TEMP

AUTOMATIC

OFF  REAR   1      2      3      4

OFF

A/C

A/C

MAX

HI

LO

TEMP

AUTOMATIC

OFF  REAR   1 

OFF

A/C

Climate Controls

64

-------------------------------------------------------------------------------------------------------------------------------------------------------------


Content      ..     2      3      4      5     ..