Ford Galaxy / Ford S-MAX. Manual - part 831
 

  Index      Ford     Ford Galaxy / Ford S-MAX - service repair manual 2006 year


Search            


Content   ..  829  830  831  832   ..


Ford Galaxy / Ford S-MAX. Manual - part 831


AG55: CHECK FOR OPEN CIRCUIT BETWEEN THE PCM AND THE EJB

Disconnect Connector C1BB03-A from the EJB. 

Measure the resistance between the PCM, 
connector C1E108-L, pin J1, circuit CBB08E 

(GY/YE), wiring harness side and the EJB, 
connector C1BB03-A, pin 16, circuit CBB08A 
(GY/YE), wiring harness side. 

Is a resistance of less than 2 Ohms registered? 
Yes 

CHECK and if necessary RENEW the EJB. CHECK 
the operation of the system. 

No 

LOCATE and RECTIFY the break in the circuit 
between soldered connection SP482 and the EJB 
with the aid of the Wiring Diagrams. CHECK the 
operation of the system. 

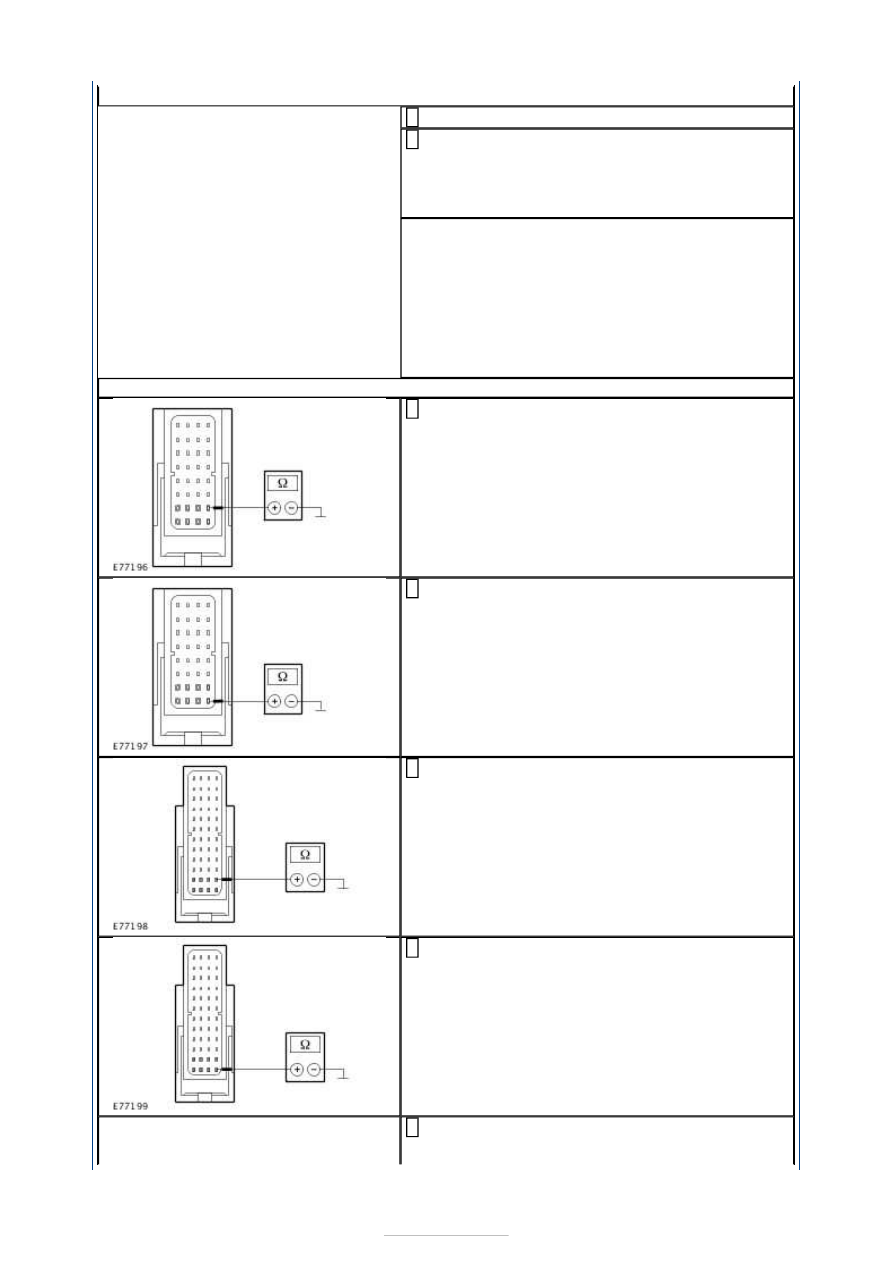
AG56: CHECK THE GROUND CONNECTION OF THE PCM

Measure the resistance between the PCM, 
connector C1E108-K, pin G4, circuit GD120AD 

(BK/GN), wiring harness side and ground. 

Measure the resistance between the PCM, 
connector C1E108-K, pin H4, circuit GD120Y 

(BK/GN), wiring harness side and ground. 

Measure the resistance between the PCM, 
connector C1E108-J, pin L4, circuit GD120W 

(BK/GN), wiring harness side and ground. 

Measure the resistance between the PCM, 
connector C1E108-J, pin M4, circuit GD120AE 

(BK/GN), wiring harness side and ground. 

Measure the resistance between the PCM, 
connector C1E108-L, pin J2, circuit GD120AC 


(BK/GN), wiring harness side and ground. 

Measure the resistance between the PCM, 
connector C1E108-L, pin K4, circuit GD120AA 

(BK/GN), wiring harness side and ground. 

Is a resistance of less than 2 Ohms measured in all of 
the cases? 
Yes 

GO to AG57

.  

No 

- If a resistance of more than 2 Ohms is 
measured in one of the measurements:LOCATE 
and REPAIR the break in the relevant circuit 
between the PCM and soldered connection SP190 
using the Wiring Diagrams. CHECK the operation 
of the system. 
- If a resistance of more than 2 Ohms is 
measured in all of the measurements:LOCATE 
and RECTIFY the open circuit in the 
corresponding circuit between soldered 
connection SP190 and ground connection 
G1D108D with the aid of the Wiring Diagrams. 
CHECK the operation of the system. 

AG57: CHECK FOR OPEN CIRCUIT BETWEEN THE PCM AND THE DATA LINK 
CONNECTOR (DLC)

CAUTION: The following measurement must only be performed using the Ford 

approved diagnostic tool digital multimeter. Failure to observe this instruction can lead to 
damage. 

Measure the resistance between the PCM, 
connector C1E108-K, pin A4, circuit VDB04AE 

(WH/BU), wiring harness side and the DLC, 
connector C3DB04, pin 6, circuit VDB04L 
(WH/BU), wiring harness side. 

Is a resistance of less than 2 Ohms registered? 
Yes 

GO to AG58

.  


No 

LOCATE and REPAIR the open circuit between the 
PCM and the DLC using the Wiring Diagrams. 
CHECK the operation of the system. 

AG58: CHECK THE CIRCUIT BETWEEN THE PCM AND THE DLC FOR OPEN CIRCUIT

CAUTION: The following measurement must only be performed using the Ford 

approved diagnostic tool digital multimeter. Failure to observe this instruction can lead to 
damage. 

Measure the resistance between the PCM, 
connector C1E108-K, pin A3, circuit VDB05AH 

(WH), wiring harness side and the DLC, 
connector C3DB04, pin 14, circuit VDB05Z (WH), 
wiring harness side. 

Is a resistance of less than 2 Ohms registered? 
Yes 

CHECK the PCM and RENEW if necessary. CHECK 
the operation of the system. 

No 

LOCATE and REPAIR the open in the respective 
circuit between the PCM and DLC by using the 
wiring diagrams. CHECK the operation of the 
system. 

AG59: CHECK THE VOLTAGE AT THE PCM

Disconnect Connector C1E104-H from the PCM. 

Measure the voltage between the PCM, connector 
C1E104-H, pin L1, circuit SBB10A (YE/RD), 

wiring harness side and ground. 

Does the meter display battery voltage? 
Yes 

GO to AG61

.  

No 

GO to AG60

.  

AG60: CHECK FOR OPEN CIRCUIT BETWEEN THE PCM AND THE EJB

Disconnect Connector C1BB03-A from the EJB. 

Measure the resistance between the PCM, 
connector C1E104-H, pin L1, circuit SBB10A 

(YE/RD), wiring harness side and the EJB, 
connector C1BB03-A, pin 26, circuit SBB10B 
(YE/RD), wiring harness side. 

Is a resistance of less than 2 Ohms registered? 
Yes 

CHECK and if necessary RENEW the EJB. CHECK 
the operation of the system. 

No 

LOCATE and REPAIR the break in the circuit 
between the PCM and the EJB with the aid of the 


Wiring Diagrams. CHECK the operation of the 
system. 

AG61: CHECK THE VOLTAGE AT THE PCM

Disconnect Connector C1E104-G from the PCM. 

Ignition switch in position II. 

Measure the voltage between the PCM, connector 
C1E108-G, pin E1, circuit CBB42A (GN), wiring 

harness side and ground. 

Does the meter display battery voltage? 
Yes 

GO to AG63

.  

No 

GO to AG62

.  

AG62: CHECK FOR OPEN CIRCUIT BETWEEN THE PCM AND THE EJB

Ignition switch in position 0. 

Disconnect Connector C1BB01-A from the EJB. 

Measure the resistance between the PCM, 
connector C1E104-G, pin E1, circuit CBB42A 

(GN), wiring harness side and the EJB, connector 
C1BB01-A, pin 99, circuit CBB42B (GN), wiring 
harness side. 

Is a resistance of less than 2 Ohms registered? 
Yes 

CHECK and if necessary RENEW the EJB. CHECK 
the operation of the system. 

No 

LOCATE and REPAIR the break in the circuit 
between the PCM and the EJB with the aid of the 
Wiring Diagrams. CHECK the operation of the 
system. 

AG63: CHECK THE VOLTAGE AT THE PCM

Ignition switch in position 0. 

Disconnect Connector C1E104-J from the PCM. 

Use a fused test lead (1 A) at the PCM to bridge 
connector C1E104-G, pin B1, circuit CE302A 

(YE/BU), wiring harness side and ground. 

Measure the voltage between the PCM, connector 
C1E104-J, pin G1, circuit CBB08A (GY/YE), 

wiring harness side and ground. 


Content   ..  829  830  831  832   ..