Ford Galaxy / Ford S-MAX. Manual - part 249


  Index      Ford     Ford Galaxy / Ford S-MAX - service repair manual 2006 year


Search            


Content   ..  247  248  249  250   ..


Ford Galaxy / Ford S-MAX. Manual - part 249


35.  

36.  

37.  

38.  
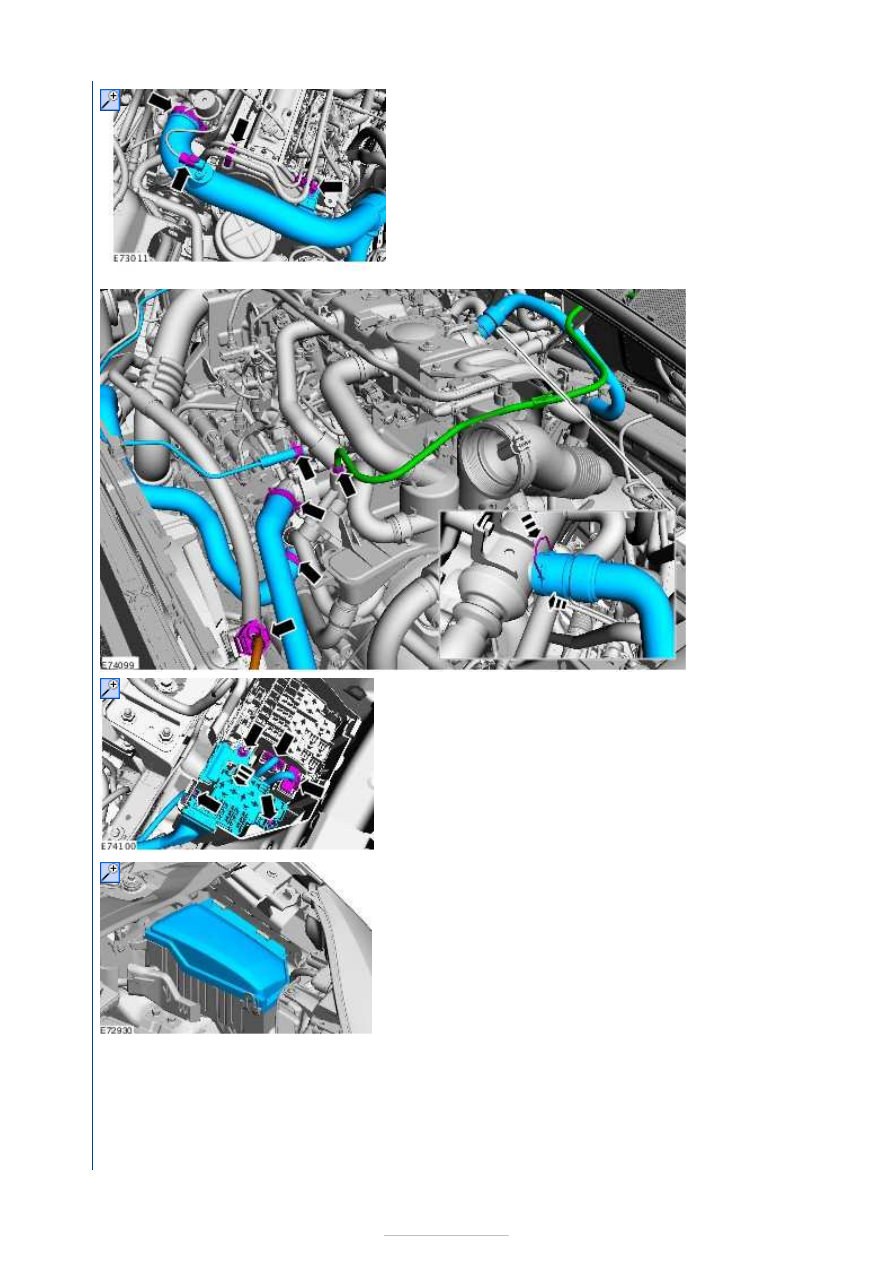


39. Torque: 12 Nm 

40. Install the battery. 

Refer to: 

Battery

 (414-01 Battery, Mounting and Cables, Removal and Installation).

41. Bleed the cooling system. 

Refer to: 

Cooling System Draining, Filling and Bleeding

Lynx/1.8L Duratorq-TDCi (92kW/125PS) - Lynx, General Procedures).

42. Install the air cleaner. 

Refer to: 

Air Cleaner

 (303-12D Intake Air Distribution and Filtering 

Duratorq-TDCi (92kW/125PS) - Lynx, Removal and Installation).

43.  


Engine - 1.8L Duratorq-TDCi 
(74kW/100PS) - Lynx/1.8L Duratorq-
TDCi (92kW/125PS) - Lynx - Engine 
Accessories

S-MAX/Galaxy 2006.5 (02/2006-)


Print


Installation 

Special Tool(s) 

Materials 

205-072 
Universal Flange Holding Wrench 

303-122 
Lifting Bracket, Engine 

303-193 
Timing Peg, Crankshaft TDC 

303-376B 
Alignment Plate, Camshaft 

303-393 
Locking Tool, Flywheel 

303-435 
Mounting Stand 

303-435-06 
Mounting Bracket for 303-435 

303-710 
Timing Tool, Crankshaft 

Name

Specification

Flange Sealant - Anaerobic LP WSK-M2G348-A7 / 5U7J-M2G348-BA

1.

CAUTION: Make sure that new bolts are 

installed. 

Special Tool(s): 

303-393


Torque: 


35 Nm 
45° 

Stage 1: 
Stage 2: 


2. Install the clutch disc and pressure plate. 

Refer to: 

Clutch Disc and Pressure Plate

 (308-

01B Clutch - Vehicles With: 6-Speed Manual 
Transaxle - MMT6, Removal and Installation). 

3.

NOTE: Only rotate the crankshaft in the 
normal direction of rotation. 

1. Remove the cylinder block blanking plug 

and install the special tool. 

Special Tool(s): 

303-193


2. Rotate the crankshaft slowly until the 

crankshaft stops. 

3. Make sure that the crankshaft does 

not rotate during installation of the 
special tool.Make sure that the 
crankshaft is at the TDC position 
before locking the special tool.
Using 
the special tool, lock the crankshaft. 

Special Tool(s): 

303-393


4. Using the special tool, install the crankshaft 

position (CKP) sensor retaining bracket. 

Special Tool(s): 

303-710


Torque: 

10 Nm 

5.

NOTE: Install a new crankshaft position 
(CKP) sensor. 
NOTE: The CKP sensor must make contact 
with the flywheel. 

Torque: 

6 Nm 

6.   

1. 

Torque: 

Snug Torque 10 Nm 
Delay 2 Seconds 18 Nm 
Untighten 40° 
Final Torque 26 Nm 

2. 

Torque: 

33 Nm 

7. Install a new gasket 

Torque: 

23 Nm 


Content   ..  247  248  249  250   ..