Ford Galaxy / Ford S-MAX. Manual - part 1045


  Index      Ford     Ford Galaxy / Ford S-MAX - service repair manual 2006 year


Search            


Content   ..  1043  1044  1045  1046   ..


Ford Galaxy / Ford S-MAX. Manual - part 1045
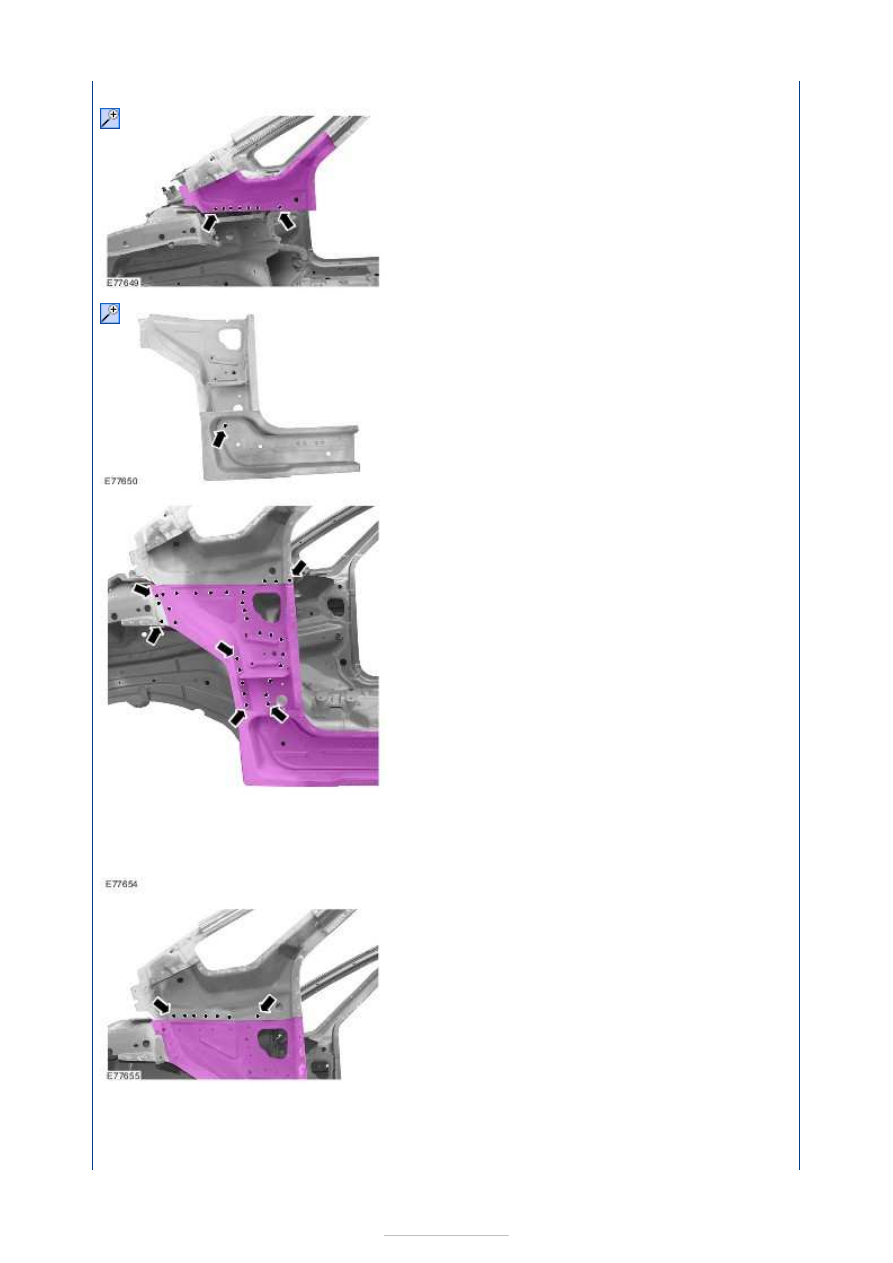


followed. 

1. A-pillar inner panel 

Drill out the holes for puddle welding (10 
mm diameter). 

2. A-pillar inner panel 

Drill a hole for puddle welding (10 mm 
diameter). 

3. A-pillar inner panel 

Resistance spot weld. 

4. A-pillar inner panel 

Puddle weld. 

5. A-pillar inner panel 

NOTE: Once the A-pillar reinforcement 
and the A-pillar outer panel have been 


installed this area is no longer 
accessible.  

Applu PU sealant to the outside and 
inside. 

6. A-pillar inner panel 

1. Puddle weld. 
2. Continuous MIG weld seam. 

7. A-pillar inner panel 

Resistance spot weld. 

8. A-pillar inner panel 

1. Surface grind the MIG weld seams in the 

area of the welded flange. 

NOTE: Once the A-pillar reinforcement 
and the A-pillar outer panel have been 
installed this area is no longer 
accessible.  

2. Apply self-adhesive sealing strip. 

9.

NOTE: Only tack-weld the rocker panel 
reinforcement at the top and bottom. The 
final welded joint is made when the rocker 
panel is installed. 

Rocker panel reinforcement 

1. Continuous MIG weld seam. 
2. Resistance spot welding (tack-weld). 

10.

WARNING: The A-pillar reinforcement is 

covered with a hot-dip aluminized coating on 
its entire surface. This coating needs to be 
fully ground off on the MIG welding flanges 


on the front using a fibre grinding disc. Any 
contamination due to parts of the coating in 
the welding bath will weaken the welded 
joint. 

A-pillar reinforcement 

Clean the contact area. 

11. A-pillar reinforcement 

Drill holes for puddle welding (10 mm 
diameter). 

12.

NOTE: Working from the inside, insert the 
NVH element at the A-pillar reinforcement 
into the mounting tube for the instrument 
panel bracket. 

A-pillar, inner panel (inside view) 

Apply PU glass adhesive to the NVH 
element. 

13.

NOTE: The PU window adhesive acts as 
noise insulation in the area of position 1. 

A-pillar reinforcement 

1. Apply PU window adhesive to the inside of 

the A-pillar. 

2. Apply PU glass adhesive to the NVH 

element. 

3. Puddle weld. 


14.

NOTE: Only tack-weld A-pillar 
reinforcement. The final welded joint is 
made when the outer A-pillar is installed. 

A-pillar reinforcement 

Resistance spot welding (tack-weld). 

15.

NOTE: The MIG spot welds need to be 
surface ground so that the outer A-pillar fits 
correctly. 

A-pillar reinforcement 

Surface grind the MIG spot welds. 


Content   ..  1043  1044  1045  1046   ..