Ford Galaxy / Ford S-MAX. Manual - part 1010


  Index      Ford     Ford Galaxy / Ford S-MAX - service repair manual 2006 year


Search            


Content   ..  1008  1009  1010  1011   ..


Ford Galaxy / Ford S-MAX. Manual - part 1010
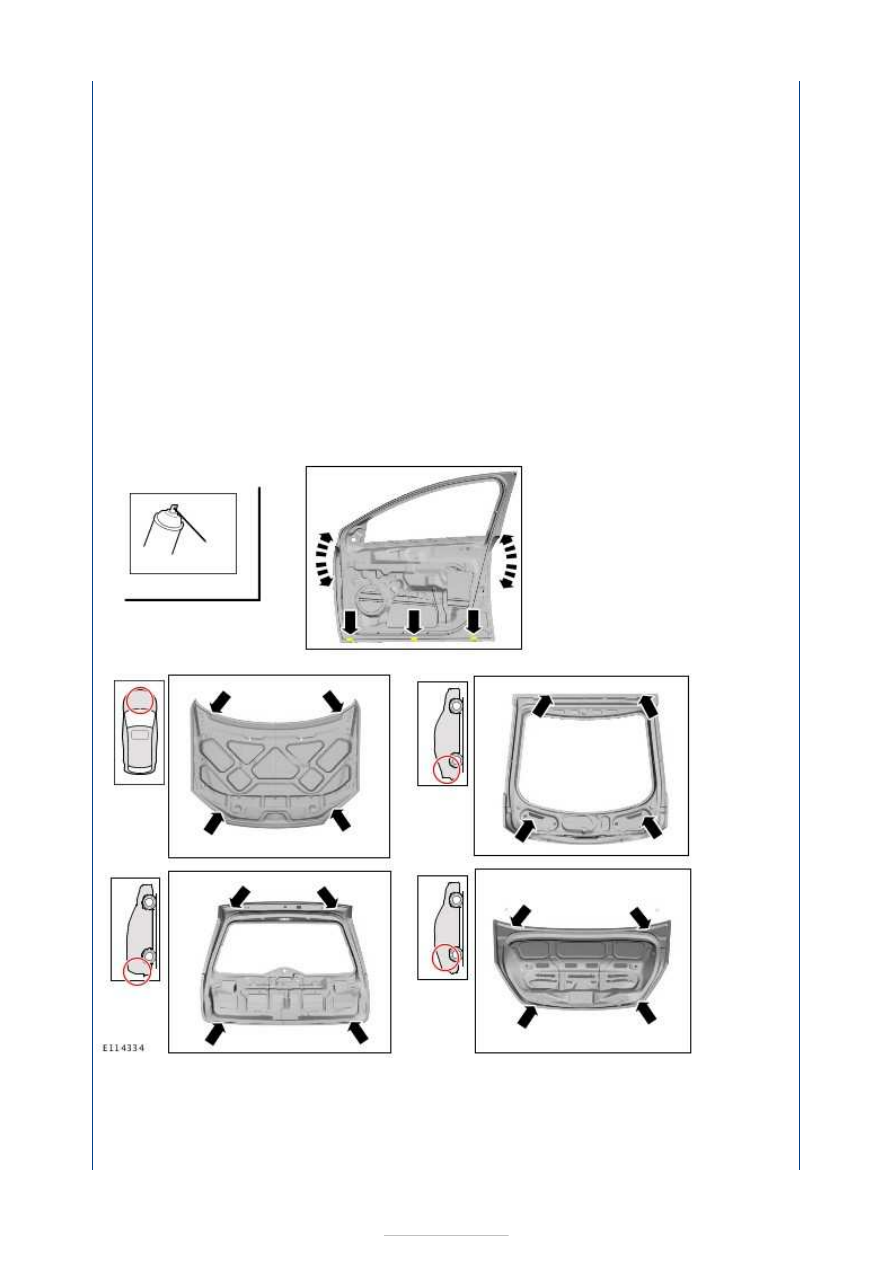


A hole may be drilled in a suitable place for areas which are not accessible for the 
application of cavity wax. The diameter depends on the size of plugs available. When this is 
done it is vital to make sure that no drilling swarf remains in the cavity (rust will form if any 
remains). The edge of the hole must be treated with cavity wax. Finally close with a plug 
and seal with underseal. 

Only on components with clinched flange edges: 

After painting, the inner clinched flange edge must be sealed as far as is possible with 
cavity wax. For this, the repaired component should be positioned upright and corrosion 
protection wax sprayed into the water drainage holes and/or the thread holes for the hinges 
in both directions (50 ml corresponds to about 20 seconds spraying time). 

For doors, tilt and turn the component to spread the corrosion protection wax over the 
whole edge of the flange. 

Wax application 

Corrosion protection for the floor pan (example) 


Item

Description

1

Injection points for cavity wax protection

2

PVC stone chip protection at the wheel arches

3

PVC underbody protection

4

PVC stone chip protection

5

PU primer


Body Repairs - General Information - 
Corrosion Damage/Corrosion Repair

S-MAX/Galaxy 2006.5 (02/2006-)


Print


Description and Operation 

Modern vehicle bodies are protected from corrosion by elaborate measures. Multilayer 
coatings on the panel surface prevent direct contact between the metal and oxygen, and so 
protect it from corrosion. 

In the long-term however, corrosion on a vehicle cannot be completely prevented. 

NOTE: Basic and in-depth training is offered on the following topics. You will find an 
overview of the complete range of training in the Training Brochure issued by the Ford 
Service Organization. 

What is corrosion? 

Corrosion is destruction of a subsurface caused by chemical or electrochemical effects 
which operate from the outer surface. 

If the protective layers become damaged, electrochemical conversion processes are 
initiated, which allow the metal to oxidize. This leads to the formation of corrosion. 

The following factors lead to corrosion: 

Mechanical damage such as stone chips and scratches which penetrate through to the 
steel panel.  
Damp interiors.  
Unfavorable weather or environmental conditions, as may occur in areas with high 
humidity, high salt content in the air or serious air pollution due to aggressive gases and 
dusts.  
Insufficient corrosion protection after repairs.  
Lack of care by the vehicle owner of the painted and corrosion proofed surfaces or areas 
on the vehicle. 

In order to maintain long-term corrosion protection, the vehicle must be checked at regular 
intervals. 

In doing so, the follow areas must be inspected and any damage rectified: 

Damage to the paint surface cause by scratches or stone impact must be suitably 
rectified according to the specifications.  
Damage to the PVC underbody protection or the PU stone chip protection must be 
refinished.  
Damage to the PVC underbody protection or the PU stone chip protection must be 
refinished.  
Incomplete or damaged sealing at clinched flanges must be renewed.  
Check the cavity protection and renew it if incomplete.  
Poorly installed or damaged covers and stone chip protection fixtures must always be 
renewed.  
Check seals and seal carriers for wear and correct mounting. Any damaged seals must be 
renewed.  
All rubber grommets and blanking plugs must be present and correctly installed.  
A damp or wet floor inside the vehicle indicates that there are leaks in the bodywork. The 
interior must be dried out and the leaks must be completely rectified. 

The corrosion formation can vary in extent. 

With rust film or edge rust formation, the surface of the paint has small traces of corrosion 
present. The traces of corrosion can possibly be removed in such cases by polishing the 
paint surfaces. If this is not possible however, the traces of corrosion must be rectified by 
using a touch-up technique. 

If the corrosion is just starting, with up to 1 mm rusting below (in the form of a dot or a 
line) the damage is rectified as follows: 

Clean the defective location.  
Mechanically remove the rusting which is starting below the surface.  
If the area is small, apply primer and allow it to dry, then use the paint pencil to touch up 
the area - if not, respray the damaged area.  

If rust is already under the paint finish to the steel panel, then the whole paint finish in the 
affected area must be sanded away.  

Furthermore, the existing traces of corrosion in the body panel must be carefully and 
completely removed. 

Finally a new paint finish must be applied in this area. In the case of rusting through, the 
affected body panel is already completely destroyed. Such damage requires complete or at 
least partial replacement. 

NOTE: : In the general section there are several chapters which present the techniques 
necessary for a professional corrosion repair. 

The outcome of this is the following repair sequence:  

Remove the rusted-through part.  
Remove the remaining traces of corrosion.  
Offer up the new part.  
Prepare the joint areas.  
Weld the new part into place.  
Produce the corrosion protection. 

For a professional repair it is essential to reproduce the corrosion protection during and 
after the repair. 


Content   ..  1008  1009  1010  1011   ..