Ford Falcon. Manual - part 480
501-20b-135
Occupant Restraints — Passive
501-20b-135
GENERAL PROCEDURES (Continued)
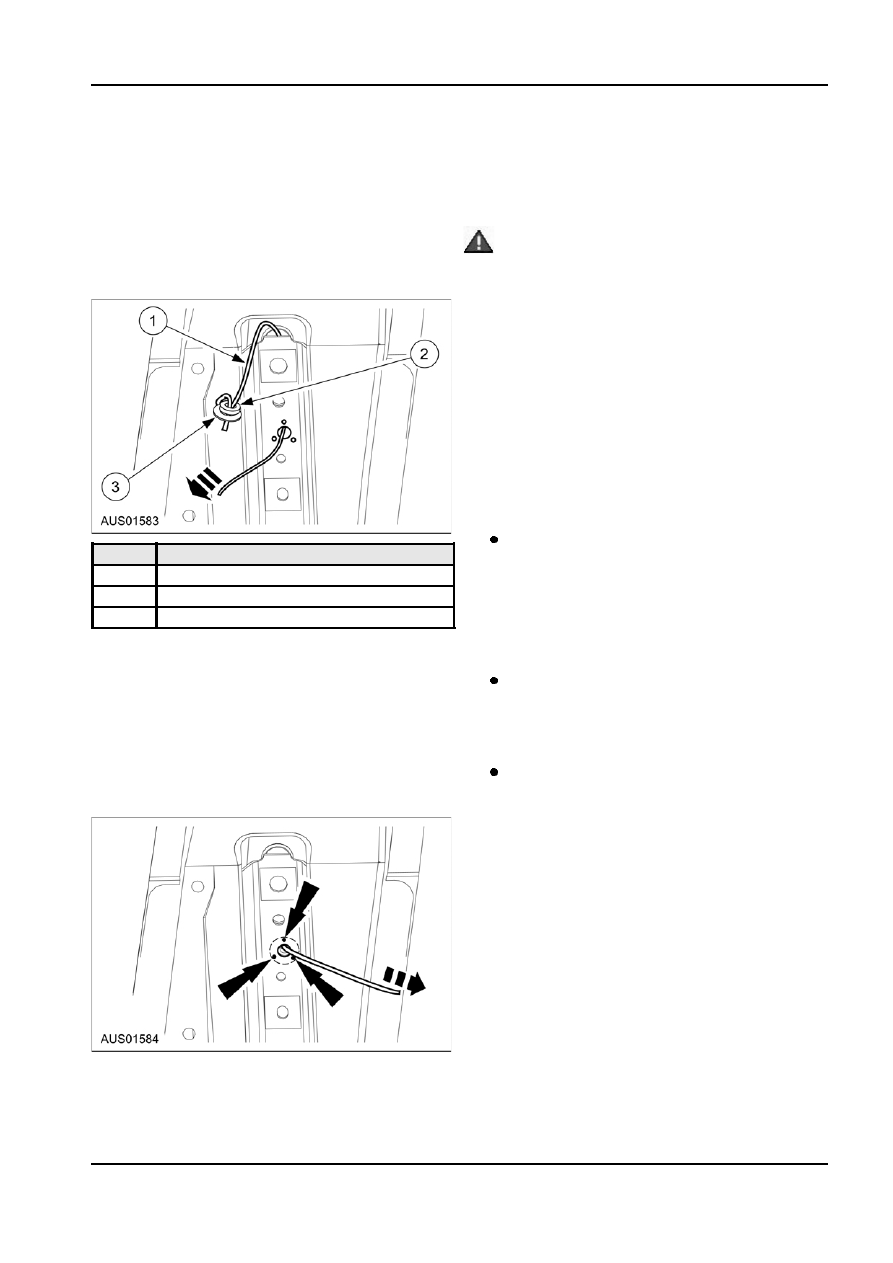
5. Set up for the positioning of the weld nut.
10. Tighten the attaching screws to specification. For
additional information, refer to Specifications in
1. Route a sufficient length of wire through the
this section.
weld nut clearance hole and back out an
adjacent access hole.
Weld Nut Repair — Stripped Weld Nut
2. Position a weld nut, shoulder end up, onto the
wire.
WARNING: To avoid accidental deployment
3. Position a flat washer onto the wire and
and possible personal injury, the backup power
secure it so it cannot be pulled off.
supply must be depleted before repairing or
replacing any front or side airbag supplemental
restraint system (SRS) components and before
servicing, replacing, adjusting or striking
components near the front or side airbag sensors,
such as doors, instrument panel, console, door
latches, strikers, seats and hood latches.
The side impact sensors (if equipped) are located
at or near the base of the B-pillars.
To deplete the backup power supply energy,
disconnect the battery ground cable and wait at
least one minute. Be sure to disconnect auxiliary
batteries and power supplies (if equipped).
1. Inspect the weld nut and surrounding area for
repair.
If there is not enough clearance for a larger
bolt stud to go through or a larger bolt head to
Item
Description
turn, then a Heli-Coil® will have to be made.
1
Cord
Follow the instructions with the Heli-Coil®
2
Weld nut
repair kit.
3
Flat Washer
2. If a 6 mm weld nut is stripped, drill out the hole
using a letter “H” or 6.5mm (0.26in) drill bit. Then
6. Plug weld the weld nut into position.
tap, using an 8mm by 1.25 bit.
1. Pull the welding wire back through the
Do not oversize a 6 mm weld nut by more
clearance hole, allowing the weld nut and flat
than 8mm.
washer to follow the welding wire through and
stop against the sheet metal.
3. If an 8 mm weld nut is stripped, drill the hole
using a letter “R” or in 9.75mm (0.3990) drill bit.
2. Make sure the weld nut shoulder is aligned
Then tap, using a 10mm by 1.50 bit.
through the clearance hole in the sheet metal.
Do not oversize an 8 mm weld nut by more
3. With the weld nut firmly held in position, plug
than 10 mm.
weld the weld nut at the three holes drilled
previously.
4. Obtain the appropriate oversized screw.
5. Install the attaching screw(s) to the component.
6. Tighten the attaching screws to specification. For
additional information, refer to Specifications in
this section.
7. Metal finish as required.
8. Verify the nut is securely in place.
9. Install the component with the previously obtained
screw.
G12357 en