Ford Falcon. Manual - part 379
417-01-55 Exterior
Lighting 417-01-55
REMOVAL AND INSTALLATION (Continued)
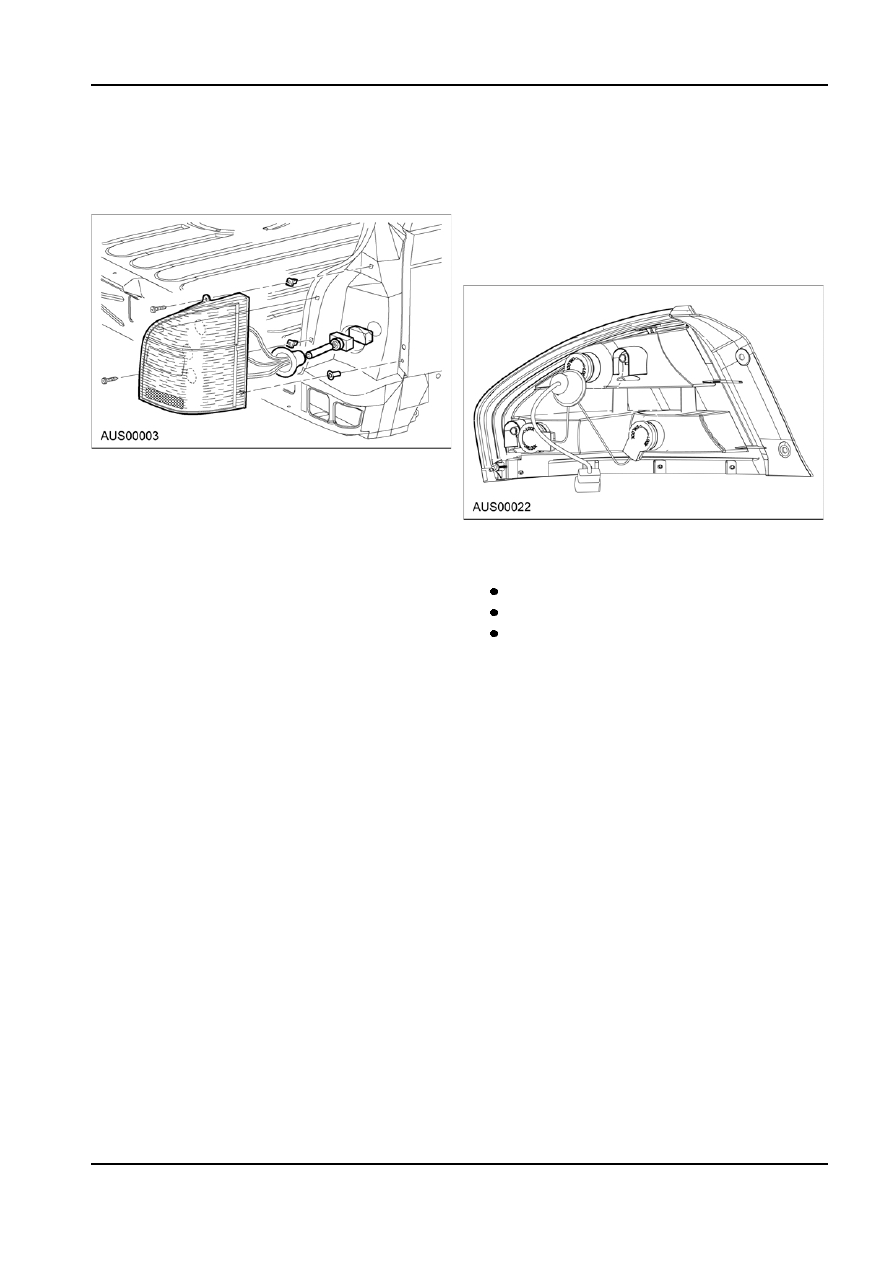
Tail Lamp Assembly — Wagon
Tail Lamp, Reverse Lamp and Rear
Indicator Bulb — Sedan And Wagon
Removal
1. Open the liftgate.
Removal
1. Follow steps 1, 4, 5 of Tail Lamp Assembly
Removal and Installation procedure, so that lamp
assembly is free from vehicle. It is not necessary
to disconnect the electrical wiring from vehicle.
2. Remove the rear quarter interior trim.
3. Disconnect wiring connector to tail lamp and
squeeze rubber grommet through hole.
4. Remove the two retained screws, one on the
2. Remove bulb holder from socket by rotating
inboard side and another one on the top of the tail
holder anti-clockwise approximately 1/8th turn
lamp assembly.
until free from socket.
5. Insert a thin flat head screwdriver or similar object
Stop and tail lamp - (clear twin filaments bulb)
having a flat blade to the forward side of the
outboard stud and gently prise it off the plastic
Indicator lamp - (amber bulb)
retainer, being careful to protect any paint from
Reverse lamp - (clear bulb)
damage.
3. Remove bulb from holder by rotating
6. Remove the tail lamp assembly.
anti-clockwise approximately 1/8th turn.
Installation
Installation
1. Pull the wiring assembly in and ensure the rubber 1. Install bulb in holder by gently pushing bulb into
grommet is correctly seated to body panel.
holder and rotating bulb clockwise.
2. Insert the locating peg to the upper inboard
2. Insert bulb and holder assembly into socket. Note:
square hole on the body panel and push the
the holder cannot be inserted into the incorrect
outboard stud into the plastic retainer.
socket. Rotate holder clockwise until firm in
3. Install the two retained screws.
socket.
4. Connect the wiring connector and refit the rear
3. Follow the procedure given in this section for
quarter interior trim.
installation of the tail lamp assembly.
5. Close
the
liftgate.
Tail Lamp Assembly — Style Side Box
Removal
1. Open
tailgate.
2. Remove two bolts on taillight edge.
G86747 en