Ford Falcon. Manual - part 194
303-06-13 Starting
System 303-06-13
GENERAL PROCEDURES (Continued)
2. It is recommended that the commutator be turned 2. Examine drive end housing mounting surfaces
in two stages, that is pre turning and finish
and threaded holes for damage.
turning. In the pre turning stage the commutator is Drive shaft and planetary assembly inspection
undercut to a maximum depth of 0.8mm.
1. Carefully examine the assembly for signs of wear
NOTE: It is most important to use dust extraction
or cracking.
when undercutting commutators.
2. If worn replace the whole planetary drive. The
3. After undercutting the commutator place the
planetary gear hub and bush may be replaced
armature in the lathe and finish cut using a fine
separately if required.
tool. The cut should be no more than 0.03mm.
3. To replace the hub remove the circlip and thrust
After turning, brush out the commutator slots
washer and withdraw the planetary shaft. To
using a stiff brush and polish surface if necessary.
reassemble reverse the procedure.
NOTE: Runout should be less than 0.1mm for the
NOTE: The planetary gears are pre lubricated, a
commutator and 0.5mm for the laminations.
small amount of light oil may be used to lubricate
Drive end and commutator end bushes
the armature spigot bushing prior to reassembly.
The helix for the drive assembly must be
NOTE: Replace bushes whenever excessive
lubricated with lithium based grease only.
armature shaft side play is evident. If bushes are
excessively worn the starter motor is likely to operate
Drive assembly inspection
inefficiently or the armature may foul the pole pieces.
1. Inspect the pinion for signs of wear or chipped
1. Remove both the commutator end housing and
teeth.
drive end bush by carefully tapping out with a
2. Rotate the pinion by hand and check for any signs
mandrel. Be sure that the commutator end
of roughness or slipping, examine the pinion bush
cover/drive end housing is well supported.
for wear or scoring, if in doubt replace the drive
This can be achieved by soaking the bushes over
assembly.
night in mineral oil. If time does not permit over
Contact burn off reserve testing
night soaking oil can be forced into the bush by
placing a thumb over one end of the bush and
1. Press the plunger until the contacts close, this will
filling it with oil. Using the other thumb press firmly
be indicated when the test lamp comes on.
until the oil is visible on the outer surfaces of the
2. It must be possible to push the plunger another
bush.
1mm or more towards the magnetic core. If less
NOTE: Note that the bushings used in starter
than 1 mm the solenoid must be replaced.
motors are made from porous sintered metal and
Interwinding short circuit testing
as such they will hold oil to provide lubrication. It
is important that the bushes are pre lubricated
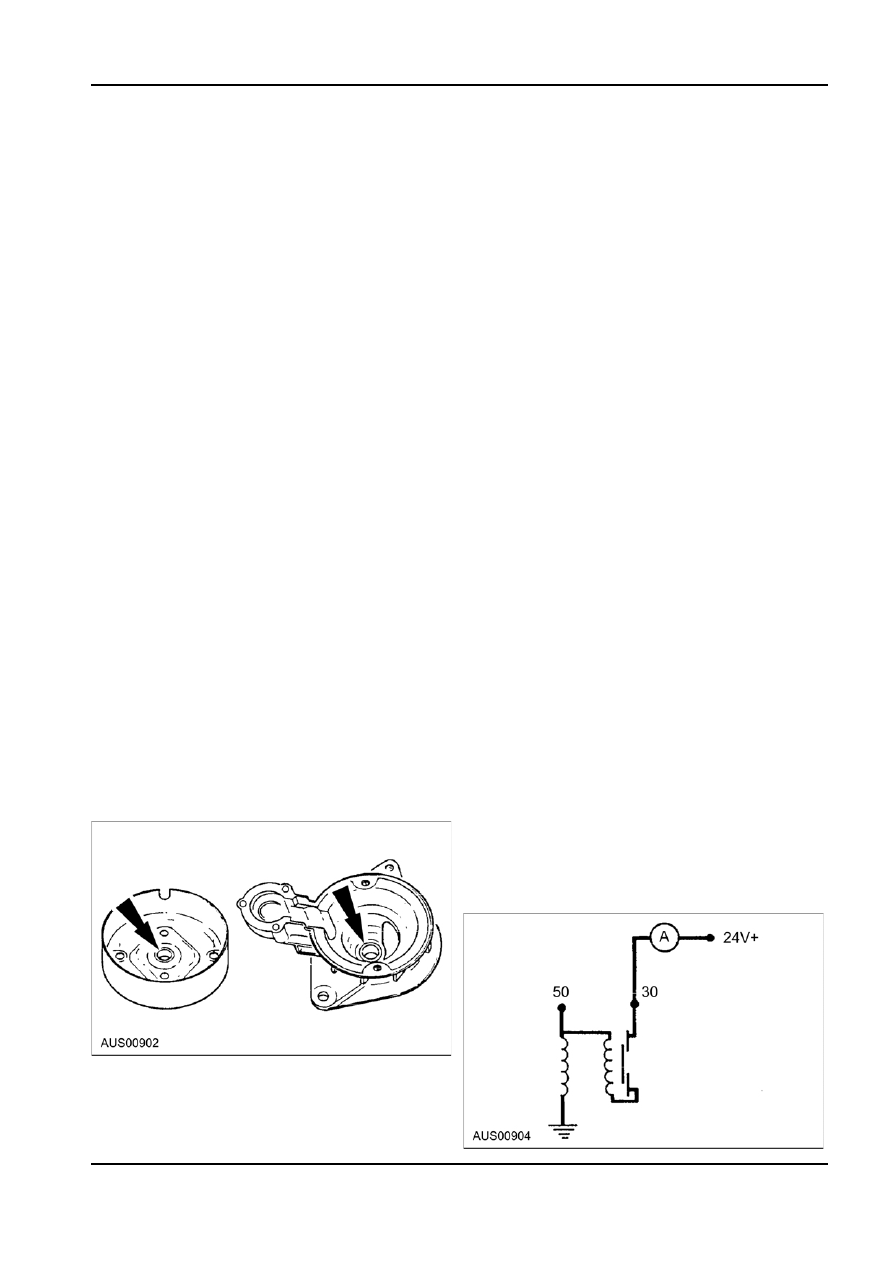
1. A 24 volt supply is required for this test. Apply
prior to fitting.
positive supply to terminal 30 (main battery supply
input) and negative to the casing.
2. New bushes may be pressed or tapped into
2. Press the plunger fully home.
position using a suitably sized shouldered
mandrel. Do not ream bushes after installation as 3. Release the plunger, it should return to it’s rest
the self lubricating qualities will be impaired.
position by the action of the return spring. If it
does not the windings have inter winding short
circuits.
NOTE: When the solenoid is connected in this
way the windings are differentially compounded,
that is, their fields are in opposition to each other.
Drive end housing & Commutator end cover
inspection
1. Inspect the housing and cover for damage, wear
or cracking.
G86731 en