Ford Thunderbird (2004 year). Manual - part 12
 

  Index      Ford     Ford Thunderbird - service manual 2004 year in english


Search            


Content   ..  10  11  12  13   ..


Ford Thunderbird (2004 year). Manual - part 12


3. To remove unfasten the snaps.

4. Pull forward and lift off.

Raising the convertible top

To raise the convertible top:

1. Bring the vehicle to a complete stop. Put the vehicle in the P (Park)
position.

The convertible top will operate with the key in the RUN position,
RUN/ACC position or in the accessory delay mode. It is recommended
that the vehicle’s engine is running when raising the top to prevent
draining the battery.

2. Remove the tonneau cover and store it in the luggage compartment.

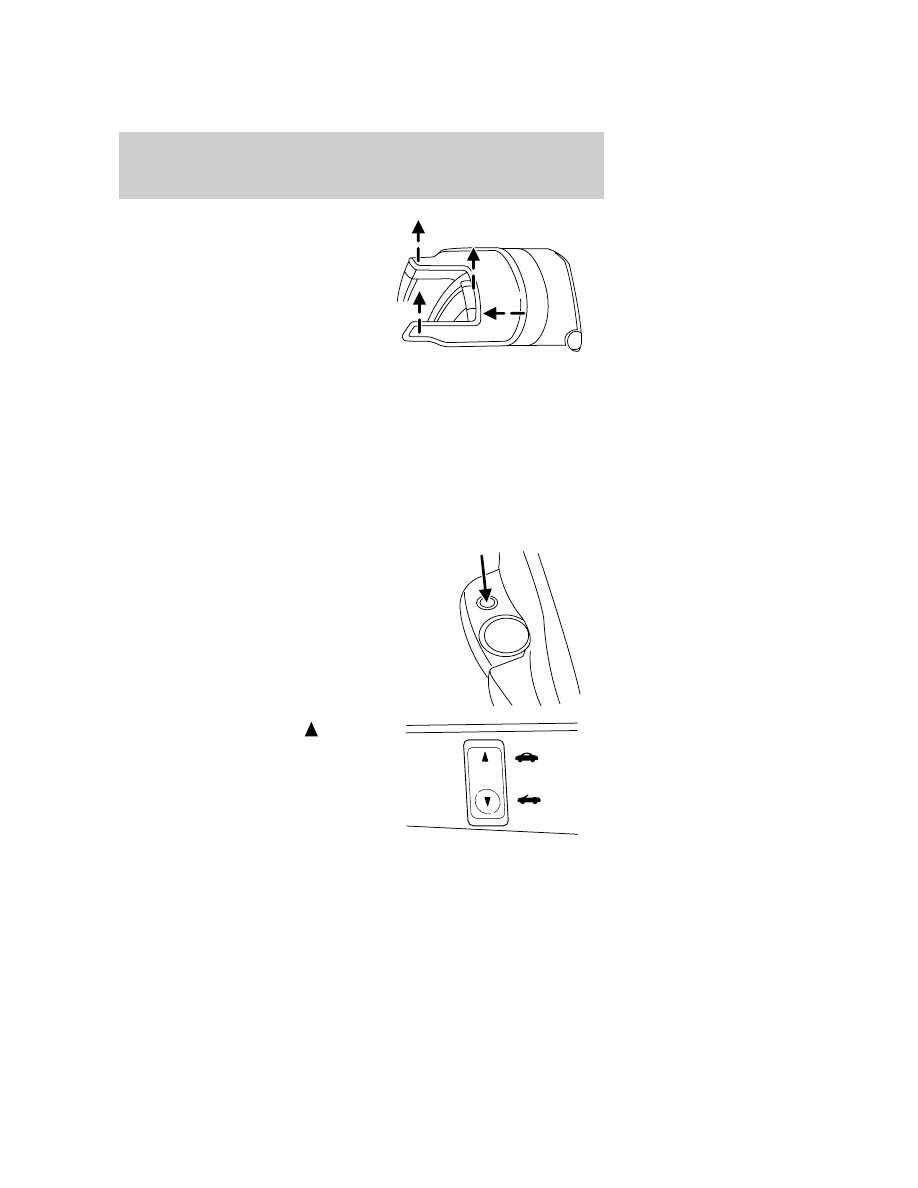
3. Push the two screws down into
the windscreen panel of your
vehicle.

4. Push the convertible top
switch, holding it until the top
unfolds and moves forward toward
the windshield header.

Driver Controls

52

5. Press the button on the
convertible top handle and pull the
handle down to open both top
clamps before the top meets the
windshield header.

6. Resume pushing the convertible top switch until it has reached the
fully closed position flush to the header.
7. The two pins under the forward edge of the top should seat
themselves in the matching holes in the header.

8. To fasten both clamps securely,
push the clamp handles into the
header on the top until they are
flush with the header. Pulling down
on the header at the center grip
while closing the latches may assist
in fastening the clamps. Use the pull
cups located on either side of the
convertible top handle.

9. Push the convertible top handle
back up so that it locks into
position.

Prolonged storage
It may be difficult to pull down and latch the convertible top after
prolonged storage with the top in the down position over the winter or in
colder temperatures. This difficulty will decline over time with warmer
temperatures and the convertible top in the full up or latched position.

Driver Controls

53

Convertible top and padded molding care
To avoid damage to the cloth top and moldings, use only an approved
Ford cleaner, or equivalent. Do not use abrasive material or cleaners.
Hot waxes applied by automatic car washes can affect the cleanability of
cloth material.
Using high water pressure or wand type car washes against the
convertible top and windows may cause water leaks and possible seal
damage.
REMOVABLE TOP (IF EQUIPPED)
For more information see the CD Rom included with this guide.
Installing the removable top

The front screw fittings must be checked to see that they are
firmly seated after driving a distance of approximately 50 to 60

km (30 to 40 miles).

The removable top does not have the same crush resistance as
an integrated steel roof in case of collision or rollover.

The removable top is not, under any circumstances, to be used
to carry or support external loads.

Movement of the removable top requires at least two people.
The removable top weighs approximately 38 kg (84 lb). Also,

due to its shape, the weight is biased to the rear of the removable top.

Your vehicle must be turned OFF and placed in PARK on a level
surface prior to installing or removing the top.

Driver Controls

54

2. Ensure that the removable top levers are rotated rearward to the fully
open position. Lock the wheels on the storage cart, and with the help of
at least another person remove the top from the cart.

Once per year, apply a small amount
of silicone lubricant,
F5AZ–19553–AA, to the receivers as
shown. The lubricant should be
sprayed directly into the hole to
avoid contaminating the trim parts.

3. Lower the rear of the top into
position so that the pins are placed
into the bracket receivers.

4. Position the front of the top so that the locating tabs on each side are
placed in the mounting castings. Ensure that the weather-strip on the
top is placed on the body mounted seal without any wrinkles or gaps.
The joint should have a smooth and continuous transition to prevent
water leaks.

5. Take the mounting key from the bag located in the trunk.

Driver Controls

55


Content   ..  10  11  12  13   ..