Ford Focus RS (2011 year). Instruction - part 132


  Index      Ford     Ford Focus RS - service repair manual (2011 year) in english


Search            


Content   ..  130  131  132  133   ..


Ford Focus RS (2011 year). Instruction - part 132


Rear Floor Panel Section

General Equipment

Measurement or alignment angle system

1. Replacement Parts

• Rear floor panel

Removal

1. General Notes

• Back panel, quarter panel and water drain

panel with reinforcement are already
removed before commencing the repair.

• Move carpets and wiring out of the working

area.

2. NOTE: Several sectional repairs may be

necessary depending upon the extent of
damage.

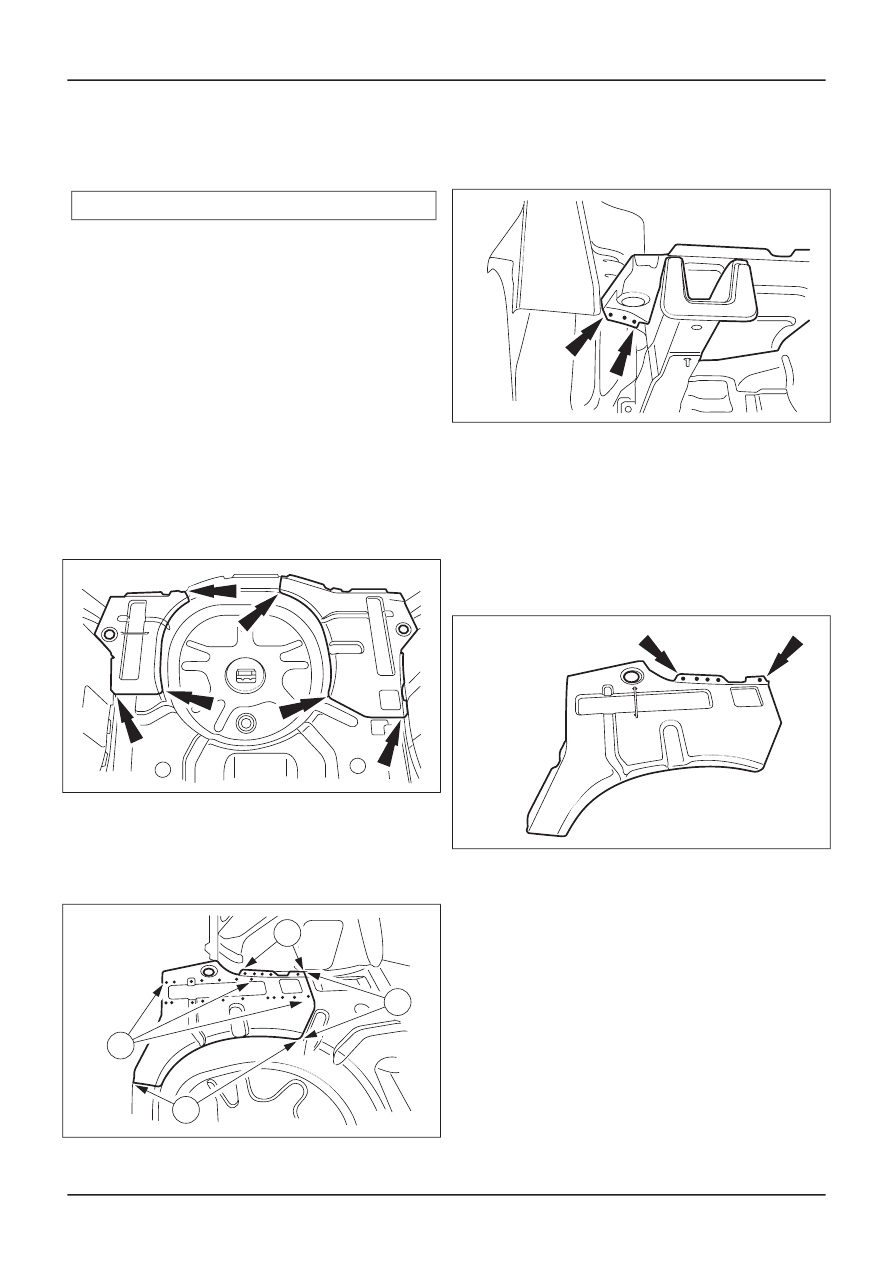
Overview of cut locations

E46009

3. Rear floor panel

1. Cut location.
2. Mill out the spot welds.
3. Grind out the spot welds.

E46010

2

1

1

3

4. Rear floor panel

• Grind out the spot welds.

E46011

Installation

NOTE: Before resistance spot welding of body
panels with a total panel thickness of 3 mm and
greater, the welding equipment instructions
contained in sub-section 501-25A must be followed.

1. Rear floor panel

• Drill holes for puddle welding.

E46012

2. Rear floor panel

1. Continuous MIG weld.
2. Resistance spot weld.

G287758en

501-30-

28

Rear End Sheet Metal Repairs

501-30-

28

REMOVAL AND INSTALLATION

3. Puddle weld.

E46010

2

1

1

3

3. Rear floor panel

• Resistance spot weld.

E46011

G287758en

501-30-

29

Rear End Sheet Metal Repairs

501-30-

29

REMOVAL AND INSTALLATION

Rear Side Member Section

General Equipment

Measurement or alignment angle system

1. Replacement Parts

• Side member sectional part
• Crossmember retaining flange

Removal

1. General Notes

• Rear floor panel, back panel and quarter

panel are already removed before
commencing the repair.

2. NOTE: The cut location may vary depending

upon the extent of the damage.

Rear side member

• Cut location.

E46015

Installation

NOTE: Fit crossmember retaining flange using the
alignment angle and fix in place. Insert and fit the
side member.

1. Rear side member

1. Continuous MIG weld.

2. Resistance spot weld.

E46016

1

2

G287765en

501-30-

30

Rear End Sheet Metal Repairs

501-30-

30

REMOVAL AND INSTALLATION

Luggage Compartment Bulkhead

General Equipment

Measurement and alignment angle system

1. Replacement parts

• Luggage compartment bulkhead
• Left luggage compartment bulkhead

connecting piece

• Right luggage compartment bulkhead

connecting piece

Removal

1. General:

• Necessary removal work: Cover, both roll

protection units, doors, luggage compartment
lid, B pillar trim, rear seat and back, driver
and passenger seats.

• Reposition the carpeting and the wiring

harness away from the working area.

2. Luggage compartment bulkhead connecting

pieces

• Mill out the spot welds.

E85585

3. Luggage compartment bulkhead connecting

pieces

• Grind out the MIG weld seams.

E85586

4. Luggage compartment bulkhead

G942256en

501-30-

31

Rear End Sheet Metal Repairs

501-30-

31

REMOVAL AND INSTALLATION

• Rough separating cuts.

E85587

5. Luggage compartment bulkhead (view from

front)

1. Mill out the spot welds.
2. Grind out the MIG weld seams.

E85588

1

1

2

6. Luggage compartment bulkhead (view from

rear)

1. Mill out the spot welds.

2. Grind out the MIG weld seams.

E85589

1

1

2

7. Luggage compartment bulkhead (view from

rear)

• Warm the adhesive application area (approx.

170º C).

E85590

8. Luggage compartment bulkhead remaining

flanges

G942256en

501-30-

32

Rear End Sheet Metal Repairs

501-30-

32

REMOVAL AND INSTALLATION

• Grind out the MIG weld seams.

E85591

Installation

NOTE:

• Before resistance spot welding of body panels

with a total panel thickness of 3 mm and greater,
the welding equipment instructions contained
in sub-section 501-25 must be followed.

• The new parts must be positioned accurately in

order for the roof mechanism to work properly.

1. Fit the new parts and fix with the alignment

angle.

2. Luggage compartment bulkhead (view from

rear)

• Drill holes for puddle welding (10 mm

diameter).

E85592

3. Luggage compartment bulkhead (view from

front)

• Drill holes for puddle welding (10 mm

diameter).

E85593

4. NOTE: Adhesive may only be applied thinly

between the welding points (MIG welding
areas) on the panel flange. Adhesive must
not get into the welding areas.

Luggage compartment bulkhead (view from
rear)

• Before inserting the bulkhead, apply 2 K

metal adhesive.

E85594

G942256en

501-30-

33

Rear End Sheet Metal Repairs

501-30-

33

REMOVAL AND INSTALLATION

5. Luggage compartment bulkhead (view from

rear)

1. Puddle weld.
2. Intermittent MIG weld.

E85589

1

1

2

6. Luggage compartment bulkhead (view from

front)

1. Puddle weld.
2. Intermittent MIG weld.

E85588

1

1

2

7. Luggage compartment bulkhead

• Intermittent MIG weld.

E85595

8. Luggage compartment bulkhead connecting

pieces (interior views)

G942256en

501-30-

34

Rear End Sheet Metal Repairs

501-30-

34

REMOVAL AND INSTALLATION

• Drill holes for puddle welding (10 mm

diameter).

E85596

9. Luggage compartment bulkhead connecting

pieces

• Resistance spot weld.

E85597

10. Luggage compartment bulkhead

connecting pieces

G942256en

501-30-

35

Rear End Sheet Metal Repairs

501-30-

35

REMOVAL AND INSTALLATION


Content   ..  130  131  132  133   ..