Ford F-150 (2018 year). Manual - part 90
 

  Index      Ford     Ford F-150 - service manual 2018 year in english


Search            


Content   ..  88  89  90  91   ..


Ford F-150 (2018 year). Manual - part 90


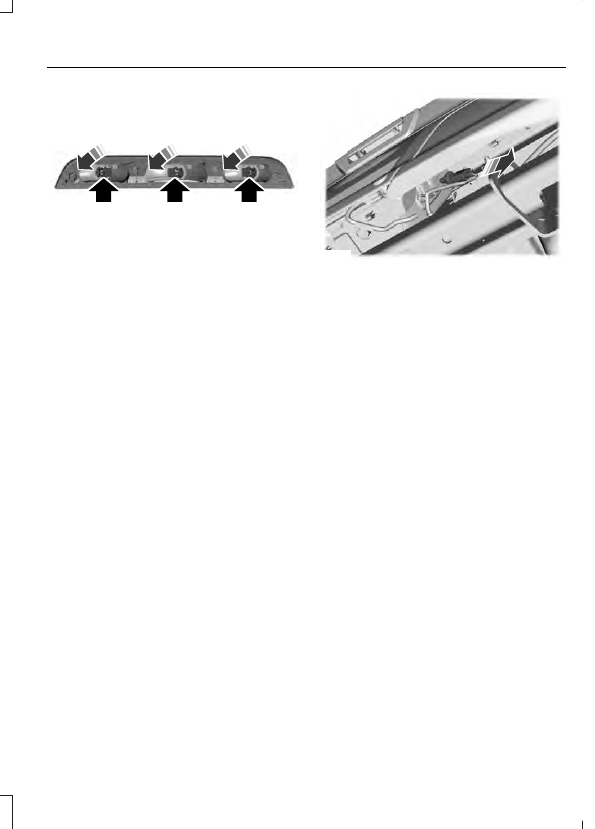
E187290

3. Remove the bulb socket by rotating it

counterclockwise and pulling it out of
the lamp assembly.

4. Pull the bulb straight out of the socket.

5. Install the new bulb in reverse order.

Replacing LED Cargo Lamp, Spot
Lamp and High-mount Brake Lamp
Bulbs

 (If Equipped)

These lamps have LED bulbs.  Contact an
authorized dealer.

Replacing the License Plate Lamp
Bulb

Note: The license plate bulbs are located
behind the rear bumper.

E187794

1.

Reach behind the rear bumper to
locate the bulb.

2. Twist the bulb socket counterclockwise

and carefully pull to remove it from the
lamp assembly.

3. Pull the bulb straight out of the socket.

4. Install the new bulb in reverse order.

Replacing Exterior Mounted Mirror
Direction Indicator Lamp Bulbs

These lamps have LED bulbs.  Contact an
authorized dealer.

BULB SPECIFICATION CHART

Replacement bulbs are specified in the
chart below.  Headlamp bulbs must be
marked with an authorized D.O.T. marking
for North America to make sure they have
the proper lamp performance, light
brightness, light pattern and safe visibility.
The correct bulbs will not damage the
lamp assembly or void the lamp assembly
warranty and will provide quality bulb
illumination time.

Exterior Lamps

Power (Watt)

Specification

Lamp

21/5W

7444NA

Front direction indicator and parking lamps.

LED

LED

Daytime running lamps.

65W

9005

Headlamp high beam.

55W

H11

Headlamp low beam.

55W

9140

Front fog lamps.

5W

W5W

Front side marker lamps.

LED

LED

Side direction indicator.

LED

LED

Puddle lamp.

27/8W

3157

Rear lamps, brake lamps, rear direction indicator

and rear side marker lamps.

*

16W

921

Central high mounted brake lamp.

*

LED

LED

Central high mounted brake lamp. Vehicles with
cargo box.

27W

3156K

Reversing lamps.

5W

168

License plate lamp.

*

May have optional LED lamps.

Note: LED lamps are not serviceable. See an authorized dealer if they fail.

Interior Lamps

Power (Watt)

Specification

Lamp

LED

LED

Glove compartment lamp.

LED

LED

Map lamp.

LED

LED

Rear dome and courtesy lamps.

LED

LED

Rear cargo box lamps.

Note: LED lamps are not serviceable. See an authorized dealer if they fail.

CHANGING THE ENGINE AIR
FILTER - DIESEL

WARNING

To reduce the risk of vehicle damage
and personal burn injuries, do not
start your engine with the air cleaner

removed and do not remove it while the
engine is running.

Use the correct specification air filter
element.  See Motorcraft Parts (page
415).

Note:  Failure to use the correct air filter
element may result in severe engine
damage.  Resulting component damage
may not be covered by the vehicle Warranty.

Change the air filter element at the correct
service interval.  See Scheduled
Maintenance (page 554).

E254171

1.

Remove the clips that secure the air
filter housing cover.  Lift and rotate the
air filter housing cover.

E254172

2. Remove the air filter element from the

air filter housing.

3. Install in the reverse order.

4. After installing a new air filter element,

you must reset the air filter restriction
gauge by pressing the reset button.

Air Filter Restriction Gauge

E254173

The air filter restriction gauge is in the
upper housing of the air filter assembly.

Check the air filter restriction gauge
whenever you open the hood to carry out
general engine maintenance or at least
every 7,500 mi (12,000 km). If you operate
your vehicle in extremely dusty conditions,
check the gauge at least every 500 mi
(800 km) or two weeks, whichever occurs
first. Change the air filter element when
the restriction gauge reads near the
change filter line and the gauge is yellow.
Allowing the restriction gauge to reach
maximum affects engine performance and
fuel economy.

Operating your vehicle in heavy snowfall
or extreme rain conditions may allow
excessive amounts of snow or water into
the air intake system. This could restrict air
flow and cause the engine to lose power
or shut down.

After installing a new air filter element, you
must reset the gauge by pressing the reset
button.

After operating your vehicle during heavy
snowfall or extreme rain, do the following:

Snow: At the earliest opportunity, open
the hood and clear any snow and ice
from the air filter housing inlet and
reset the air filter restriction gauge.

Extreme rain: The air filter element
dries out after approximately 15–30
minutes of driving at highway speeds.
At the earliest opportunity, open the
hood and reset the air filter restriction
gauge.

CHANGING THE ENGINE AIR
FILTER - GASOLINE

WARNING

To reduce the risk of vehicle damage
and personal burn injuries, do not
start your engine with the air cleaner

removed and do not remove it while the
engine is running.

Note:  Failure to use the correct air filter
element may result in severe engine
damage.  Resulting component damage
may not be covered by the vehicle Warranty.

Note: When servicing the air cleaner, do not
allow foreign material to enter the air
induction system. The engine is susceptible
to damage from even small particles.


Content   ..  88  89  90  91   ..